Writing a screenplay is already difficult. And when you have thought of what you want to write, the last thing you want to be worried about is how to write and format it correctly. It can be intimidating to know the rules and this article hopes to serve as a guide to help you format your screenplay like a professional.
Why is Formatting Necessary?
Unlike a book, a screenplay is a document that is a means to an end. Books are meant to be consumed by the reader while a screenplay serves as a “guide” for the director to shoot a scene, and not for the audience to read. This is why it is often called a blueprint for shooting a movie. A specific format is not just a requirement for the reader (producer) but also for the various technicians who will be referring to that document for doing their jobs ie. Script breakdown, budgeting, etc. Hence, it is especially important for a writer to adhere to the standard format if they would like to be seen as a professional.
A century ago, screenplays did not exist. There were merely story docs or treatment notes that did the job. With the advent of sound, dialogue, and subsequently the professionalisation of the industry with the studio system, the need for a standardized document emerged. That format came to be known as the industry standard. You may have noticed that professional movie and tele screenplays “look” a certain way. That can be attributed to its evolution from being written on a typewriter (started with theatre plays) which gives screenplays such an aesthetic.
What is the Industry Standard Format?
Let’s take a look at each of the elements of a professionally written industry standard formatted screenplay.
1. Page Setup
The aesthetic that we mentioned earlier has the following salient features:
Paper Size
Use standard letter-sized paper, which is 8.5 inches (21.6 cm) wide and 11 inches (27.9 cm) tall.
This is the most commonly accepted paper size for screenplays.
Margins
Set 1-inch (2.54 cm) margins on all sides of the page. The top, bottom, left, and right margins should all be 1 inch.
Font and Typeface
Use a monospaced or fixed-width font, typically Courier New or Courier, in 12-point size. Monospaced fonts ensure that each character takes up the same amount of horizontal space, which is essential for accurate page count estimates (one page roughly equals one minute of screen time).
Line Spacing
Use single-line spacing throughout the screenplay, which means there should be no extra space between lines.
Alignment
Text alignment should be left-justified for all elements except the title page. The title and contact information on the title page are centered.
Page Numbers
Add page numbers in the top right corner of each page, starting with page 2 (the title page is considered page 1).
Page numbers should be right-aligned and are typically located 0.5 inches from the top of the page.
2. Title Page
The title page is the very first page of your screenplay. Make sure you don’t have any scenes on this page. Focus on center-aligning the title of your screenplay in uppercase letters. This title should be the name of your project. You can include an image here if you think it helps present your screenplay better.
Add your contact information in the bottom left or right corner, including your name, address, phone number, and email address. This is for industry professionals to reach you, if need be.
3. Scene Heading (Slugline)

The scene heading, also known as a slugline, tells the reader where and when the scene takes place. It has three components (Int/Ext, Location, Time)
Start with INT. (interior) if the scene is indoors or EXT. (exterior) if it’s outdoors, followed by the specific location (eg. Cafe, House), and then the time of day (DAY or NIGHT). Use uppercase letters and center-align the text
4. Action Lines
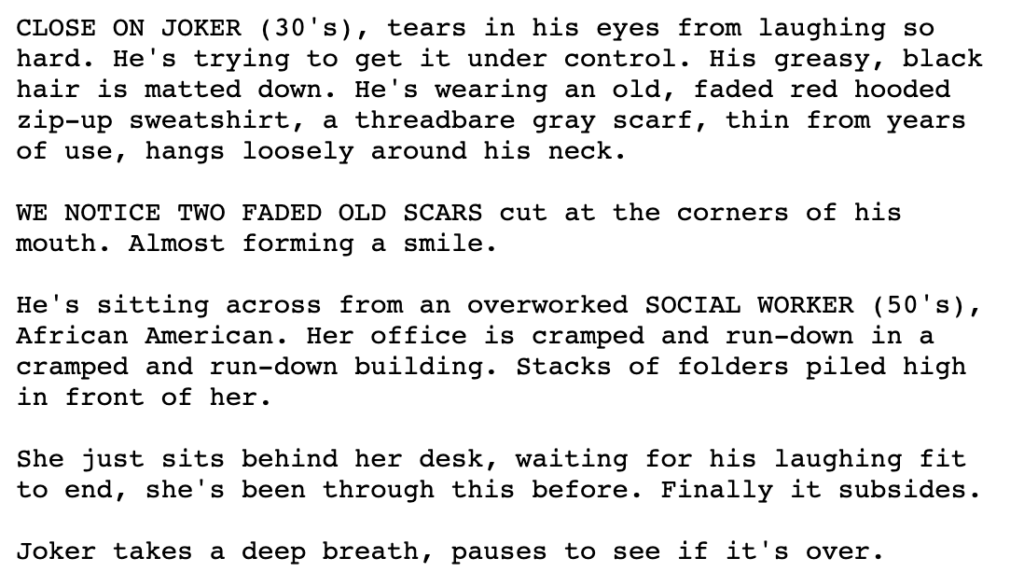
Action lines describe the physical actions and events happening in the scene.
Try to keep action lines concise, using the present tense and active voice. They help set the scene and provide context for the reader. Action Lines, along with dialogue, reflect your voice as a writer. If the action lines are too brief, it might feel dull and if they are too long, it might feel tedious. One thing to keep in mind is that action lines need to be “filmable” ie write lines that can be shot by the camera unlike words in a novel that sometimes are meant for the imagination.
5. Character Name

Introduce each character who speaks in uppercase letters. Use first name or alias of the character. In case your character does not have a designated name and are characters who only appear passingly having a dialogue or two, you can simply write who they are (Nurse, Bartender, etc). Center-align the character’s name on the page.
6. Dialogue
Write a character’s spoken lines beneath their name. Use standard capitalization and punctuation for dialogue. This is where characters communicate and advance the story. Unlike in prose writing, there is no need to use any inverted commas or quotation marks when writing dialogue. You can make use of Bold, Italics, Underlining, Capitalizing techniques if you’d like to emphasize something. But try to be as minimal as possible with its usage. Write with the same cadence as you would like your character to speak, such as including pauses for example.
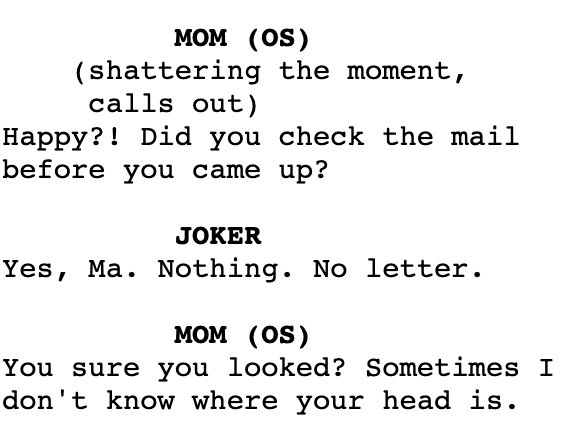
Dual Dialogue
When two characters speak simultaneously, use “V.O.” (Voice Over) or “O.S.” (Off-Screen) in parentheses after the character’s name to indicate who is speaking.
7. Parenthetical (Wrylies)
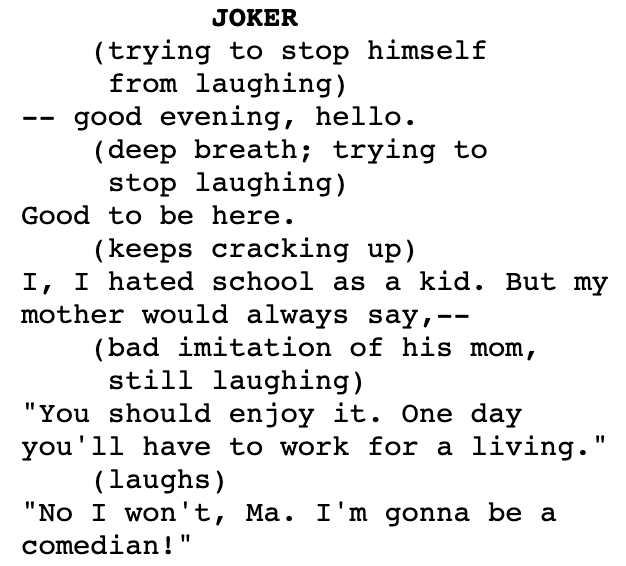
If you want to provide direction on how a line should be delivered, place it in parentheses beneath the character’s name.
These are used sparingly to indicate tone, emotion, or manner of delivery. There are two schools of thought in this. One is you should indicate how the character should deliver those lines. Two is you should not (or only in exceptional circumstances) because it’s the Director’s prerogative and that the actual dialogues should convey the manner as opposed to underlining its delivery.
8. Character Extensions
When a character’s dialogue extends to the next page, add “(CONT’D)” after the character’s name on the second and subsequent pages of their dialogue.
9. Transitions
Transitions are used to indicate changes in scenes or time. Common transitions include “CUT TO:” and “DISSOLVE TO:”, “INTERCUT:” They are placed flush with the right margin. What Parentheticals are to Directors, Transitions are to Editors. They indicate how a scene transitions from one to another. Use them situationally and cleverly, but try not to go overboard with them.
10. Sub Headers
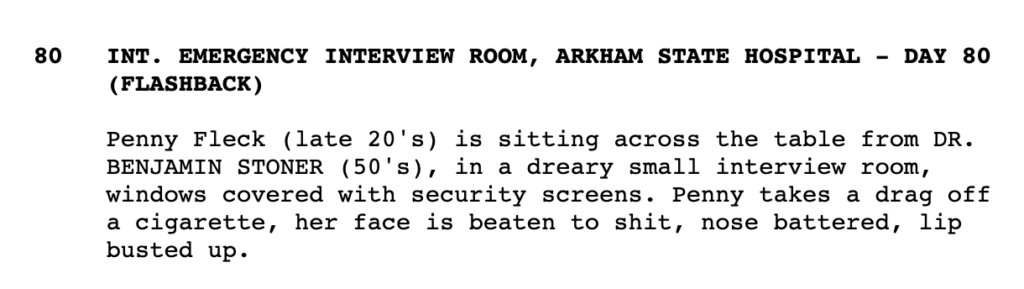
Subheaders are used in parentheses to indicate special elements like flashbacks or dream / montage / song sequences. They are centered on the page and capitalized for emphasis.
Format your Script using Screenwriting Software
As you can see, writing a professionally formatted screenplay is not difficult, but it can be tedious, especially if you are writing with a pen and paper or using word processing apps like MS Word, Google Docs. Besides the time it takes, there are chances you may make an error in keeping track with the formatting guidelines. Which is why it is recommended you use specialized apps that are built for this very reason. There are many options available for you to choose from depending on your budget and requirements.
One such popular software is Scrite. It takes care of all the requirements to help you write a professionally formatted screenplay. Scrite also supports writing in various Indian languages in addition to its note-taking and Outlining features. You can download the app here.


Whether you’re writing a short, feature, streaming show, or even a TV commercial, knowing and familiarising yourself with this format will help you make that jump from an amateur to a professional. If you’d like to refer to a sample screenplay, you can find many such on Scrite in the Scriptalay tab.