For software developers, an IDE provides several ways of working with code in a unified way. Perhaps we can think of a Scrite as an IDE for screenplay writers. After all screenplay is the source-code of a film!
Scrite offers three distinct ways to work with a screenplay.
- Screenplay Editor: where the actual screenplay is written.
- Structure Canvas: where the structure of scenes are plotted.
- Notebook: where character relationship graph and notes are captured
- Timeline: where the sequence of scenes are laid out.
Although Scrite started off with an intention to provide a single UI where users can see all of these aspects in one window, early user feedback led us to build a comprehensive screenplay editor (like a word processor). Now that we have a fairly stable screenplay editor, we wanted to get back to our roots.
With Scrite version 0.5.1 beta, we have a way of seeing all of the above in one single tab. To enable this, simply check the “Move Notebook into the Structure tab” check box in Settings > Application > Additional page.
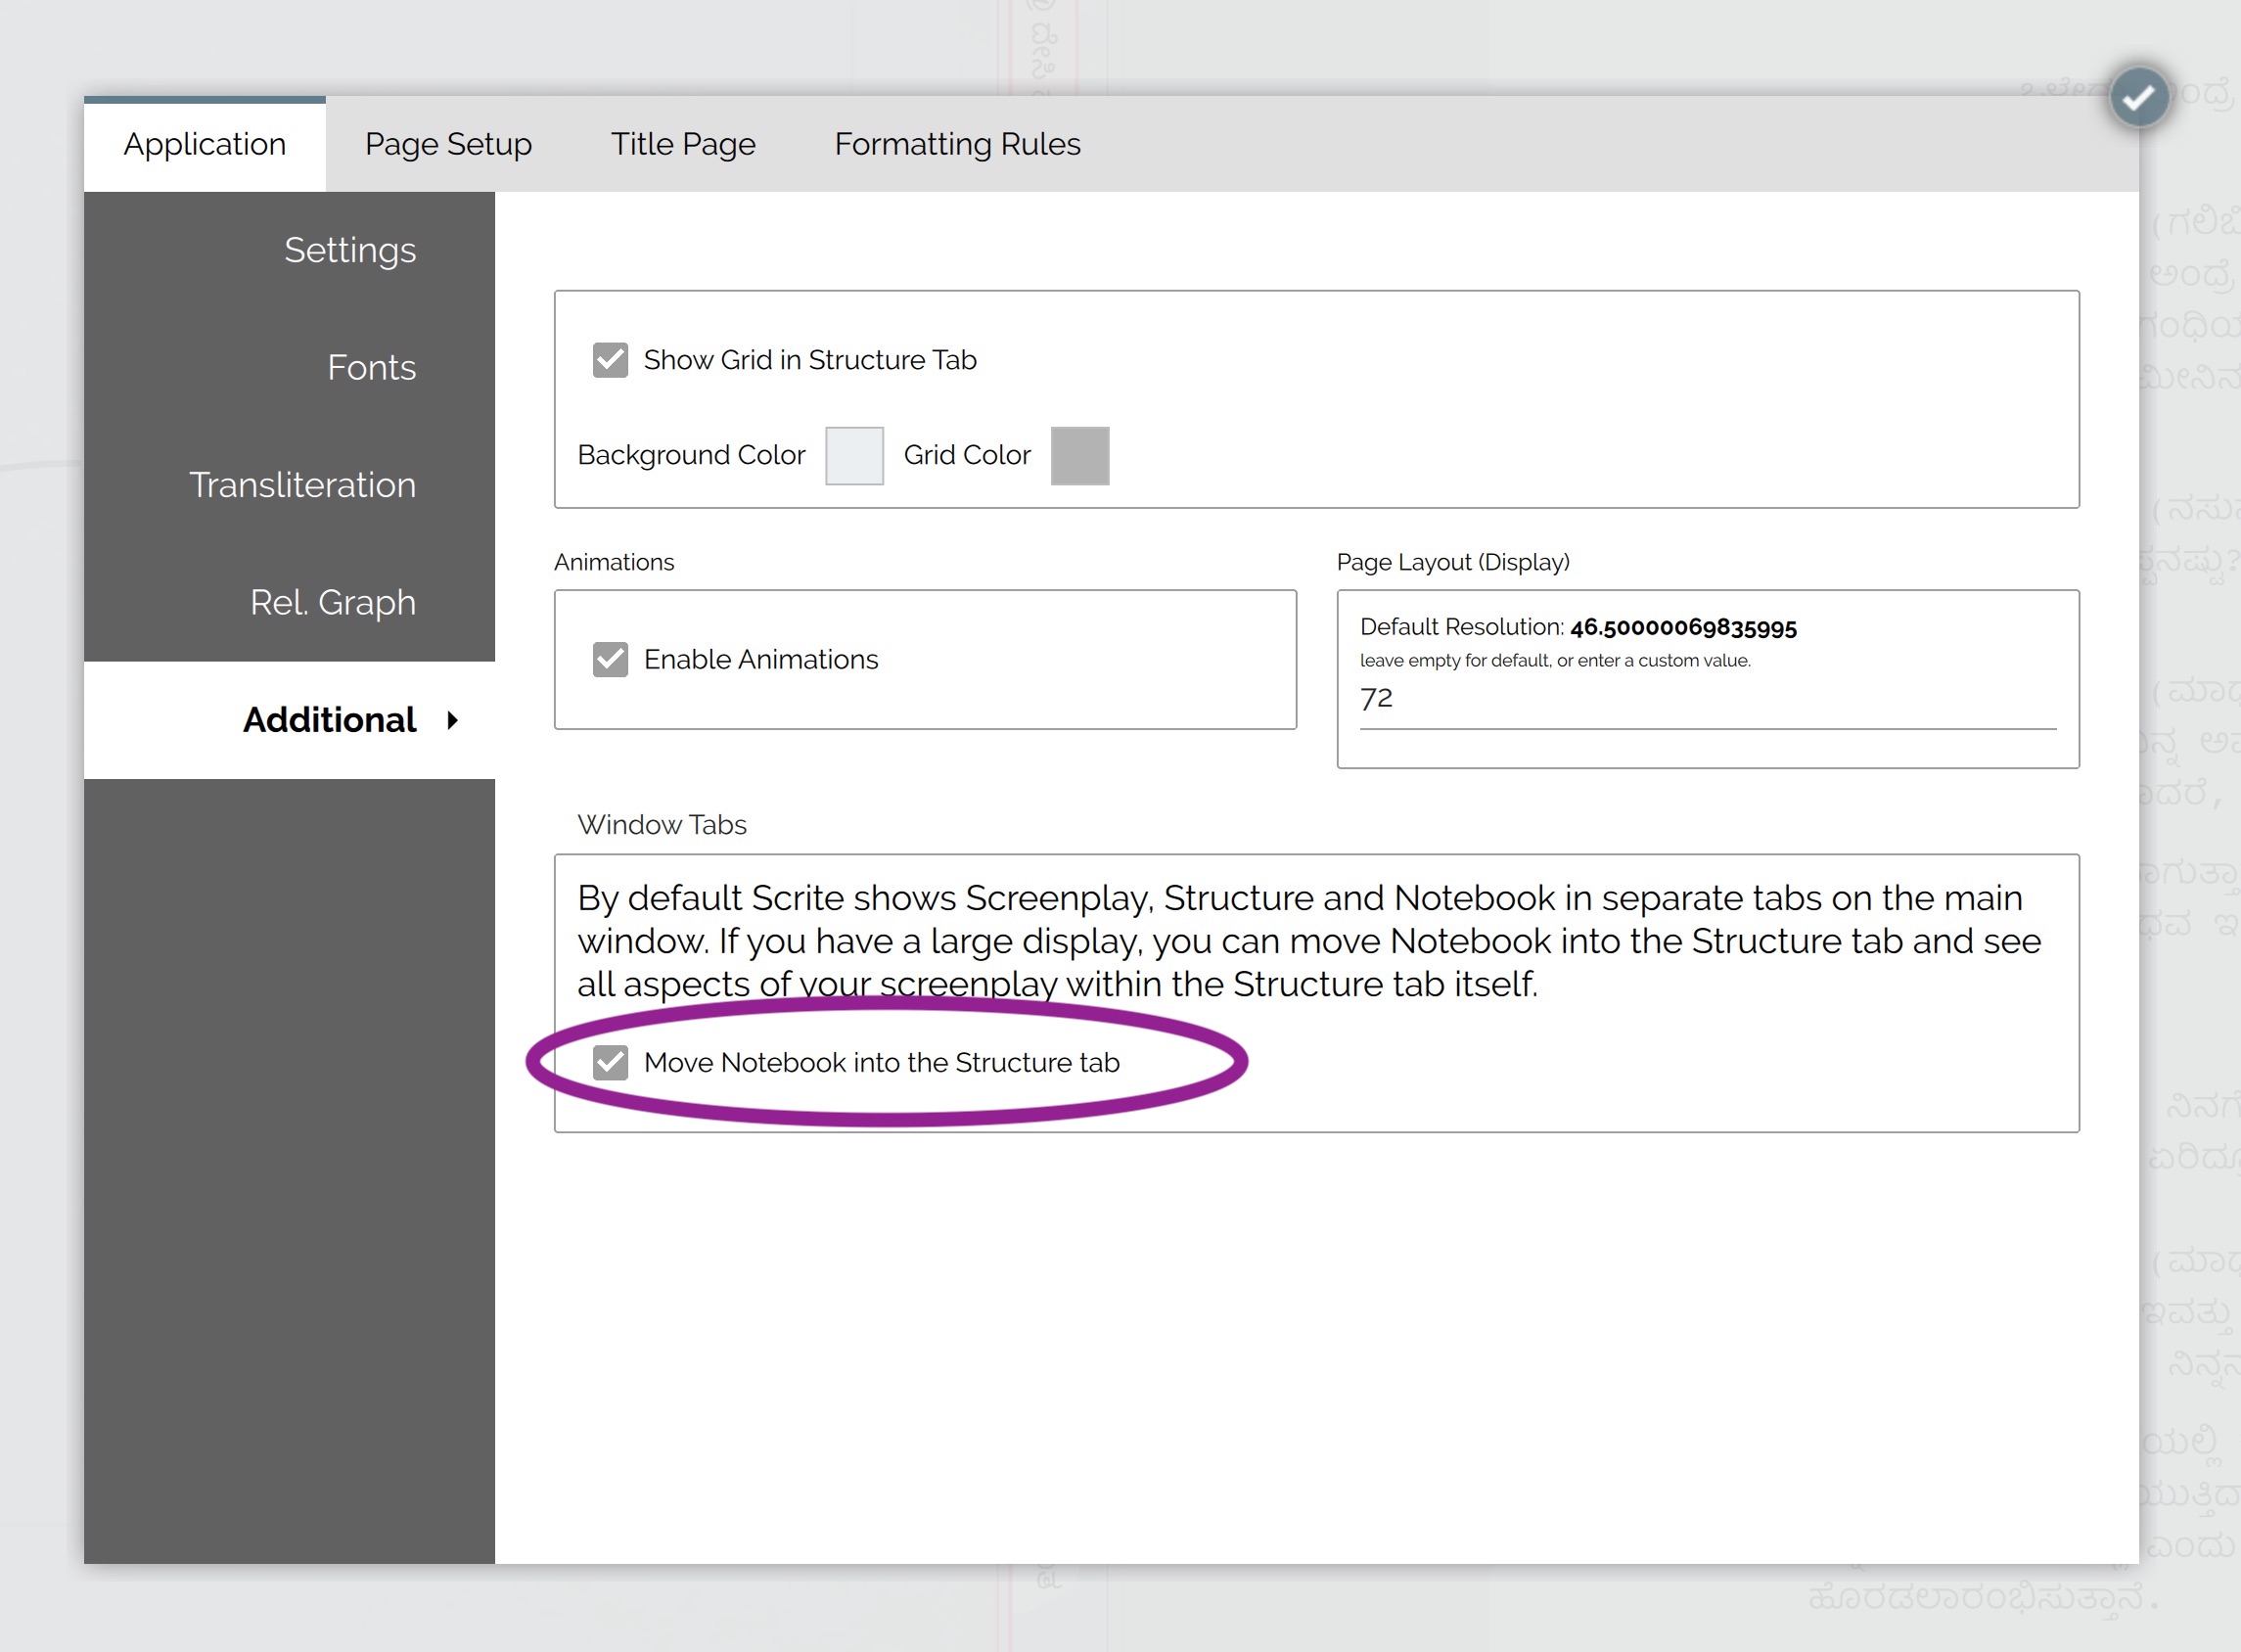
This will now move the Notebook tab into the Structure tab and you will get to see this.
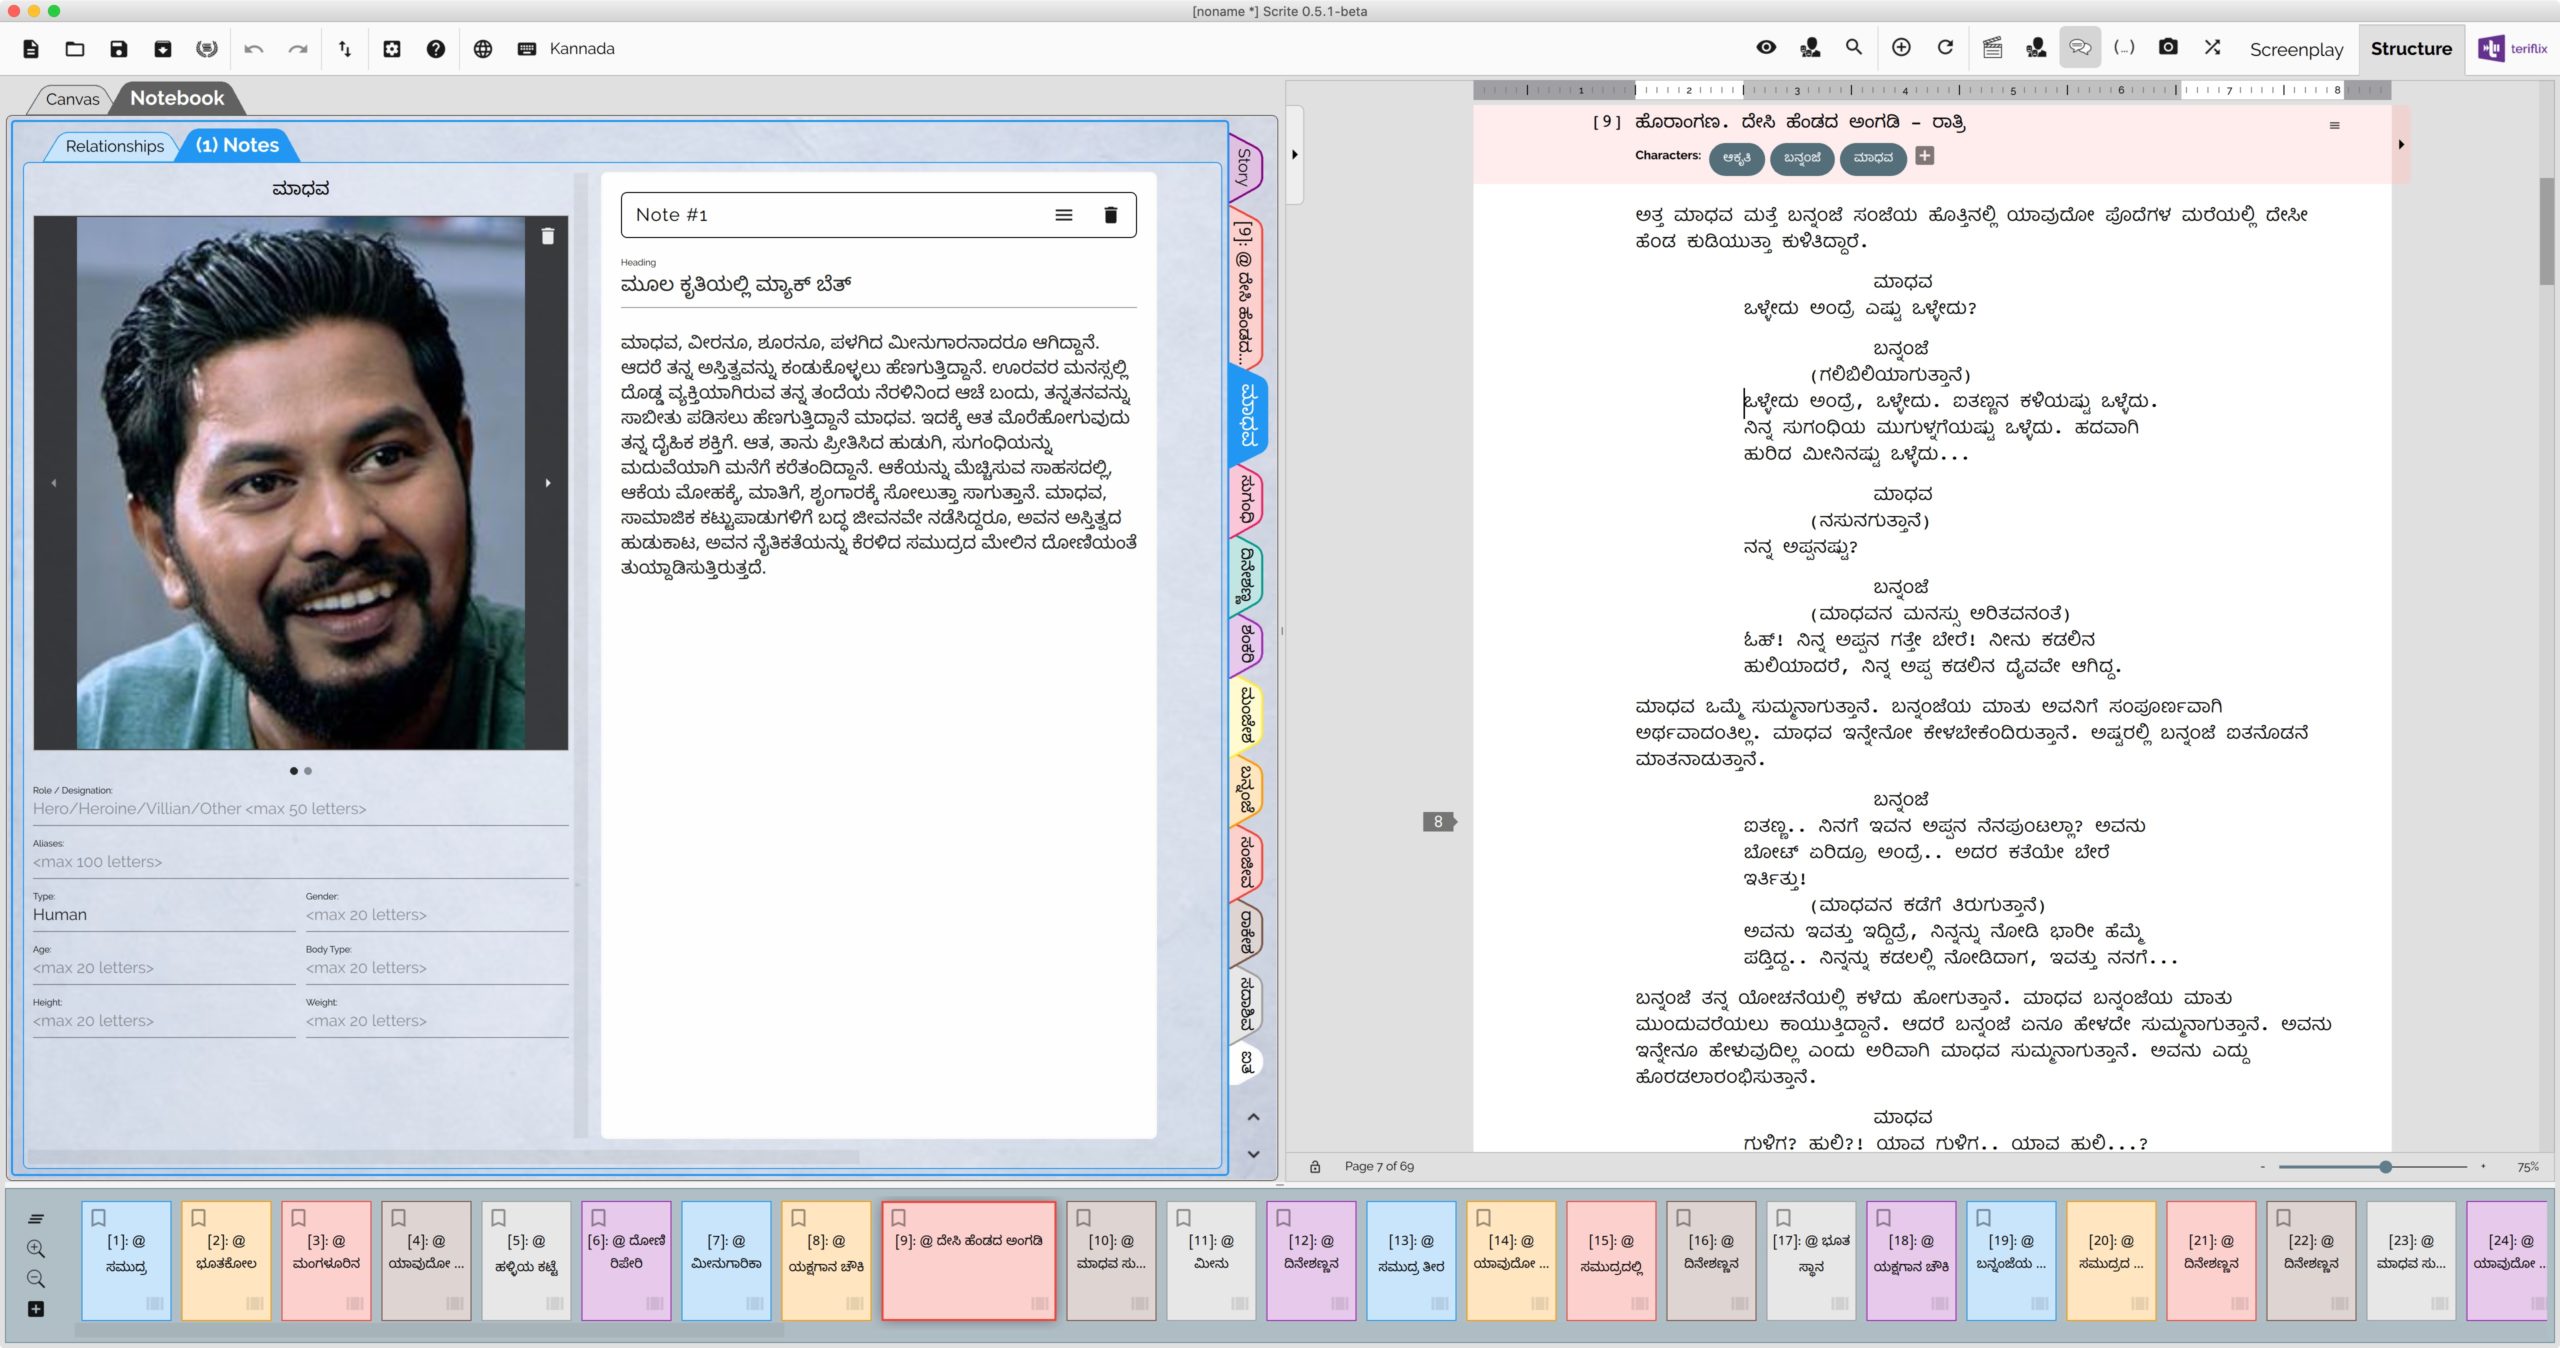
This UI mode is especially useful if you use Scrite on a large display. You can see the notebook, structure, timeline and screenplay editor in one place, without having to switch between tabs. We feel that this UI mode works best for writers who like to capture and/or refer notes while writing.
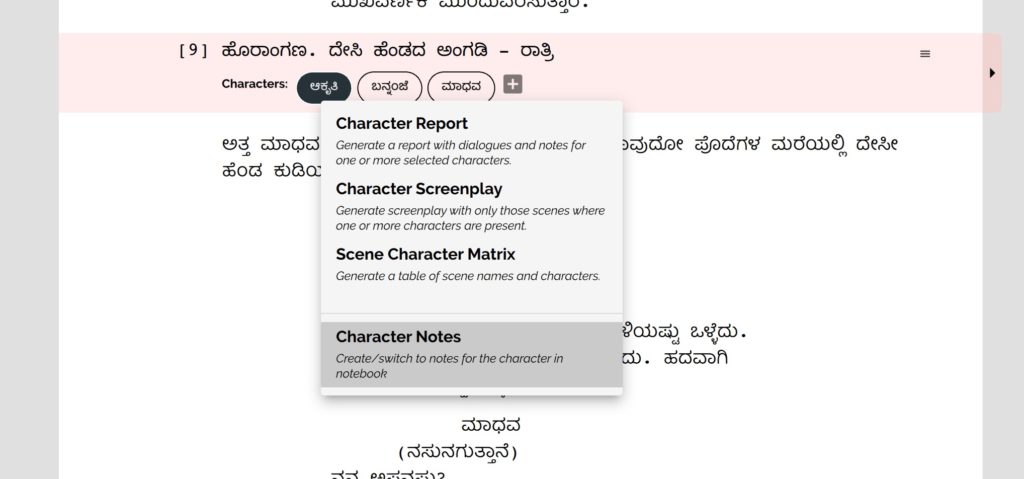
We have made a few things easy in this mode. For instance, you can click on a character name in the screenplay editor and switch to its notes tab on the Notebook.
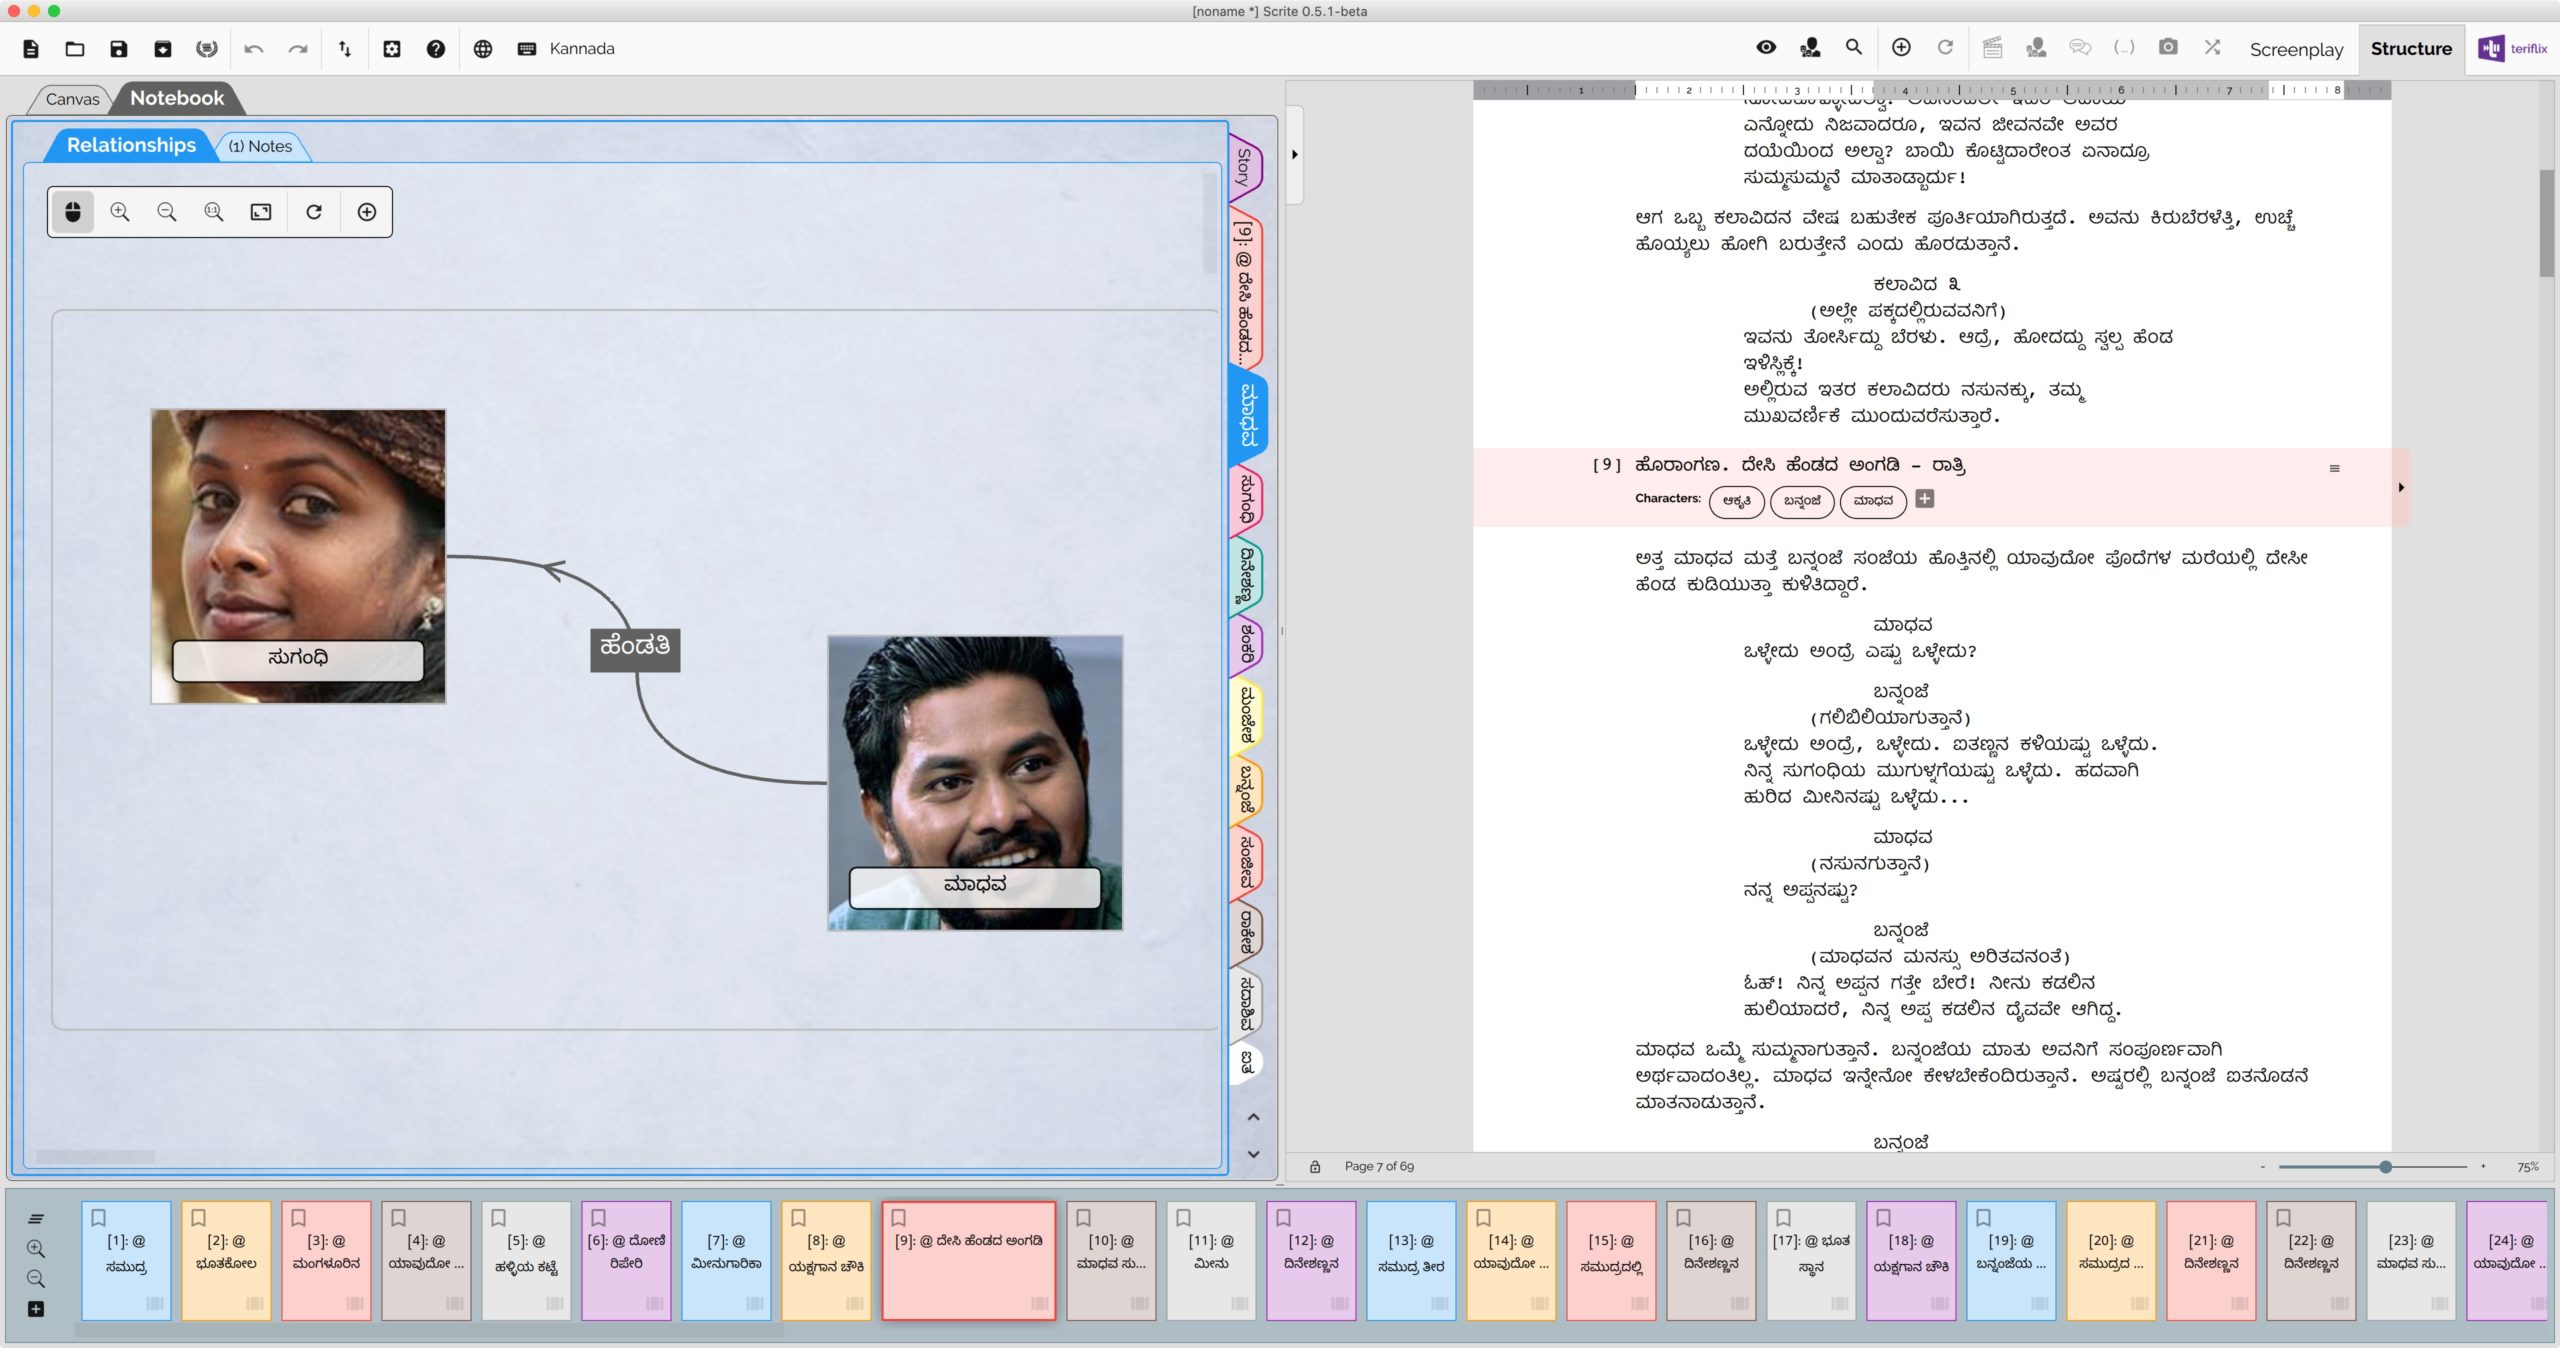
When the notebook is embedded in the Structure tab, we get an entire tab for the relationship tab. The character meta data & notes are shown in the Notes tab.
Download / update to Scrite 0.5.1 to move Notebook into Structure tab and use the app in IDE mode.