Table Of Contents
Languages Supported
Scrite allows you to type in English and 11 other Indian Languages. As we progress, support for more languages will be added.
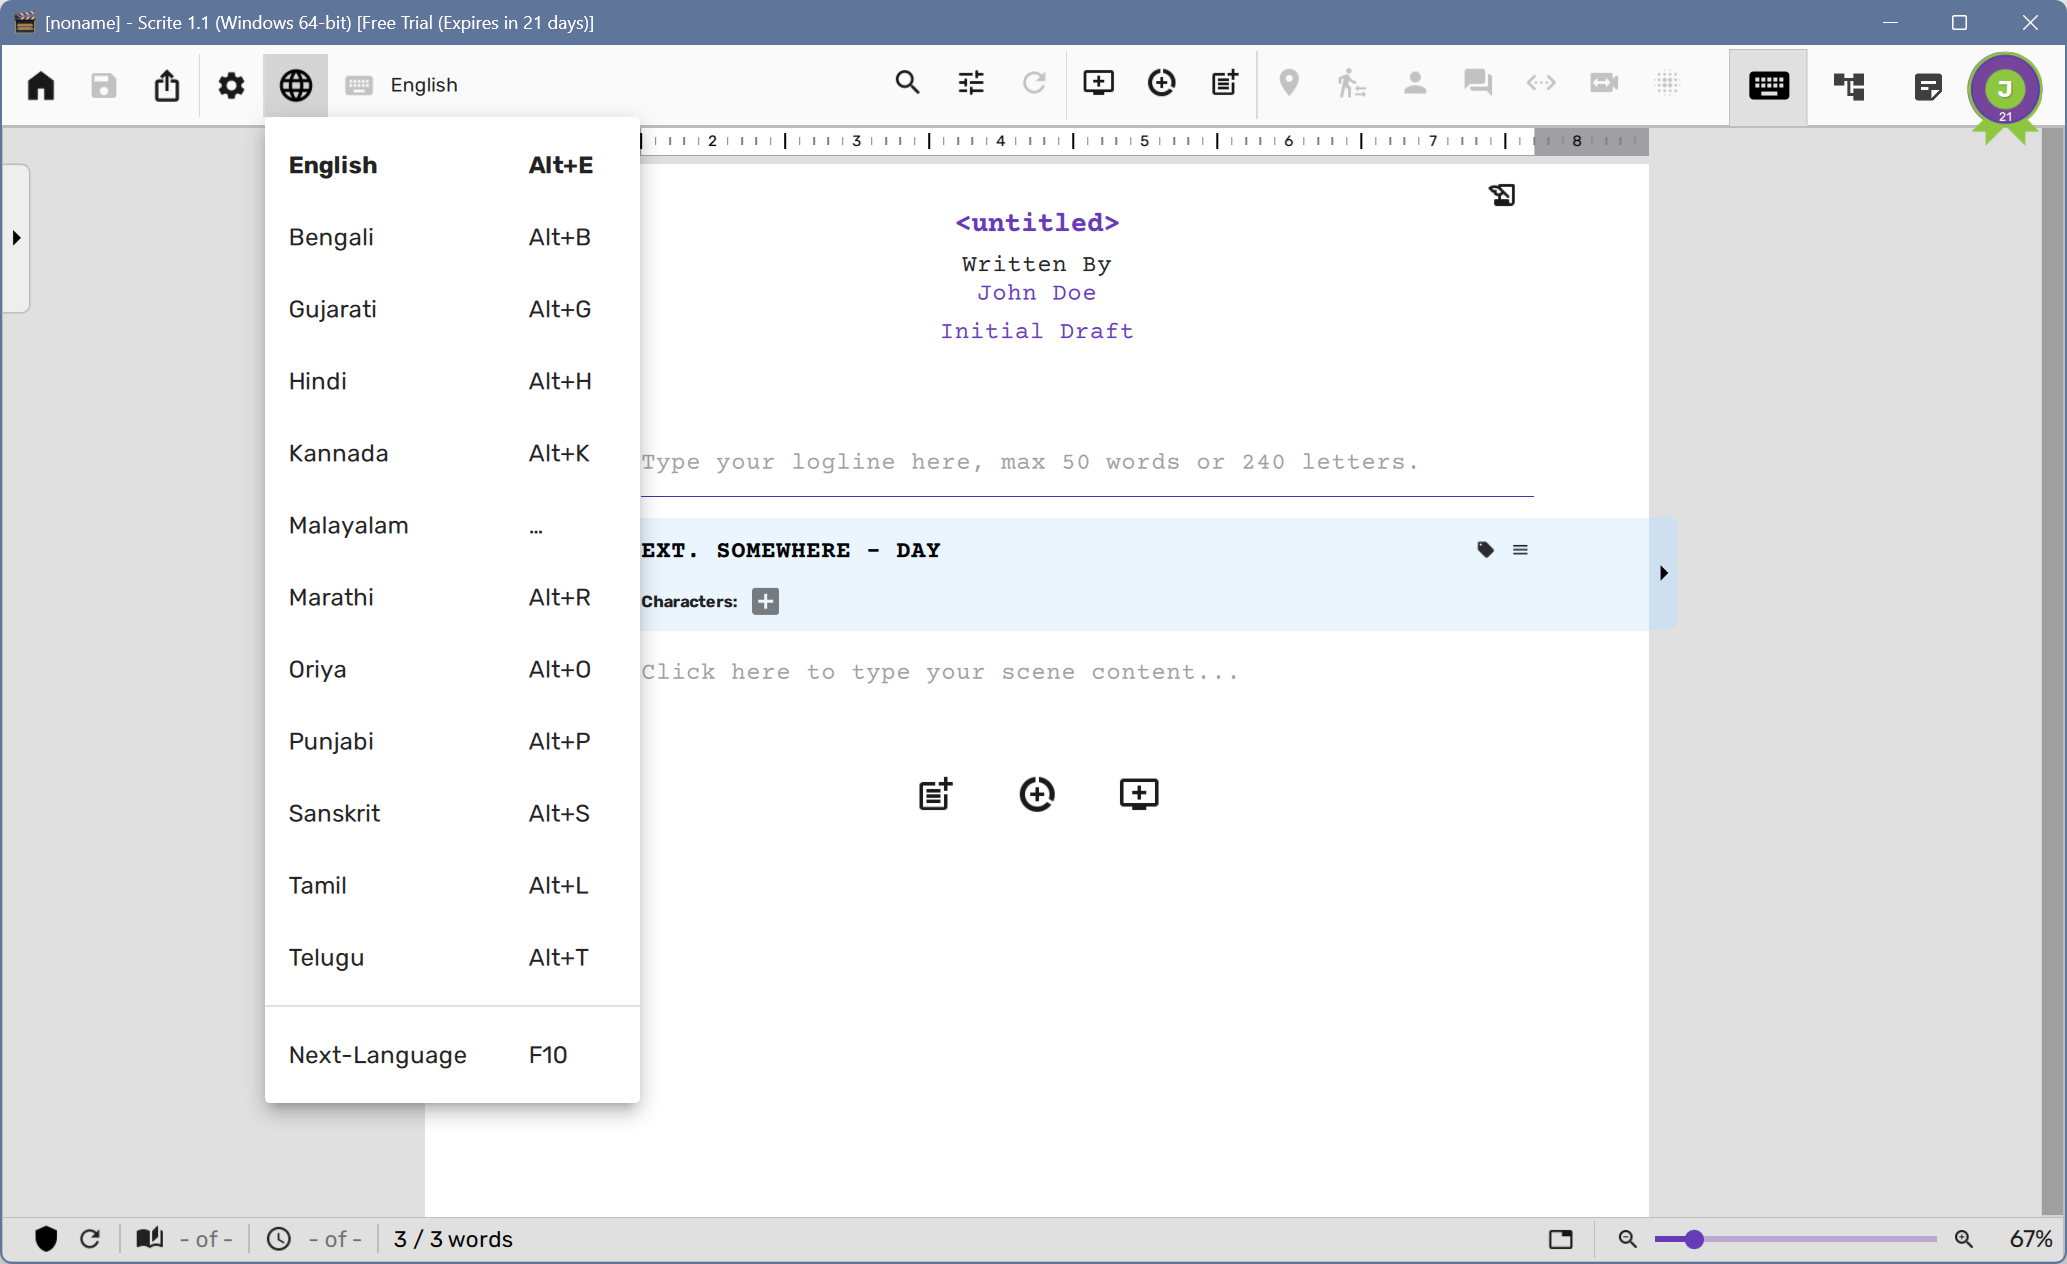
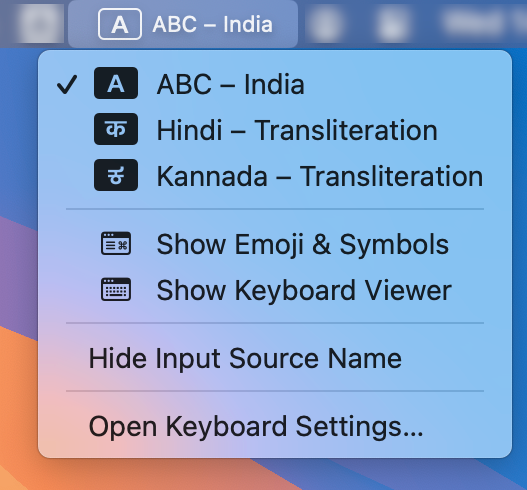
Scrite provides a built-in “almost phonetic” transliteration for Bengali, Gujarati, Hindi, Kannada, Malayalam, Marathi, Oriya, Punjabi, Sanskrit, Tamil and Telugu. Clicking on the language button on the toolbar pulls out a menu that lists all supported languages.
Switching Active Language
Simply select a language from the language menu to switch to that language. Once you change the active language, it shows up in the toolbar as marked below.

Anything you type in the screenplay editor from then on will be transliterated to that language.
Discovering Alphabet Mappings
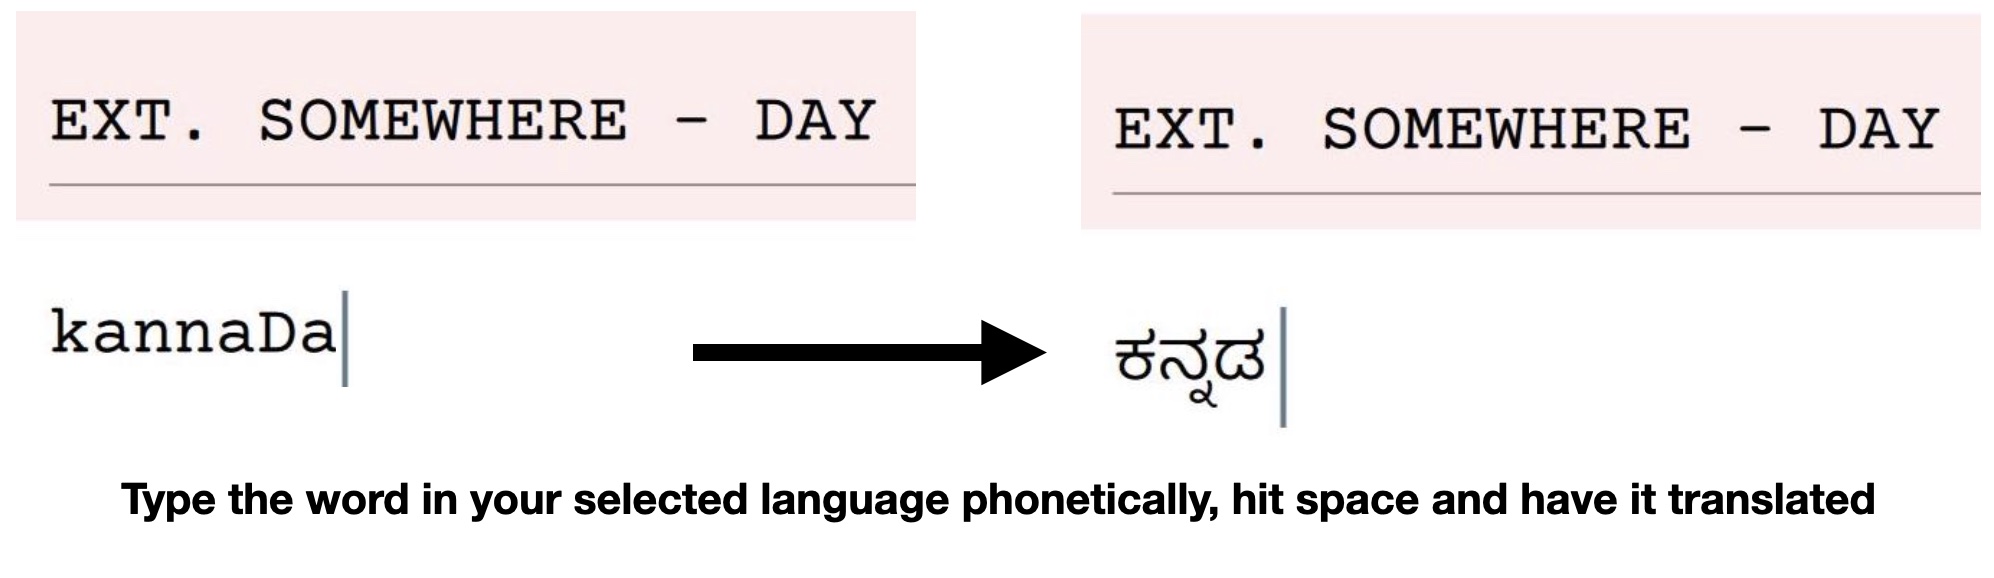
Sometimes transliteration is not exactly phonetic. For example:

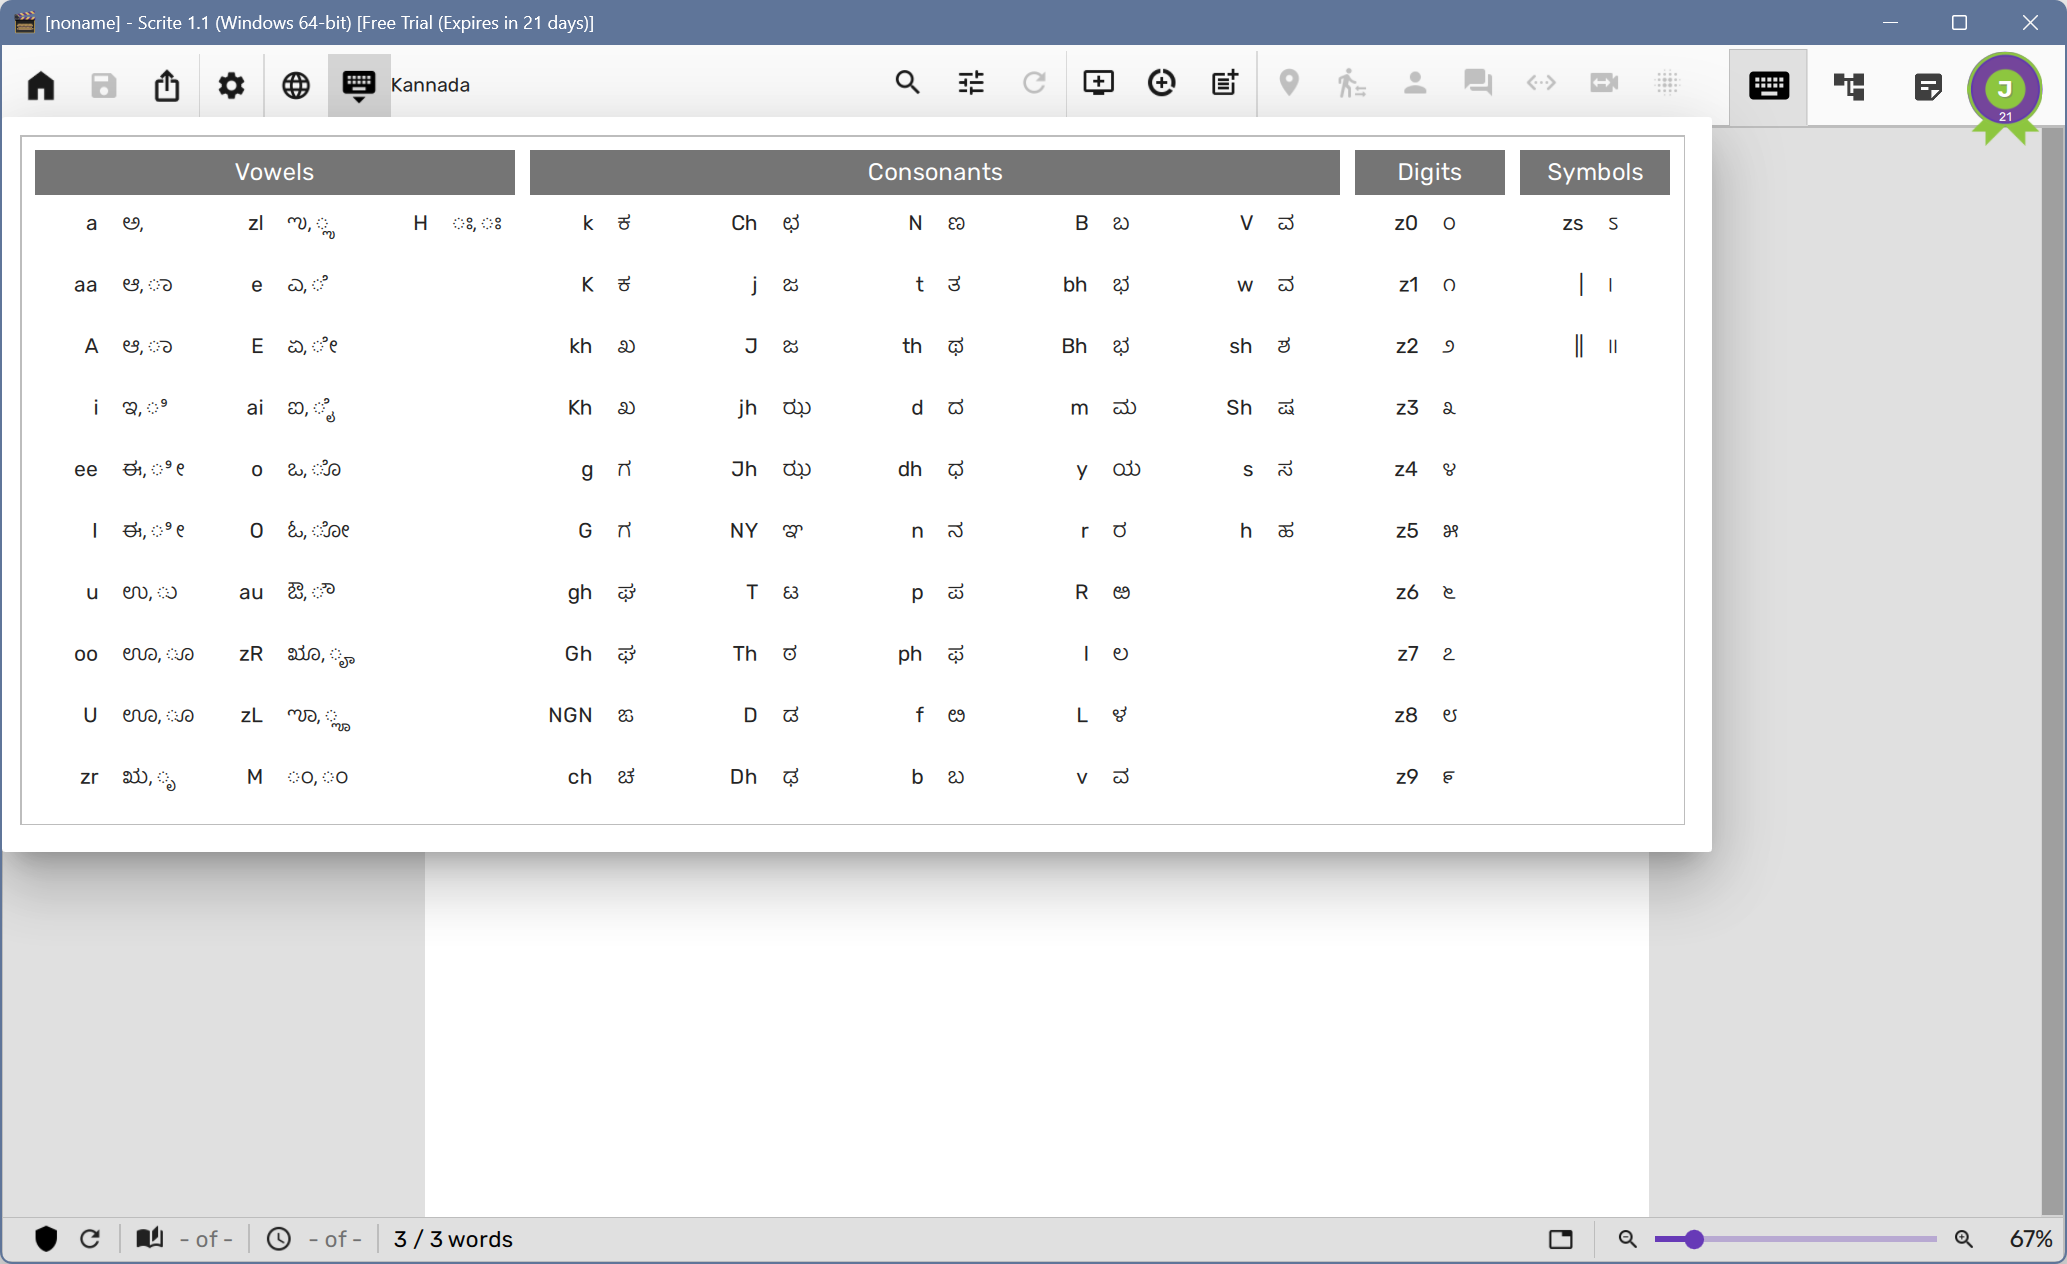
You can figure out the correct combination of letters to use for your selected language by pulling out the alphabet mappings for it. Simply click on the keyboard icon next to the current language on the toolbar:
Using Input Methods
You can add new input methods in your operating system and use it with Scrite easily. The subsections below explain how this can be done in macOS and Windows 10.
Mapping input sources on macOS
Open System Preferences > Keyboard > Input Sources in your macOS. Here you can add input sources of your choice.
If you prefer to watch a video about how to add input methods on Windows then click here. Remember to come back and read this article to understand how to map OS input methods to specific languages in Scrite.
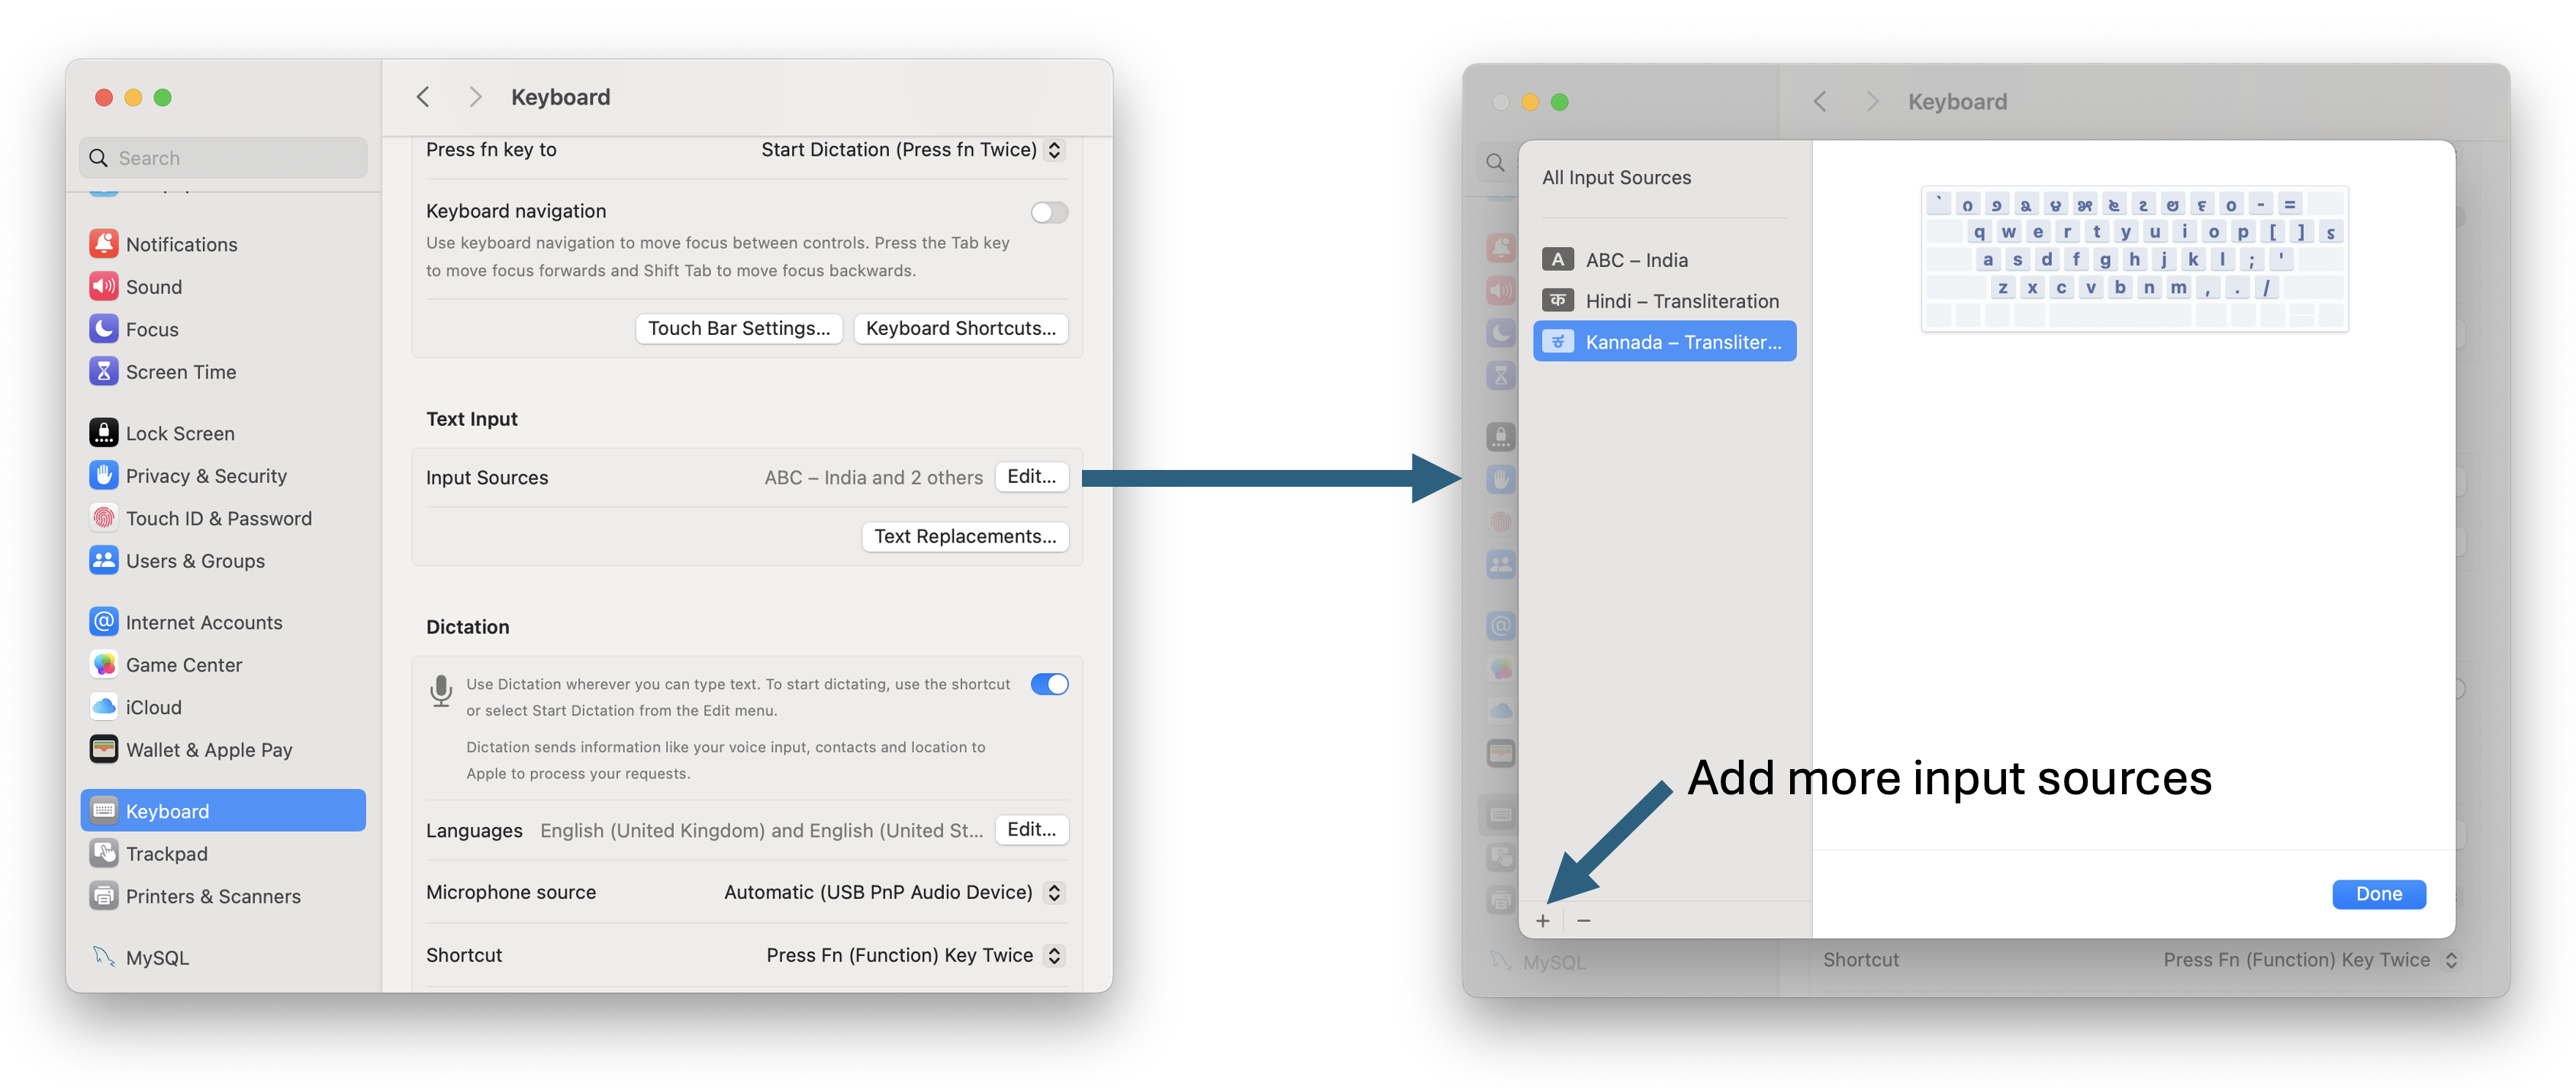
Now, verify that your input sources have been enabled by clicking on the Input menu in the menu bar.
Next, you can map the input methods for specific languages enabled in System Preferences for use with those languages in Scrite. Open Settings in Scrite from the Settings menu and switch to Language > Transliteration tab.
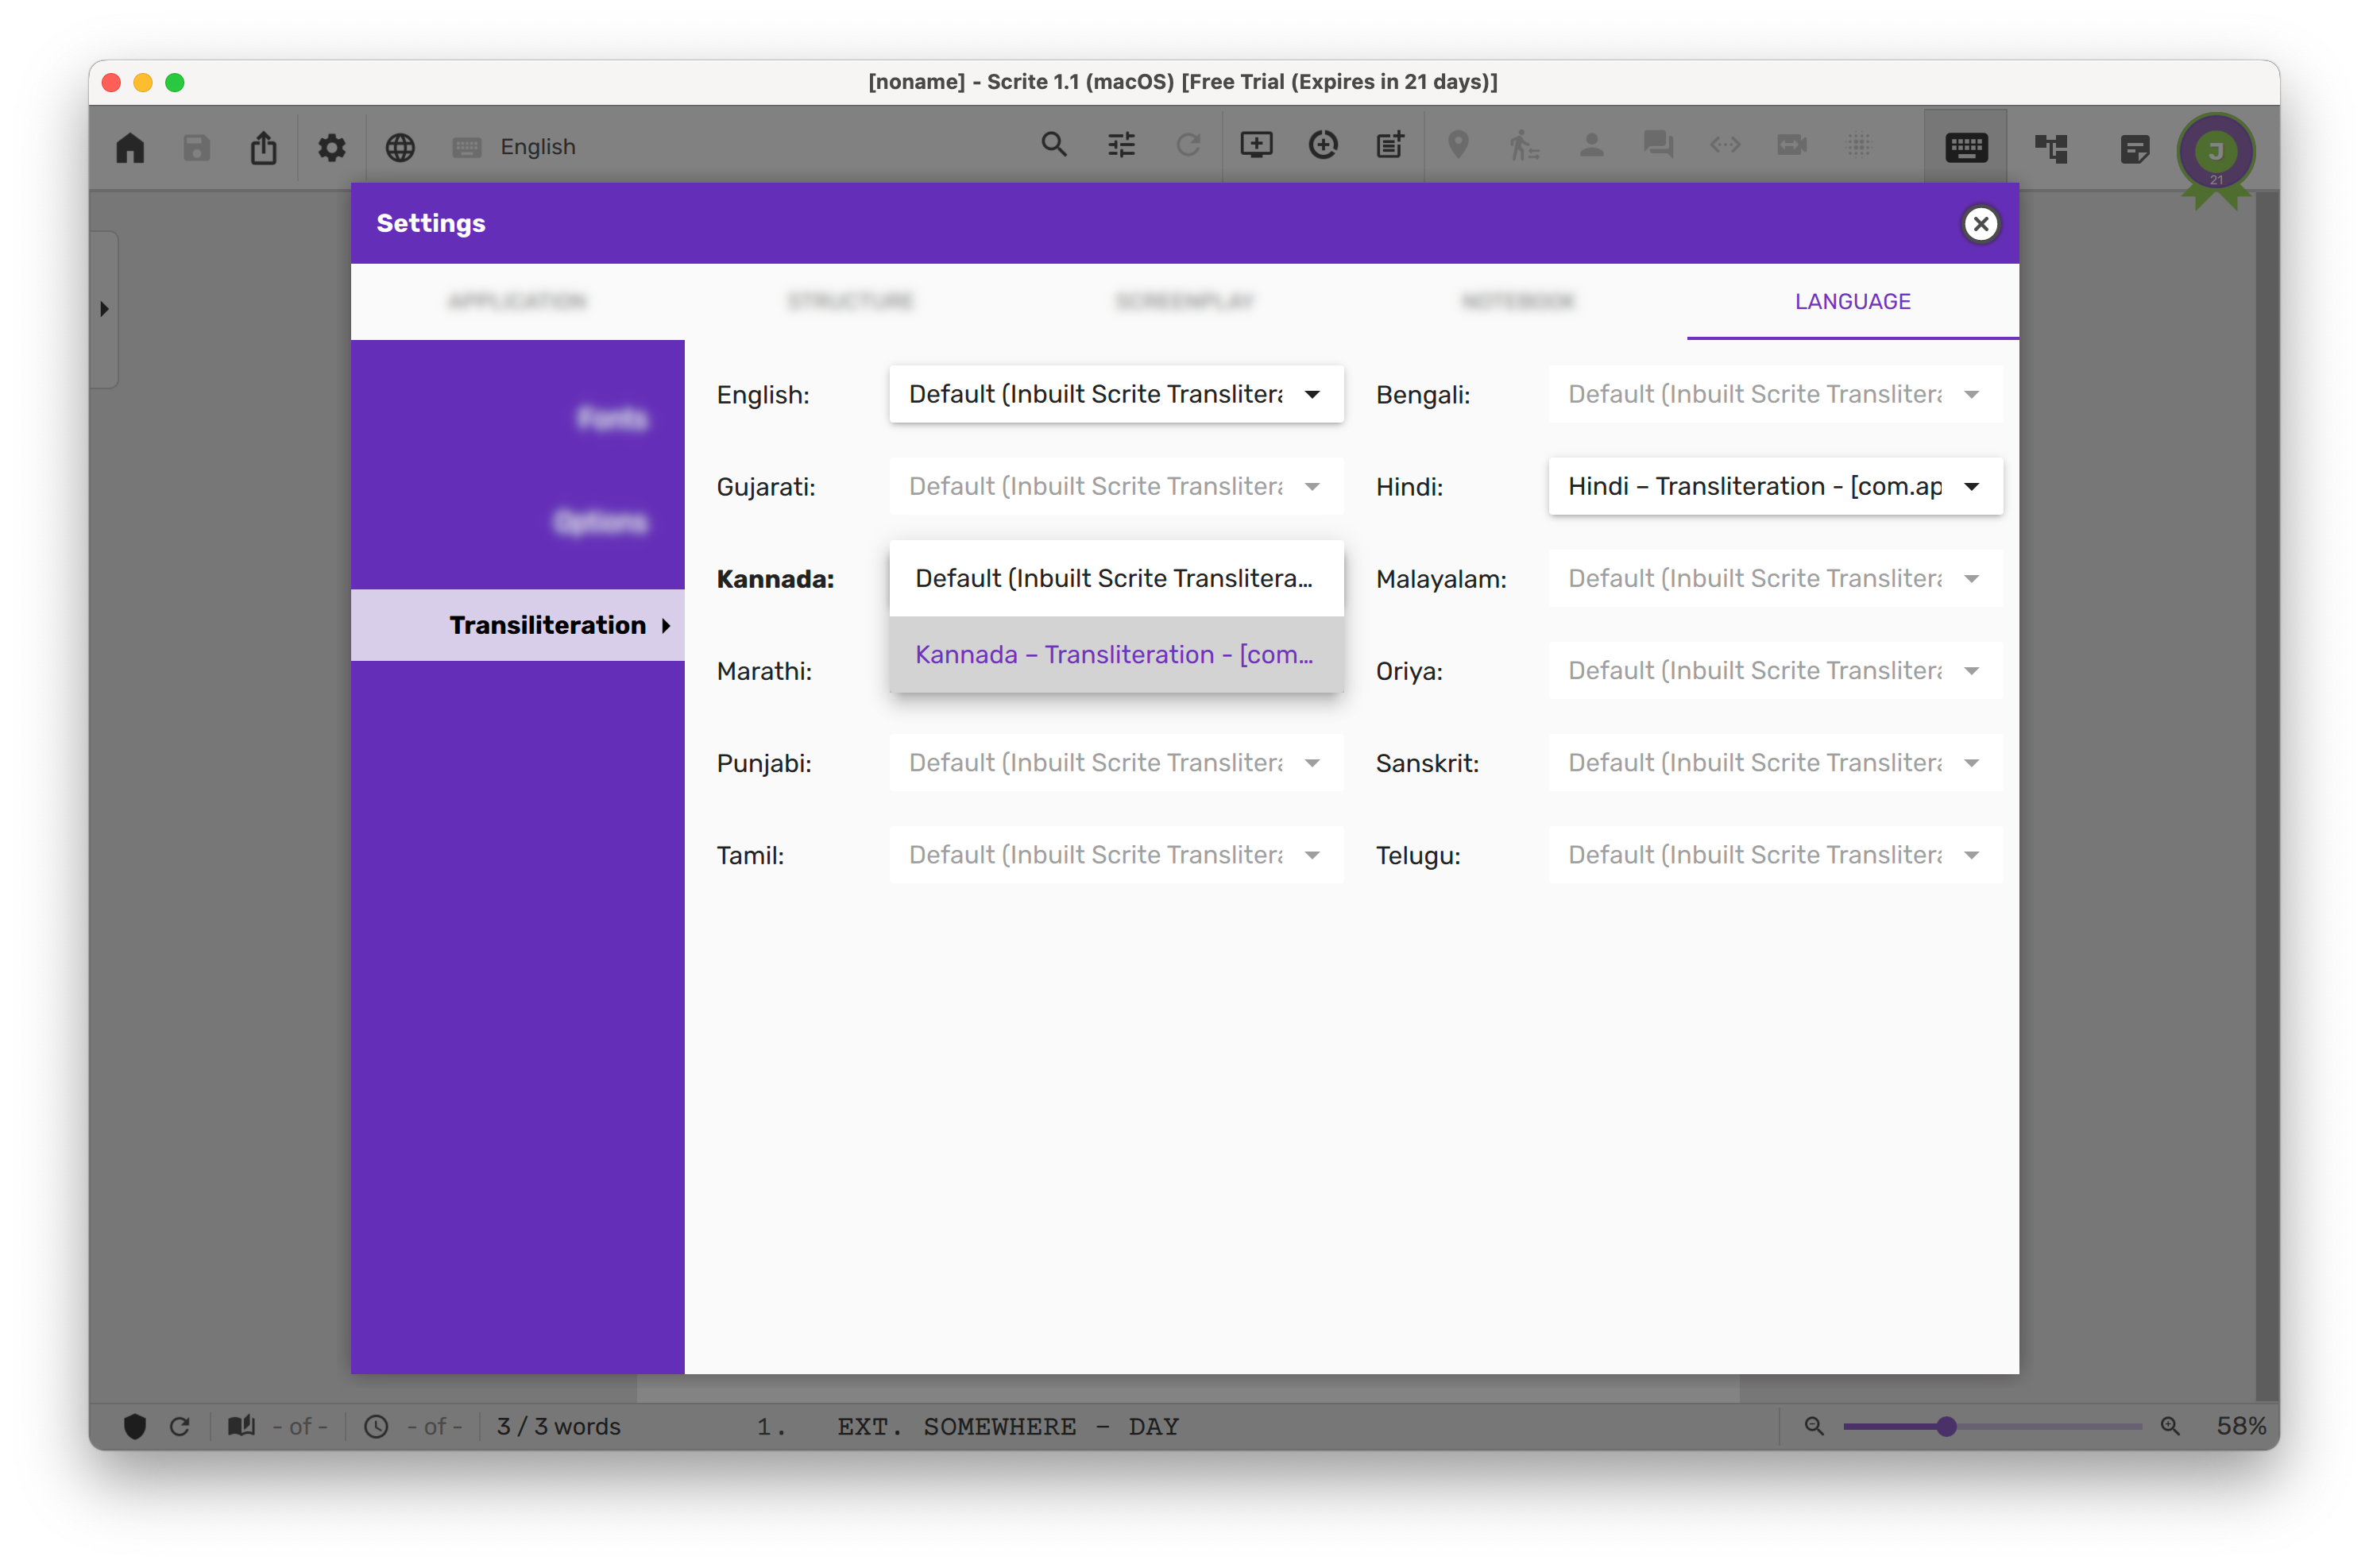
Here, you can assign the macOS’s input source with specific languages. Once you have finished mapping the input sources, click on the check mark on the top right of the dialog box.
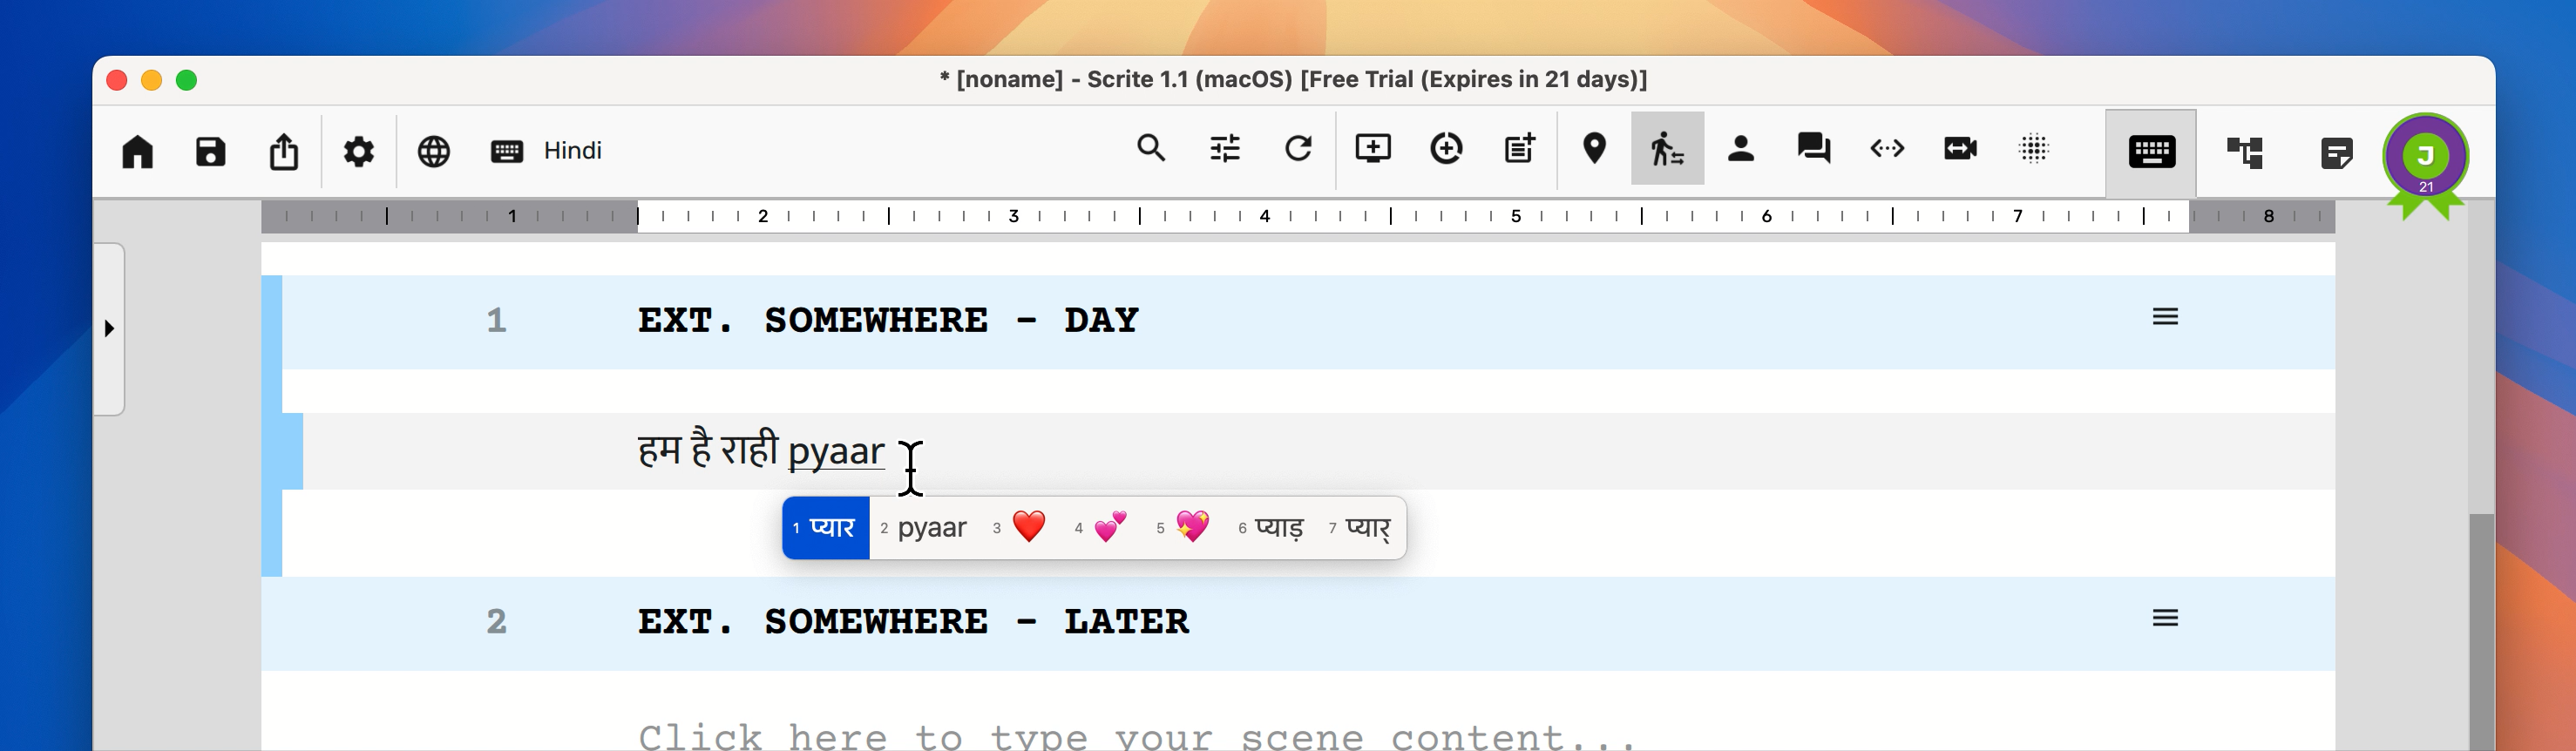
Now, when you try to write in the mapped languages, Scrite uses macOS’s input source as keyboard for transliteration intead of using its own inbuilt one.
Mapping input sources on Windows
On Windows 10, go to Settings > Language and add input methods of your choice.
If you prefer to watch a video about how to add input methods on Windows then click here. Remember to come back and read this article to understand how to map OS input methods to specific languages in Scrite.

Against, each language ensure that you have chosen Phonetic keyboards. To do that, click on the language in the list.

Click on Options and in the resulting window, click on “Add a keyboard” to add a new phonetic keyboard. We recommend that you remove other keyboards if you dont need them.

Lastly, ensure that the “Let me set a different input method for each app window” is checked.

Once you have added input methods for all the languaes you like, verify that you are able to switch between them in the status bar.

Now, on Scrite you can map languages to the input methods you just enabled in Settings. Open Scrite’s settings dialog box and switch to Language > Transliteration page.

Once you have finished mapping the input sources, click on the check mark on the top right of the dialog box.
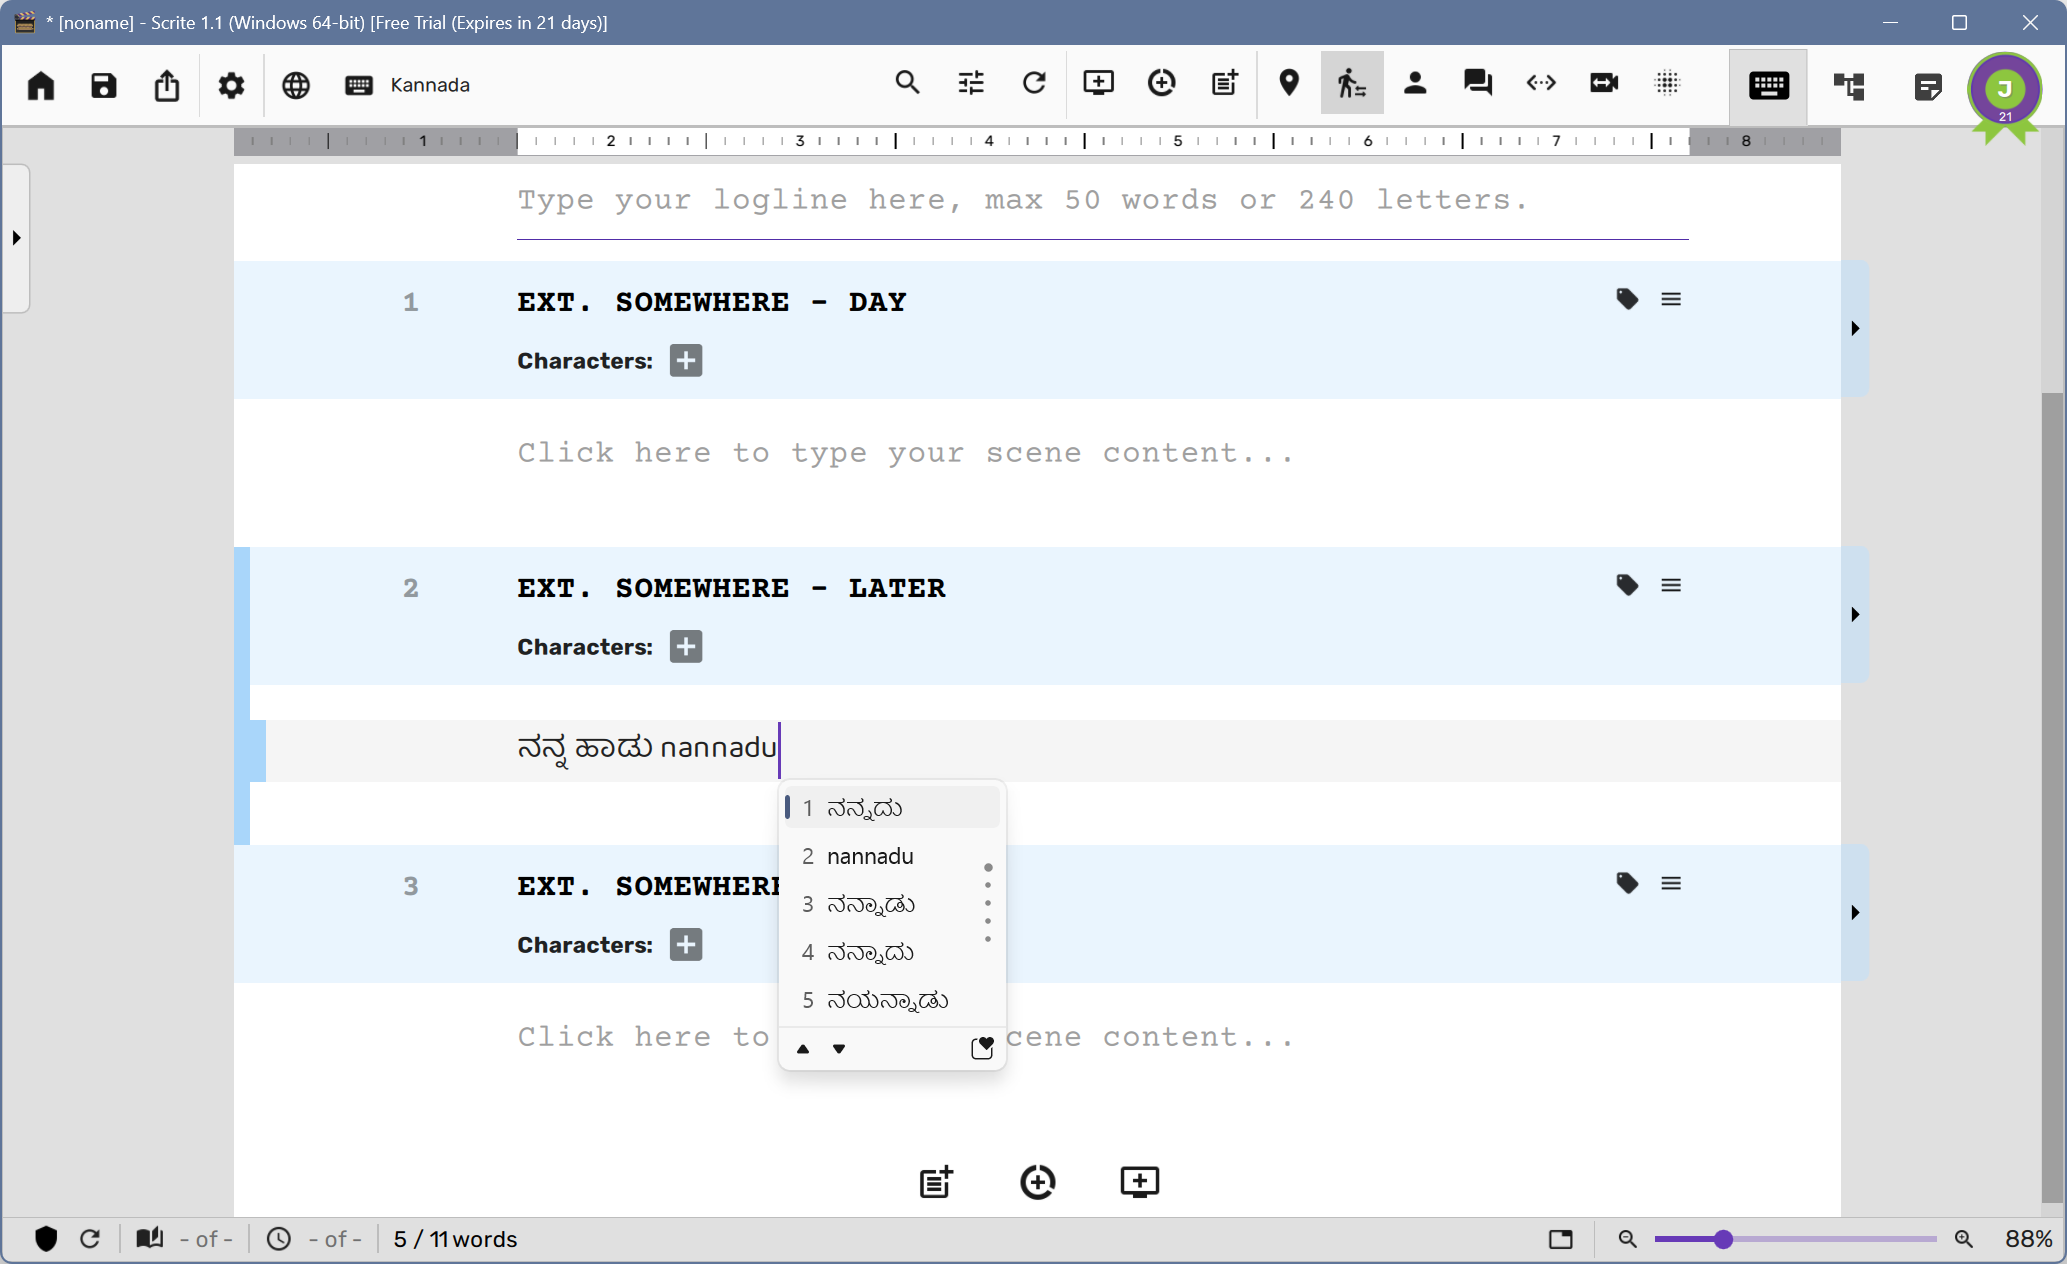
From this point onwards, Scrite will automatically switch to the input method on Windows while typing in mapped languages.
Mapping input sources on Linux
As of writing, we do not support input method mapping on Linux. We hope to address this feature gap in a future update.
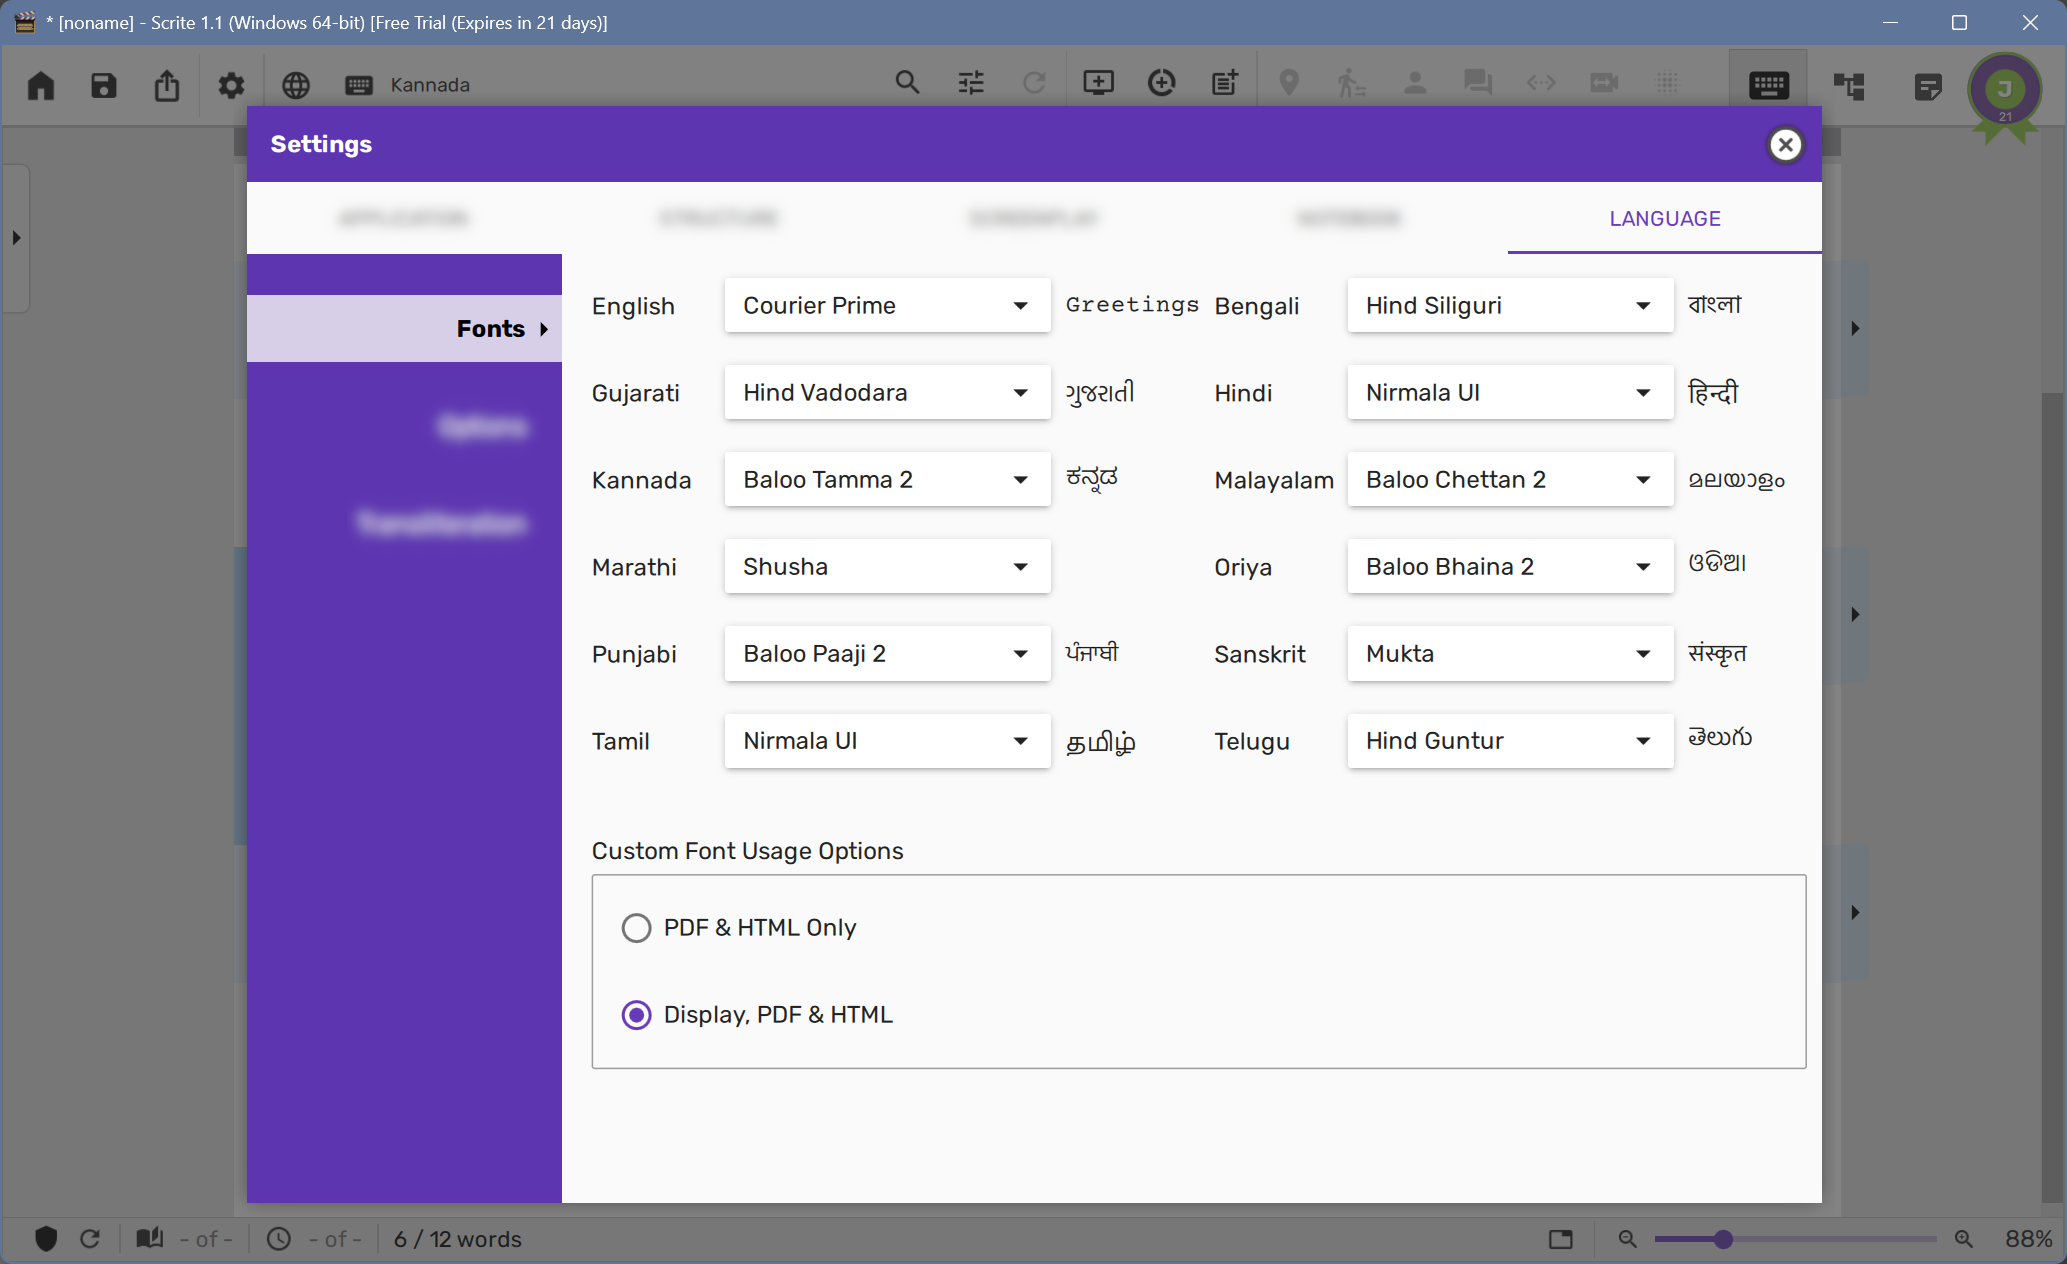
Using Custom Fonts
Scrite bundles default fonts for each language it supports. By default Scrite uses those fonts. However, you can assign different fonts by opening the Fonts page in the Language tab of Settings dialog box.
Assigning Language To A Paragraph Type
Suppose that you are writing screenplays in which all dialogues are writting in Kannada, but Action and every other paragraph kind is written in English. You can simply configure the Language option to Kannada, for the Dialogue paragraph type in Settings > Screenplay > Formatting Rules tab.
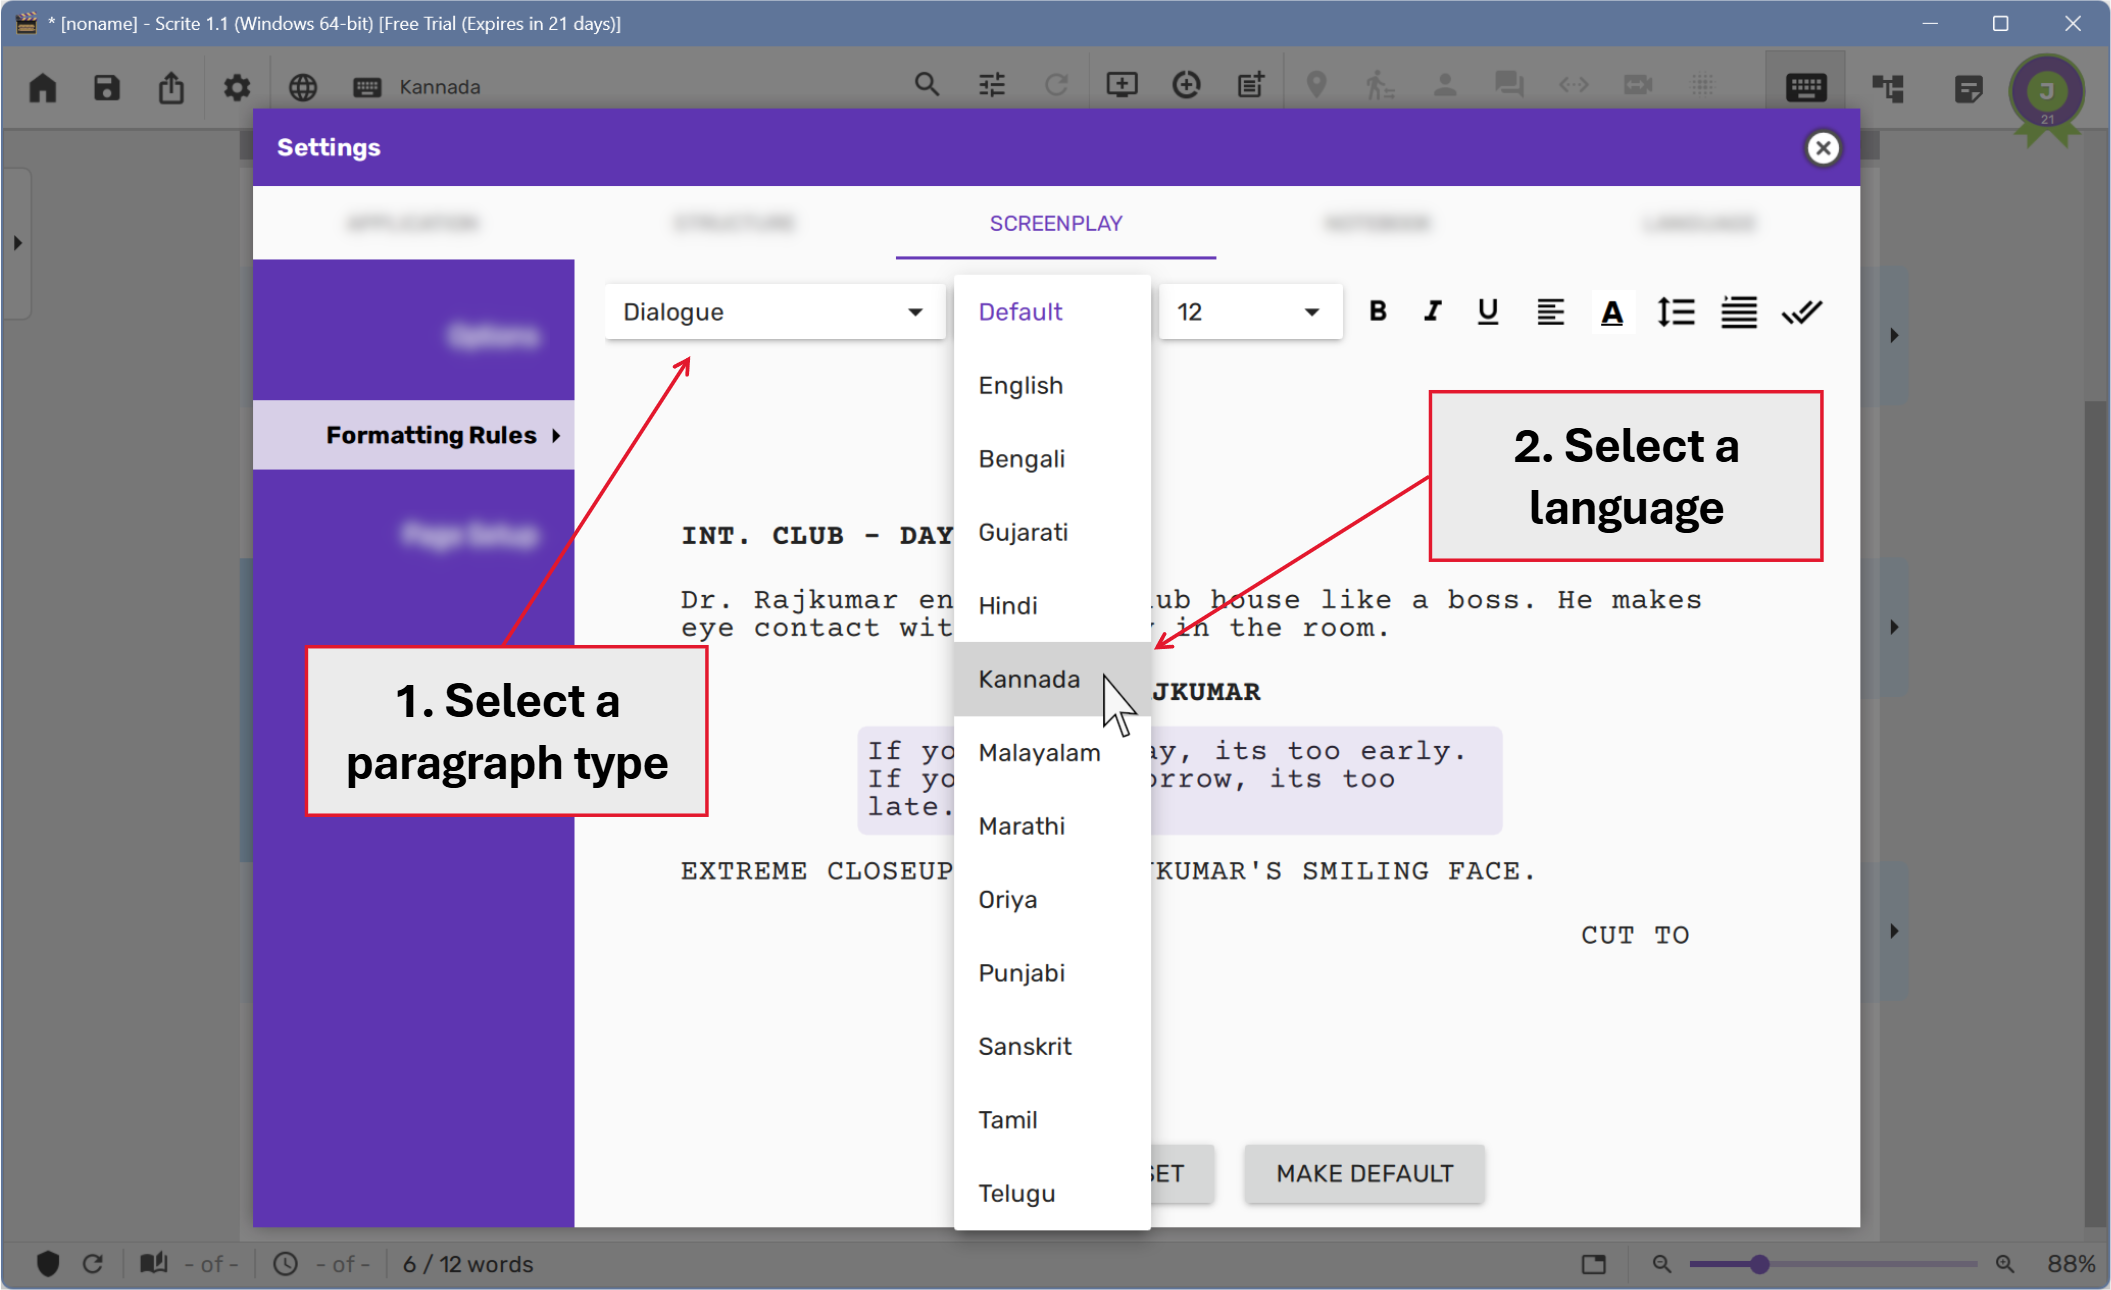
From now on, whenever you switch to a dialogue paragraph – Scrite will automatically switch to Kannada language.
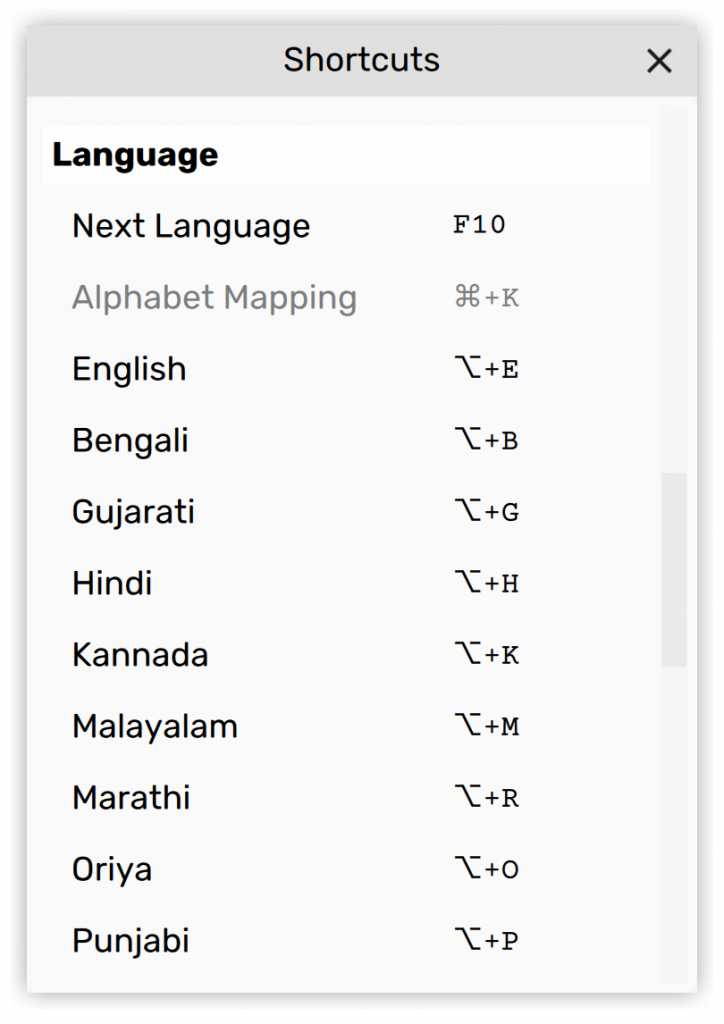
Fast Language Switching
To rapidly switch between languages, you can use keyboard shortcuts listed in the language menu or in the shortcuts dock widget.
Or if you prefer to write only in a specific subset of languages, then you can mark them as active languages in settings…
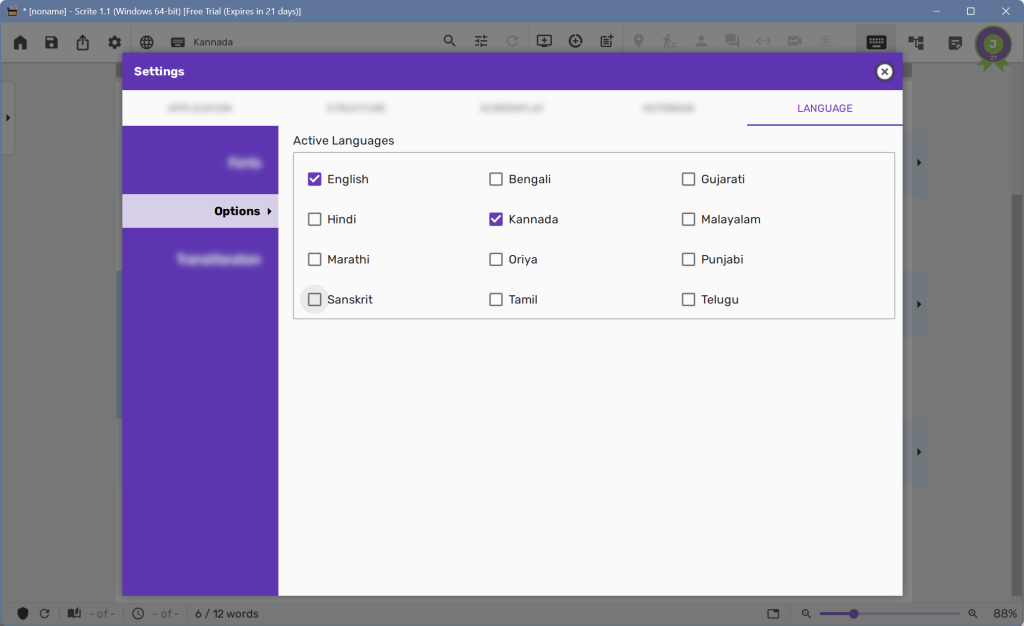
…and cycle through active languages using the F10 key.
Exporting With Fonts
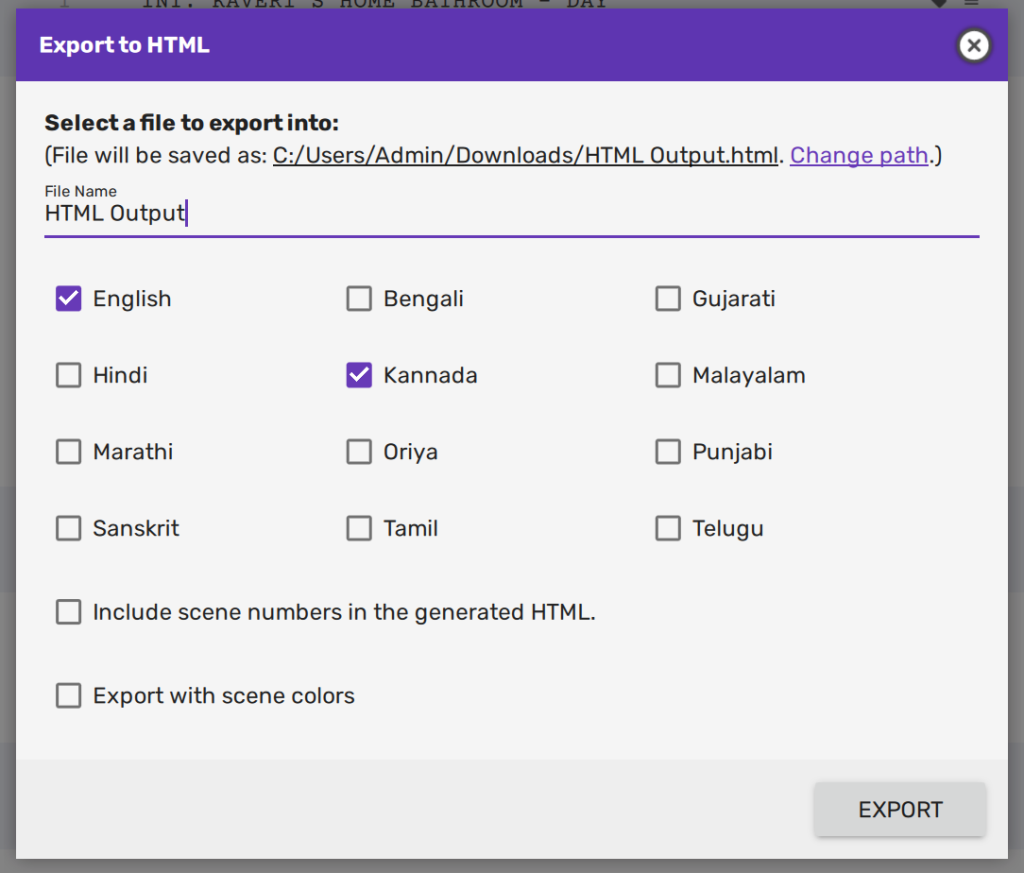
By default, Scrite embeds fonts into PDFs exports and reports. But while exporting to HTML, you will have to explicitly select the language fonts to export.
Video Tutorial
This video tutorial was recorded using a very old version of Scrite. While the UI showcased in the video differs, the concepts remains valid.
What’s next?
In the next guide, we will walk you through the basic features of the structure tab.