Table Of Contents
The “founding reason” for the Scrite project is the structure tab. So much so that initial public betas of the app only featured the structure tab.
The idea was to let users capture the shape and flow of their story visually, in addition to capturing the screenplay in its proper format.
We have come a long way since then. Today, the structure tab of Scrite is quite sophisticated, in that it lets you capture the formal structure of your screenplay in addition to being able to (still) capture the shape and flow of your story.
In this article we will walk you through the core ideas within the structure tab. Covering all the features within a single article is very challenging, so we restrict ourselves to only the basic ideas in this article.
NOTE: To make really good use of the Structure canvas, we recommend that you use Scrite on a display that supports Full HD (1920×1080) resolution or higher.
Elements Of The Structure Tab
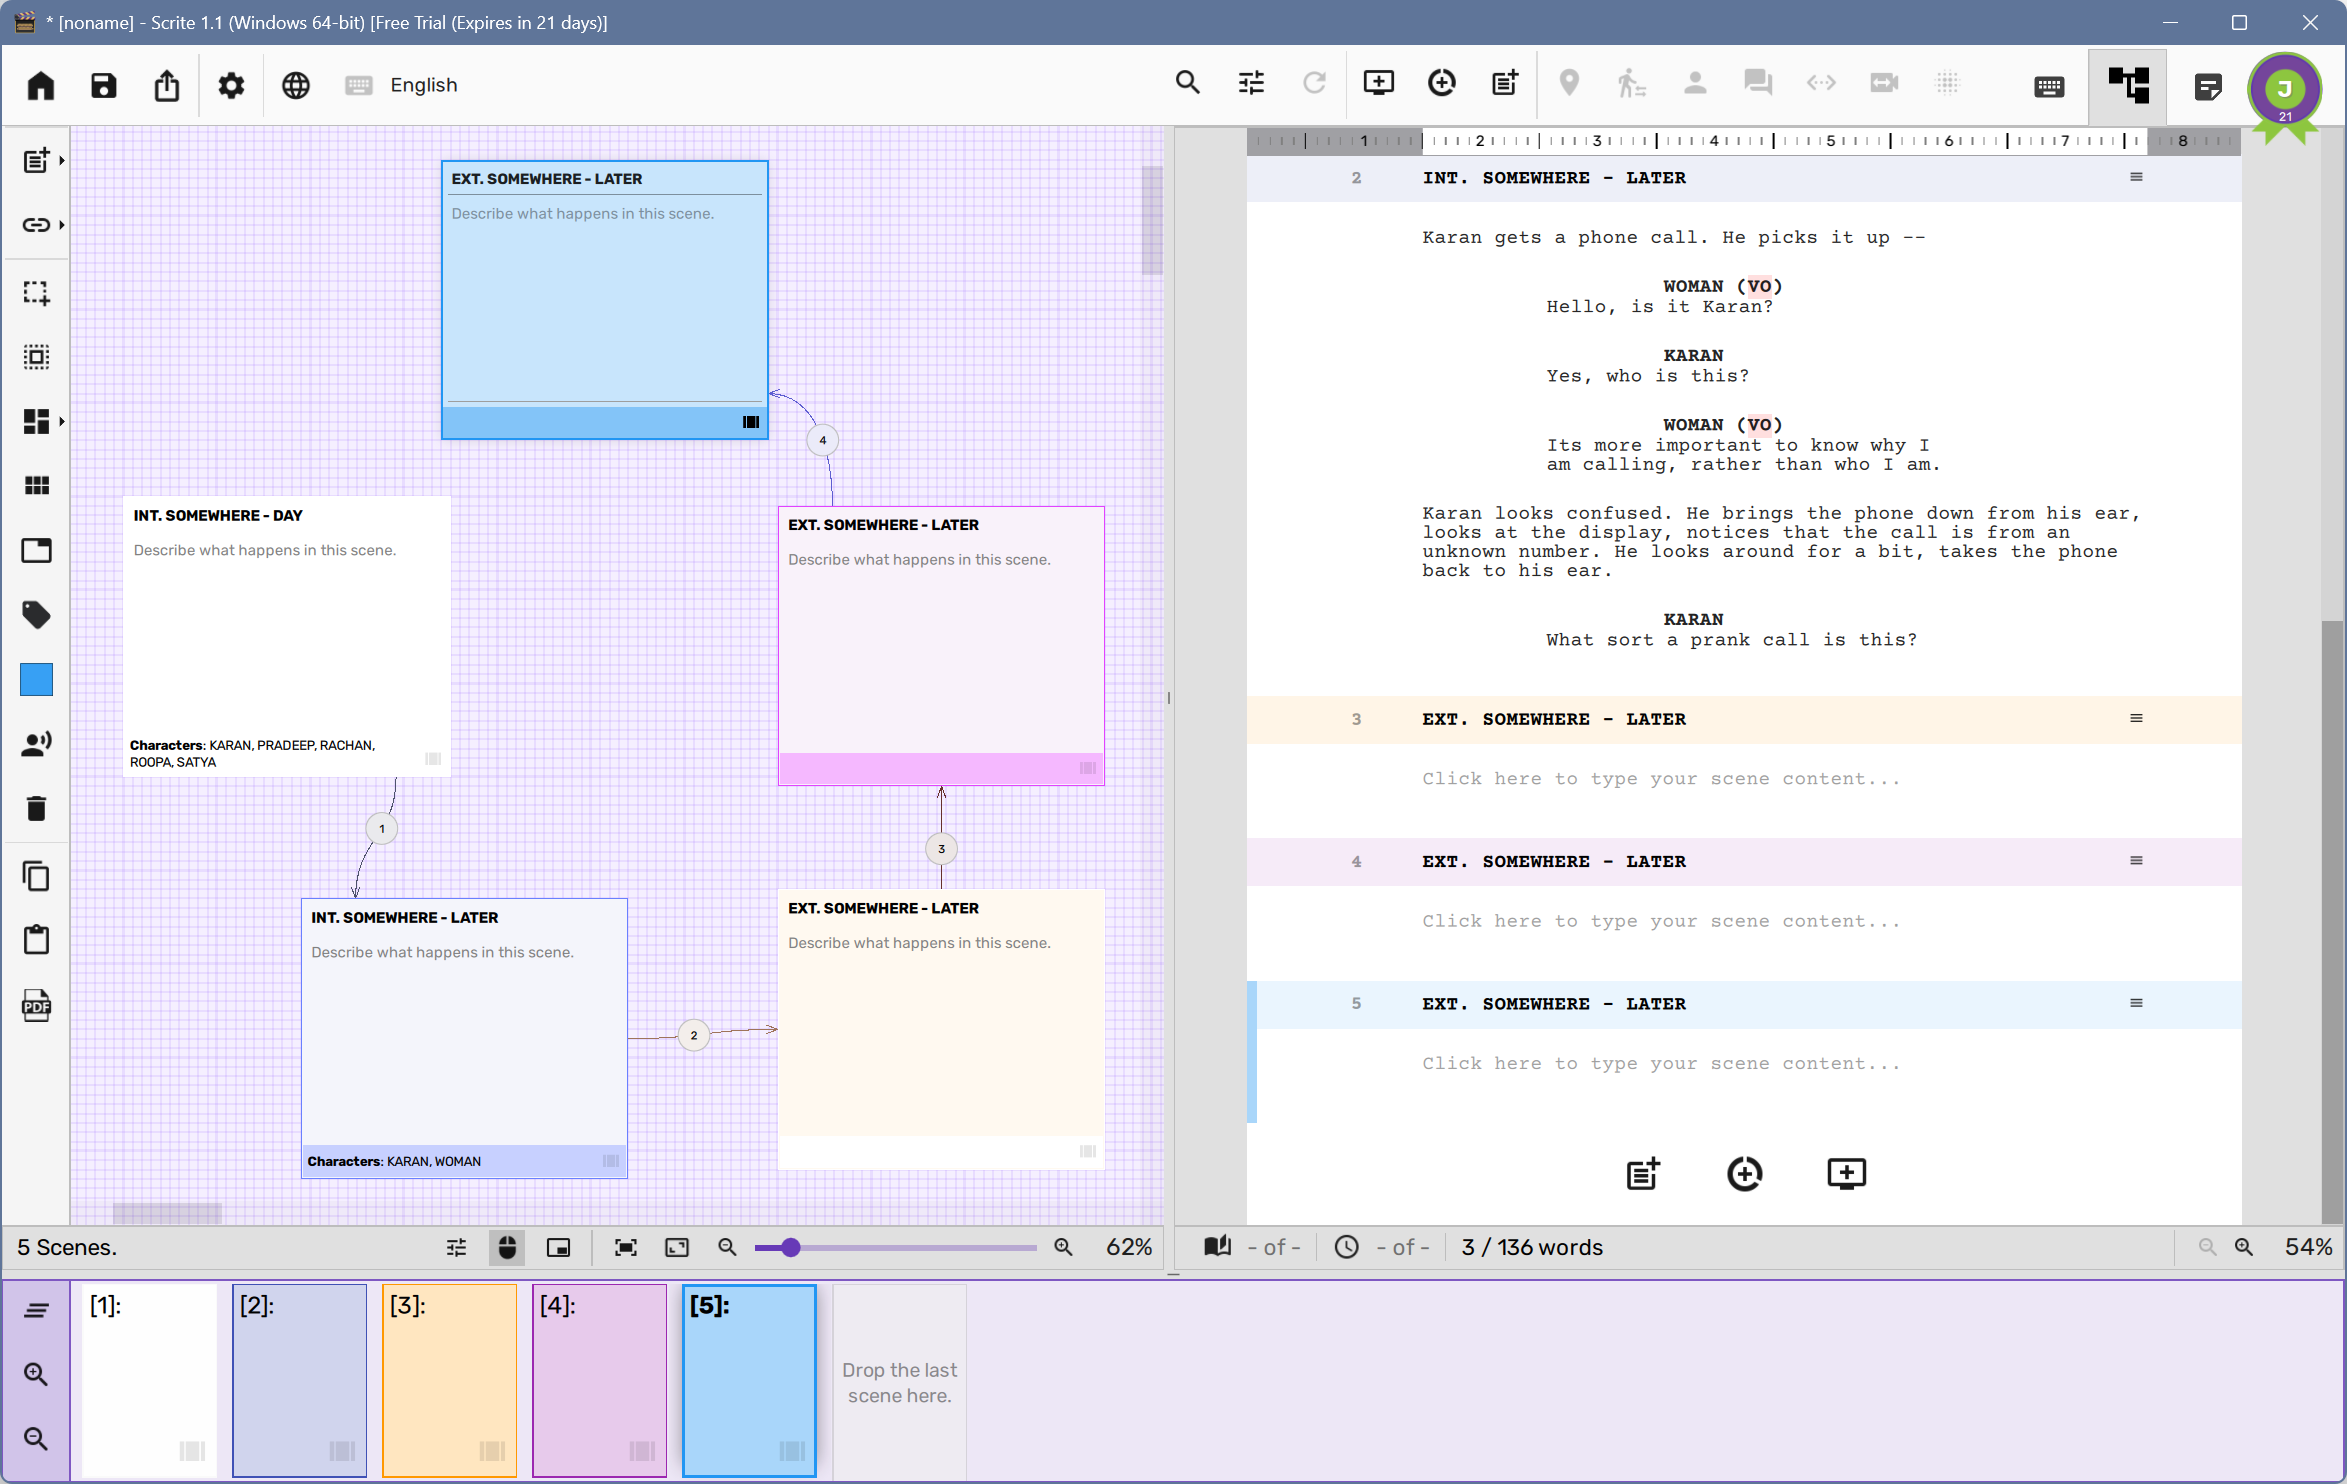
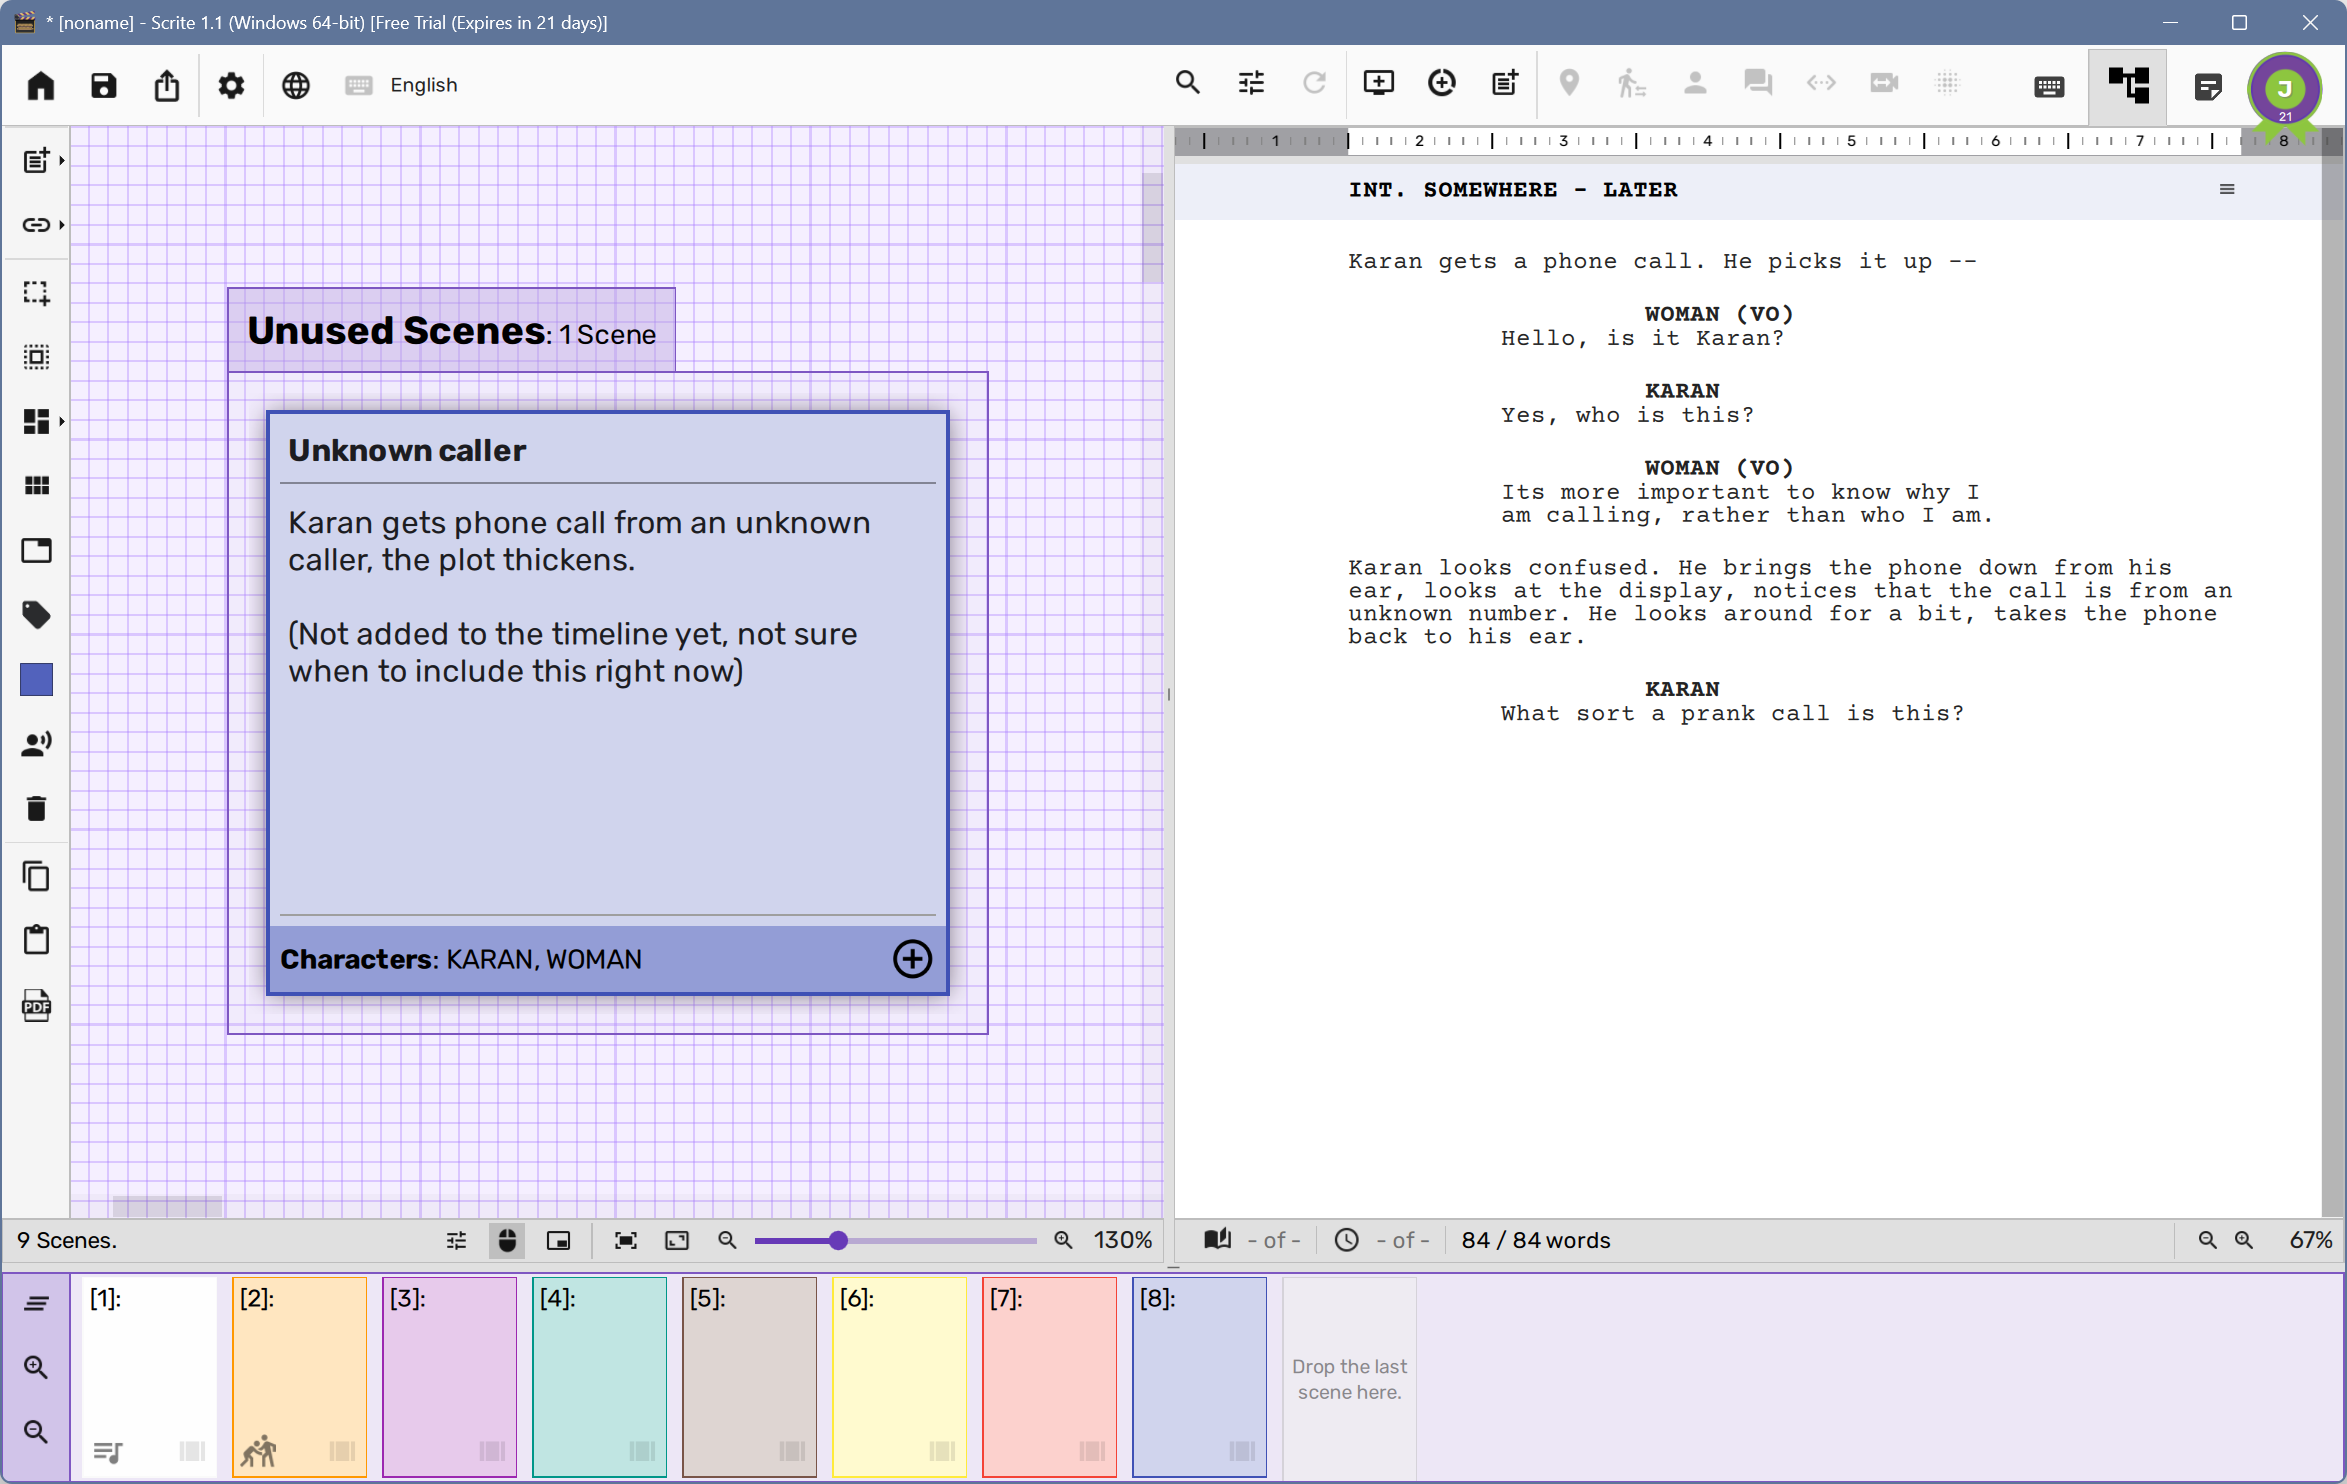
Once you switch to the structure tab, you will notice three areas. The GIF animation below shows how to switch to the structure tab and also highlights the three areas: Structure Canvas, Screenplay Editor & Timeline Editor.
Resize handles between these areas allow you to negotiate the size of each of these areas.
The core idea in this tab is this: Structure canvas is where you create scenes, Timeline is where you sequence them, the Editor is where you type the content of your scenes.
The Structure Canvas
The structure canvas is where you can capture the structure of your screenplay. In screenplay, structure is akin to story design. Every screenplay that is well made has solid structure behind it.
Film makers and film critiques use terms like “linear-structure”, “non-linear-structure”, “Rashomon structure” and so on. Screenwriters also use these terms, but they use more precise structures like “Save-The-Cat structure”, or “The Hero’s Journey Structure” and so on.
Irrespective of the structure used to build the screenplay, we can notice one consistent thing. They all have a suggested way of visually plotting the elements that make up the story of the screenplay.
On the structure canvas you can place story elements (which in the case of Screenplay is scenes) on the canvas, in a way that allows you to visually capture the structure of your screenplay.
Before we get into advanced features that lets you visually capture the structure of your screenplay, lets acquaint ourselves with the basics of scene creation.
The following GIF animation shows how to create scenes on the structure canvas and move them around.
Notice how Scrite creates an index card on the canvas every time you create a scene. Index cards can be moved around the canvas and they will be grouped as “Unused Scenes” until they are dragged and dropped to the timeline. More on this in a later section.
The Timeline Editor
The timeline editor is where you can place and sequence scenes and act/episode breaks of your screenplay.
When you create scenes on the structure canvas, they wont show up on the timeline by default. You will have to drag and drop them to the timeline.
As you add scenes from the structure canvas to the timeline you will notice two things happening on the structure canvas:
- Scenes dragged into the timeline will now get grouped under Act 1.
- Arrows appear between scenes to highlight the flow of scenes.
Infact the arrows follow the index card even if you move them around.
You can drag index cards around on the timeline to re-sequence them. Notice how the arrows update on the structure canvas as the scenes are re-sequenced.
More about timeline editor in a later section of this article.
The Screenplay Editor
In the screenplay editor area you can either edit an individual scene. When a scene is not yet added to the timeline, the editor only shows that particular scene. Otherwise it will show the scene in relation to the rest of the screenplay.
These three areas together capture the structure of your screenplay. We have only covered the basics so far, read on to understand how these panels can be used effectively for large stories.
Creating Scenes On Structure
Like we said before, the structure canvas is where you create scenes that make up your story. Many of these scenes will make it to the screenplay when they are dragged and dropped on the timeline, but some may simply be left on the structure canvas as potential scenes.
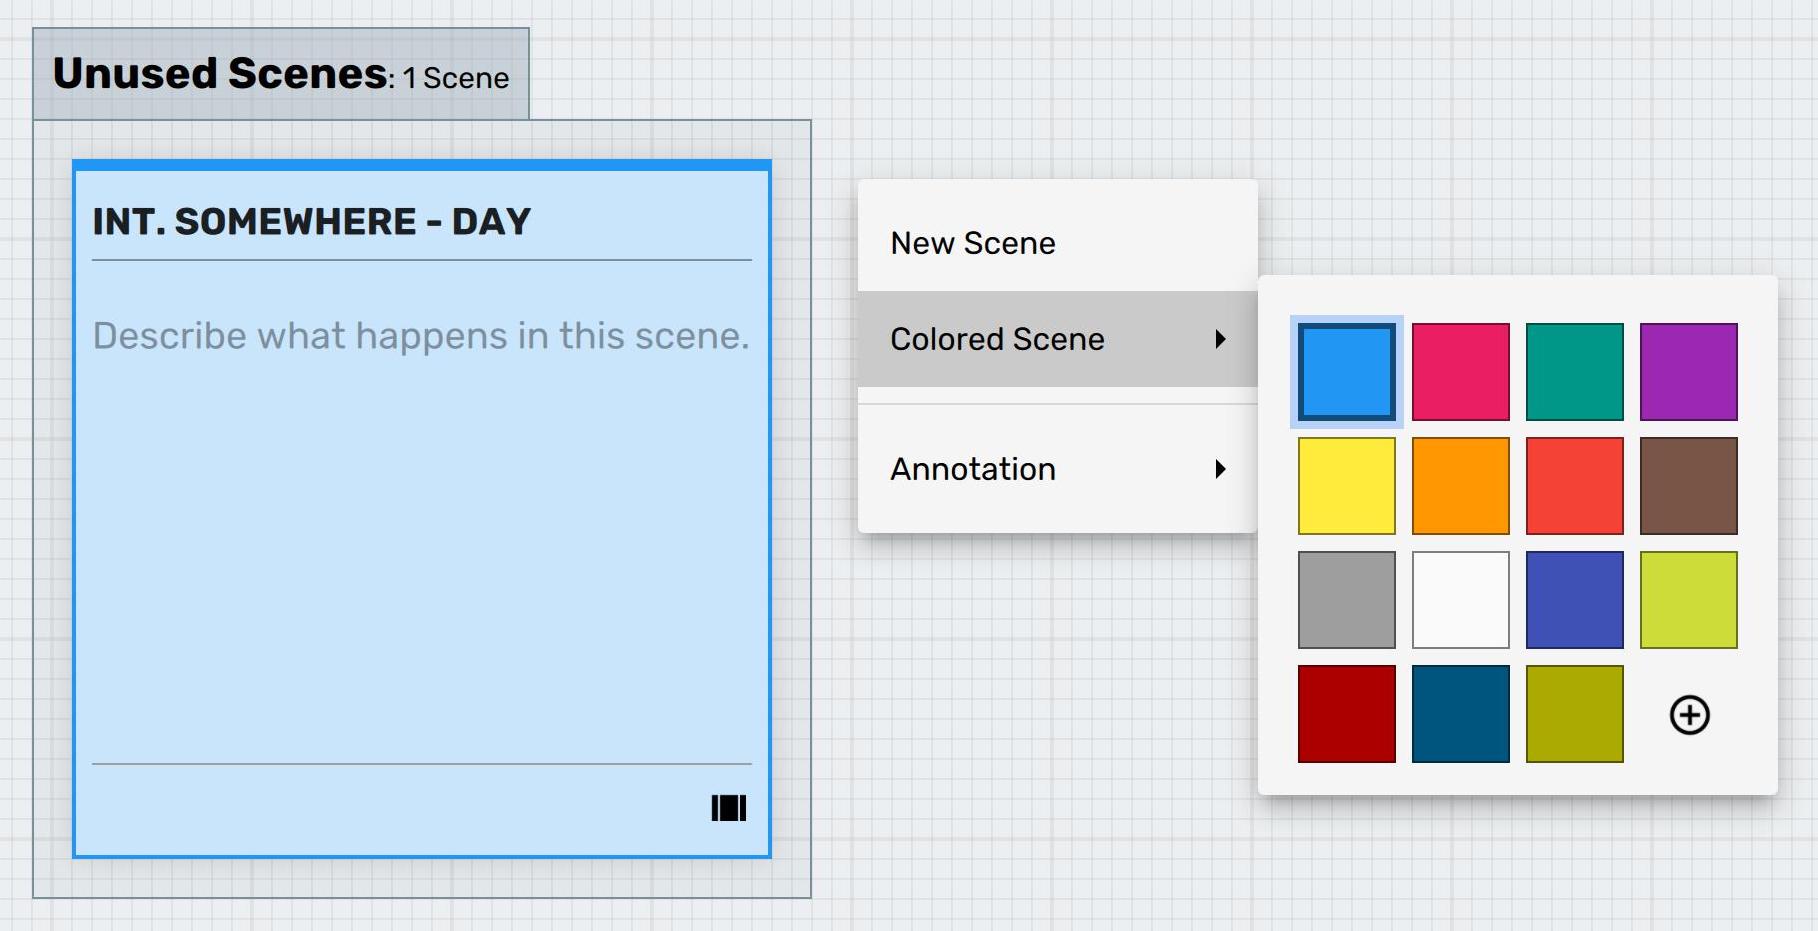
To create a scene, we can click on the create scene button on the structure canvas toolbar. Select “New Scene” or a color from the “Colored Scene” submenu and then click on an empty area in the canvas. This causes the index card of a blank scene to be created and shown on the canvas.
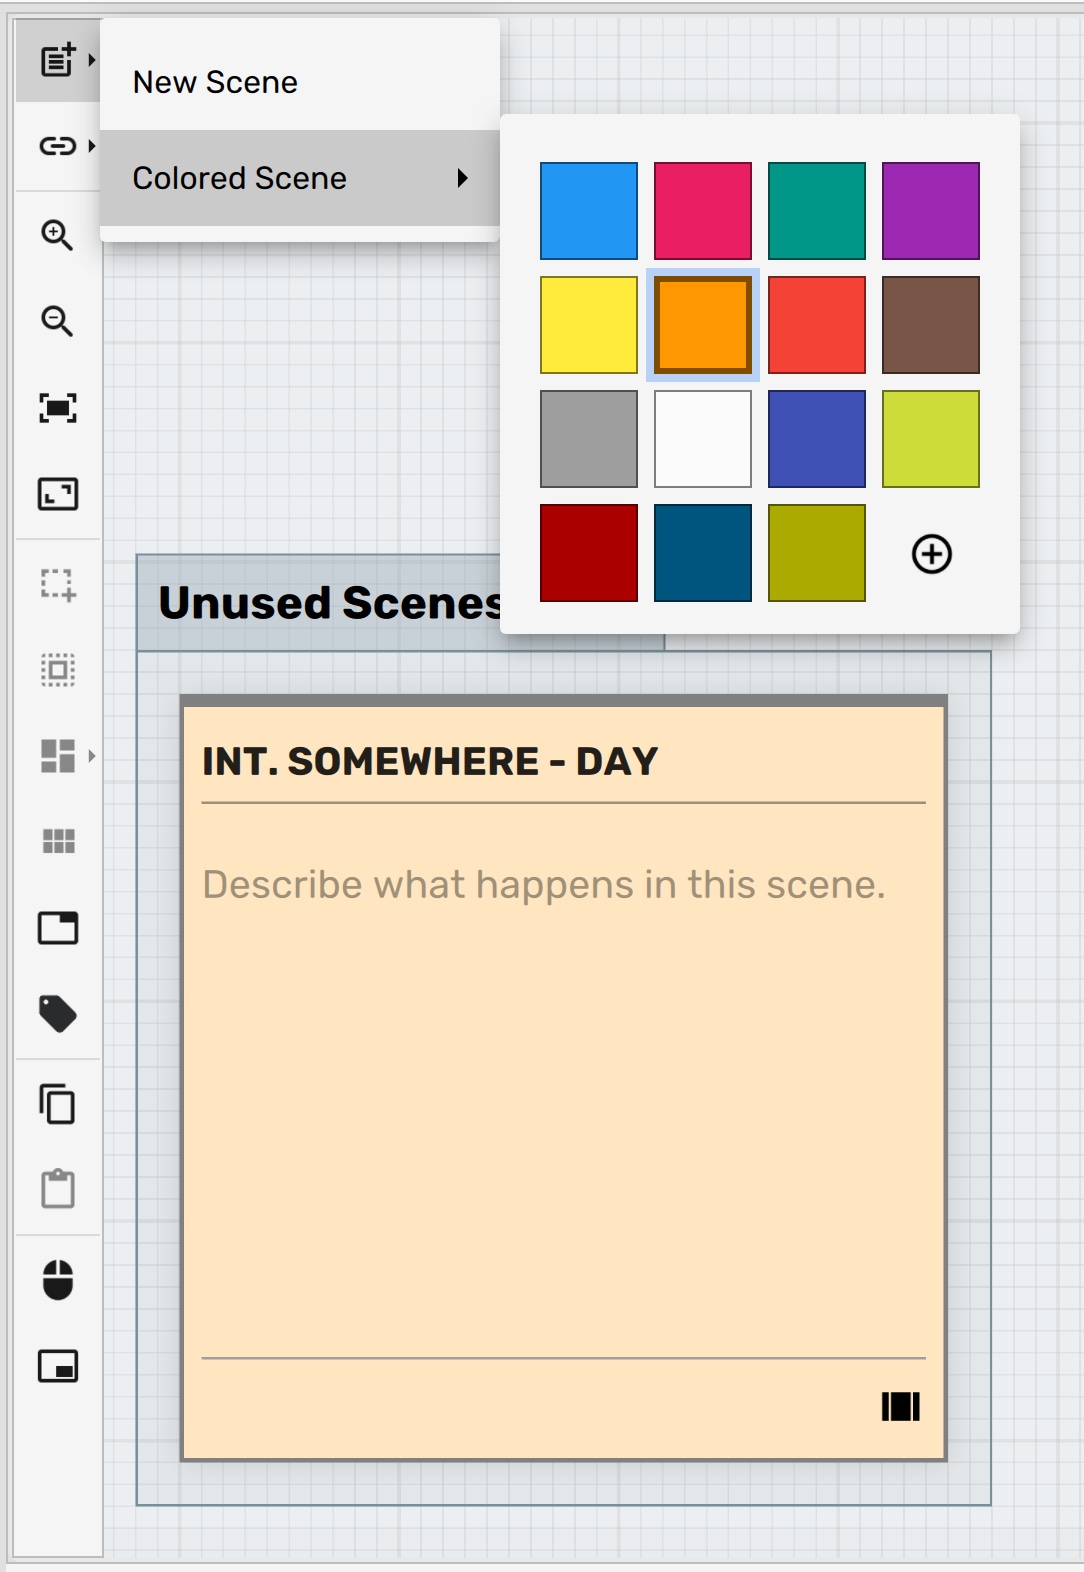
You can also right click on an empty area in the canvas and create a new scene from the context menu.
Each scene is represented with an index card on the canvas. As opposed to many other apps where index cards don’t (by default) bear implicit relevance to the screenplay itself, in Scrite each scene has its own index card. When a scene is placed on the timeline, it becomes part of the screenplay. When a scene is moved around, the index card remains tagged to it.
Index Card and the scene that it represents are so tightly coupled that we use them interchangeably in this article and also elsewhere in the website.
Index Cards Areas
Once an index card is created, you can notice three distinct areas.
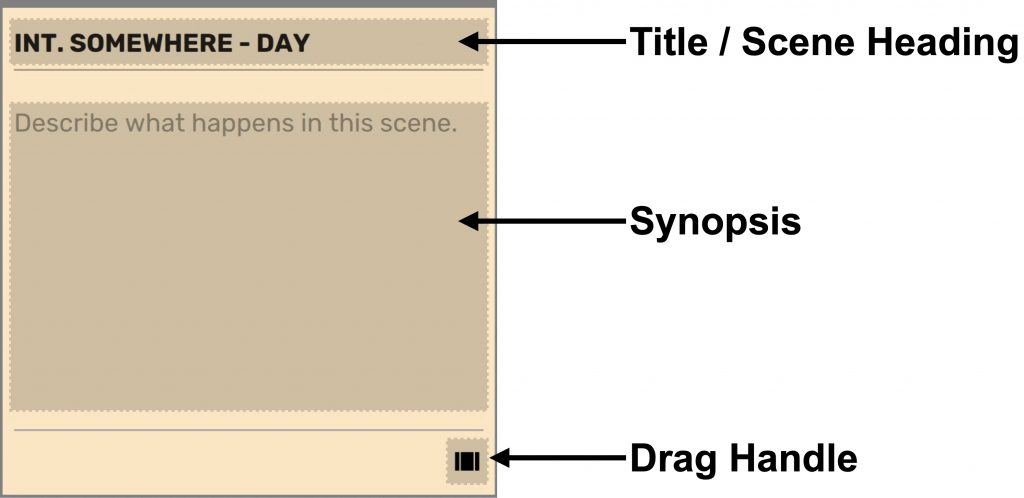
The title field on the index card where you can either type the scene heading of your scene or a title.
If a scene heading is written in the title field of the index card, then the same scene heading is used in the screenplay as well. Otherwise the title is shown only on the index card, while the scene heading of that scene on the screenplay editor can be distinct. More on this in a later section.
The synopsis is where you can type a brief description of what you expect to write in that scene.

The synopsis written here (on the index card) is always in sync with the synopsis shown on the screenplay editor against that scene. More on this in a later section.
You can type scene synopsis in any language supported by Scrite. Simply change the active language on the toolbar and phonetically write in that language.
Similarly, you can also type the index card title in any language supported by Scrite.
Drag Handle On The Index Card
The drag handle is what you use to either drag an scene from the structure canvas to the timeline—
–or drag a scene on top of another scene to stack it.

Index Card – Context Menu Options
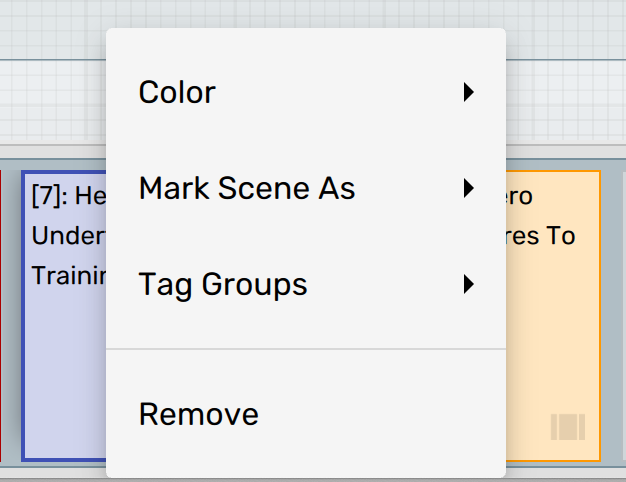
You can right click on any scene to view a context menu of options available for the scene in question.
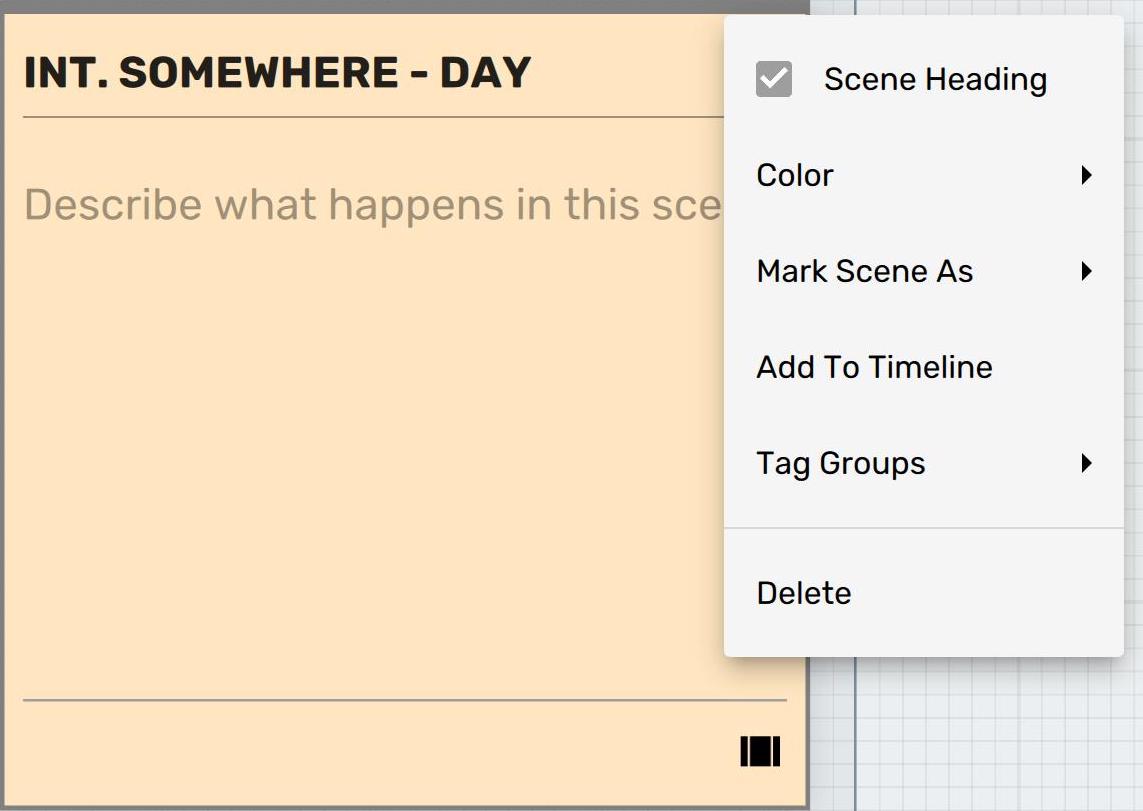
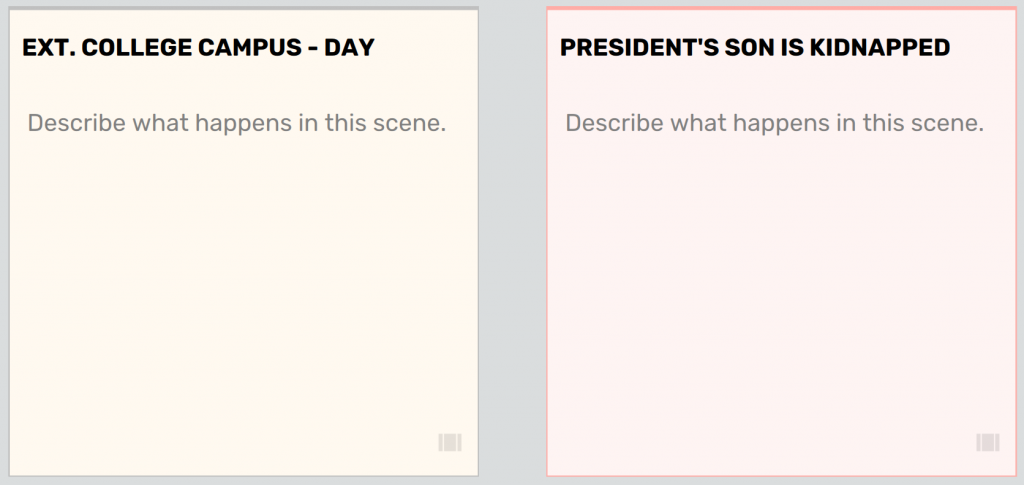
By using the “Scene Heading” checkbox, you can turn on/off scene heading for the index card. The Color menu lets you pick a different color for the index card.
Mark Scene As option presents a menu from which you can pick an option to classify your scene as a Standard, Song, Action (fight, car racing etc..) or Montage scene.
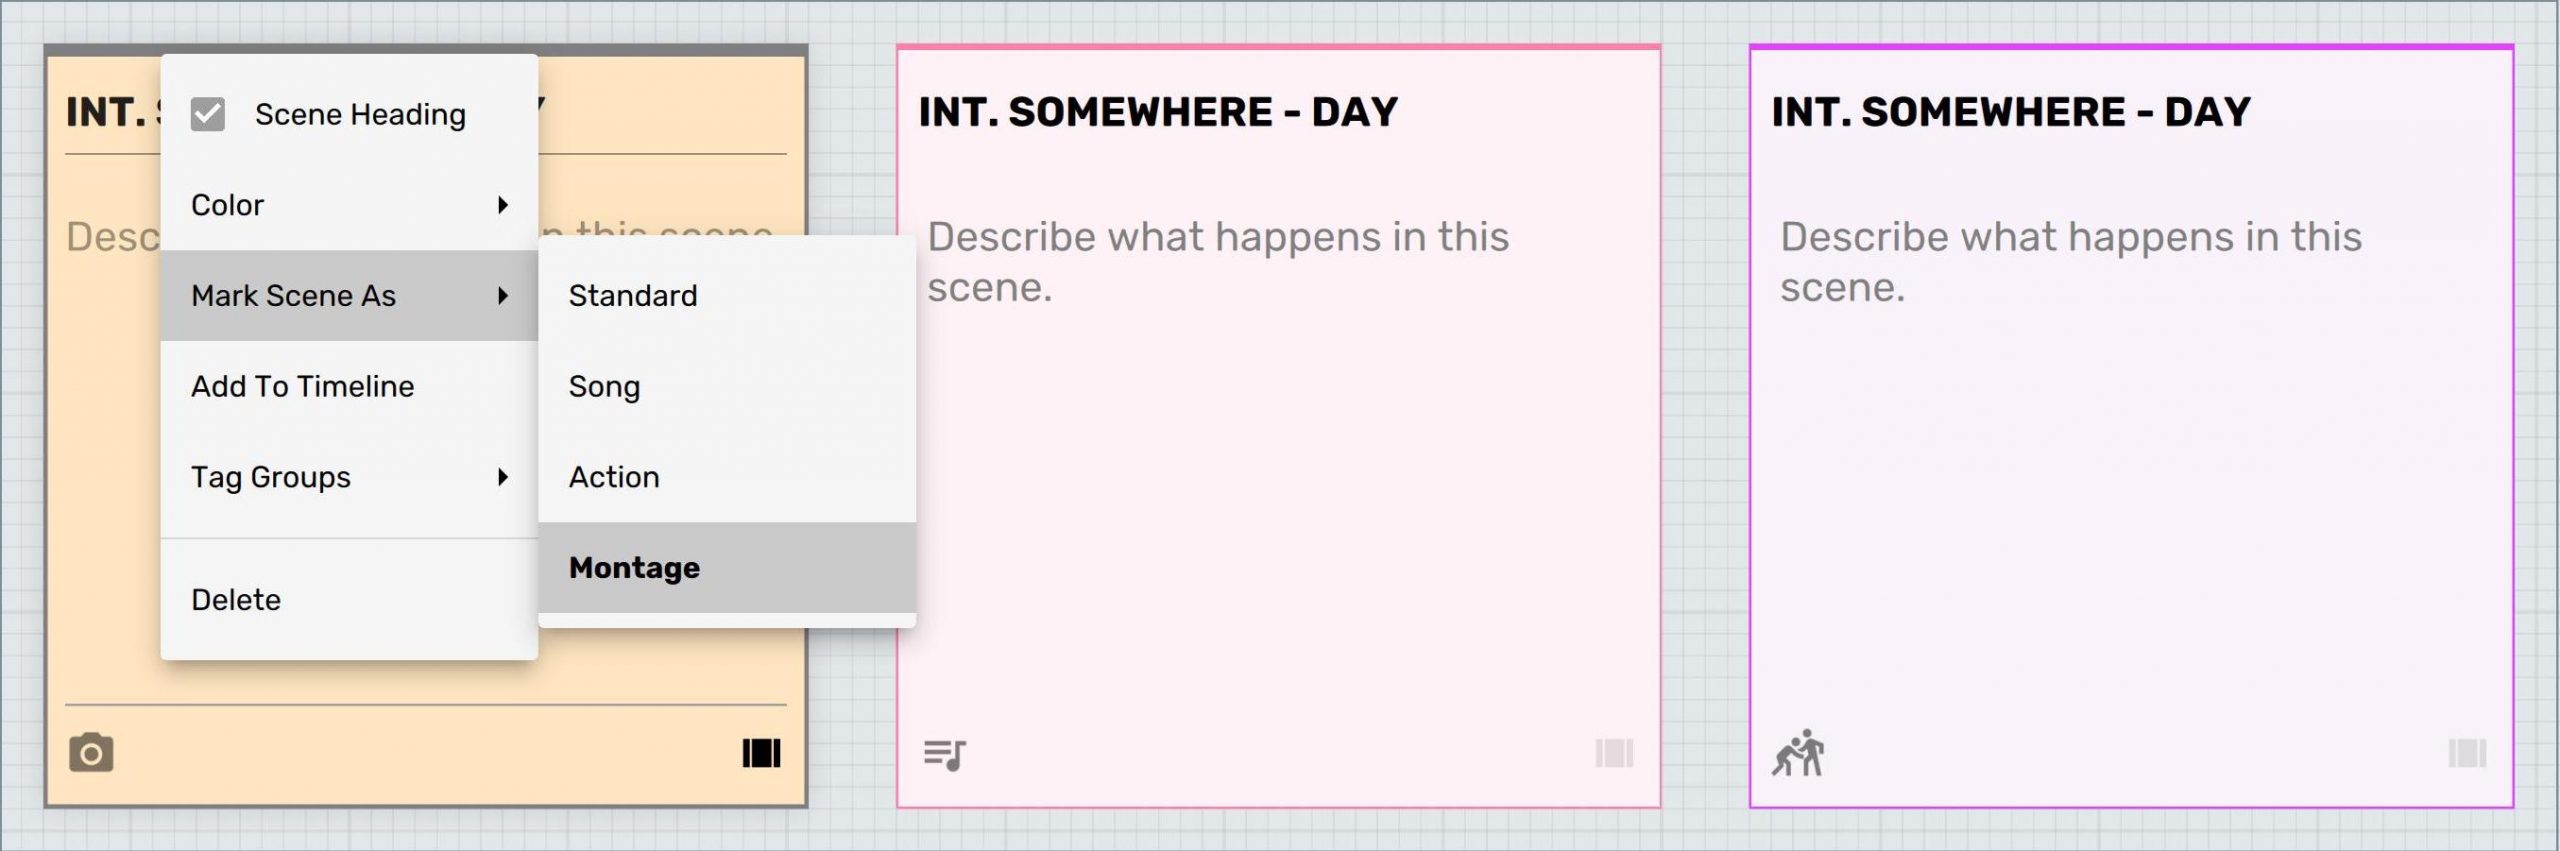
Notice how an icon shows up on the bottom left corner of the index card if the scene type is changed. In a future update we want to provide an option to let you add your own scene types into this menu.
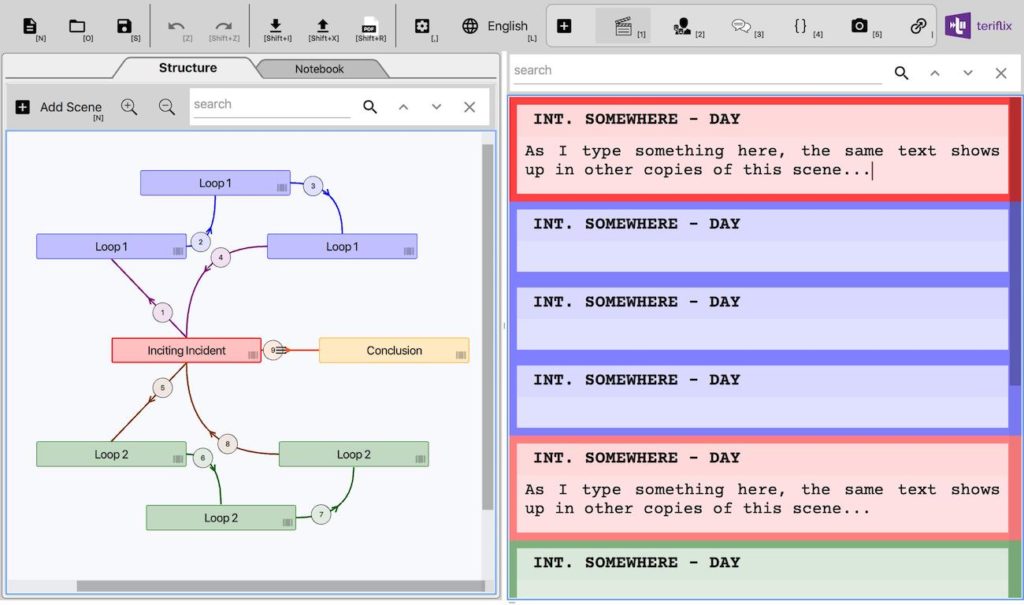
The “Add To Timeline” option adds the scene at the end of the timeline, even if was already before.
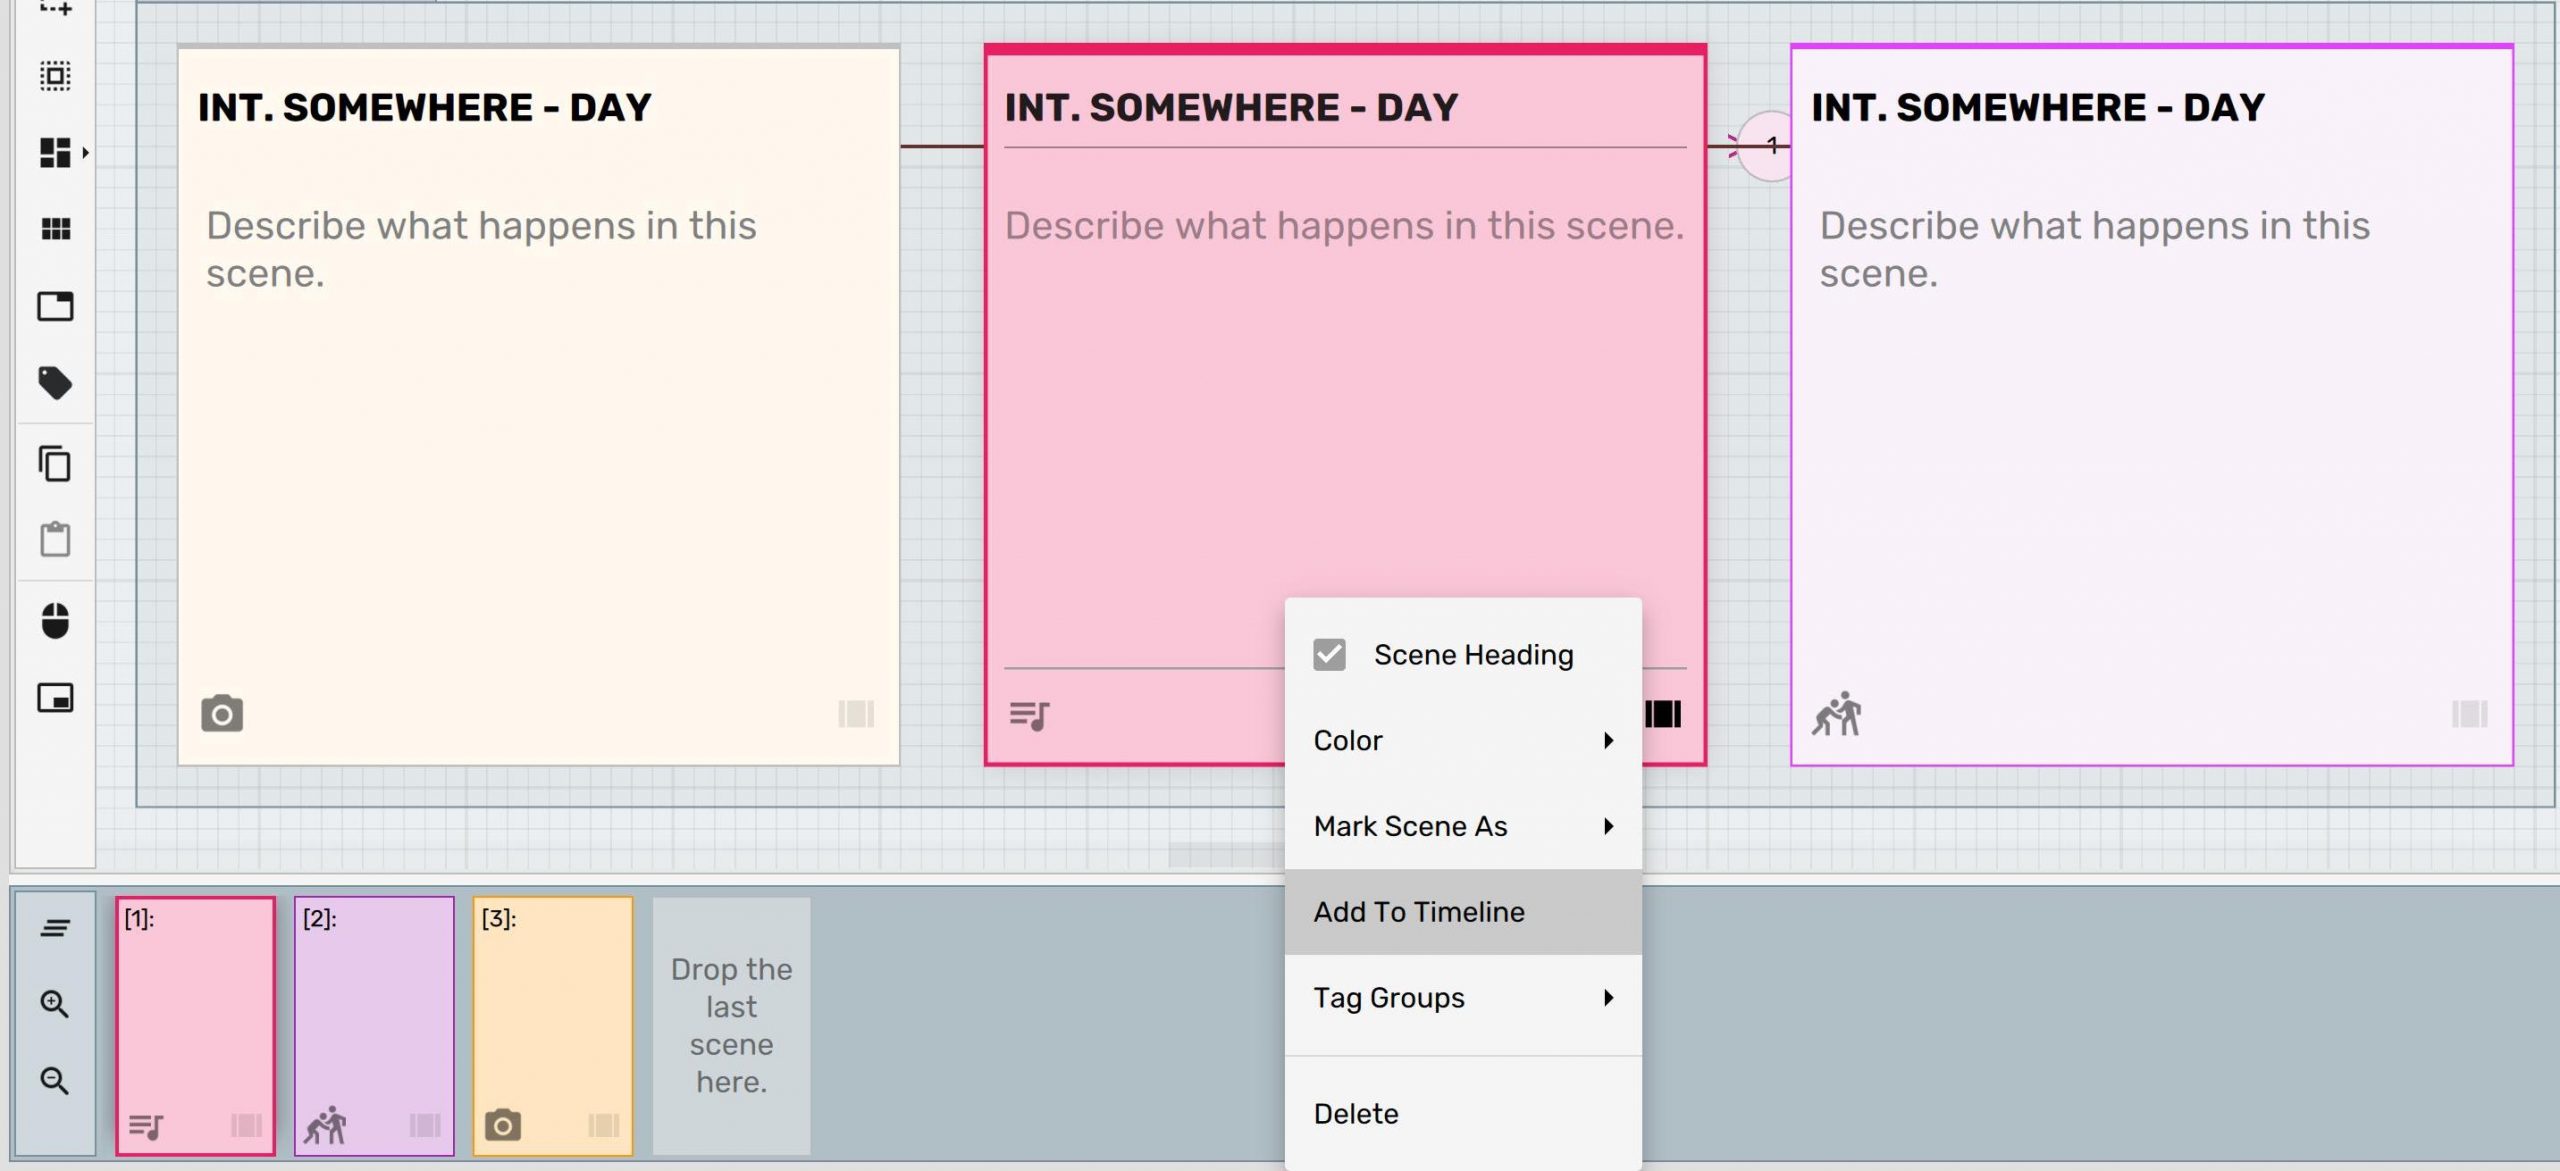
Adding the same scene twice is a possibility in screenplays that employs a Rashomon structure for example, where a single incident is revisited multiple times in the screenplay to explain it from different perspectives.
The “Tag Groups” menu option lets you to tag structural elements on your scenes. More on this in a later section.
Deleting Scenes
Finally, the “Delete” option lets you delete a scene from your structure canvas. If the scene was already added to the timeline, then it will be deleted from the timeline too. Before you delete an index card, Scrite lets you reconsider it and confirm the deletion.
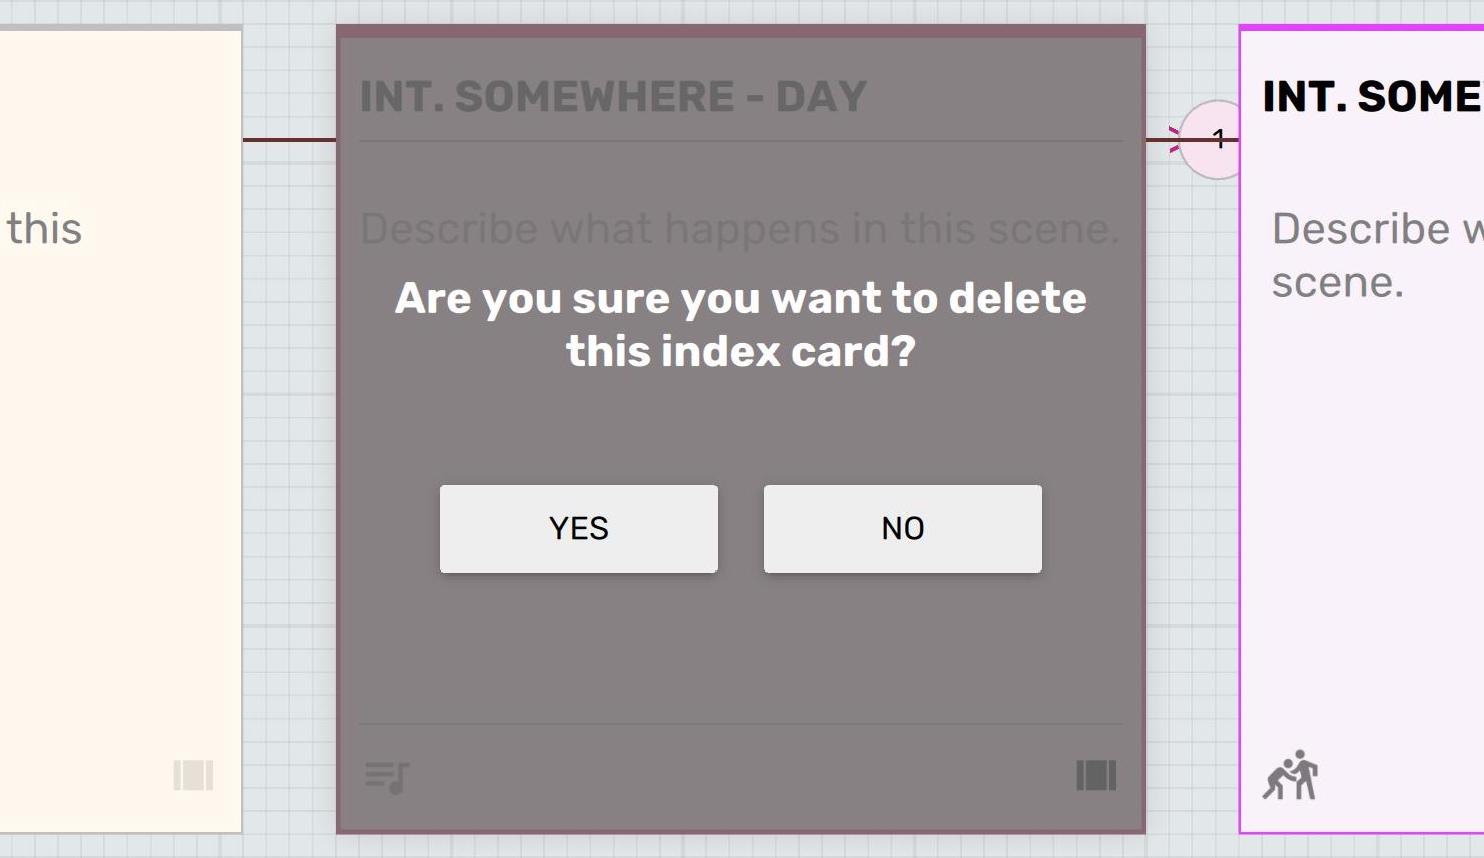
By displaying the delete confirmation dialog over the index card in question, you will also get a chance to consider the delete confirmation in context of that card.
Moving Scenes
You can click on the top few pixels of the index card or on the empty area between the scene-type icon & drag handle to move your index card around.
When you move an index card within a stack, the entire stack of cards moves with it.
Stacking Scenes
We have already talked about this in a previous section. By dragging an index card from its drag handle on to another card, we will be able to stack them.
Its also possible to select a group of index cards and select the “Stack” option to stack the index cards. To select a group of index cards, click on the  icon in the canvas toolbar and drag a selection rectangle around the index cards you want to select.
Please note, it is only possible to stack index cards if they are already added to the timeline.
The purpose of stacking index cards is to group a bunch of scenes that make up a sequence. That way they wont occupy too much visual space on the structure canvas.
Adding Scenes To Timeline
As we have already shown before, you can drag a scene from the structure canvas on to the timeline.
By dragging a scene on to the timeline, you are including it in your screenplay. Only scenes on the timeline are considered to be a part of your screenplay. Others remain in structure, but as unused scenes.
You can drag and drop scenes from structure, in-between two existing scenes on the timeline.
Selecting a scene on the structure canvas highlights it on the timeline, if it was already added. Likewise, selecting a scene on the timeline highlights that scene on the structure canvas.
Re-sequencing Scenes On Timeline
You can re-sequence scenes on the timeline by dragging them around.

Toolbar On The Timeline Panel

The toolbar on the extreme left of the timeline panel lets you to clear the timeline of all the scenes and also zoom in/out.
NOTE: Zoom In/Out makes sense only when you are working on a screenplay where each scene has some content on it. The width of the scene on the timeline will be proportional to its page length, subject to a minimum size. By zooming in/out you can alter that width to get a better comprehension of the scene’s screen time / page length.
Context Menu Options In Timeline
You can right click on any of the scenes in the timeline to pull out a context menu from where you can configure few aspects of the scene or even remove it from the timeline.
NOTE: Removing a scene from the timeline does not delete it. The scene will continue to remain on the structure canvas as an unused scene.
Editing Scene Content
The Screenplay Editor area behaves exactly like how it is described in the quick-start and advanced editing tutorials. The only difference is that the screenplay editor in the structure tab also allows you to edit scenes which have not yet been added to the timeline.
Did you notice that character names also show up on the index card? We will talk about that and other features in a future article.
What’s next?
The next article walks you through ways to capture Rashomon, non-linear, save-the-cat and multiple timeline structures of stories on the structure canvas.