In this article, we assume that you are already familiar with the basics of using the structure tab. If not please go ahead and read this article now before continuing.
Table Of Contents
Adding Scenes To Timeline Directly

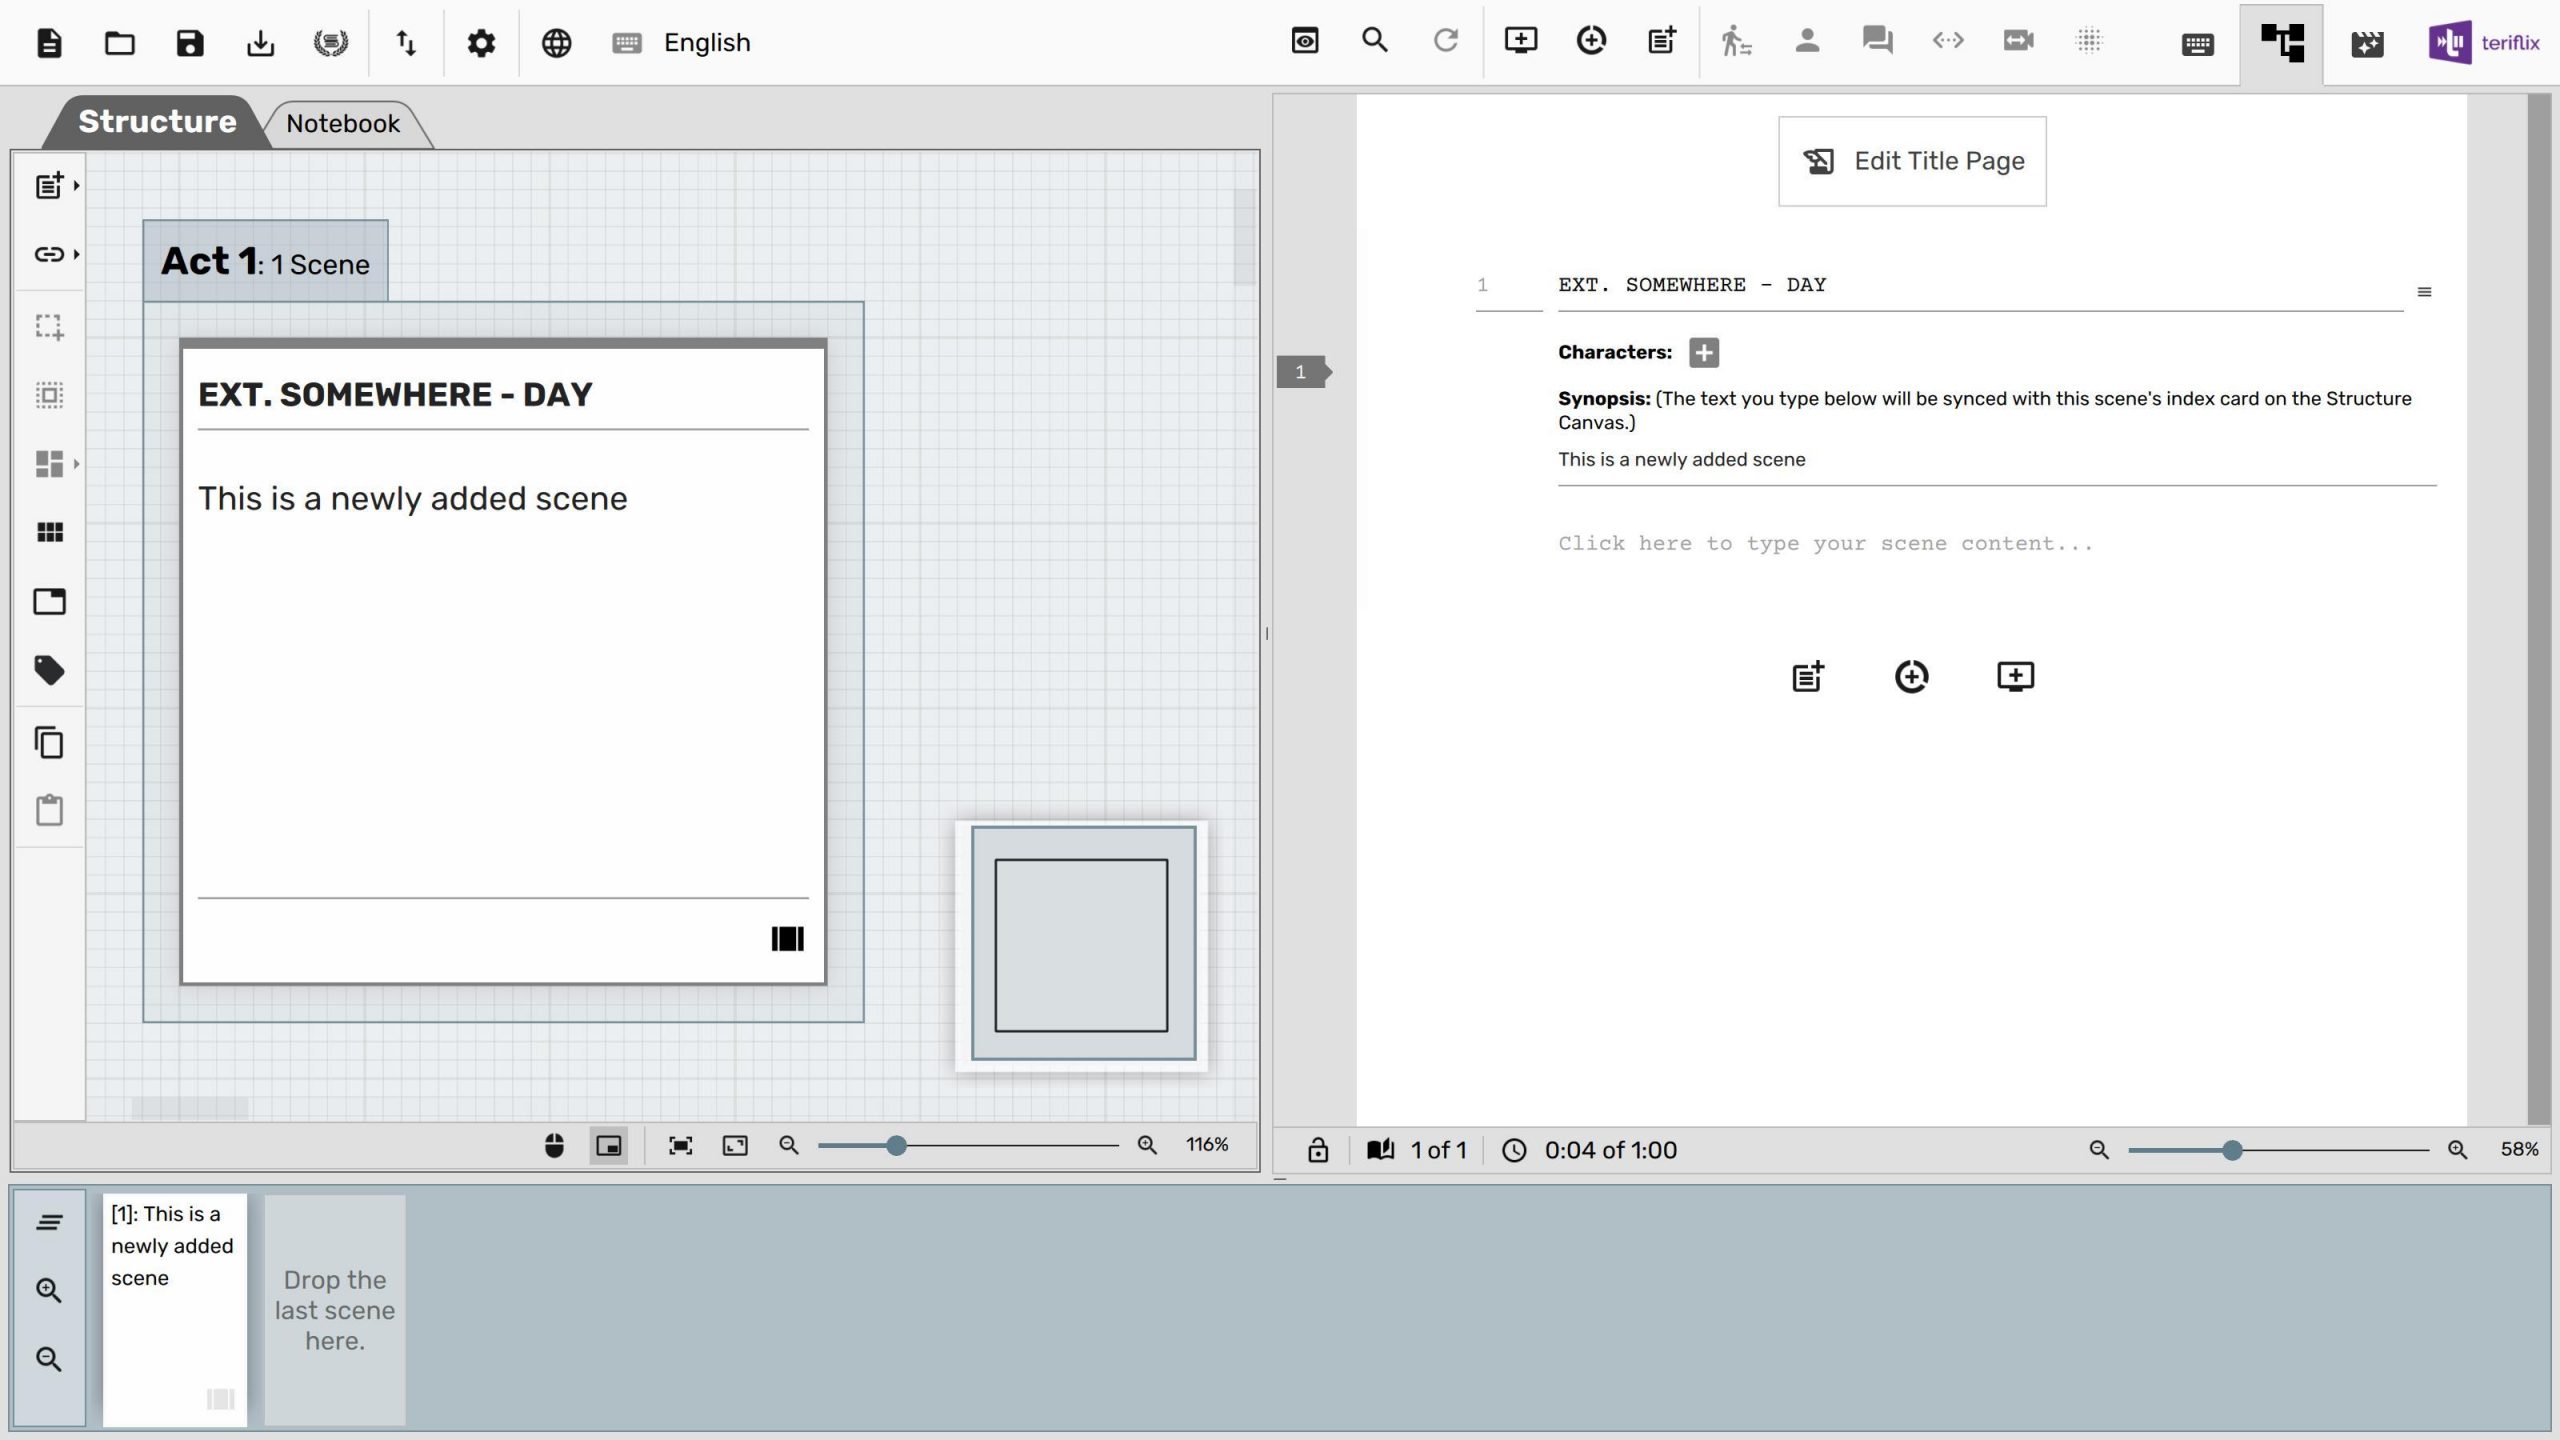
In the previous article we showed you how to create a scene on the structure canvas and then drag it to timeline, in order to include that scene in the screenplay. However this may not be the most productive of ways to create scenes if you are the kind of writer who only creates scenes with an intention to add them to the screenplay.
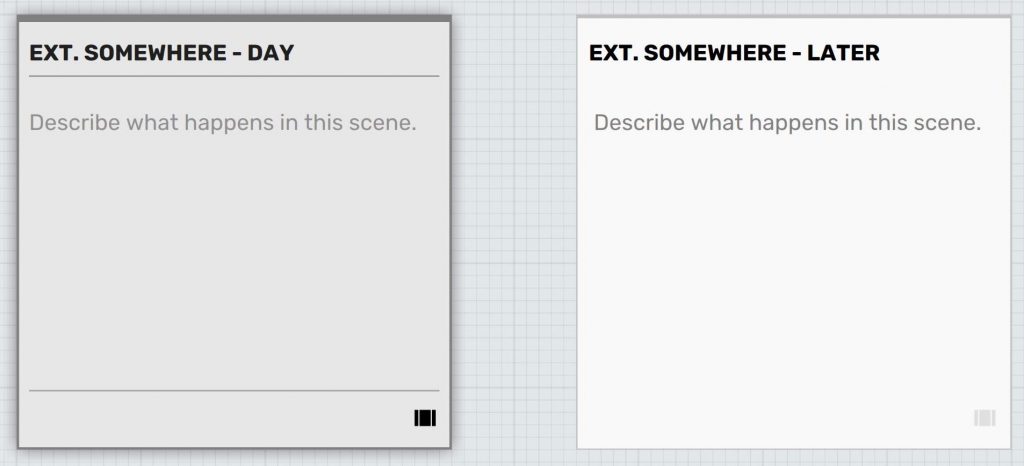
Clicking on the new scene, act and episode buttons in the toolbar creates scene, act and episode breaks; and inserts them into both structure and timeline as appropriate. Shown below is a screenshot where a scene has been added to both structure & timeline by clicking on the “New Scene” button in the toolbar.
You can also use keyboard shortcuts Control+Shift+N on Windows & Linux and ⌘+Shift+N on Mac to create a new scene. As mentioned in a previous guide, you can pull out the shortcuts dockwidget to review all shortcuts.
Shown below is a bunch of scenes with act and episode breaks thrown in.
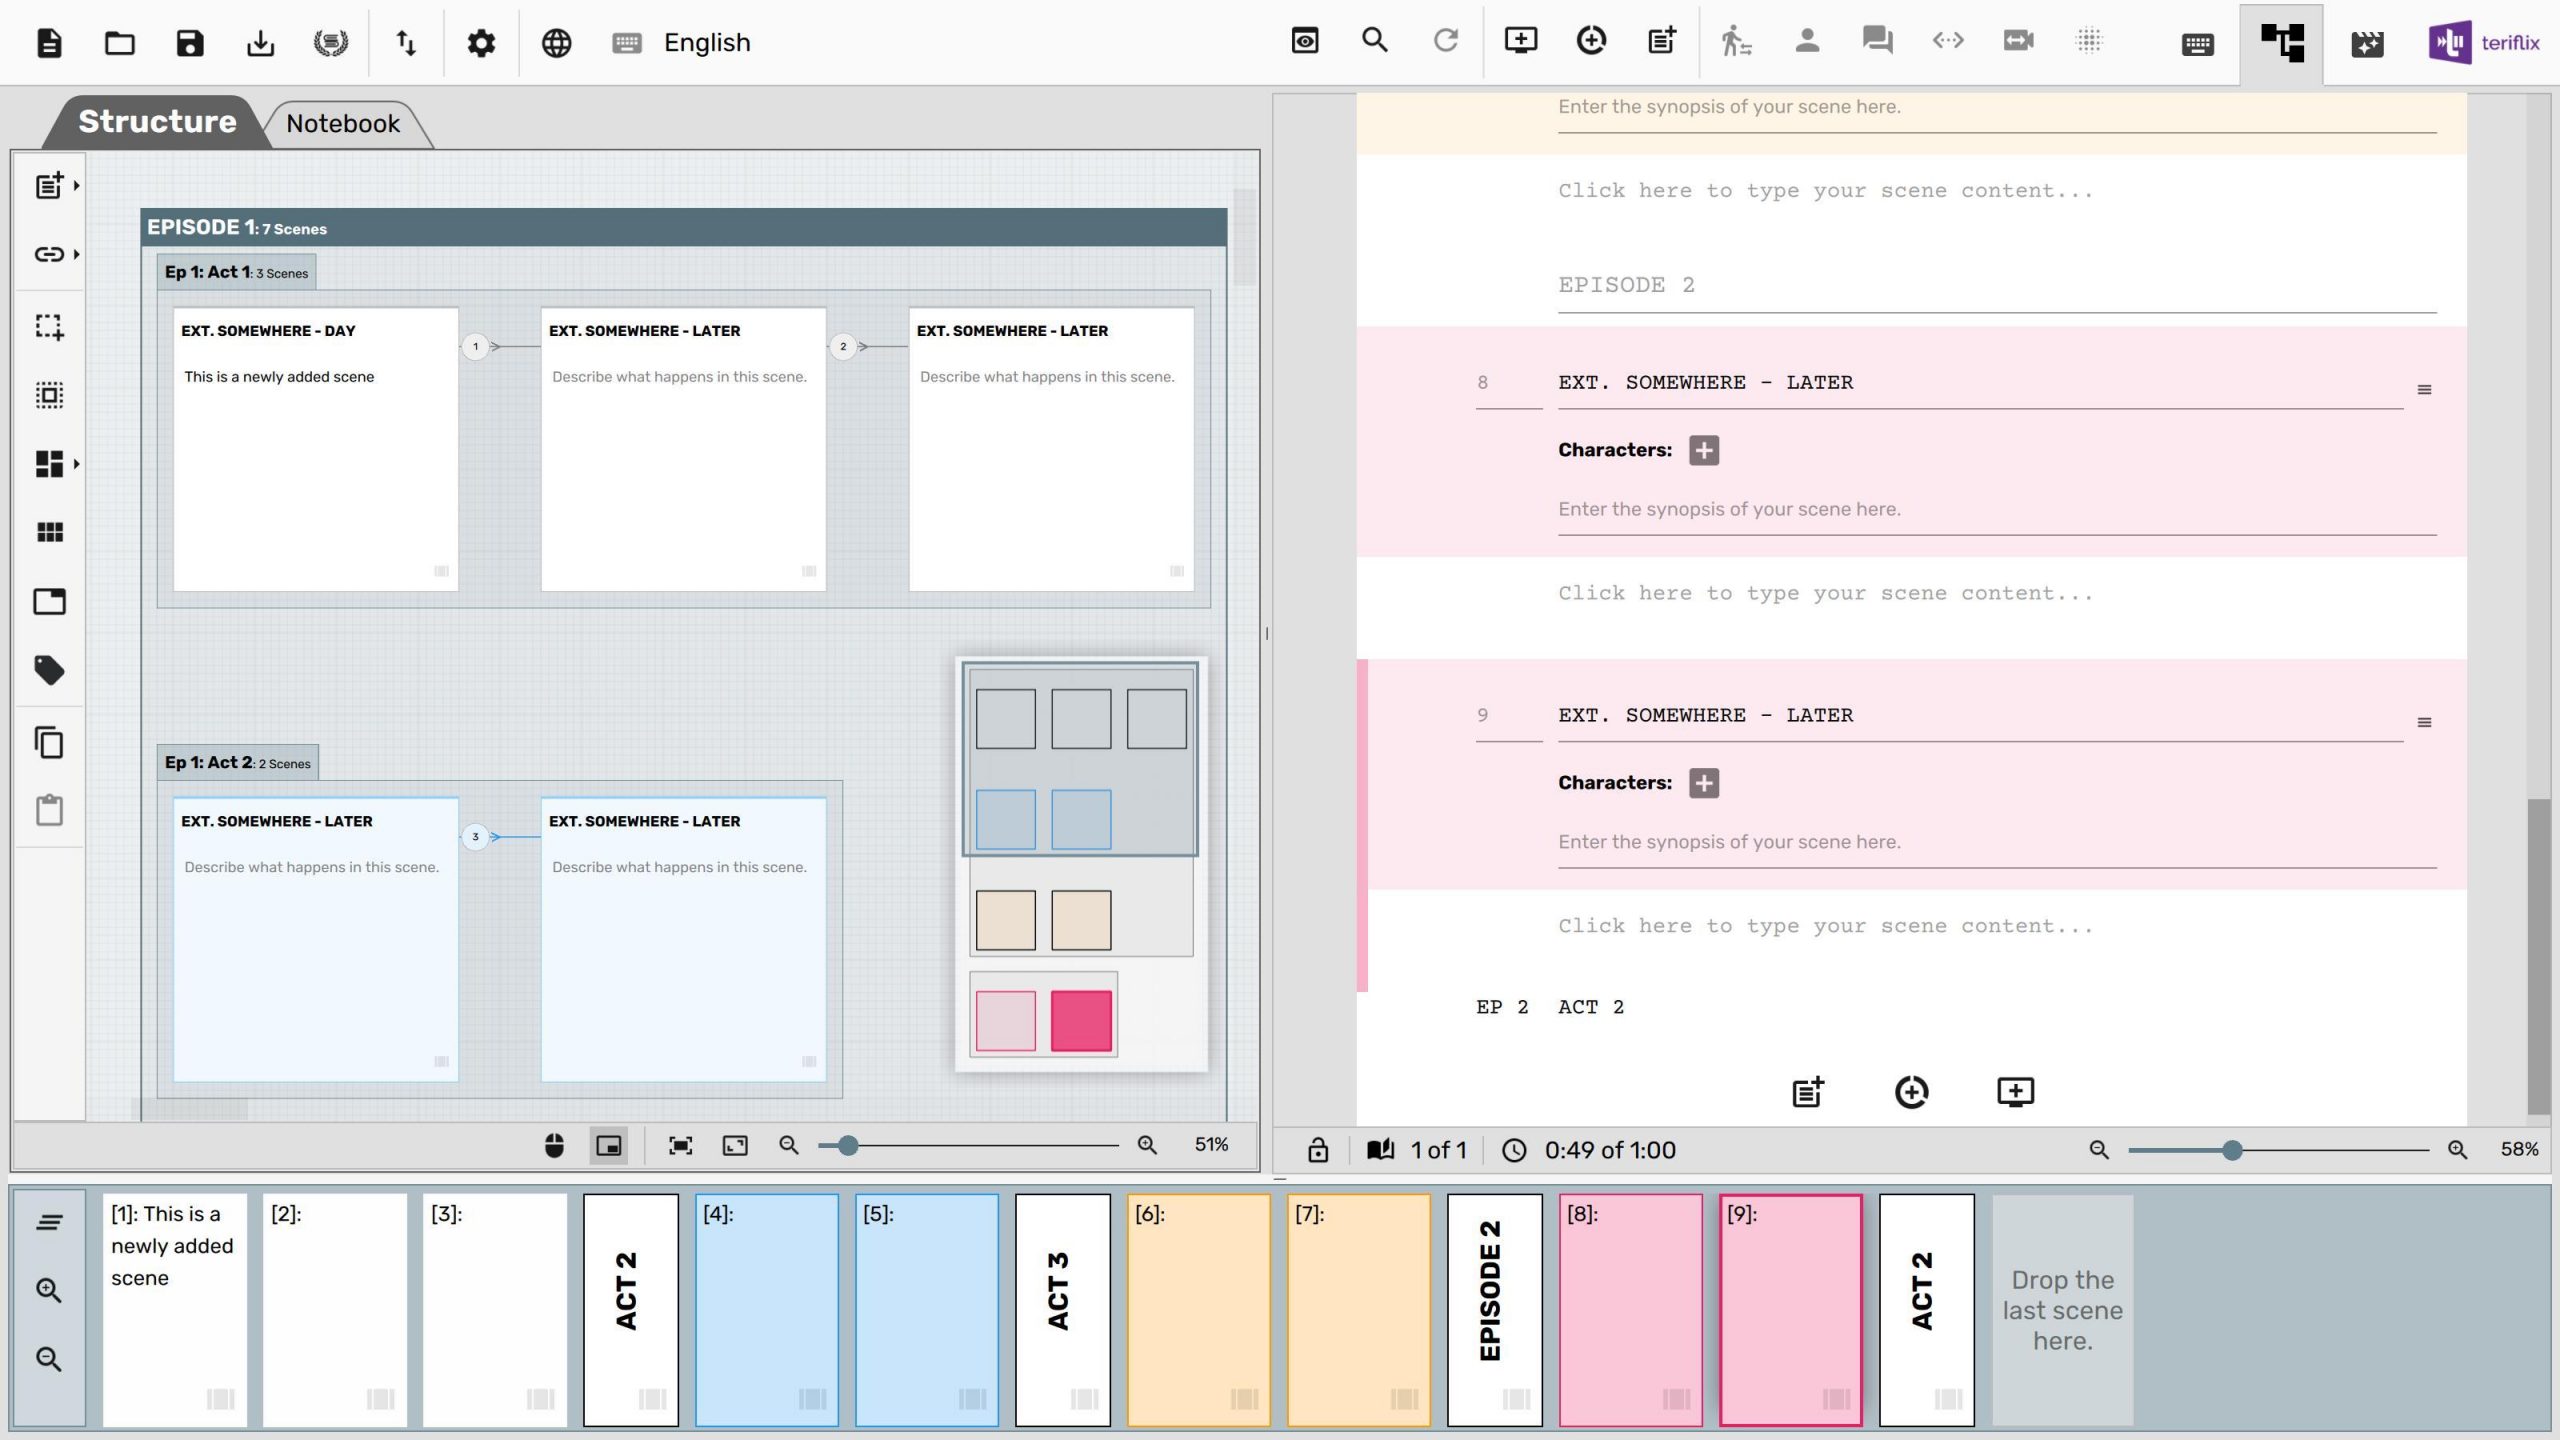
Notice how Scrite groups episodes and acts into boxes on the structure canvas. We will be speaking more about it in a later section.
Stories Have A Shape
If you have not watched Christopher Nolan explaining the structure of Memento, We recommend you watch this before proceeding – it’s one of the main reasons we even thought of the structure tab!
The book “Into The Woods: How Stories Work And Why We Tell Them” has a chapter titled “The Story Shape”, where they talk about the fundamental structure of any story. Writers, many of whom are visual thinkers, like to ascribe a geometric shape to the flow of their story. Others prefer to capture the structure into acts, sometimes using colors and almost always using a beat-board placement of index cards. The structure canvas in Scrite is meant for capturing the shape of your stories. We are going to be covering formal structures in future sections, however at this point we want to showcase how geometric shapes can be captured.
Non Linear Shapes
Let’s say your story has two timelines or tracks, and that your screenplay is an interplay of scenes from these tracks.
We can place scenes from the two timelines or tracks visually apart and even code them with different colors. By simply sequencing them in a mix, we can see a shape on the structure canvas that captures the non-linearness of the story.
Given that we can literally “see” the tracks or timelines, it becomes easy to compose content of our scenes such that they maintain consistency.
“Rashomon” Style Loops
Lets consider another scenario. Suppose that your film has one scene that is revisited over and over as you explain it from multiple perspectives.
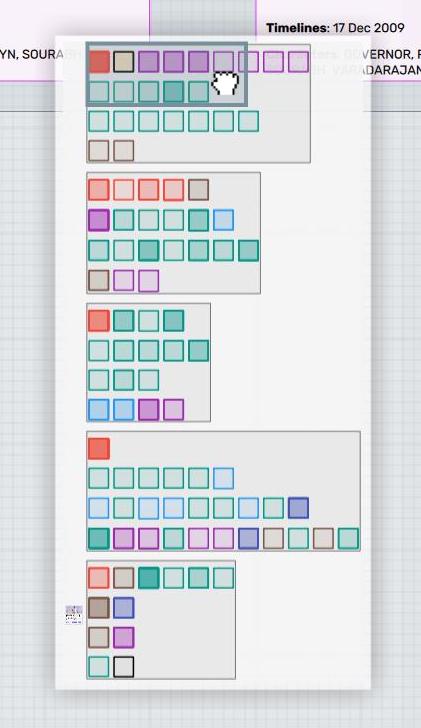
You can simply drag and drop the looped scene at several places on the timeline. For example, you in the screenshot below you can see how the index card in the center is dragged and dropped as scenes 1, 6, 11 and 16 on the timeline.
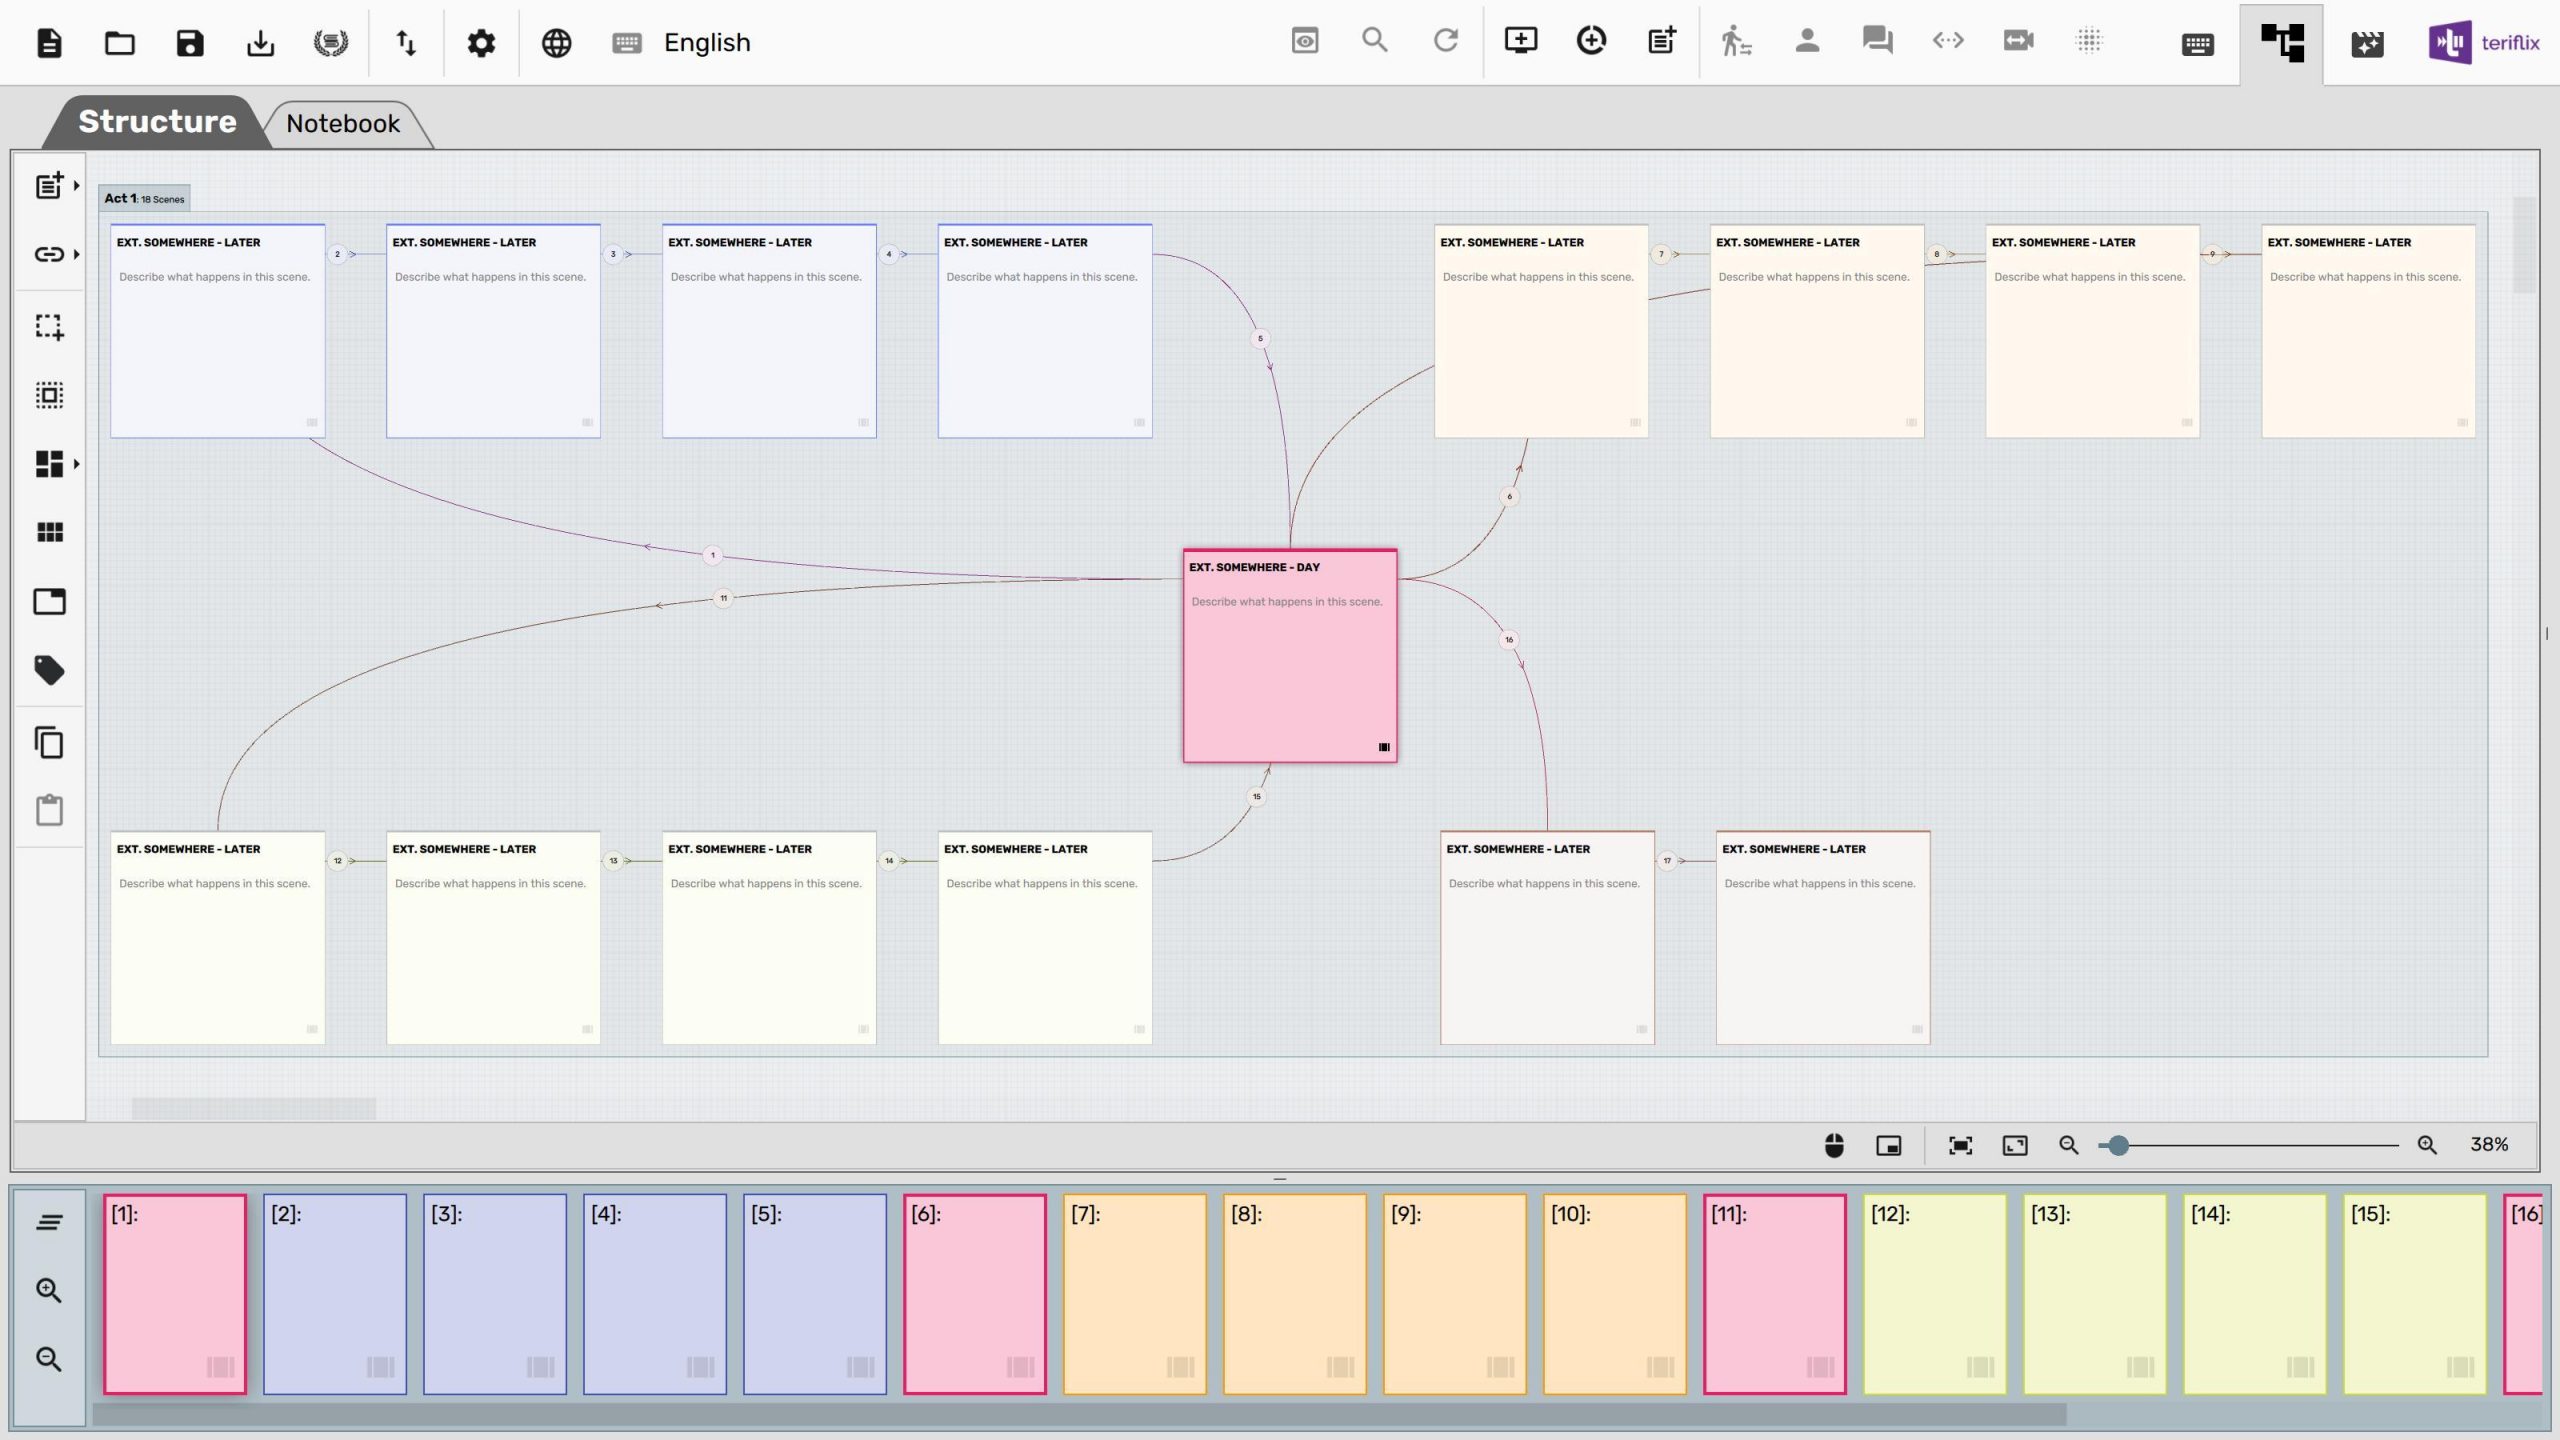
Ofcourse, we have taken a little bit of time placing the index card groups around so that we can see the loop clearly. Infact, we can now go ahead and stack the cards appropriately to visualize the loop even better.
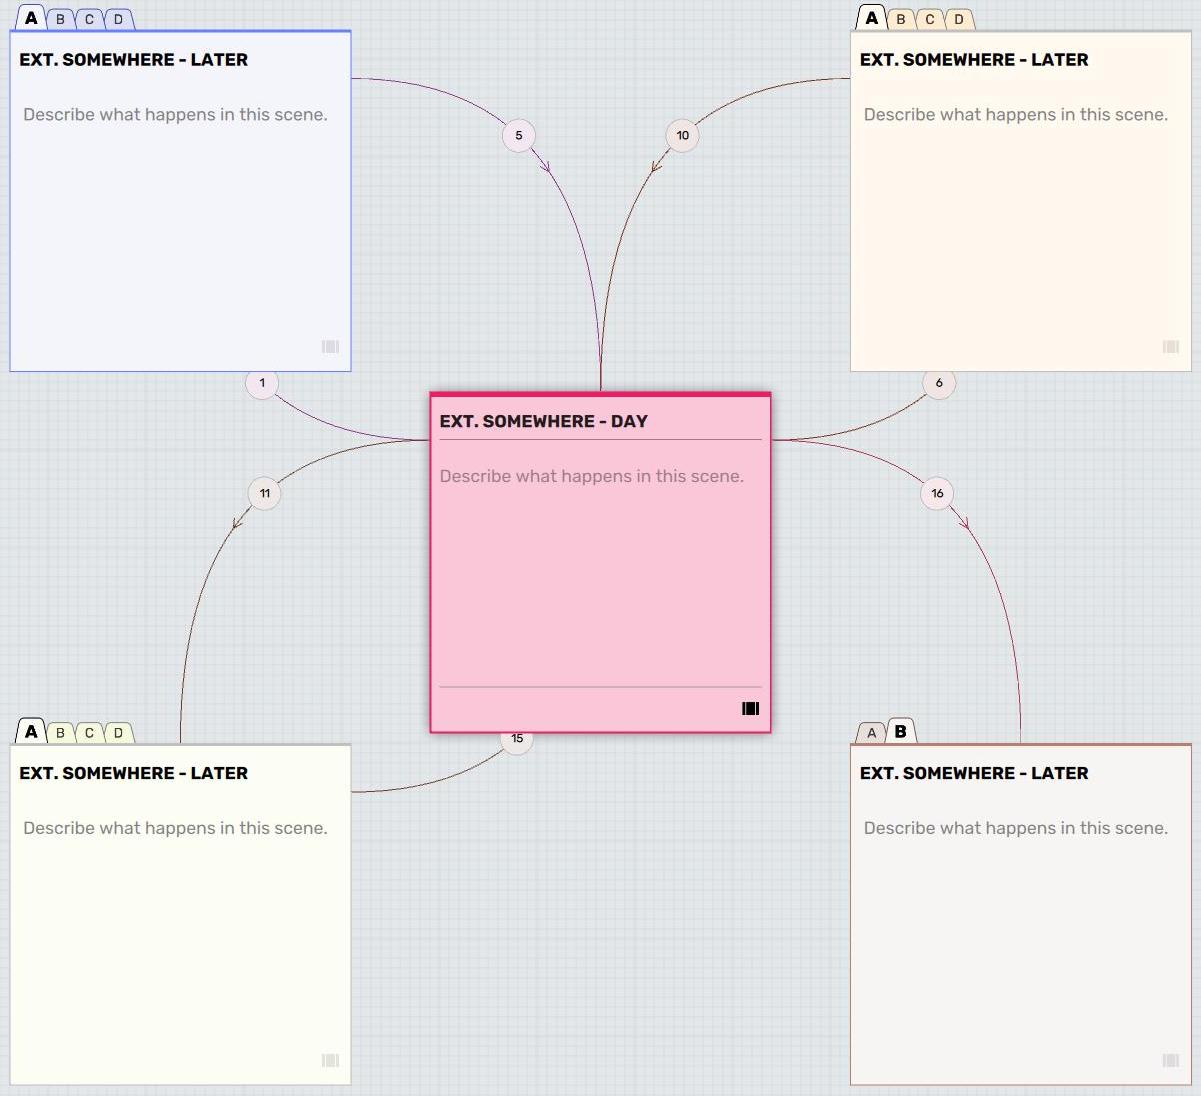
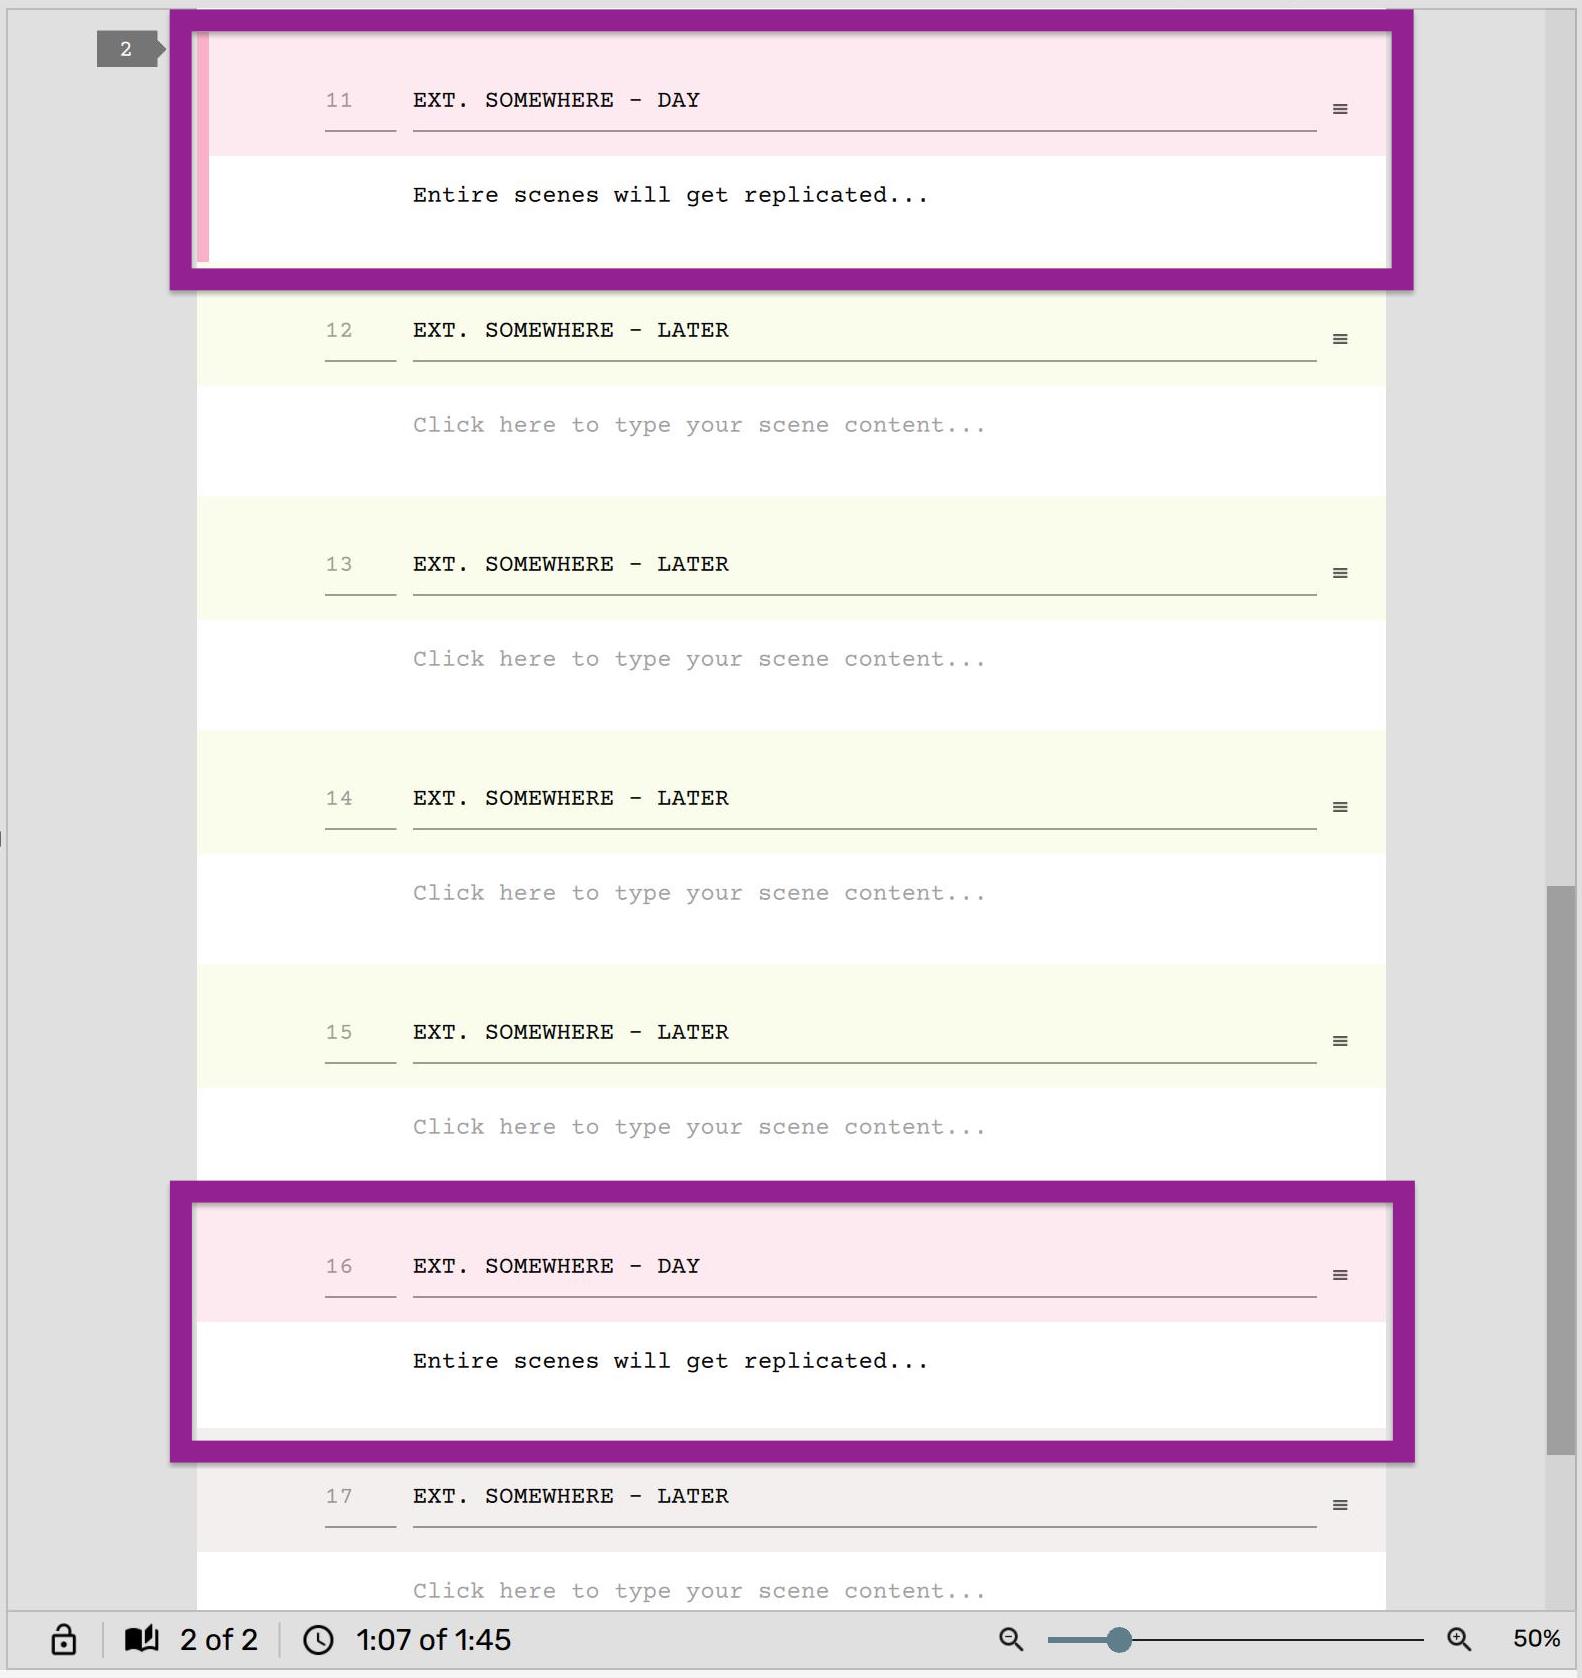
One thing to notice is that the first scene is placed at multiple places in the screenplay.
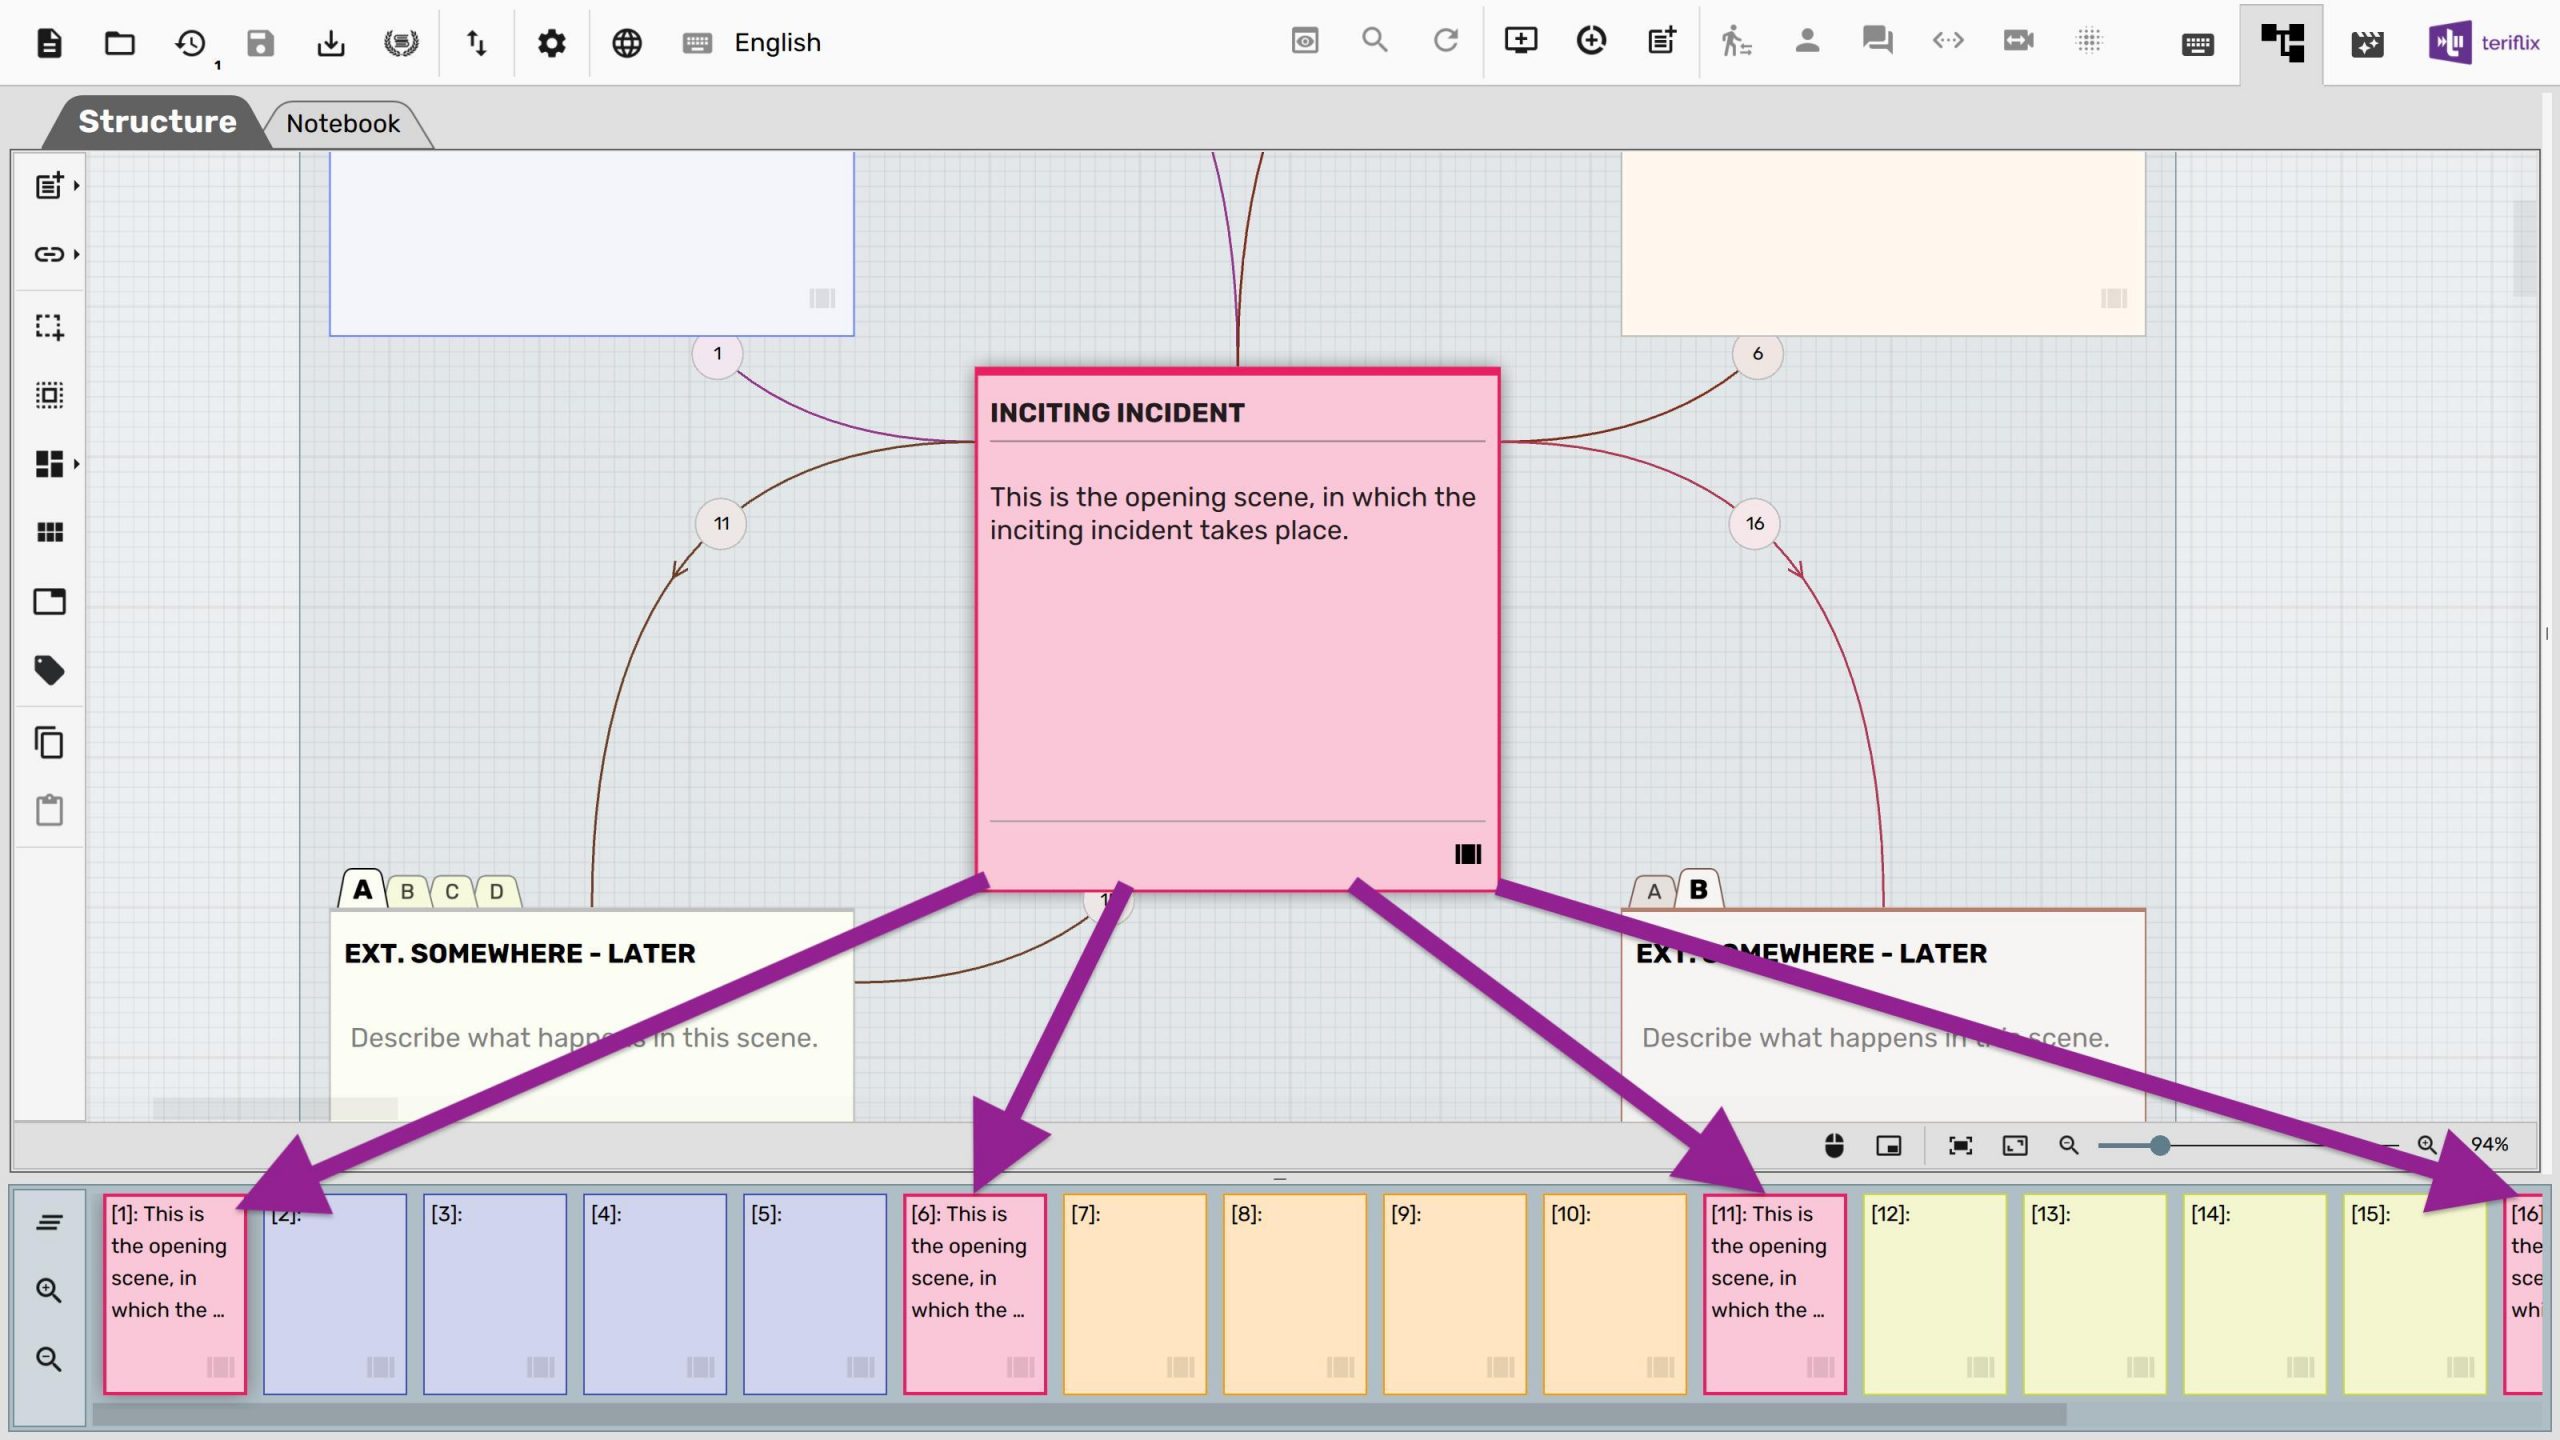
An implicit benefit one will get as a Scrite user is this: any content written in the “Inciting Incident” scene will be replicated in all the four places where it is placed. Not just the synopsis, which you can already see in the screenshot above, but entire scene contents as well.
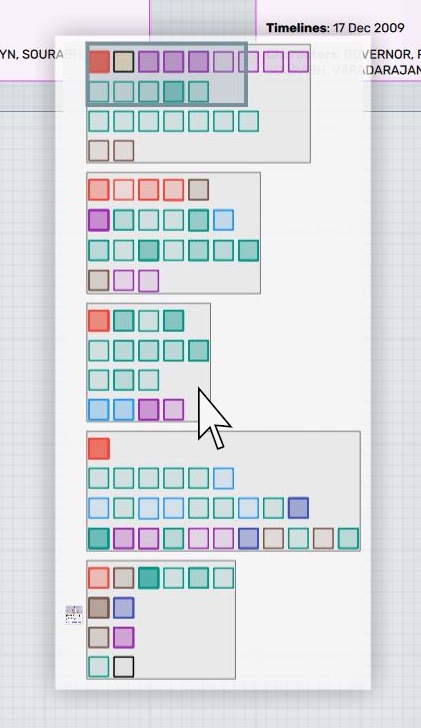
Selecting Index Cards
Simply click on an index card to select it. Selected index cards are shown with a shadow and in a more pronounced color and border, than other index cards.
To select multiple index cards, you can click on the selection mode toggle on the toolbar and draw a selection rectangle.
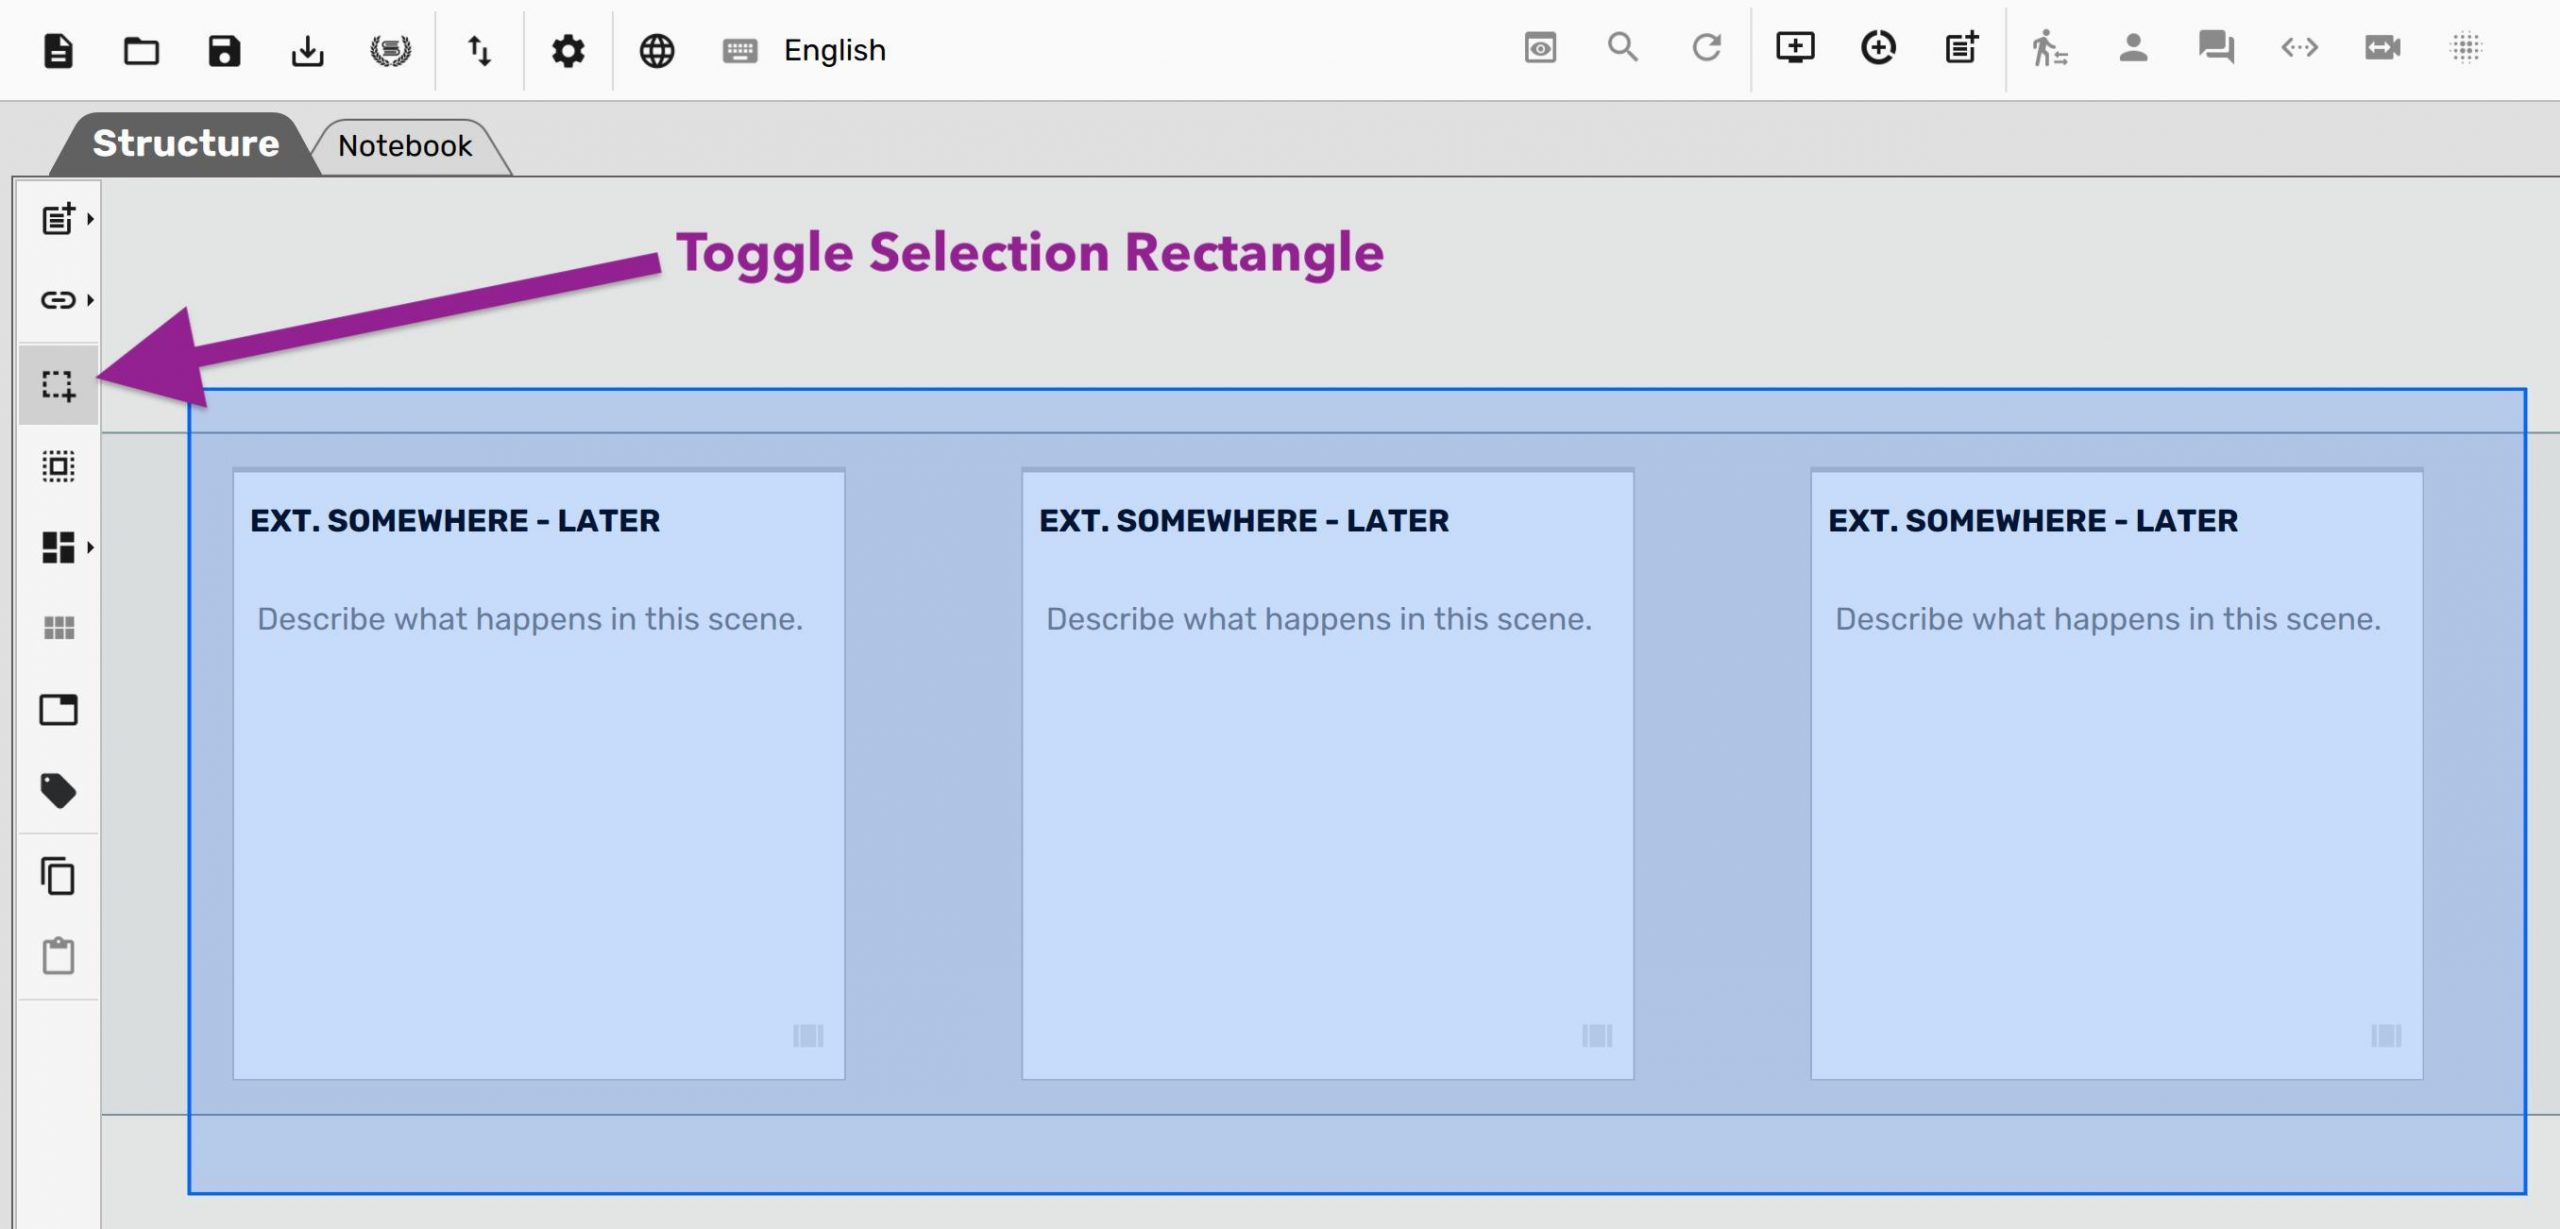
You can also hold the Control key on Windows & Linux and ⌘ key on Mac and drag the mouse around the index cards in question to select them.
Index Card Context Menu
You can right click on an index card or on a selection to pull out a context menu.
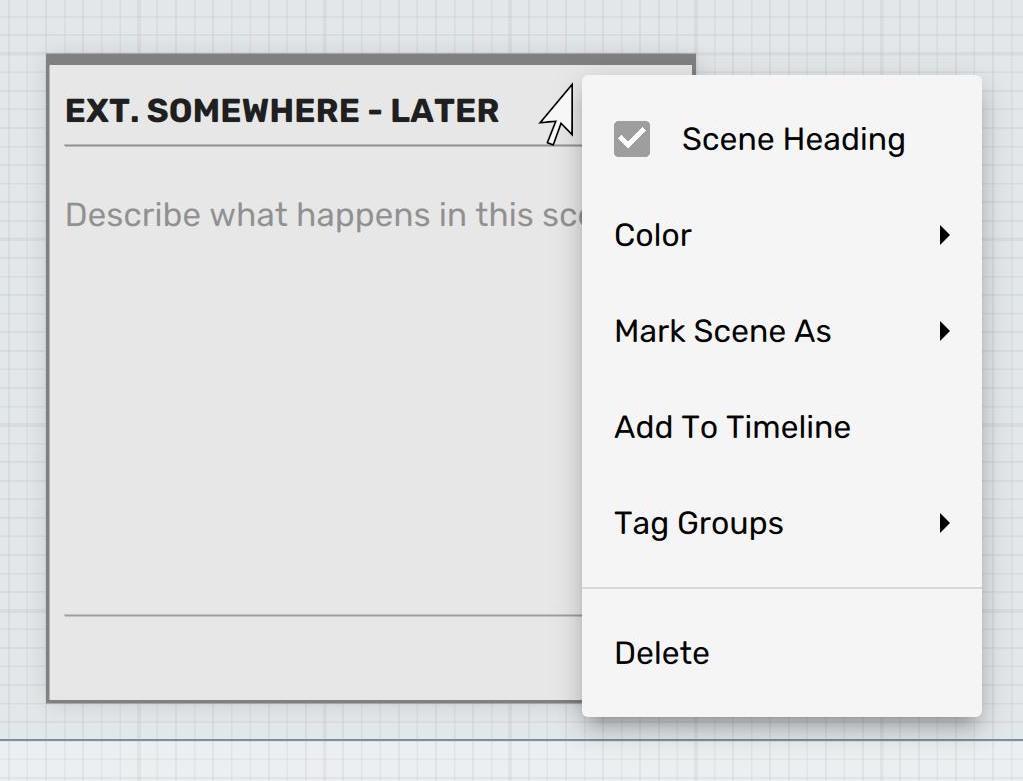
Using the context menu you can toggle scene heading, change scene color, mark a scene (explained next), add the index card to the timeline, tag the index card to belong to a structure group or delete the index card.
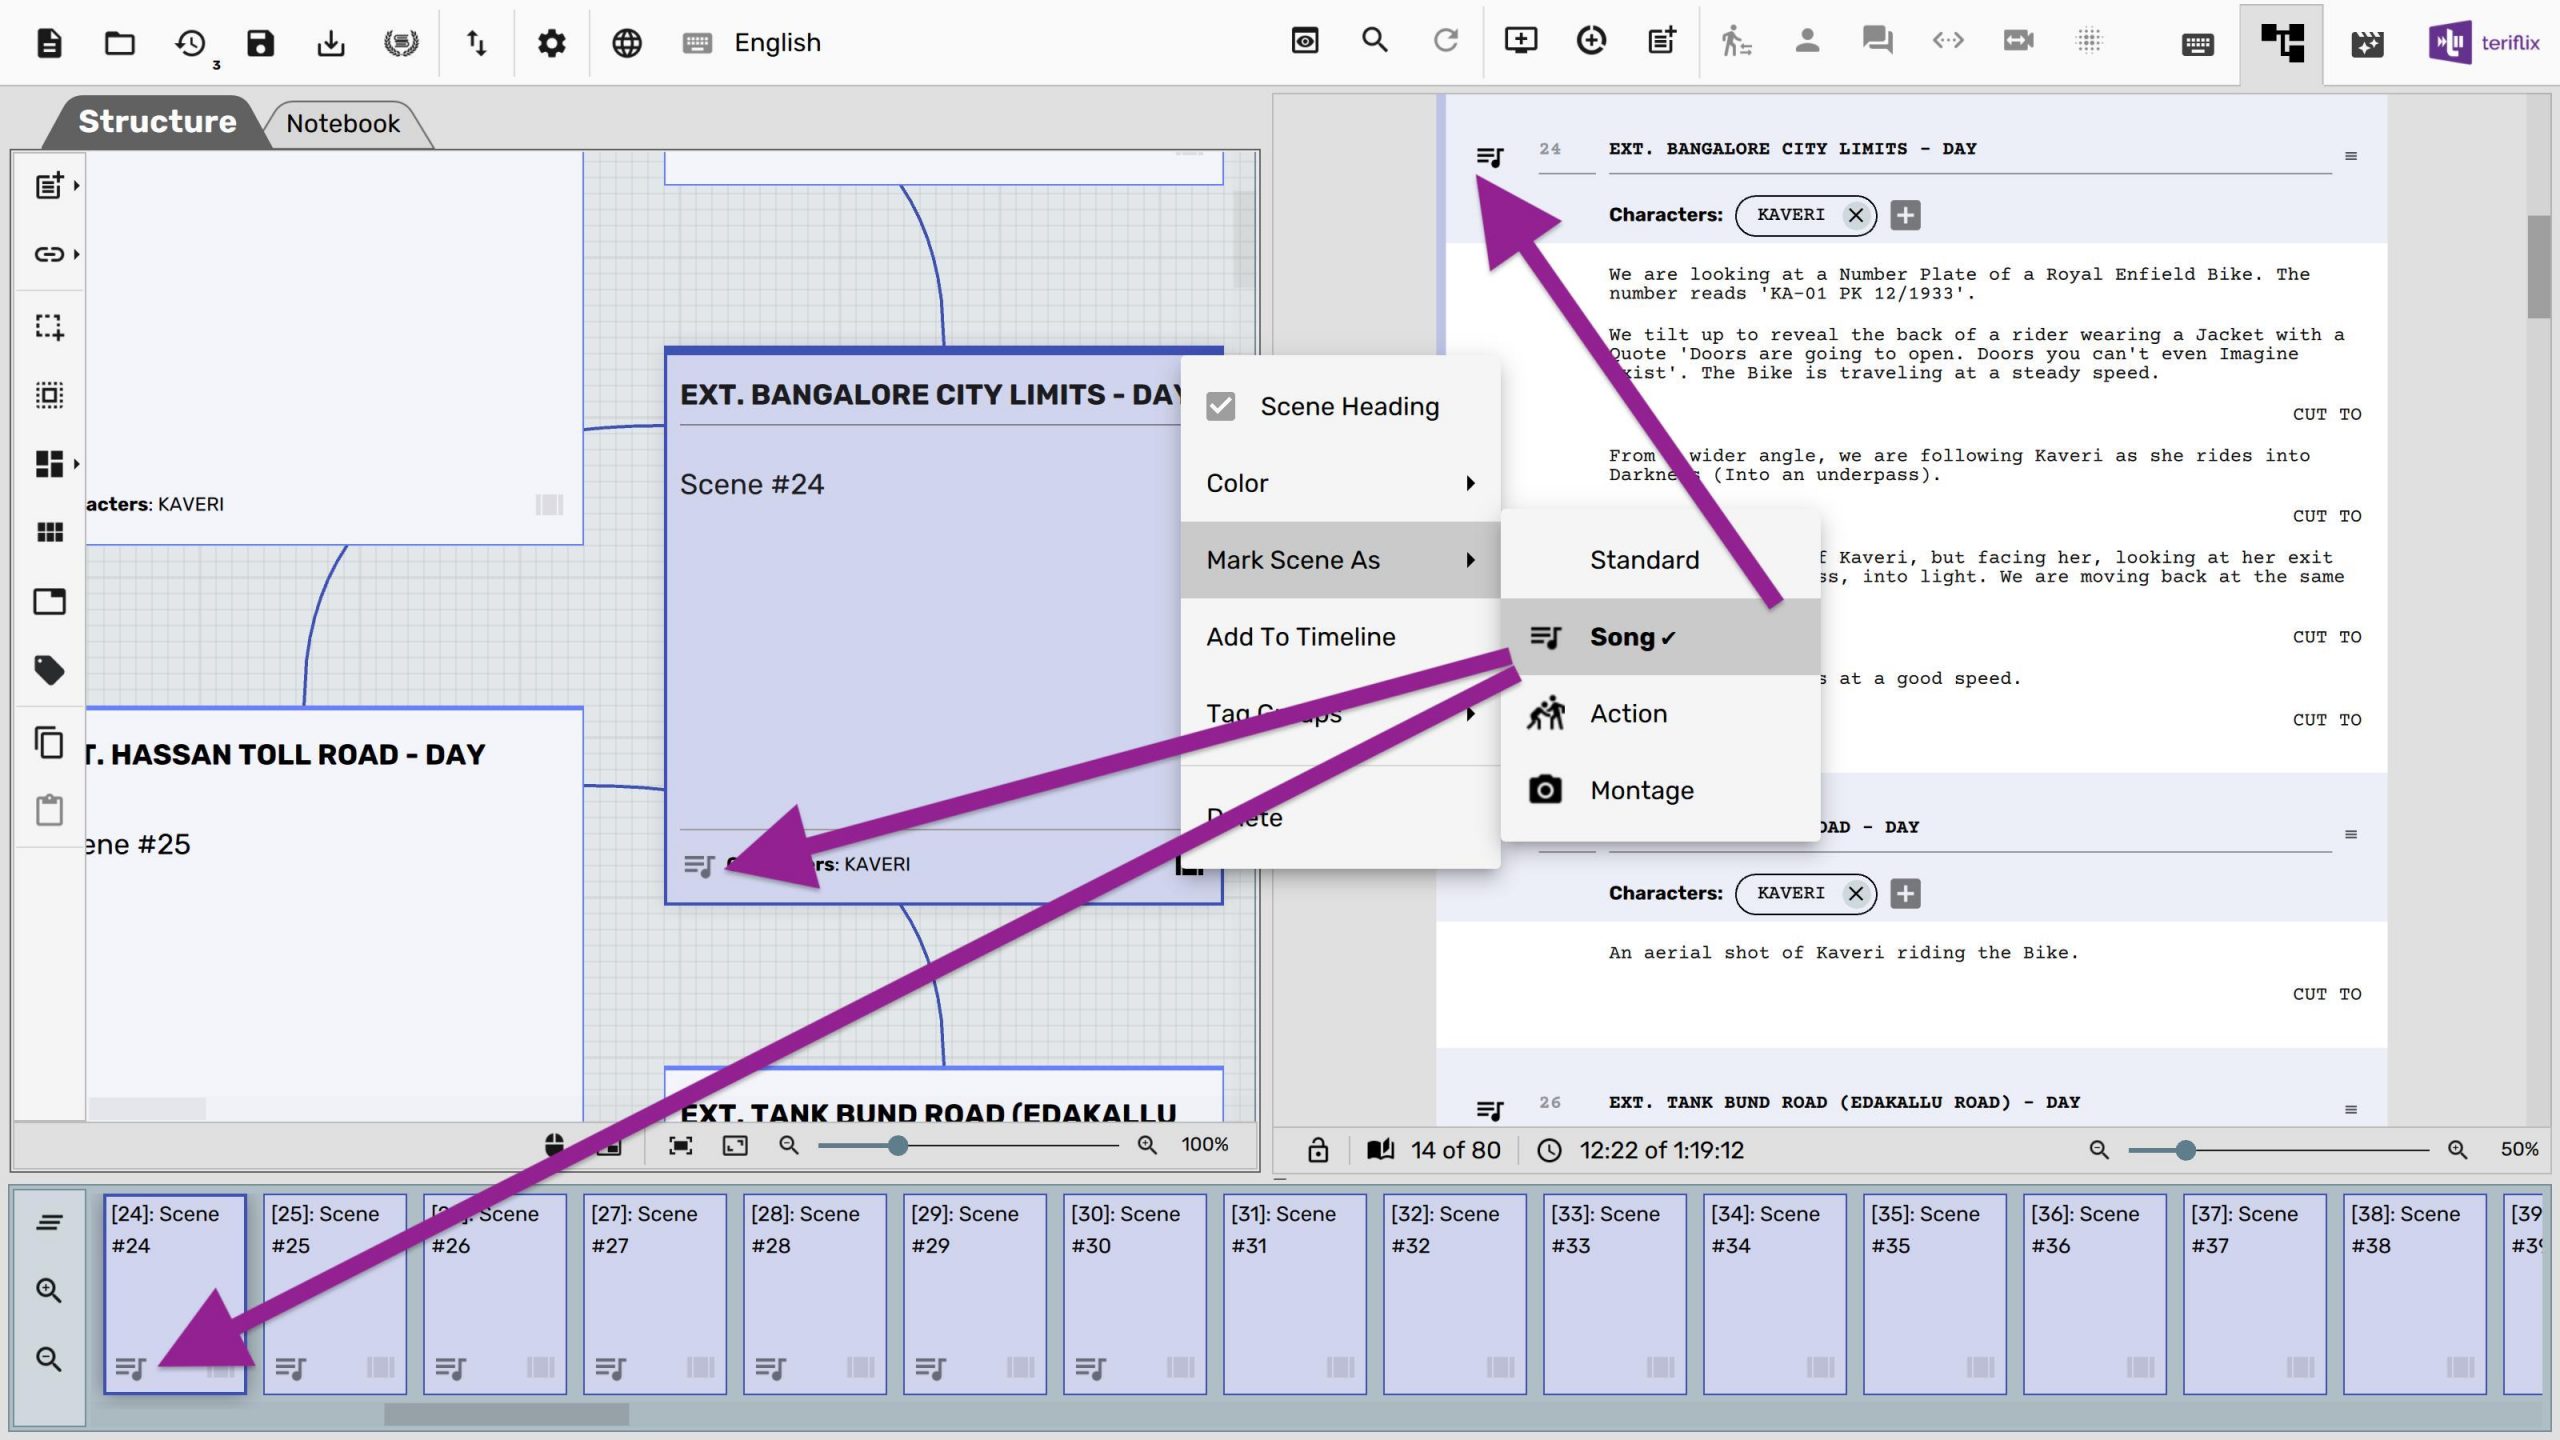
‘Mark Scene As’ Option
The Mark Scene As option lets you mark a scene as song, action or montage scene. When a scene is marked, an icon shows up next to the scene heading on the screenplay editor, against the index card in structure canvas and on the timeline panel.
In a future article we will show how to export these icons into PDF files as well.
Arranging Index Cards
The structure canvas is a blank space on which you can place index cards and annotations (covered later). The purpose behind keeping structure canvas a blank open space is to let users place the index cards along a shape that makes most sense for their story.
Moving Index Cards Using The Keyboard
While you can move index cards precisely using the mouse (or trackpad), you can also use keyboard shortcuts to move the active item. Just click on an index card (or annotation) and use
- Arrow keys to move the index card (or annotation) by 10 pixels (or 1 grid point)
- Control + Arrow keys on Windows & Linux, ⌘ + Arrow keys on Mac to move the index card (or annotation) by 50 pixels (or 5 grid points).
By using the arrow keys, you can align index cards with respect to each other.
You can select a group of index cards and use the arrow keys to move the entire group at once.
Zooming And Panning
You can use the zoom slider on the status bar of the structure canvas to zoom in/out.
By default Scrite assumes that you are using it on a computer with trackpad. So it looks for trackpad gestures to pinch-zoom in and out. If you prefer not using that gesture or prefer using mouse wheel then you can toggle mouse usage by clicking on the mouse ( ) button in the status bar.
The zoom-fit button ( ) picks a zoom level such that your entire structure is fit to view.
The zoom-one button ( ) picks a zoom level such that the active index card is shown at 100% scale.
The preview button ( ) toggles the preview panel on the canvas. You can drag the viewport indicator to pan the canvas. You can also click on an area in preview to jump to that part of the canvas while retaining the current zoom level.
Laying Out Index Cards
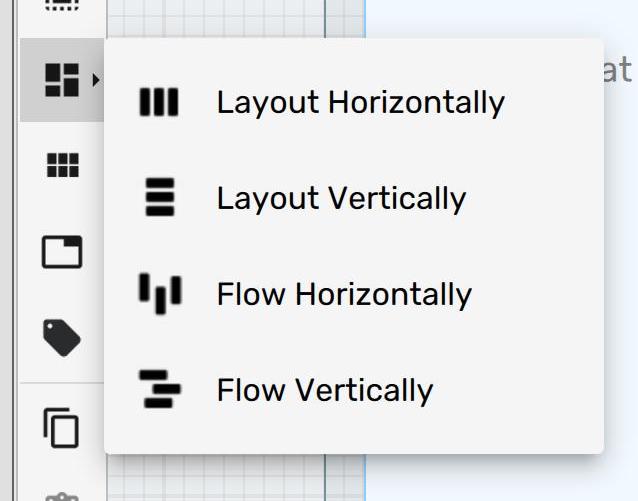
The layout options menu on the structure canvas lets you layout index cards horizontally, vertically and in a horizontal or vertical flow layout.
If there is an active selection on the structure canvas, then these layout options will apply only to the selected index cards. Otherwise they apply to all index cards on the canvas.
Using Act Breaks
So far we have been looking at structure as a shape that can be visually captured on the canvas. Formally, however, structure in screenplays are spoken about in terms of acts. The 3-Act structure is one of the most popular structures in screenplays.
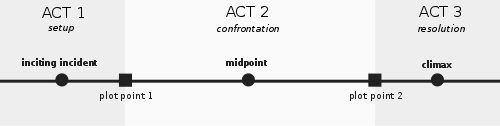
Screenplays are typically broken down into three acts, named ACT 1, ACT 2 and ACT 3.
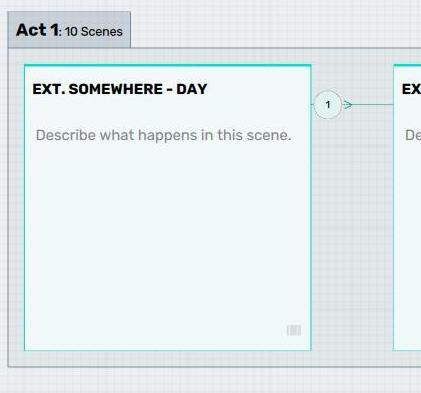
- ACT 1 is where we setup the characters and world of the film. While doing so, we encounter an inciting incident, typically in the life of the hero, which propels the rest of the story. This act ends with something called “Plot Point 1”. ACT 1 typically occupies 25% of the film or 10 sequences.
- ACT 2 is where the protagonist and antagonist confront each other. We progress towards the mid point of the film, which is typically where the hero is shown to have won a false victory. After the midpoint, everything seems to go bad for the hero until “Plot Point 2”, by which time it is seemingly clear that the hero’s effort is pointless and is getting her/him nowhere. ACT 2 typically occupies 50% of the film, or 20 sequences.
- ACT 3 is where we take off from “Plot Point 2” and catapult the protagonists into a path that takes them to the resolution of the conflict. This act ends with a climax. ACT 3 typically occupies the remaining 25% of the film, or 10 sequences.
Some writers prefer to breakdown the screenplay into four acts: ACT 1, 2A, 2B and 3; and some others into five.
Irrespective of your personal preference, you can breakdown screenplay into acts by inserting act breaks.
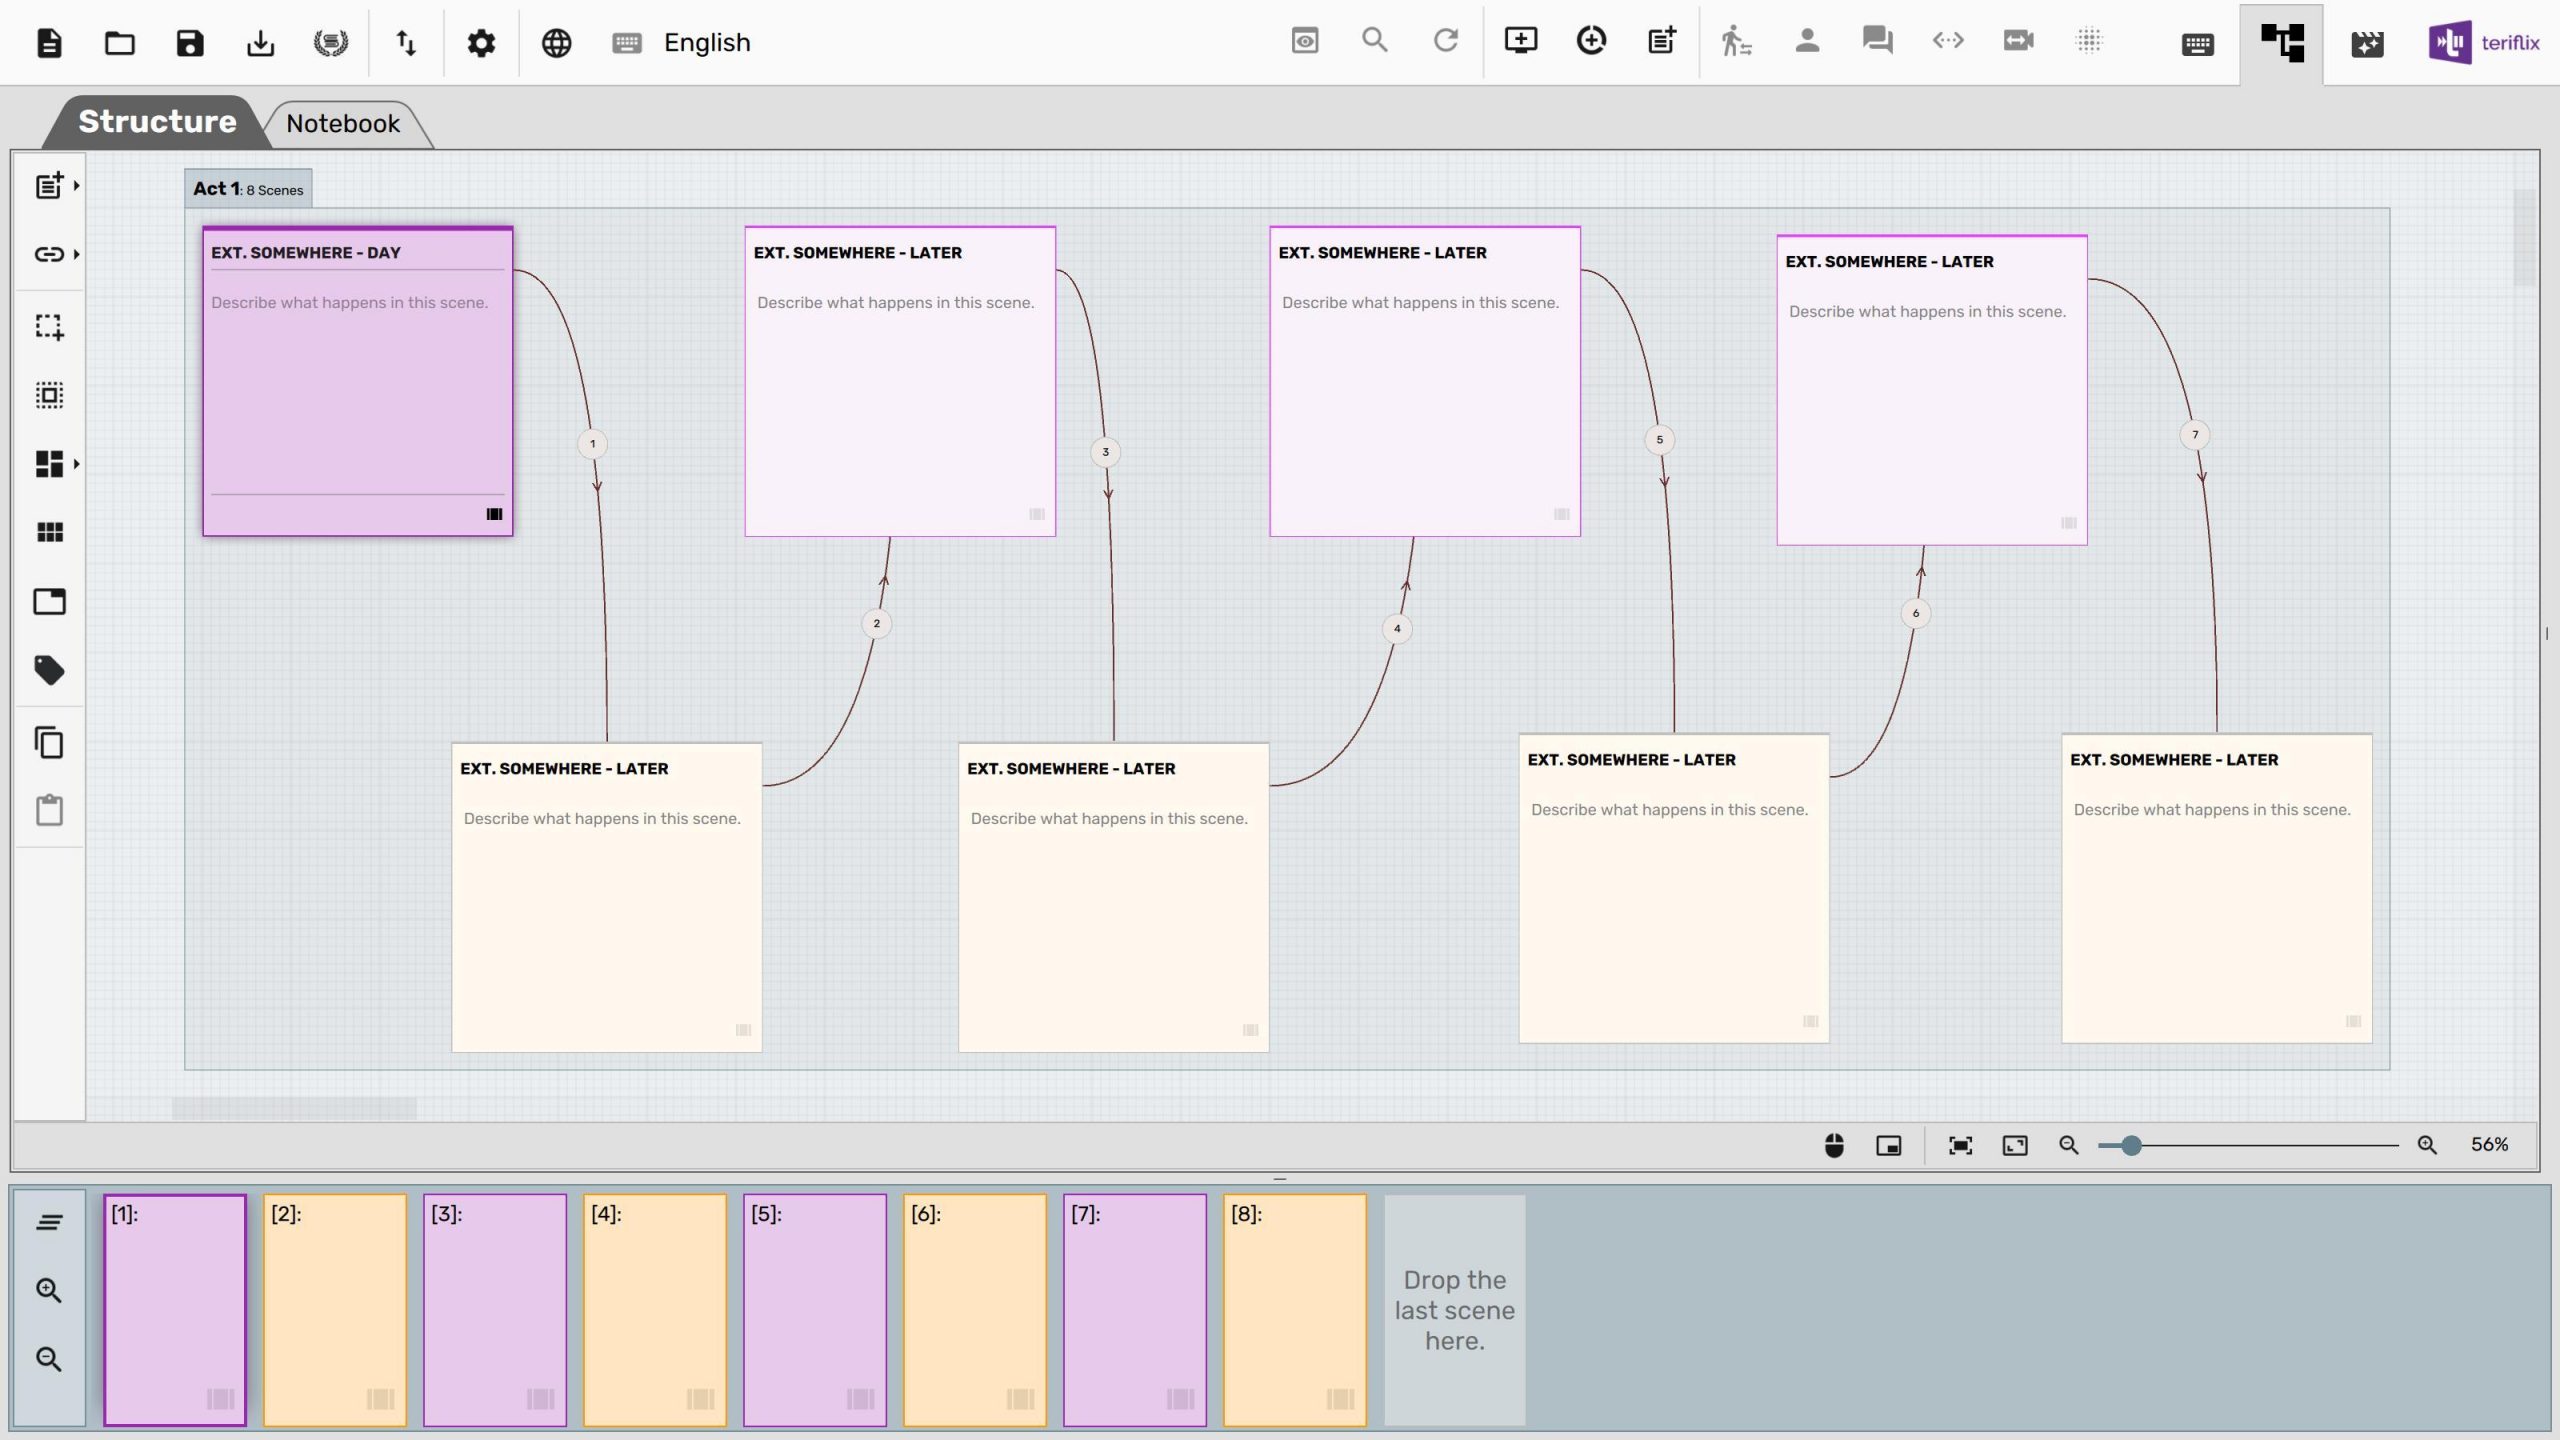
Shown below is a skeleton structure with 3 acts and empty scenes.
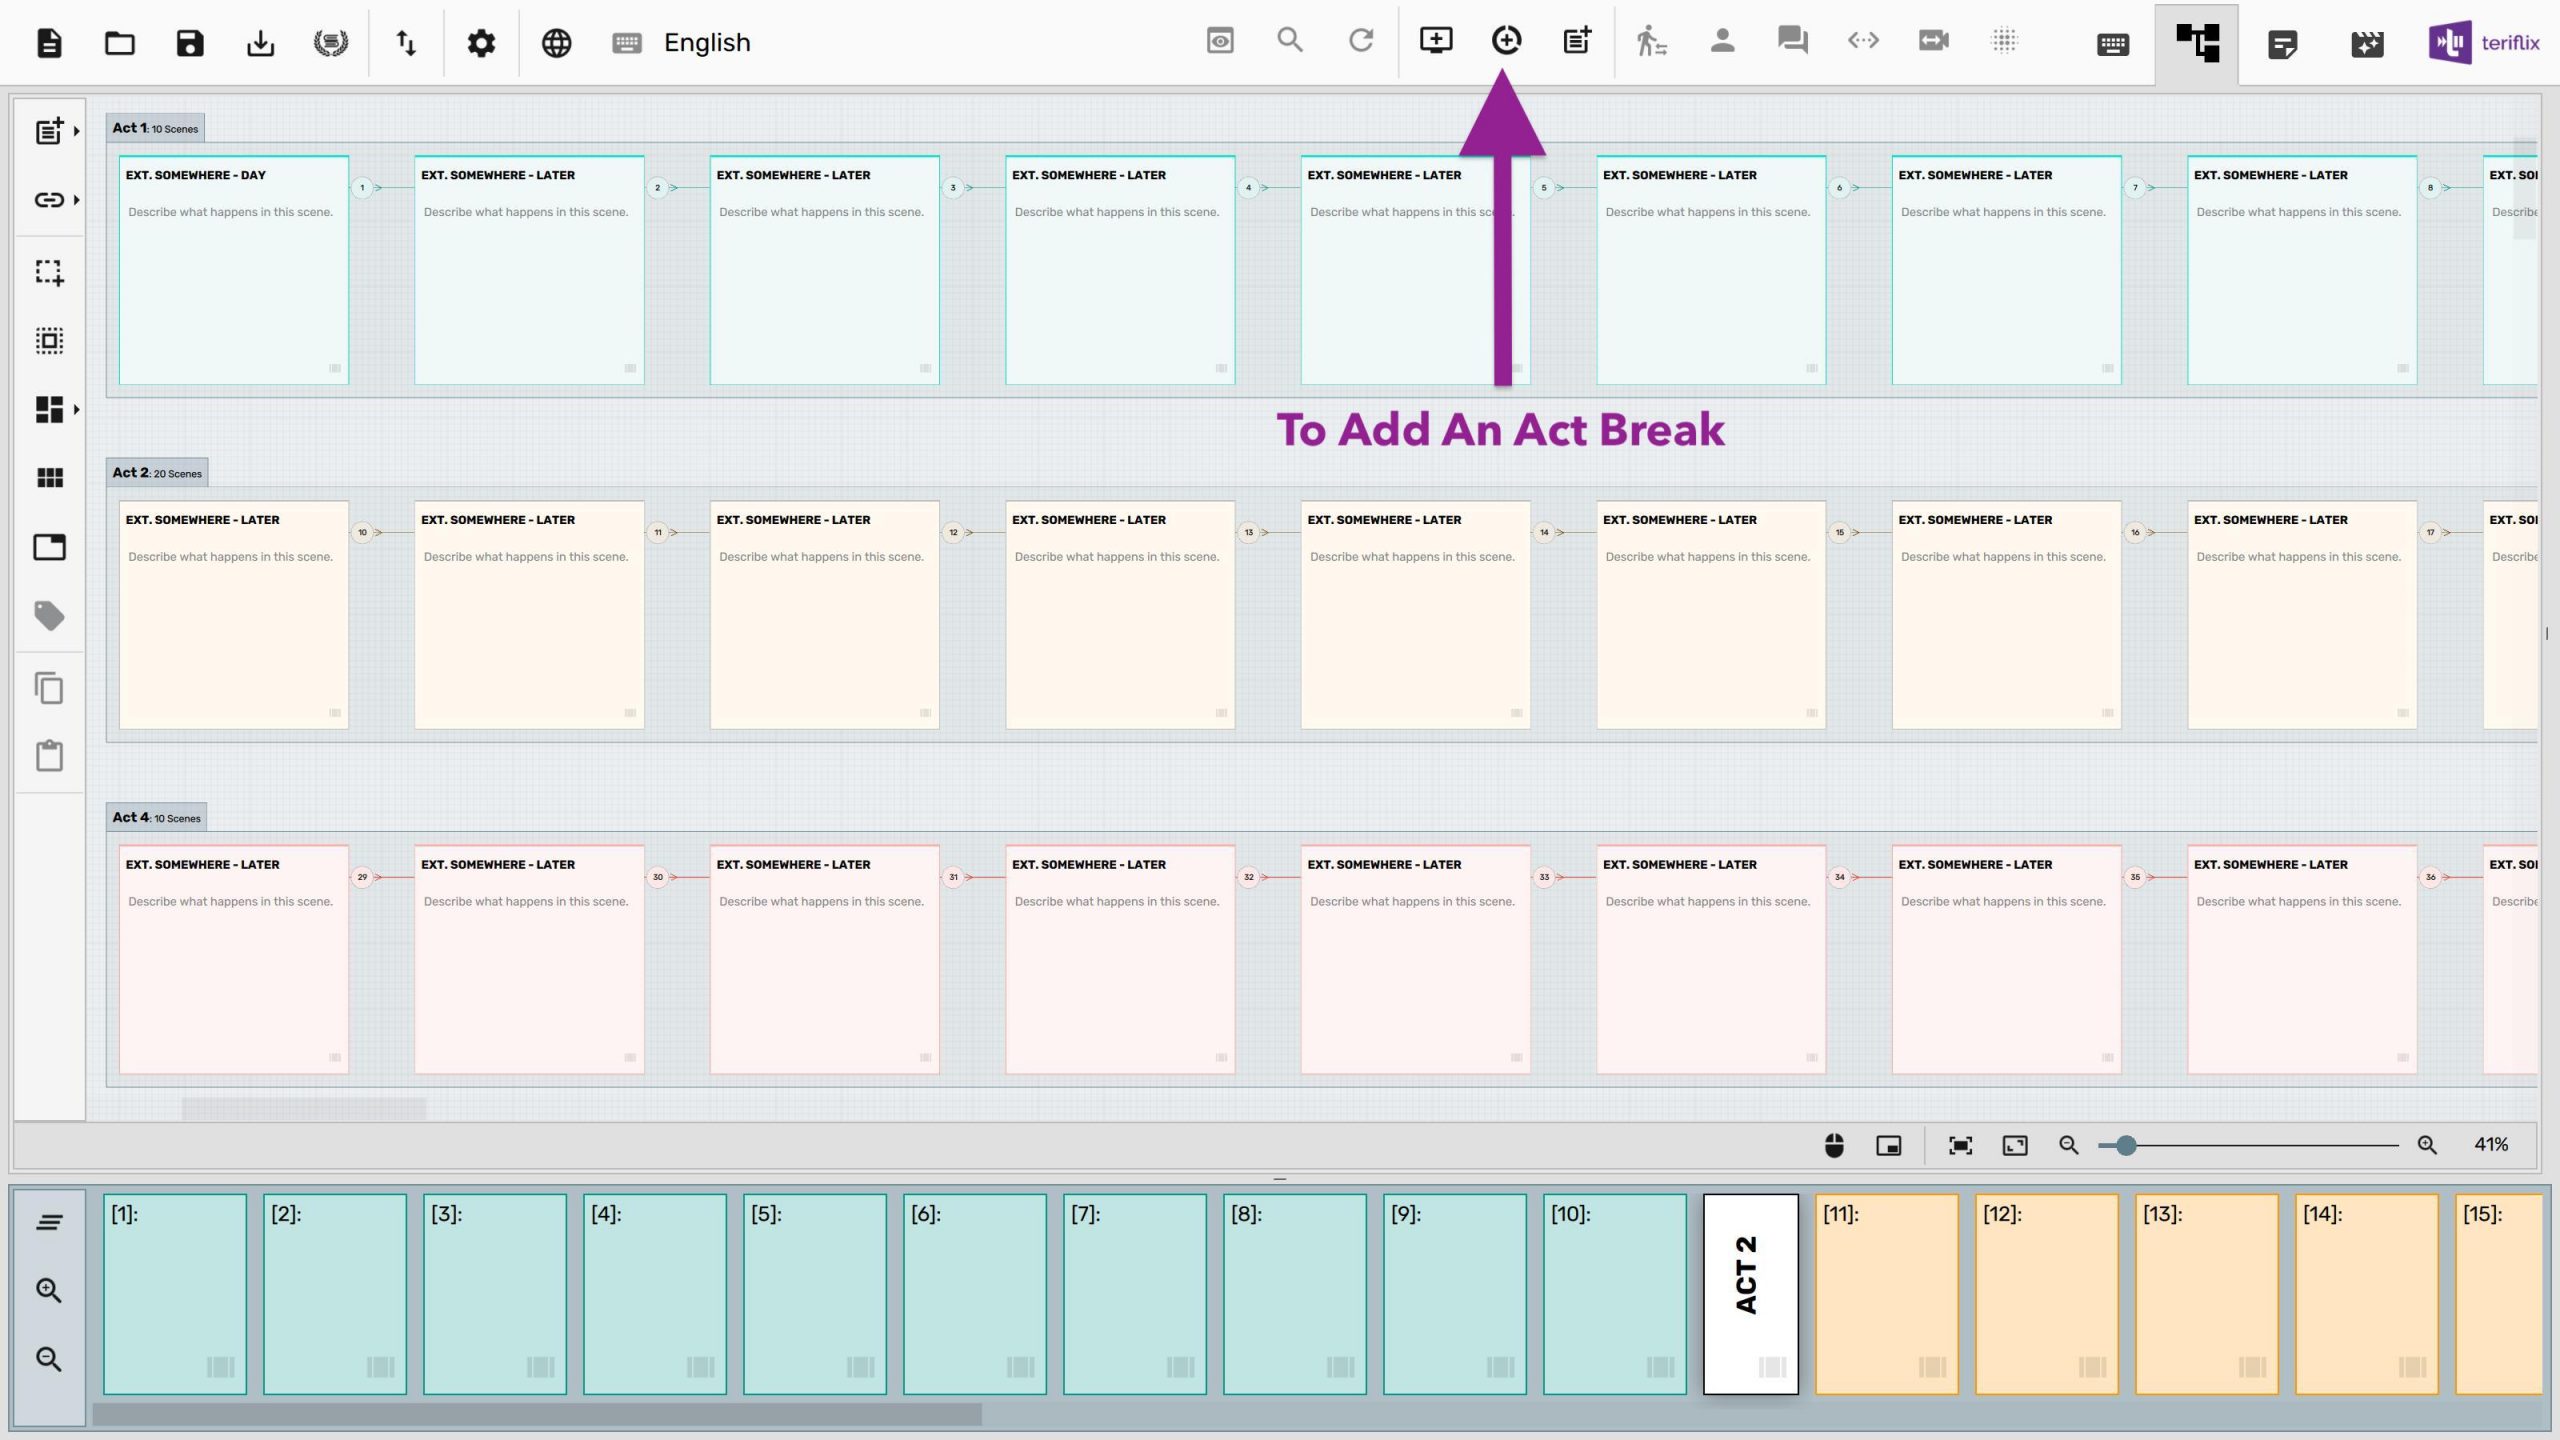
Notice how Scrite automatically renders labeled boxes around scenes from each act. These boxes automatically update their geometry when the index cards contained in them are moved. Double clicking on a box selects all index cards in it. The box label tells you how many scenes are in it.
The default behavior of Scrite is to render boxes for each act. But you can change that, as you will see shortly.
Using The Beat Board Layout
You can drag acts back and forth on the timeline to change where it occurs in the screenplay. For example, below we have dragged the act break “ACT 2” from showing up after 10th scene to showing up after the 5th scene.
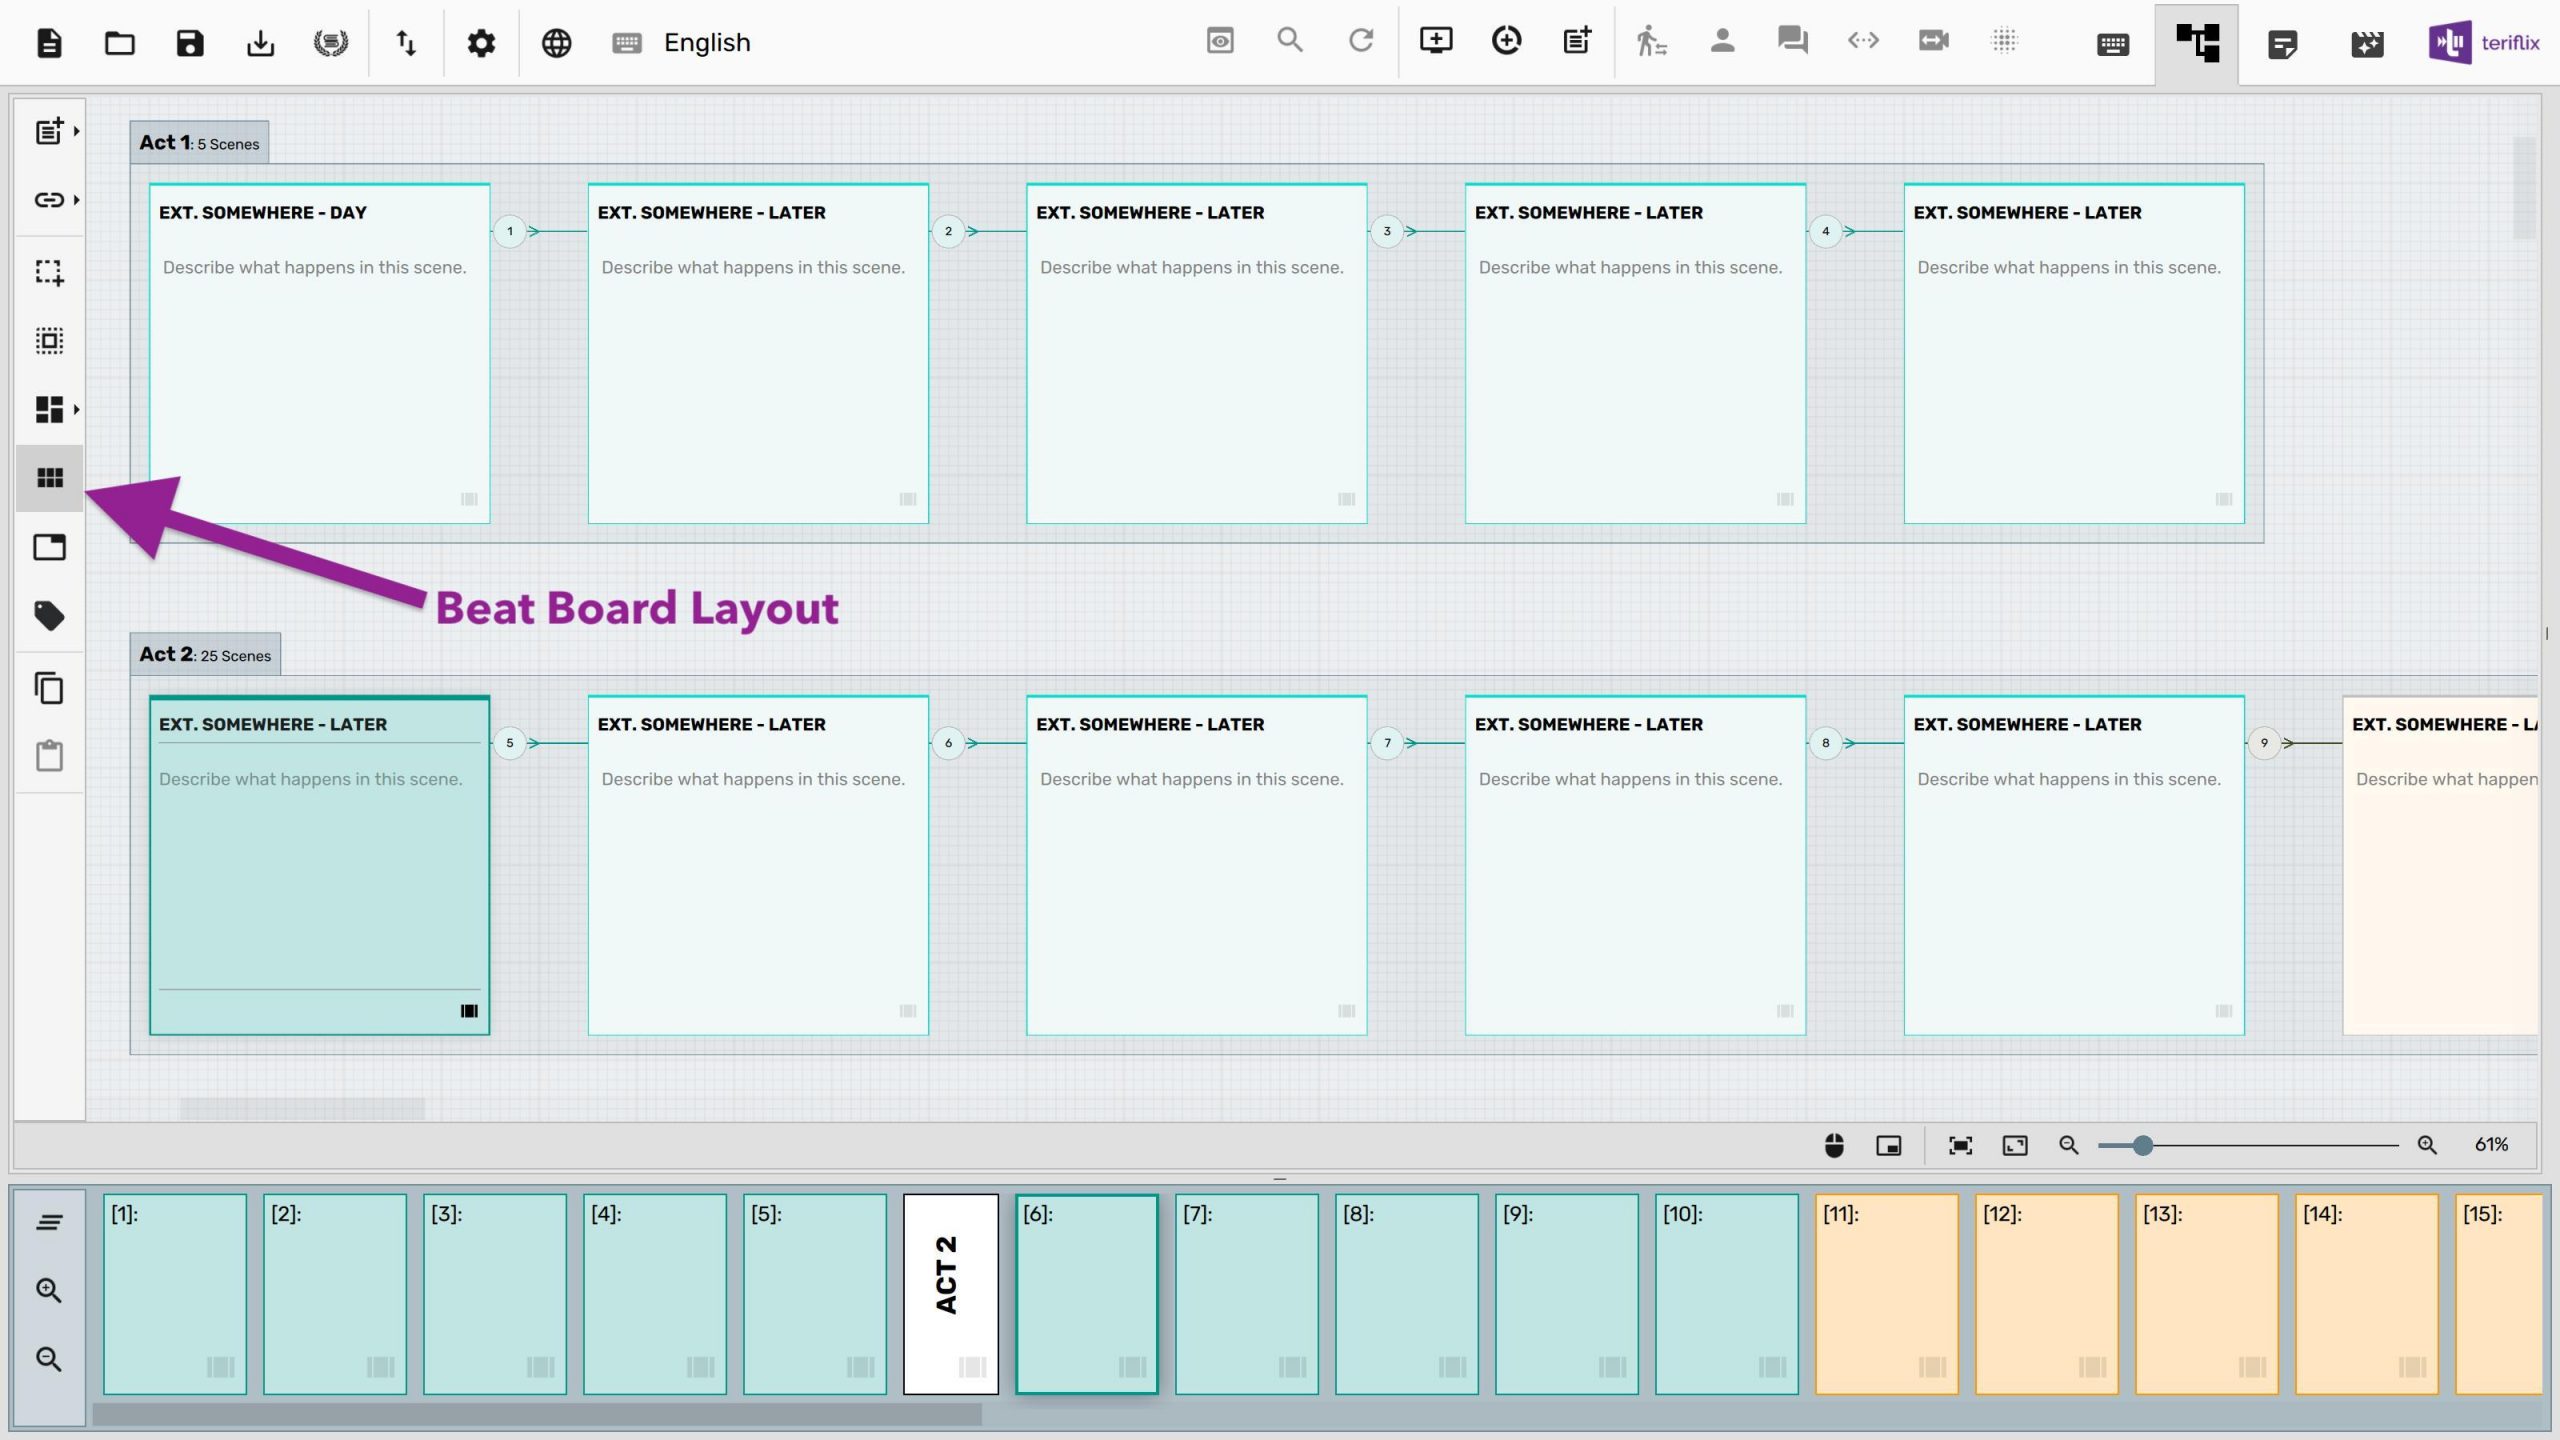
By turning on the beat-board-layout, you can ensure that the index cards are layed out properly, with each act placed on a separate row.
As long as “beat-board-layout” is turned ON, index cards are automatically placed in that layout as acts are moved around, and also as new index cards are inserted into the timeline. The structure canvas won’t let you move index cards or act groups, until the “beat-board-layout” is turned OFF.
Tagging Structural Elements
If you have not already watched this video, we recommend that you watch it now. In just 5 minutes you will get a good idea about this feature.
Recommended Reading: Tag Your Index Cards.
Episode Breaks
When the Scrite project was bootstrapped, we did not forsee that users would want to use the app to write screenplays of episodes from an entire season.
Early adopters reached out to us asking us for specific features:
- Keeping track of scenes in structure: https://www.scrite.io/index.php/forum/topic/total-scenes-on-structure-tab/
- Capturing “Bible”: https://www.scrite.io/index.php/forum/topic/noun-library-reference-wiki-show-bible/
While we are yet to release noun-reference-library and show-bible tabs, we do have ways to capture multiple episodes from a web-series within a single document.
Just like we can add ACT breaks, we can also add EPISODE breaks in Scrite. ACT numbers reset themselves every time an EPISODE break is encountered. Below is a screenshot where we can see multiple episodes on structure and timeline, each episode has multiple acts.
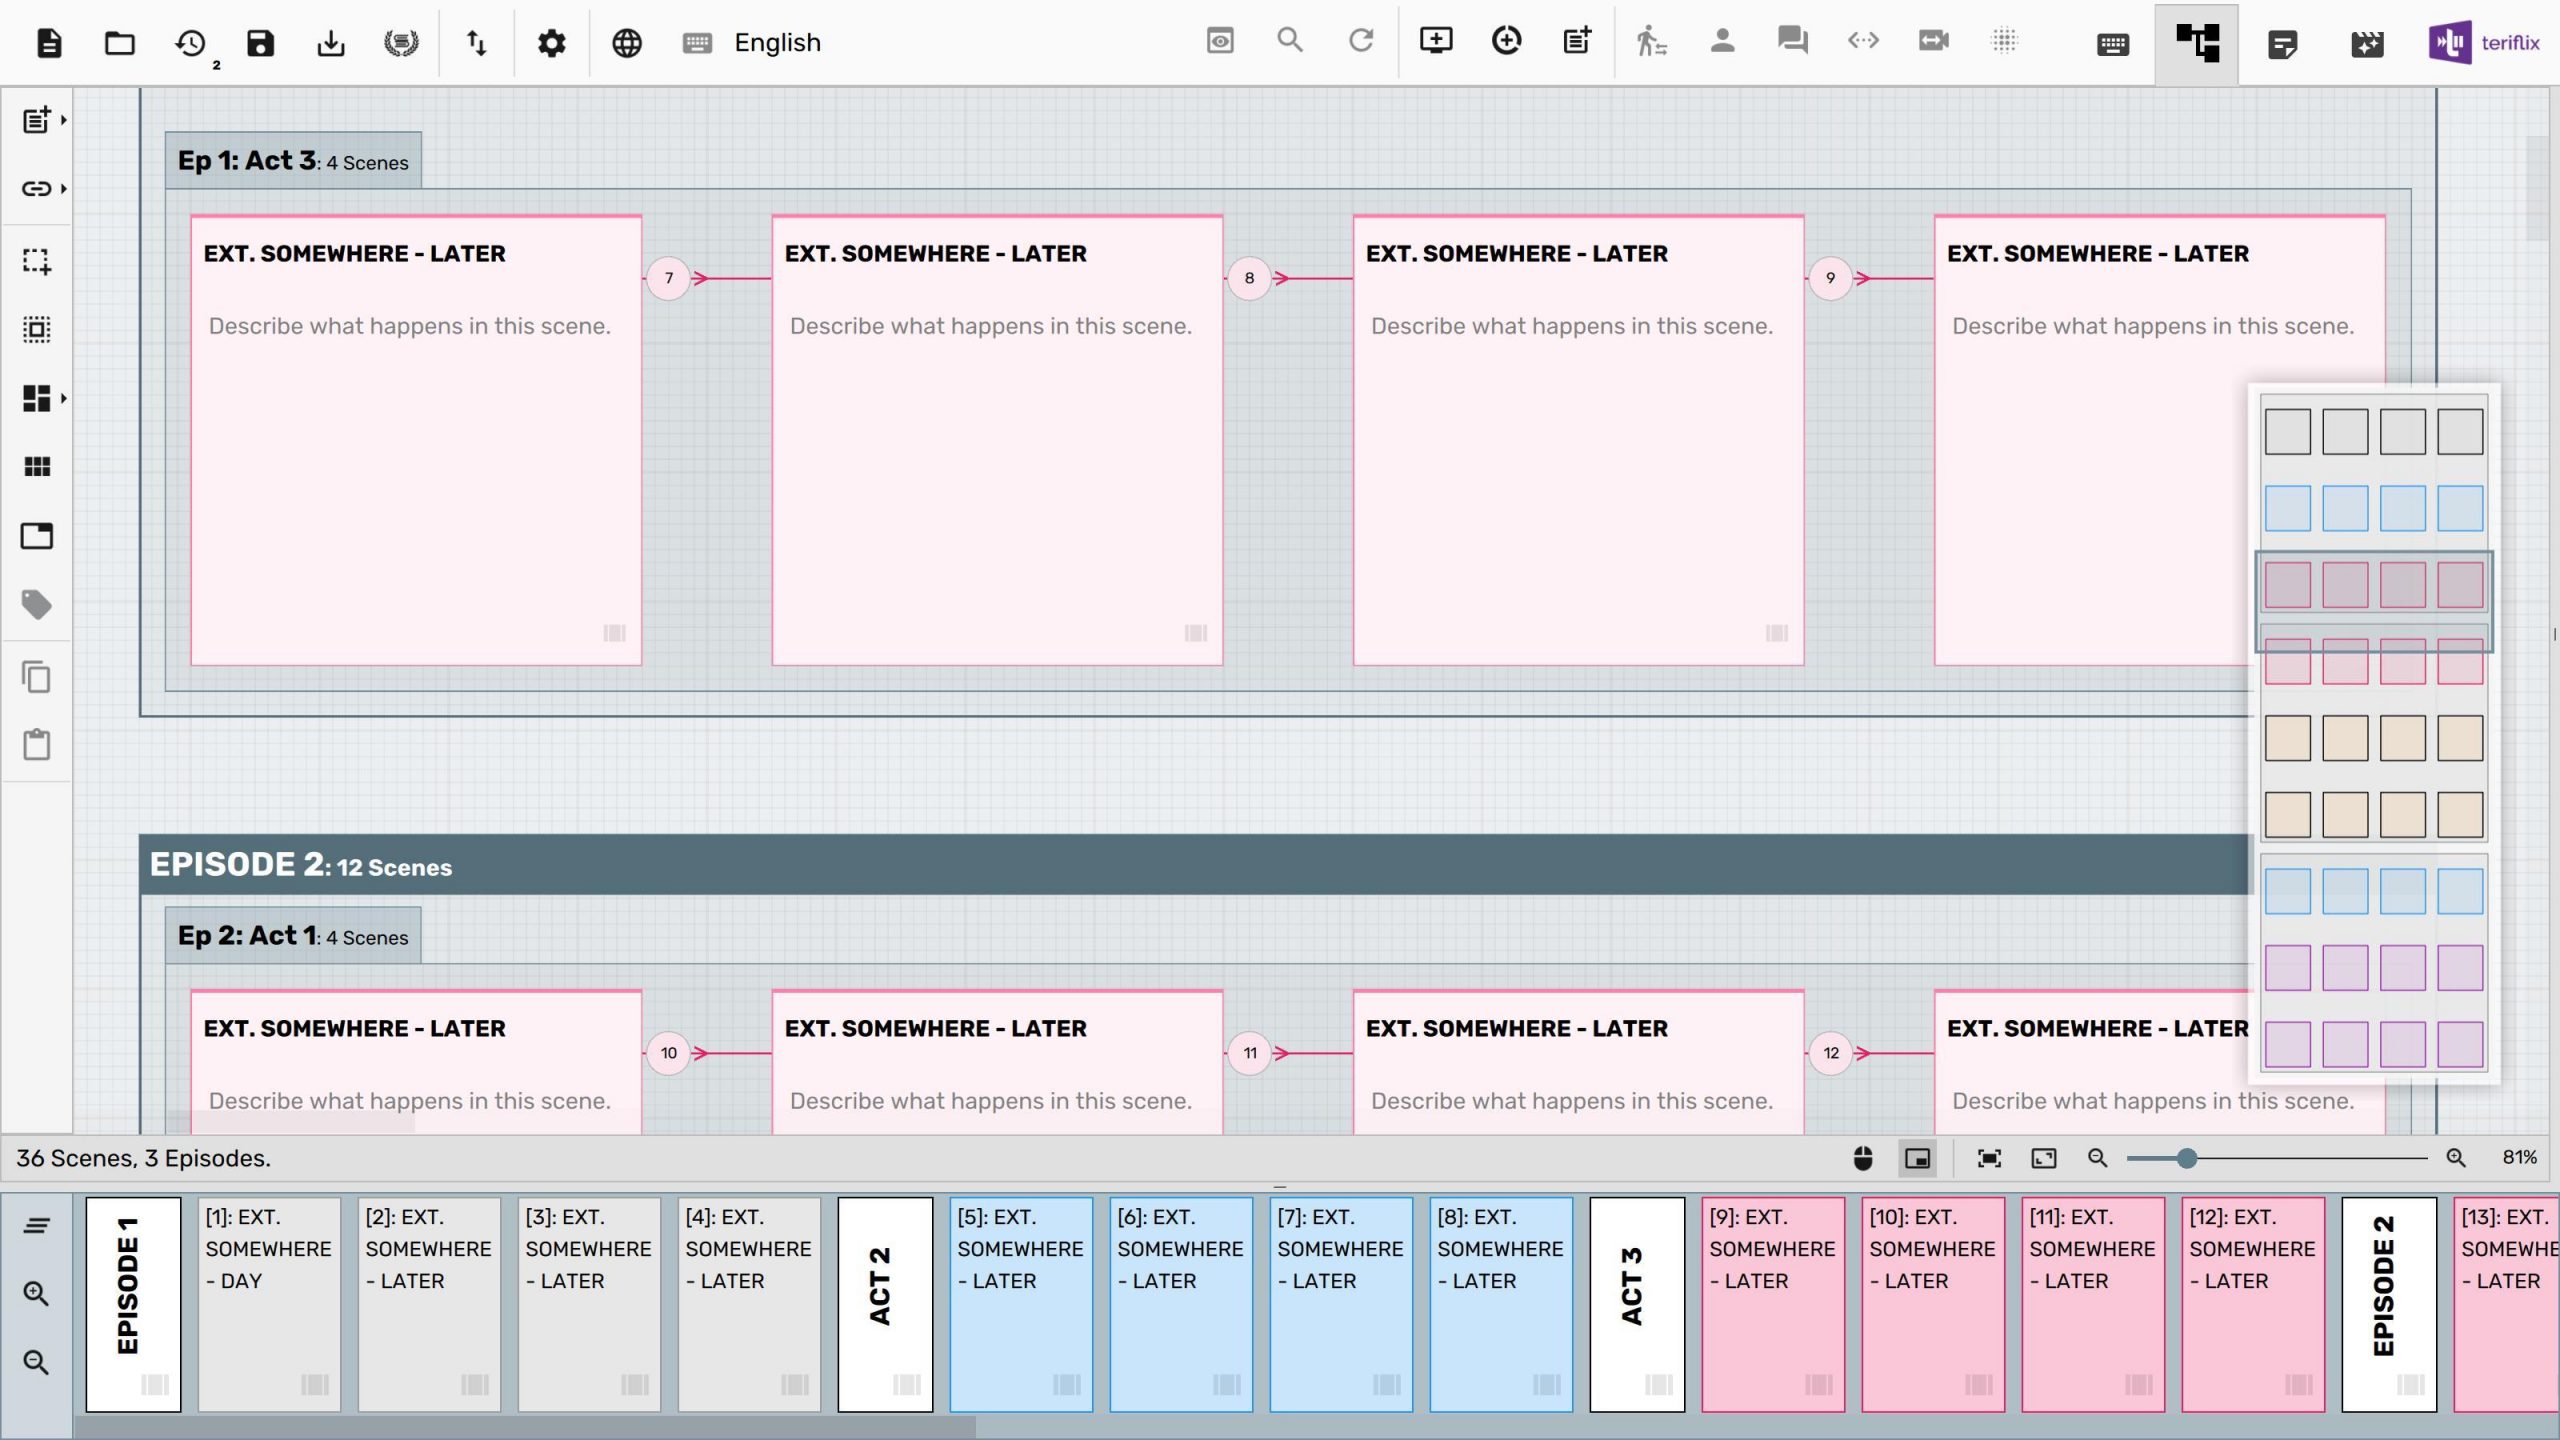
Notice how each episode gets its own box on the canvas, with acts inside them getting an additional box.
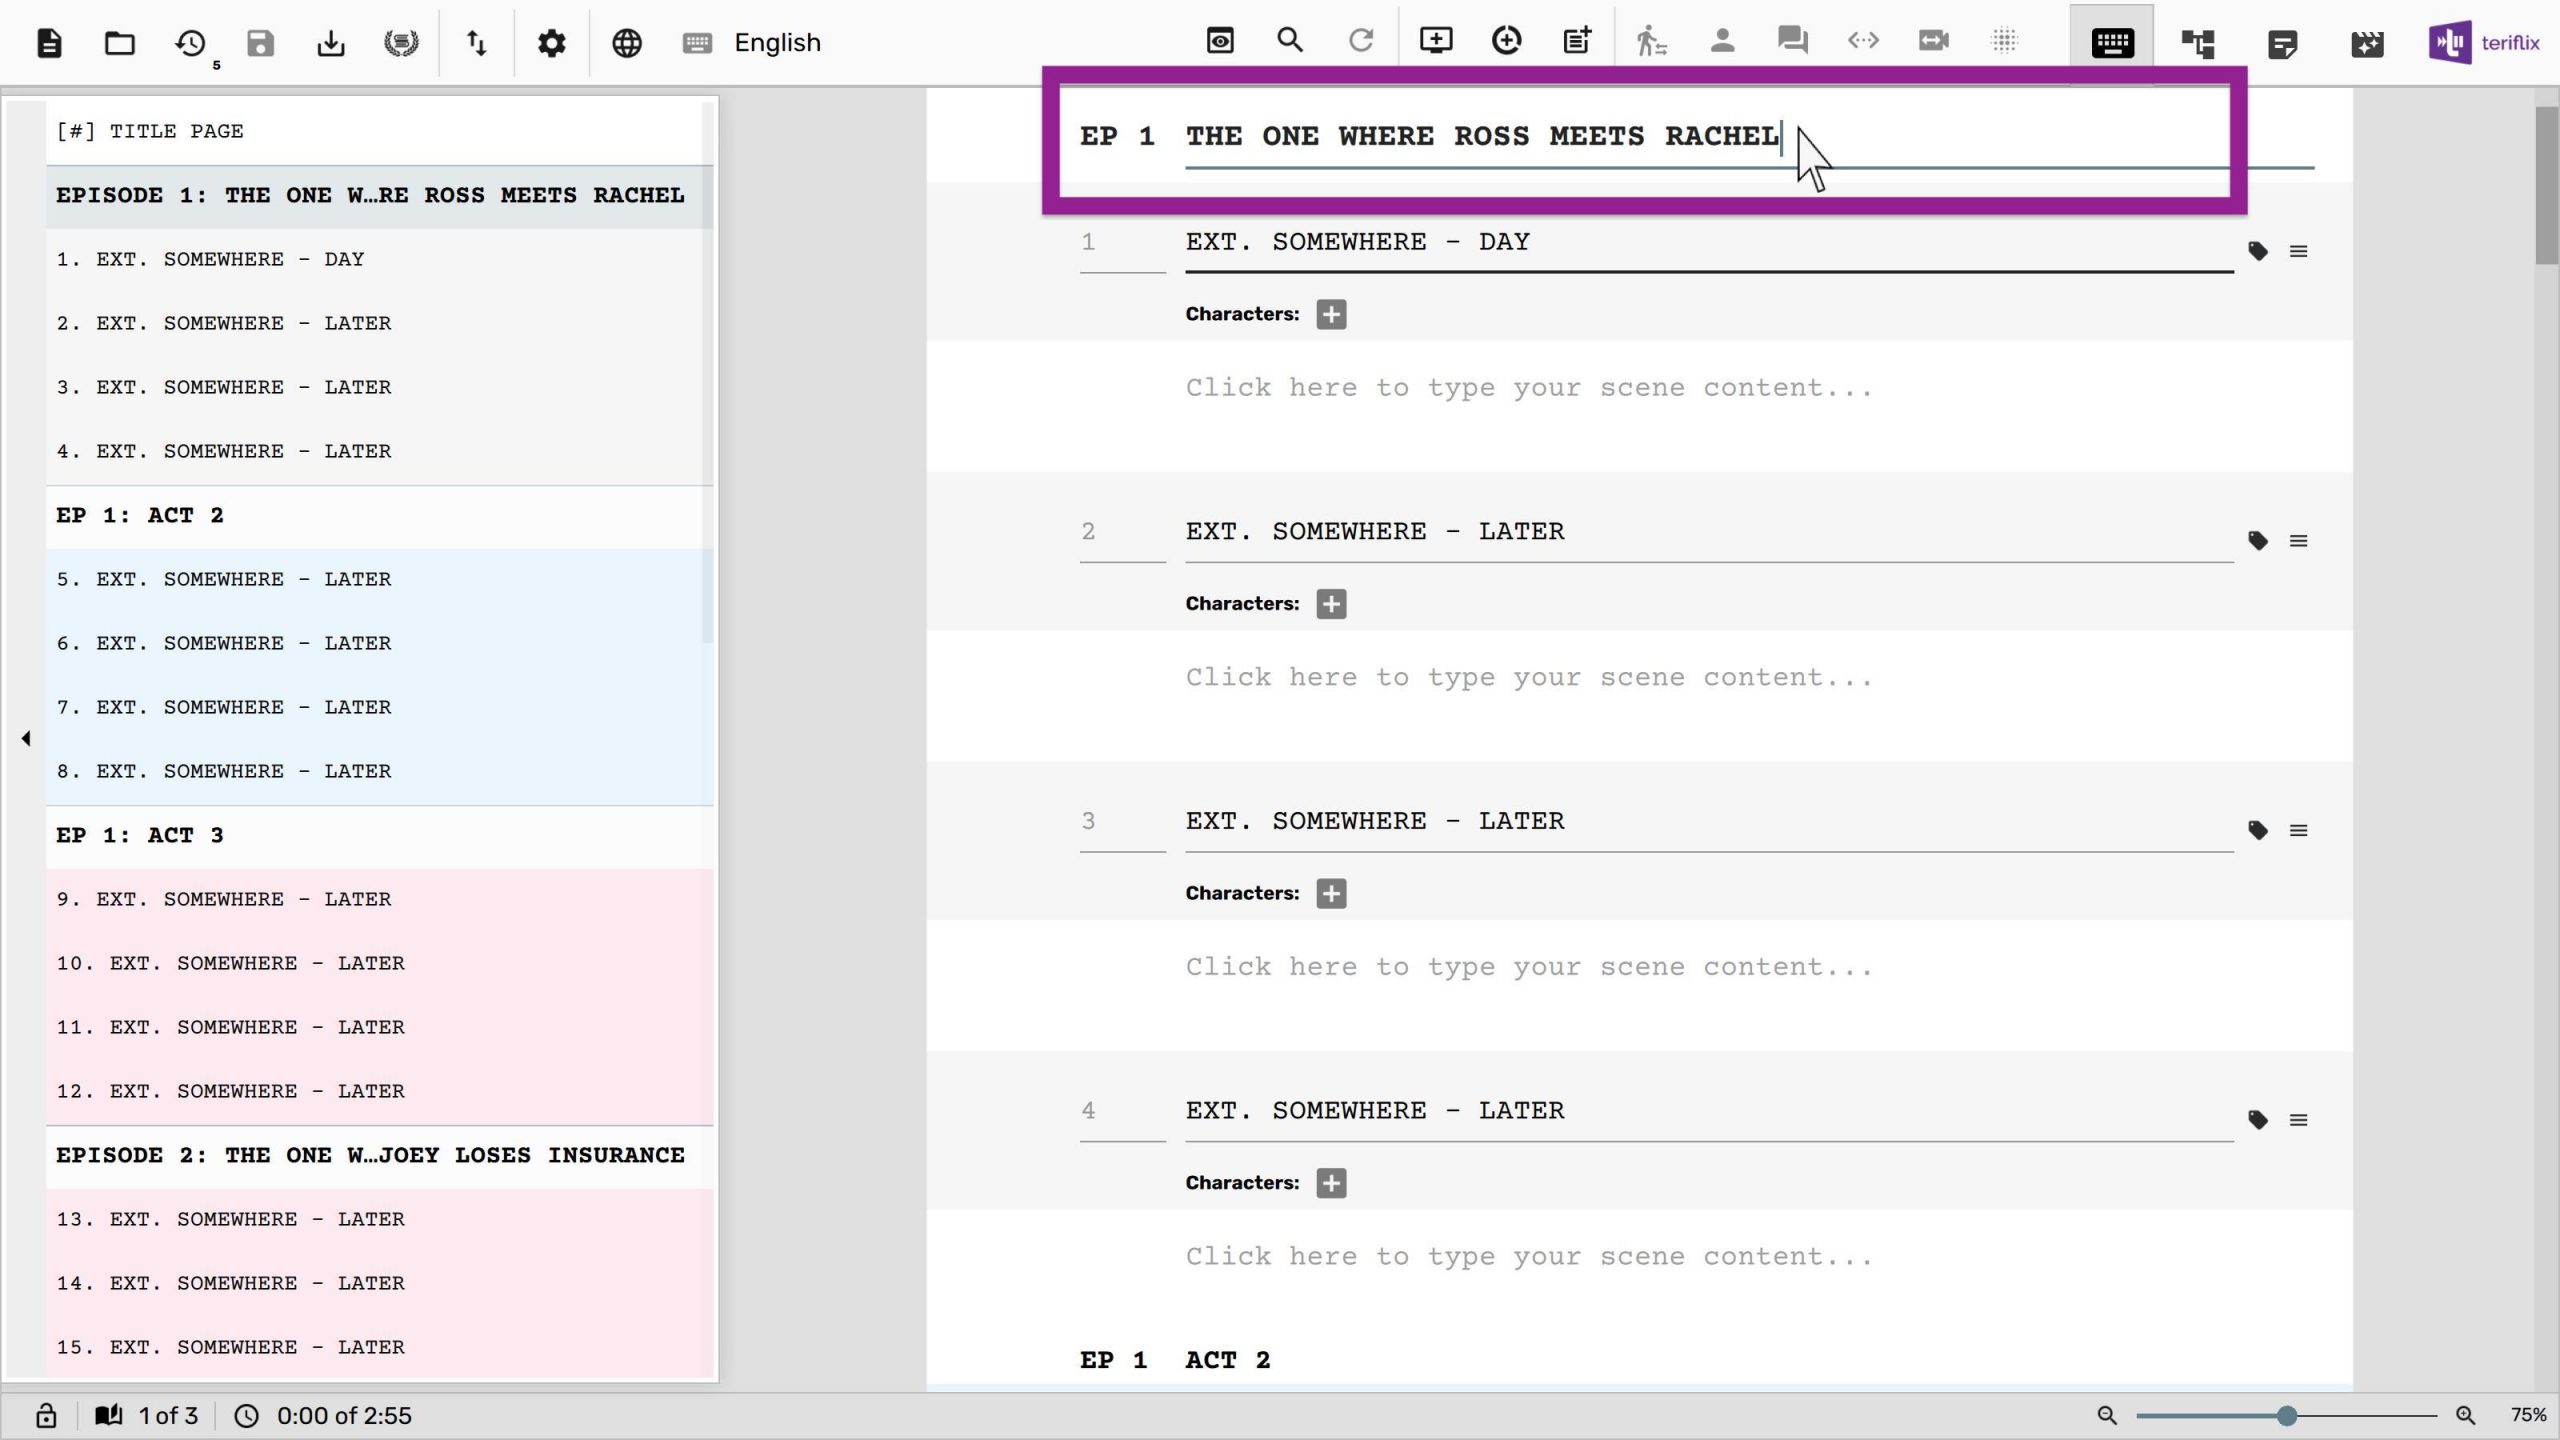
Even on the Screenplay tab, you can pull out the scene list panel on the left and notice the episode breaks. You can name each of your episodes by typing an episode name in the text box associated with the episode break on screenplay editor.
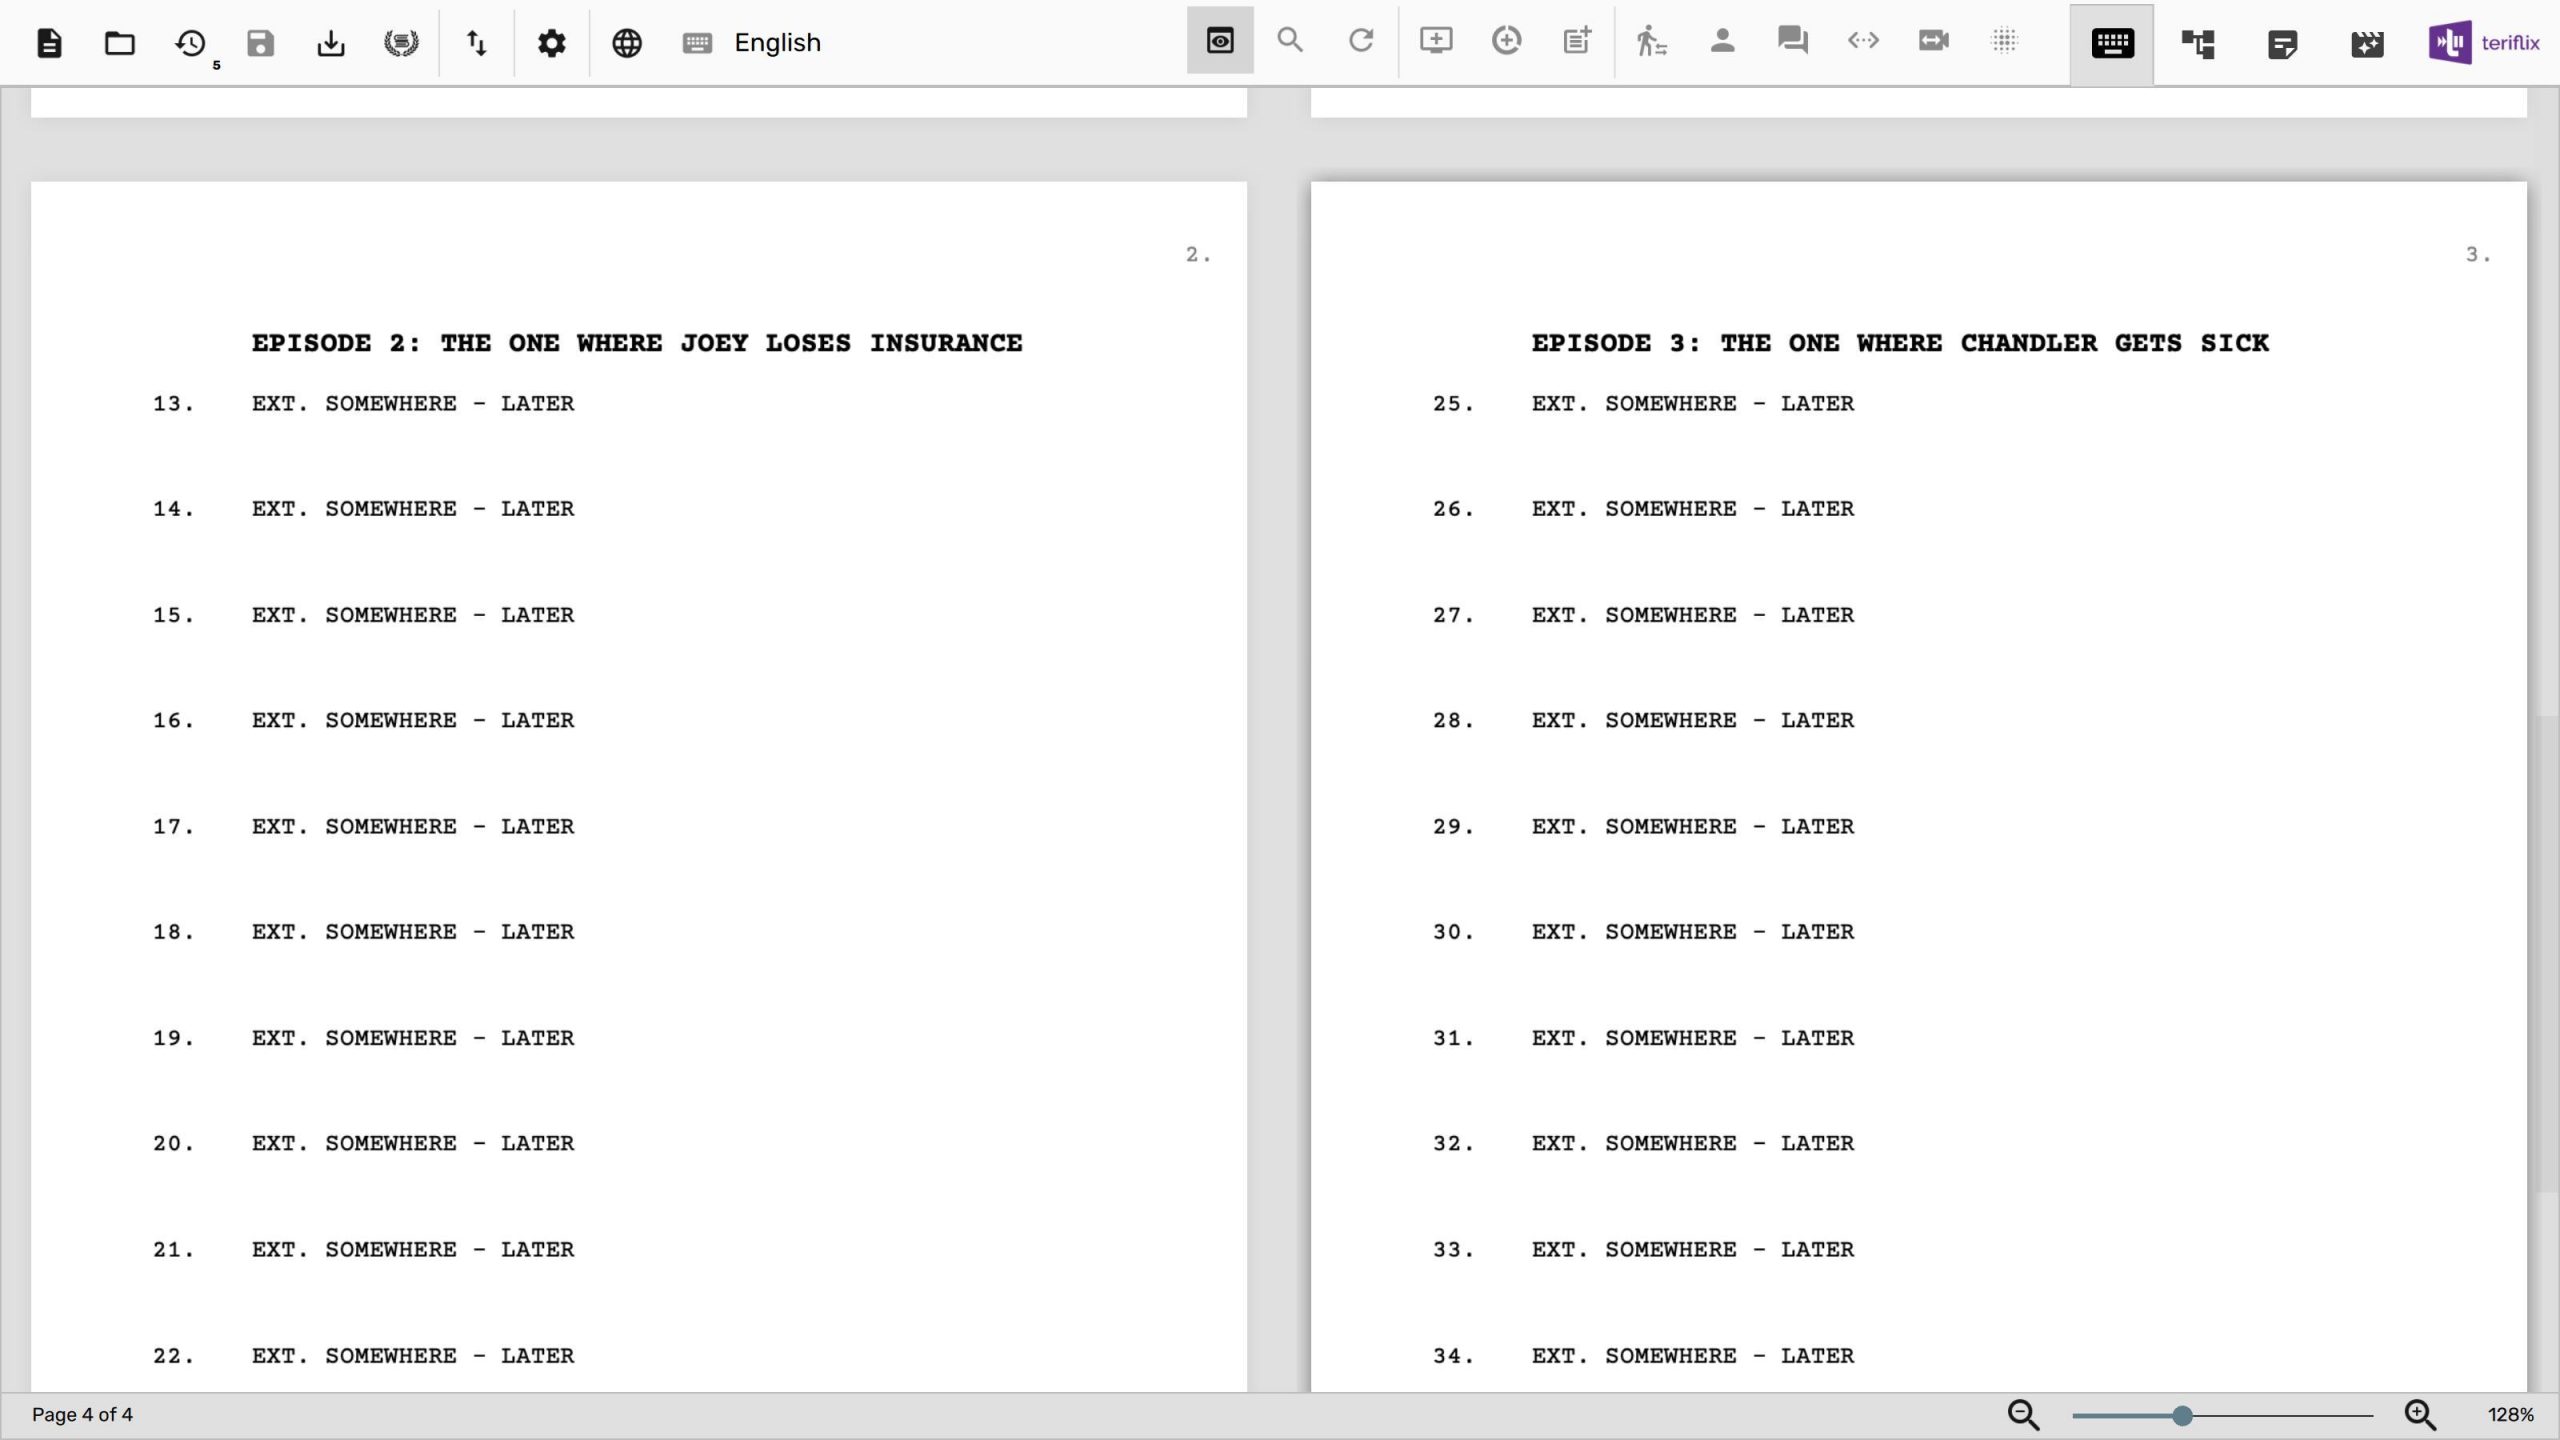
When you export the screenplay to PDF, each episode will start from a new page.
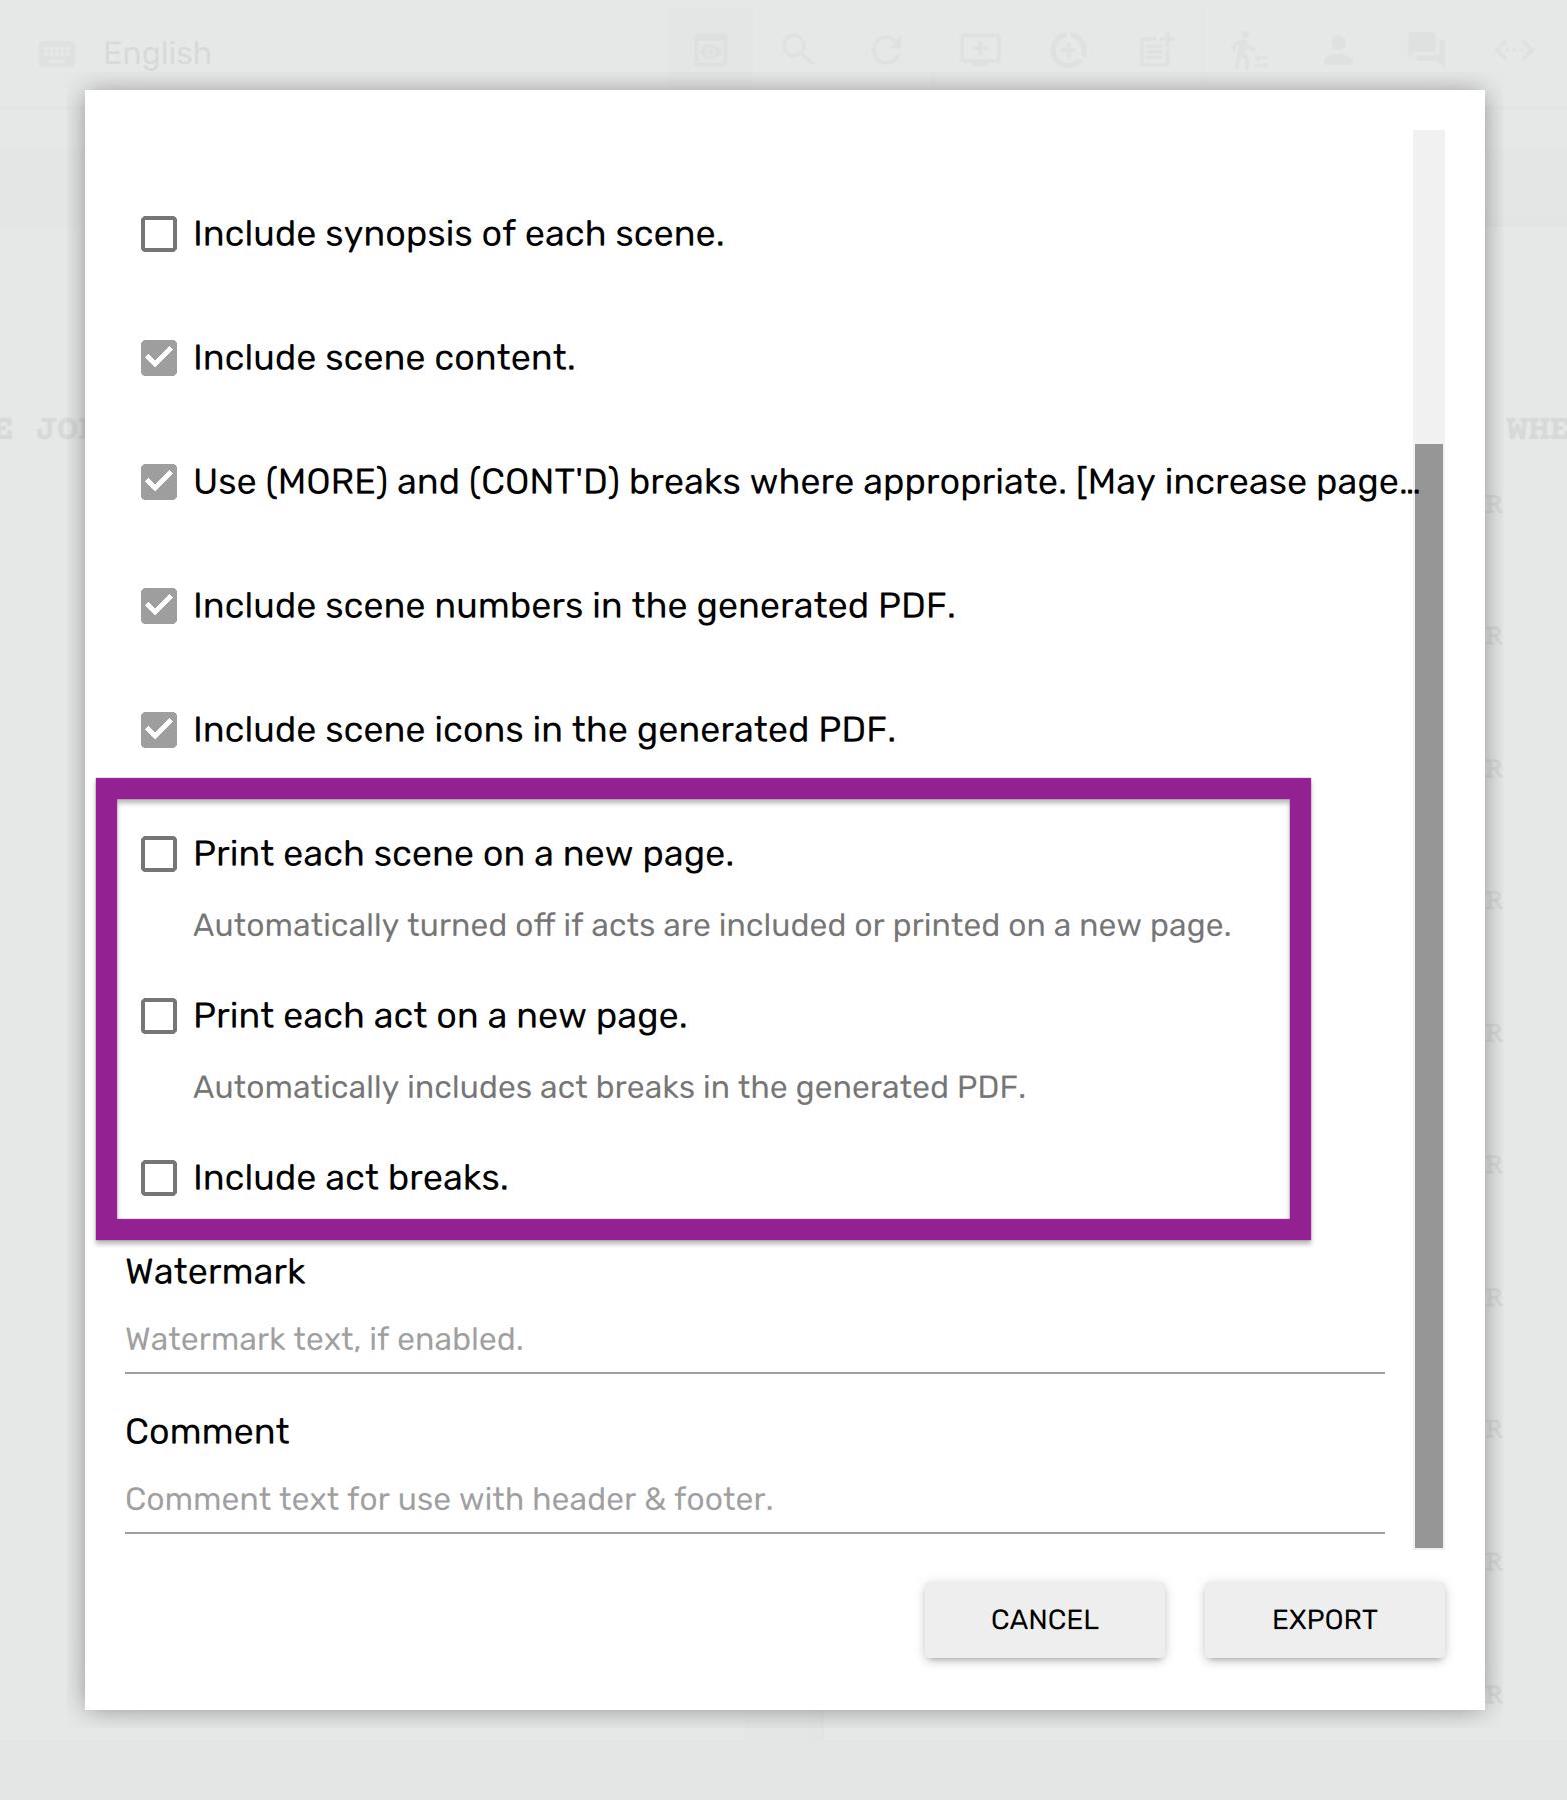
Although this will be covered in a future article, we want to highlight here that you can configure the PDF exporter to include act names or print each act from a new page.
Tracking Story Threads Using Tags
If you have read the article linked above, then you would know that in addition to using the built-in tags from “Save The Cat Structure“, it is possible to create custom structure categories & tags in Scrite. In this section, we show you a way of tracking story threads using tags.
Lets say that you are plotting a multi-episode story that spans several timelines and that you want to capture each timeline as a separate thread. You can simply capture all timelines under a structure category:
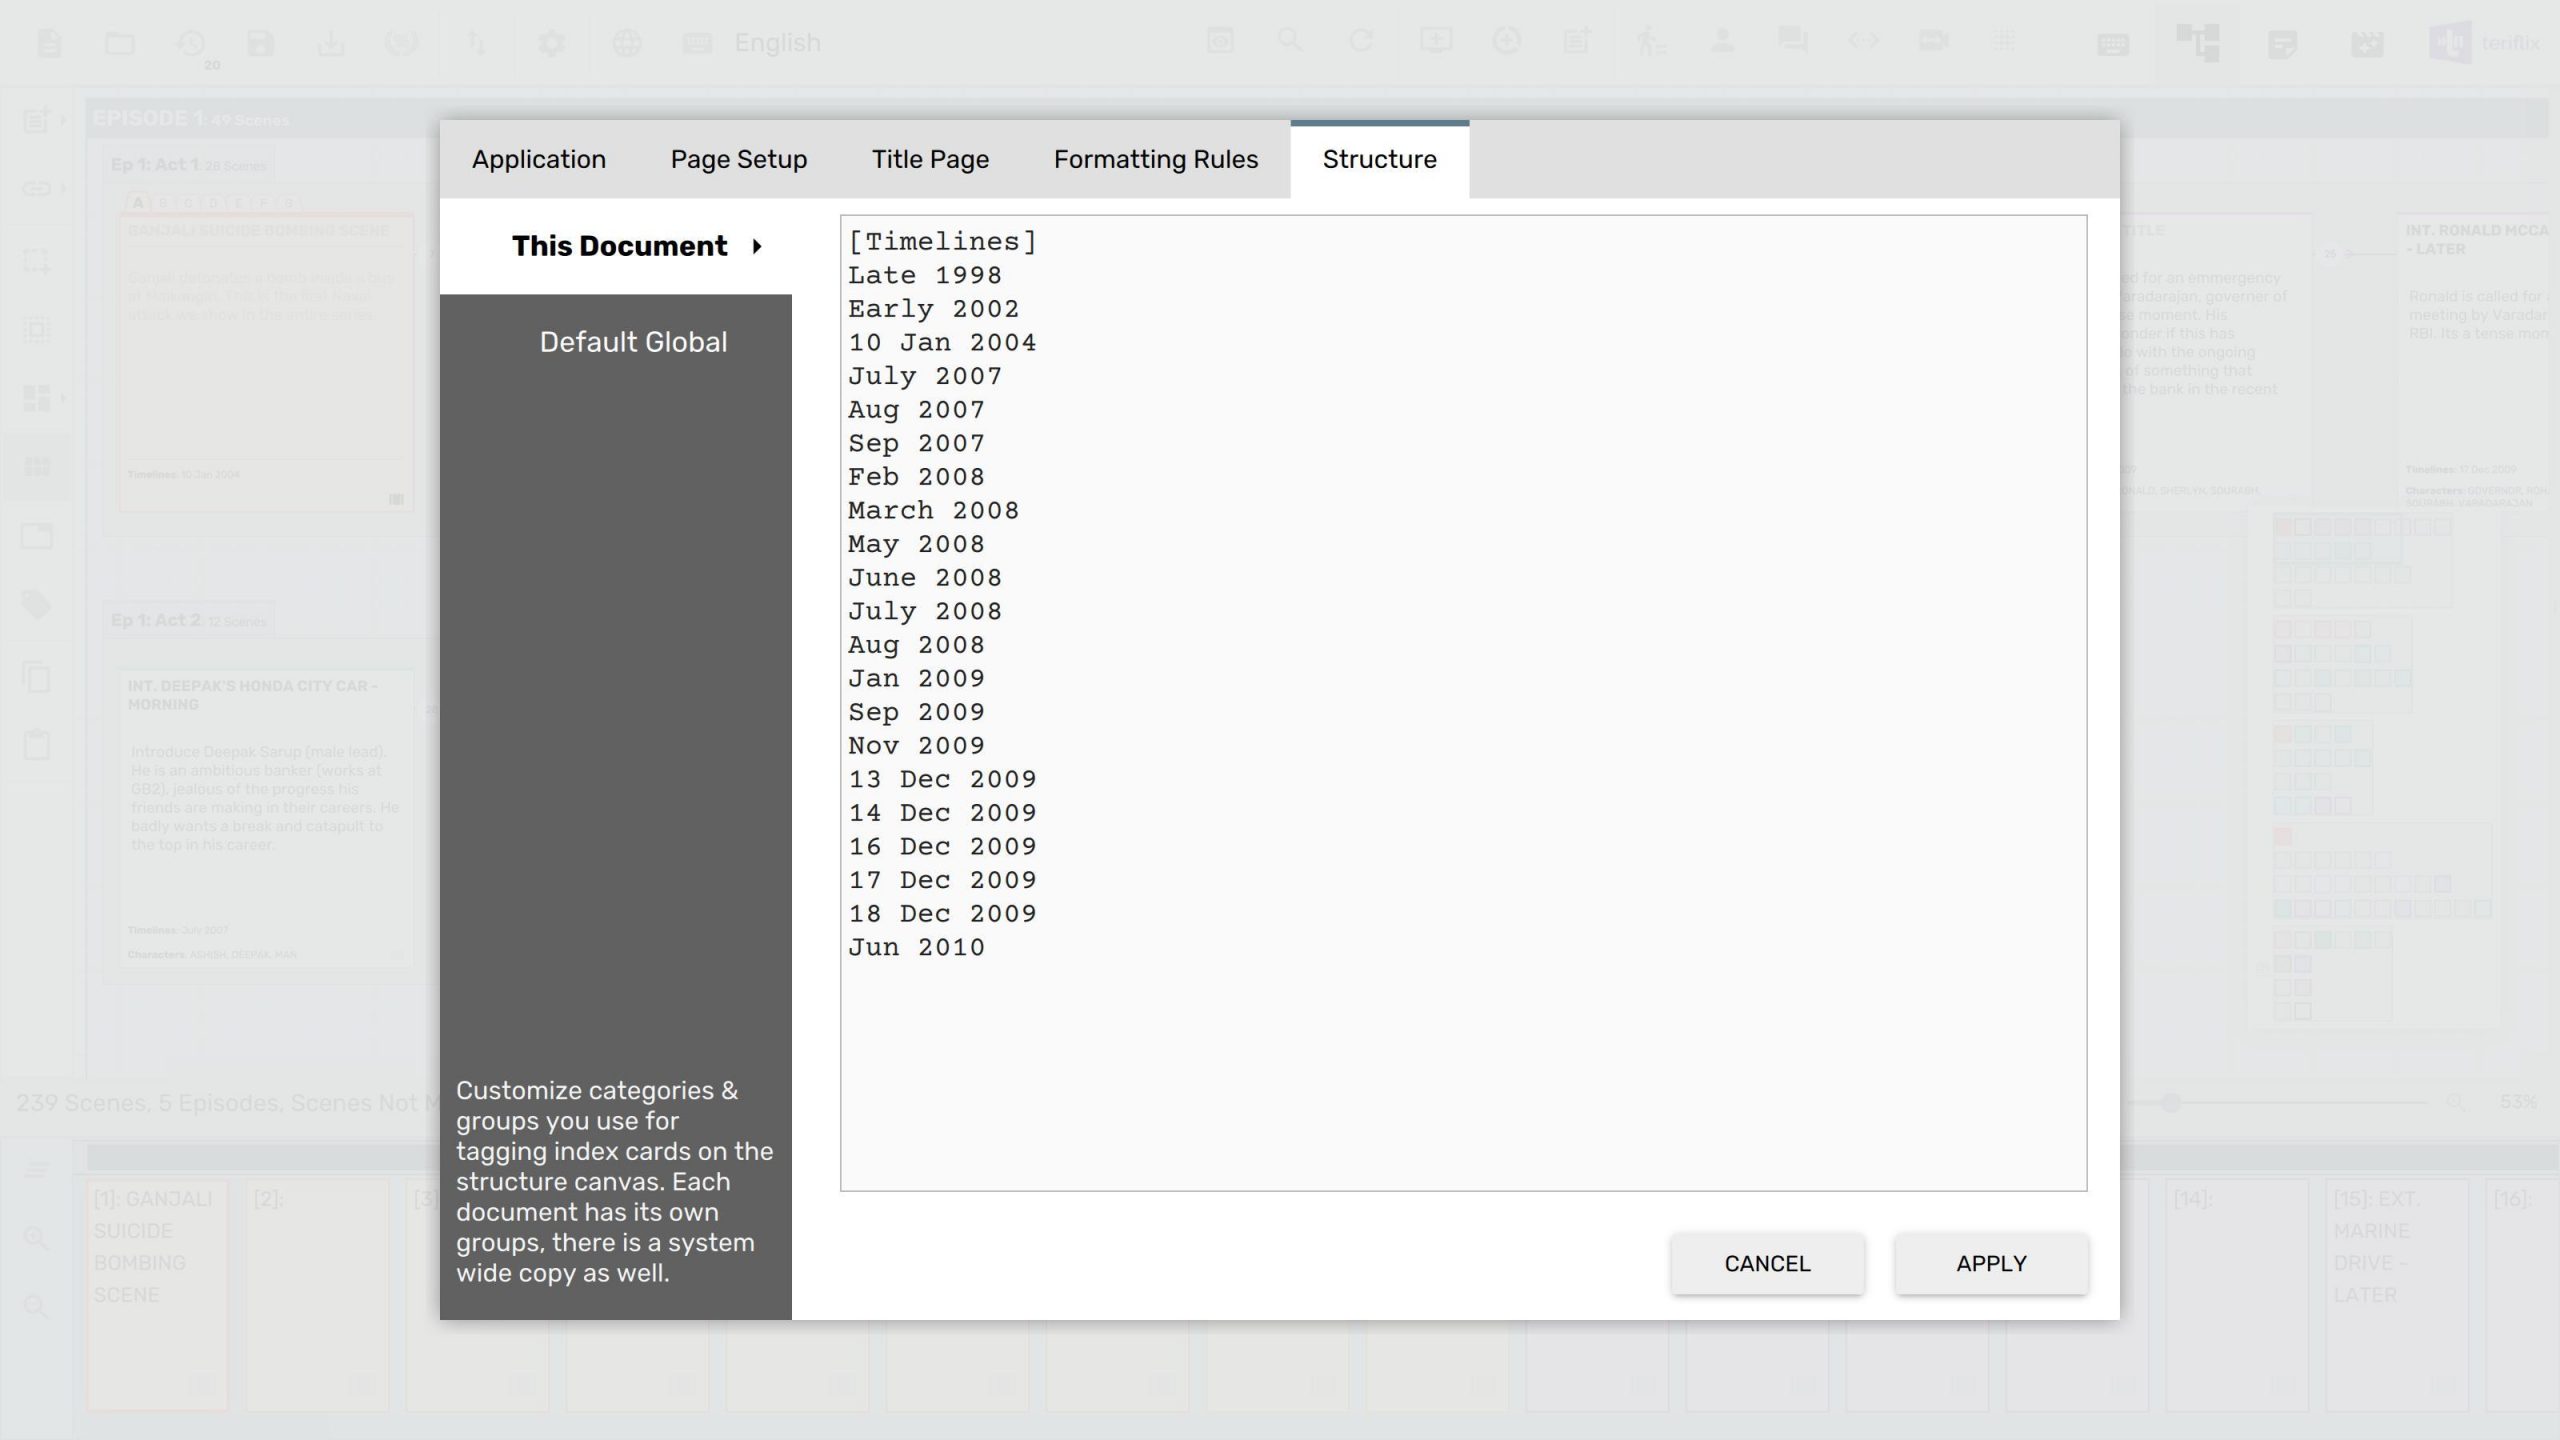
… and tag your index cards using these timeline tags.
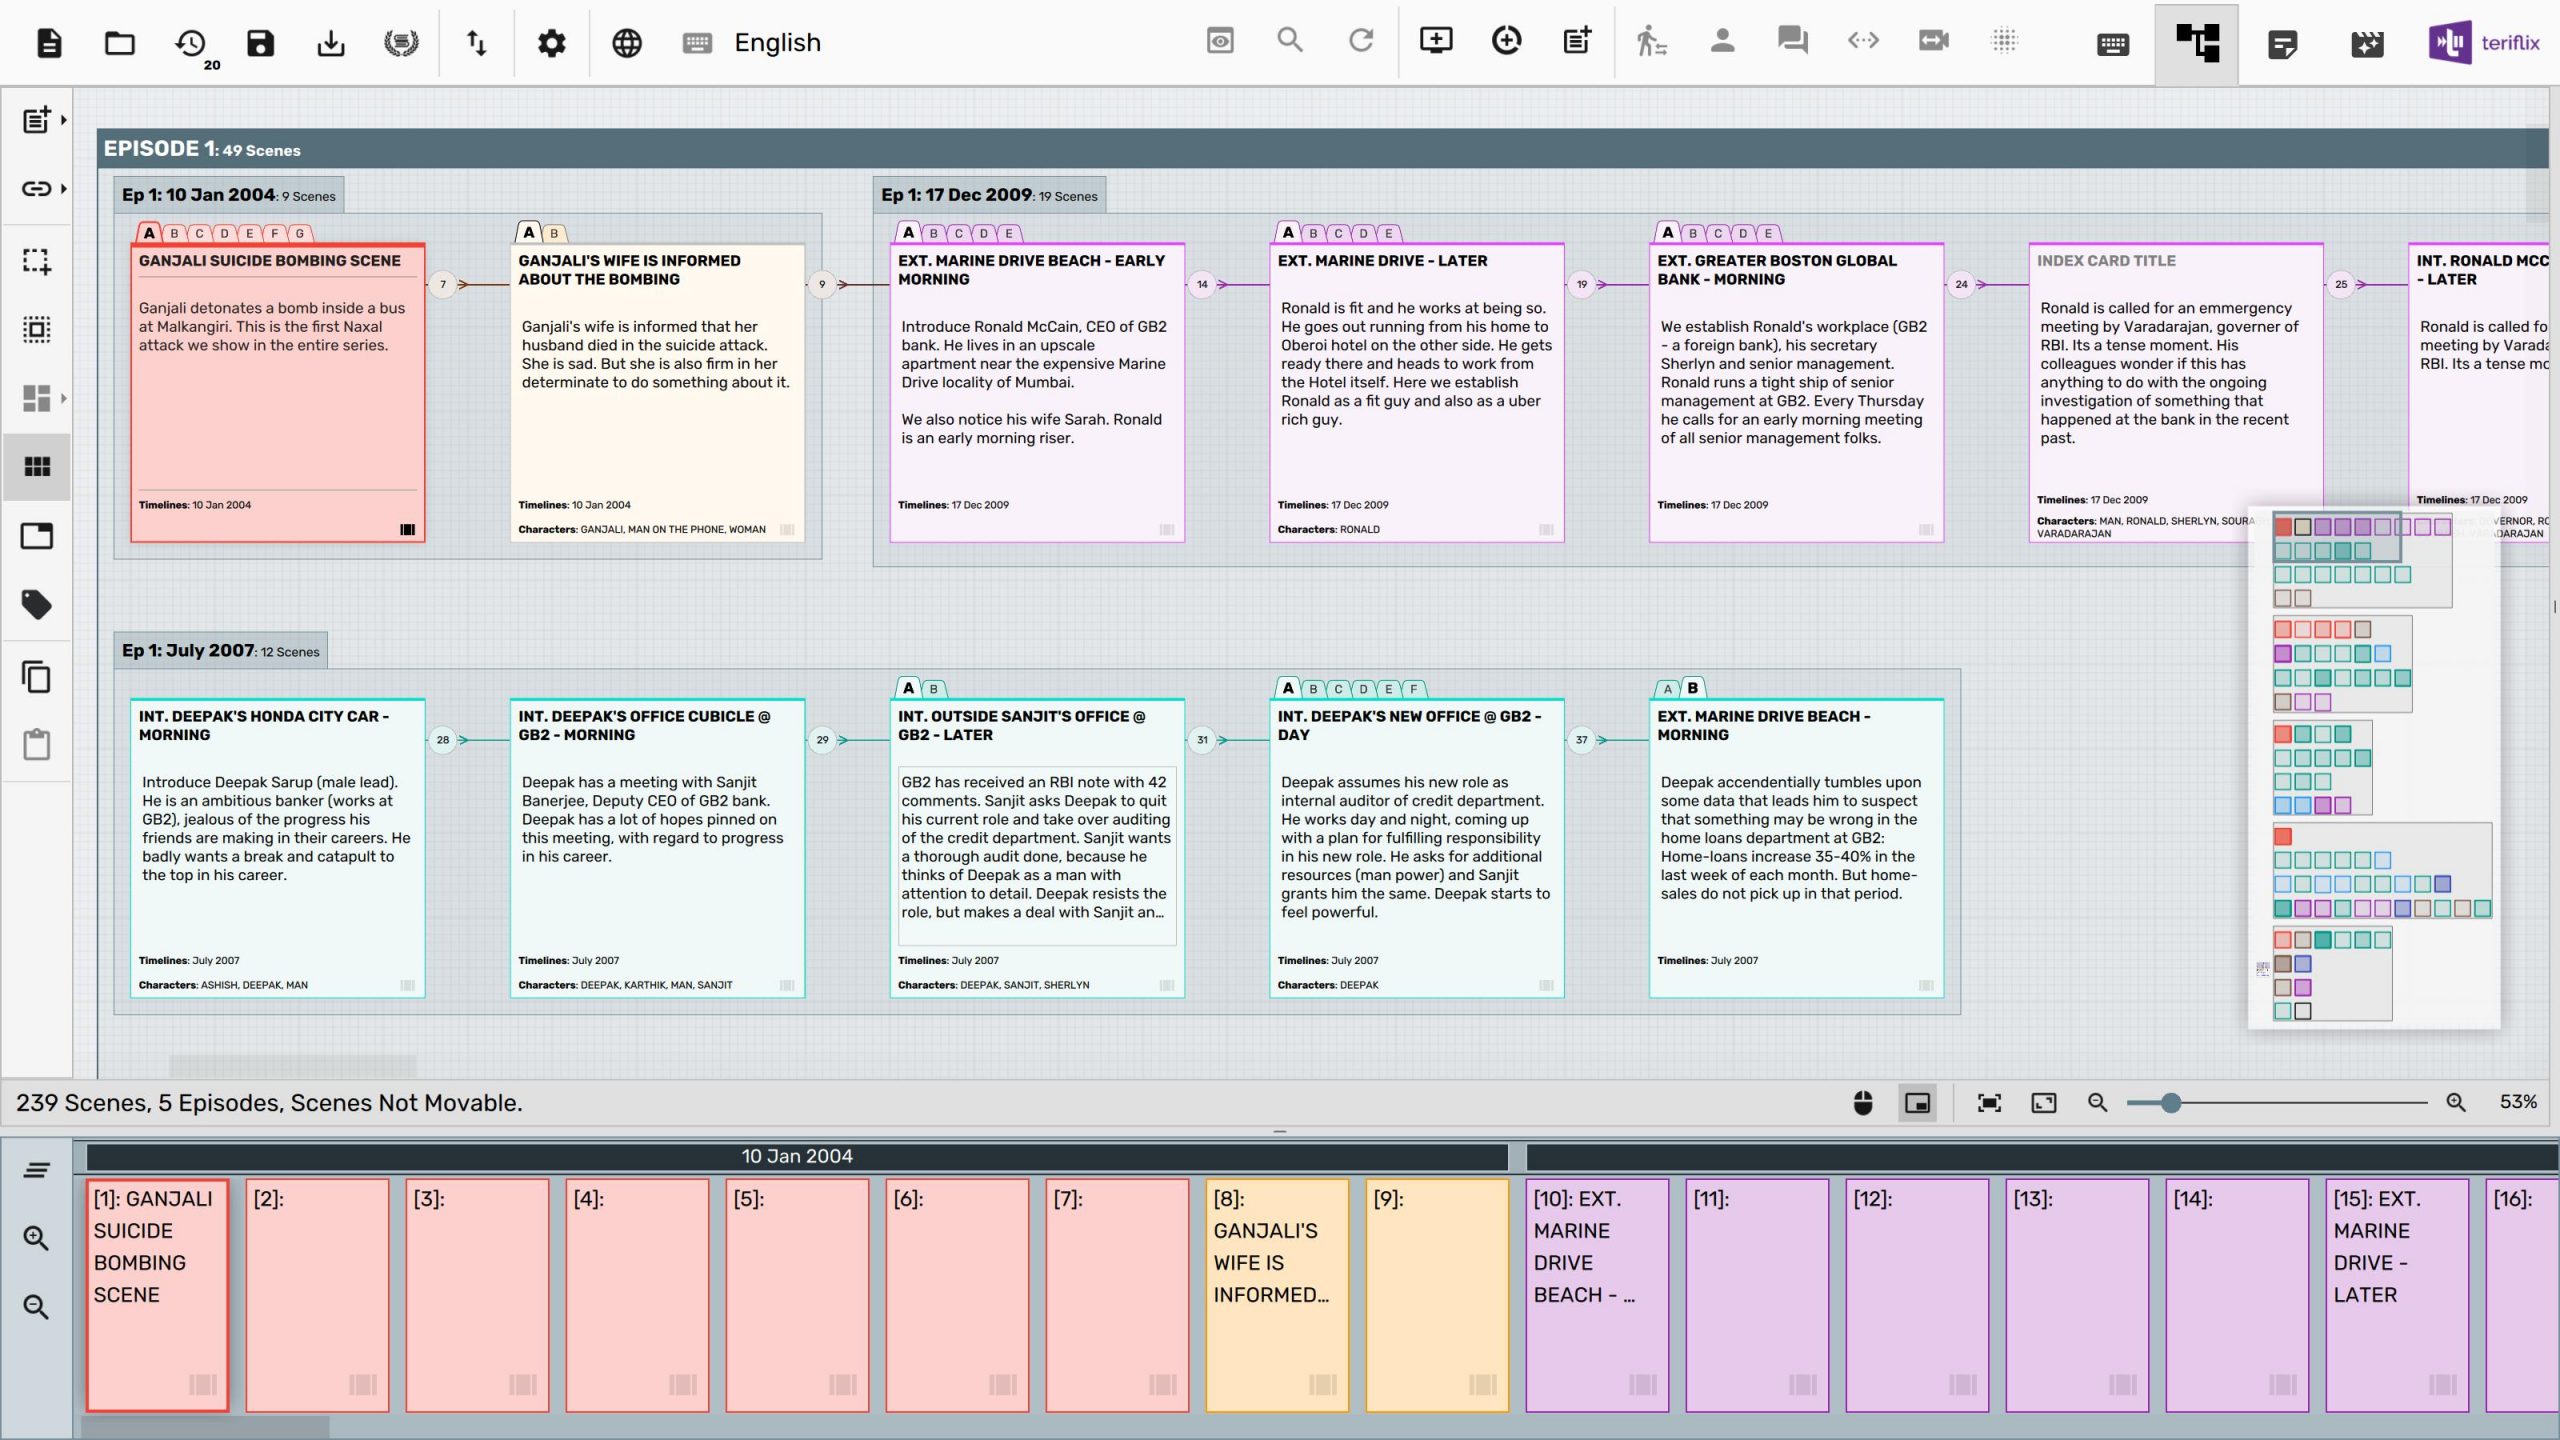
This allows you to visually see how various threads are placed and paced in your screenplay. At some point we will have a feature to filter your screenplay by a tag name, but until then you can generate a screenplay subset report with just a subset of tags.
For example, below you can see how only “July 2007” is selected in Screenplay Subset Report …
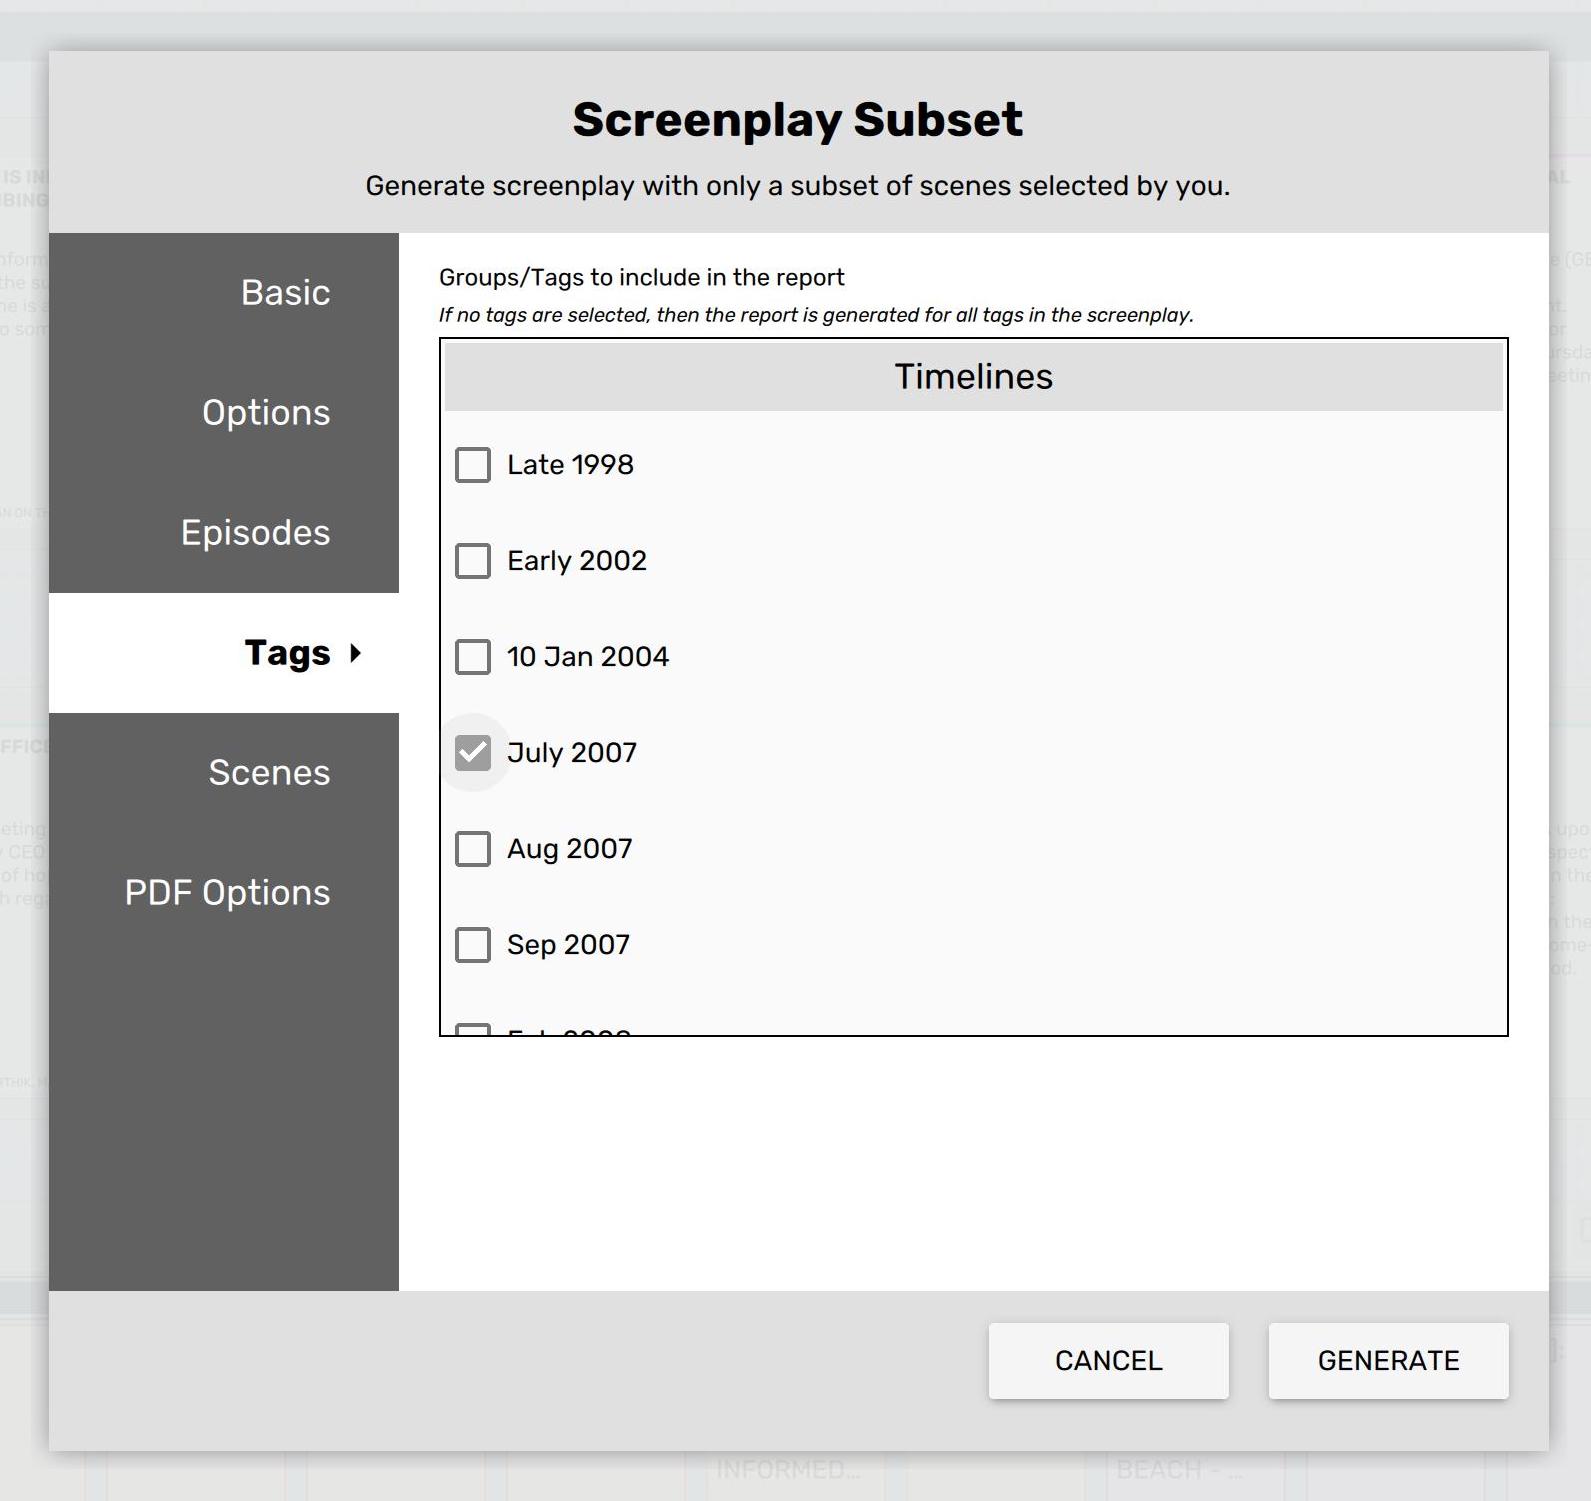
The generated PDF will only contain scenes that are tagged ‘July 2007’. By reading that PDF you will able to verify consistency of the story in ‘July 2007’ “thread” across multiple episodes.
Structure PDF Export
Once you have plotted the structure of your screenplay, you can share the Scrite document with your peers and have them review it by opening it using an installation of Scrite on their own desktops and laptops. But there is one more way in which you can share the structure canvas with your peers – it is by exporting it to PDF.
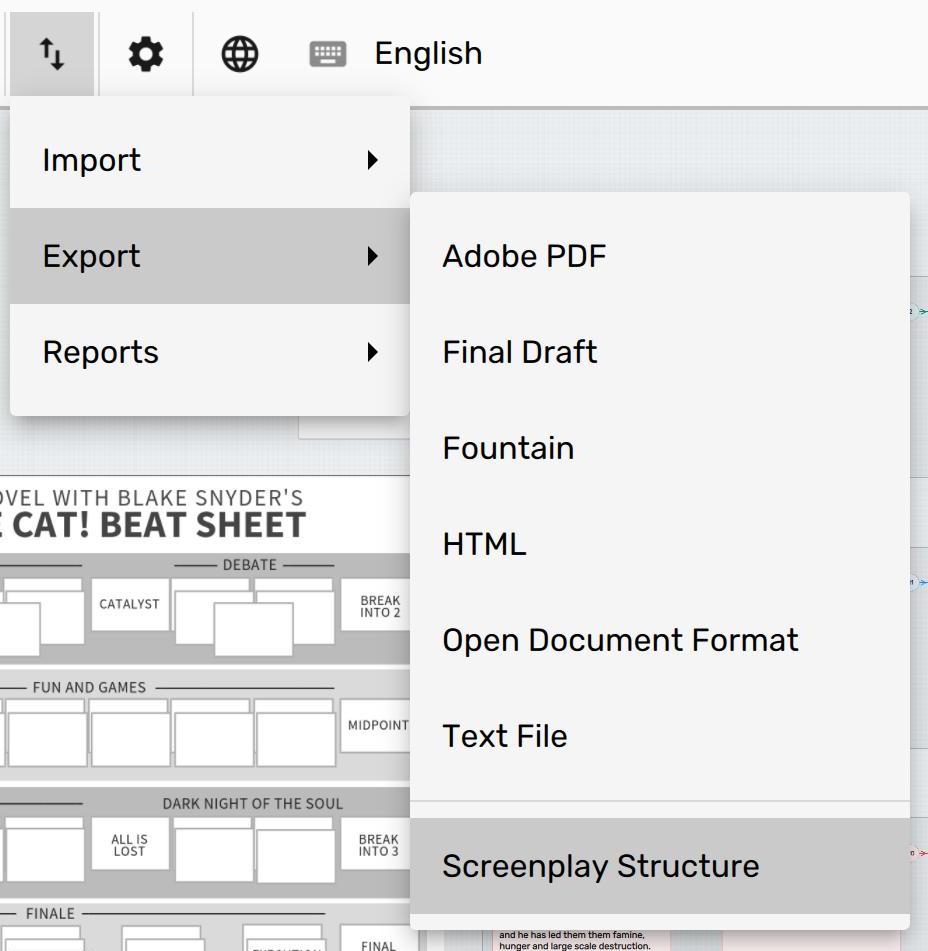
Select Export -> Screenplay Structure to export the contents of your structure canvas to a PDF.
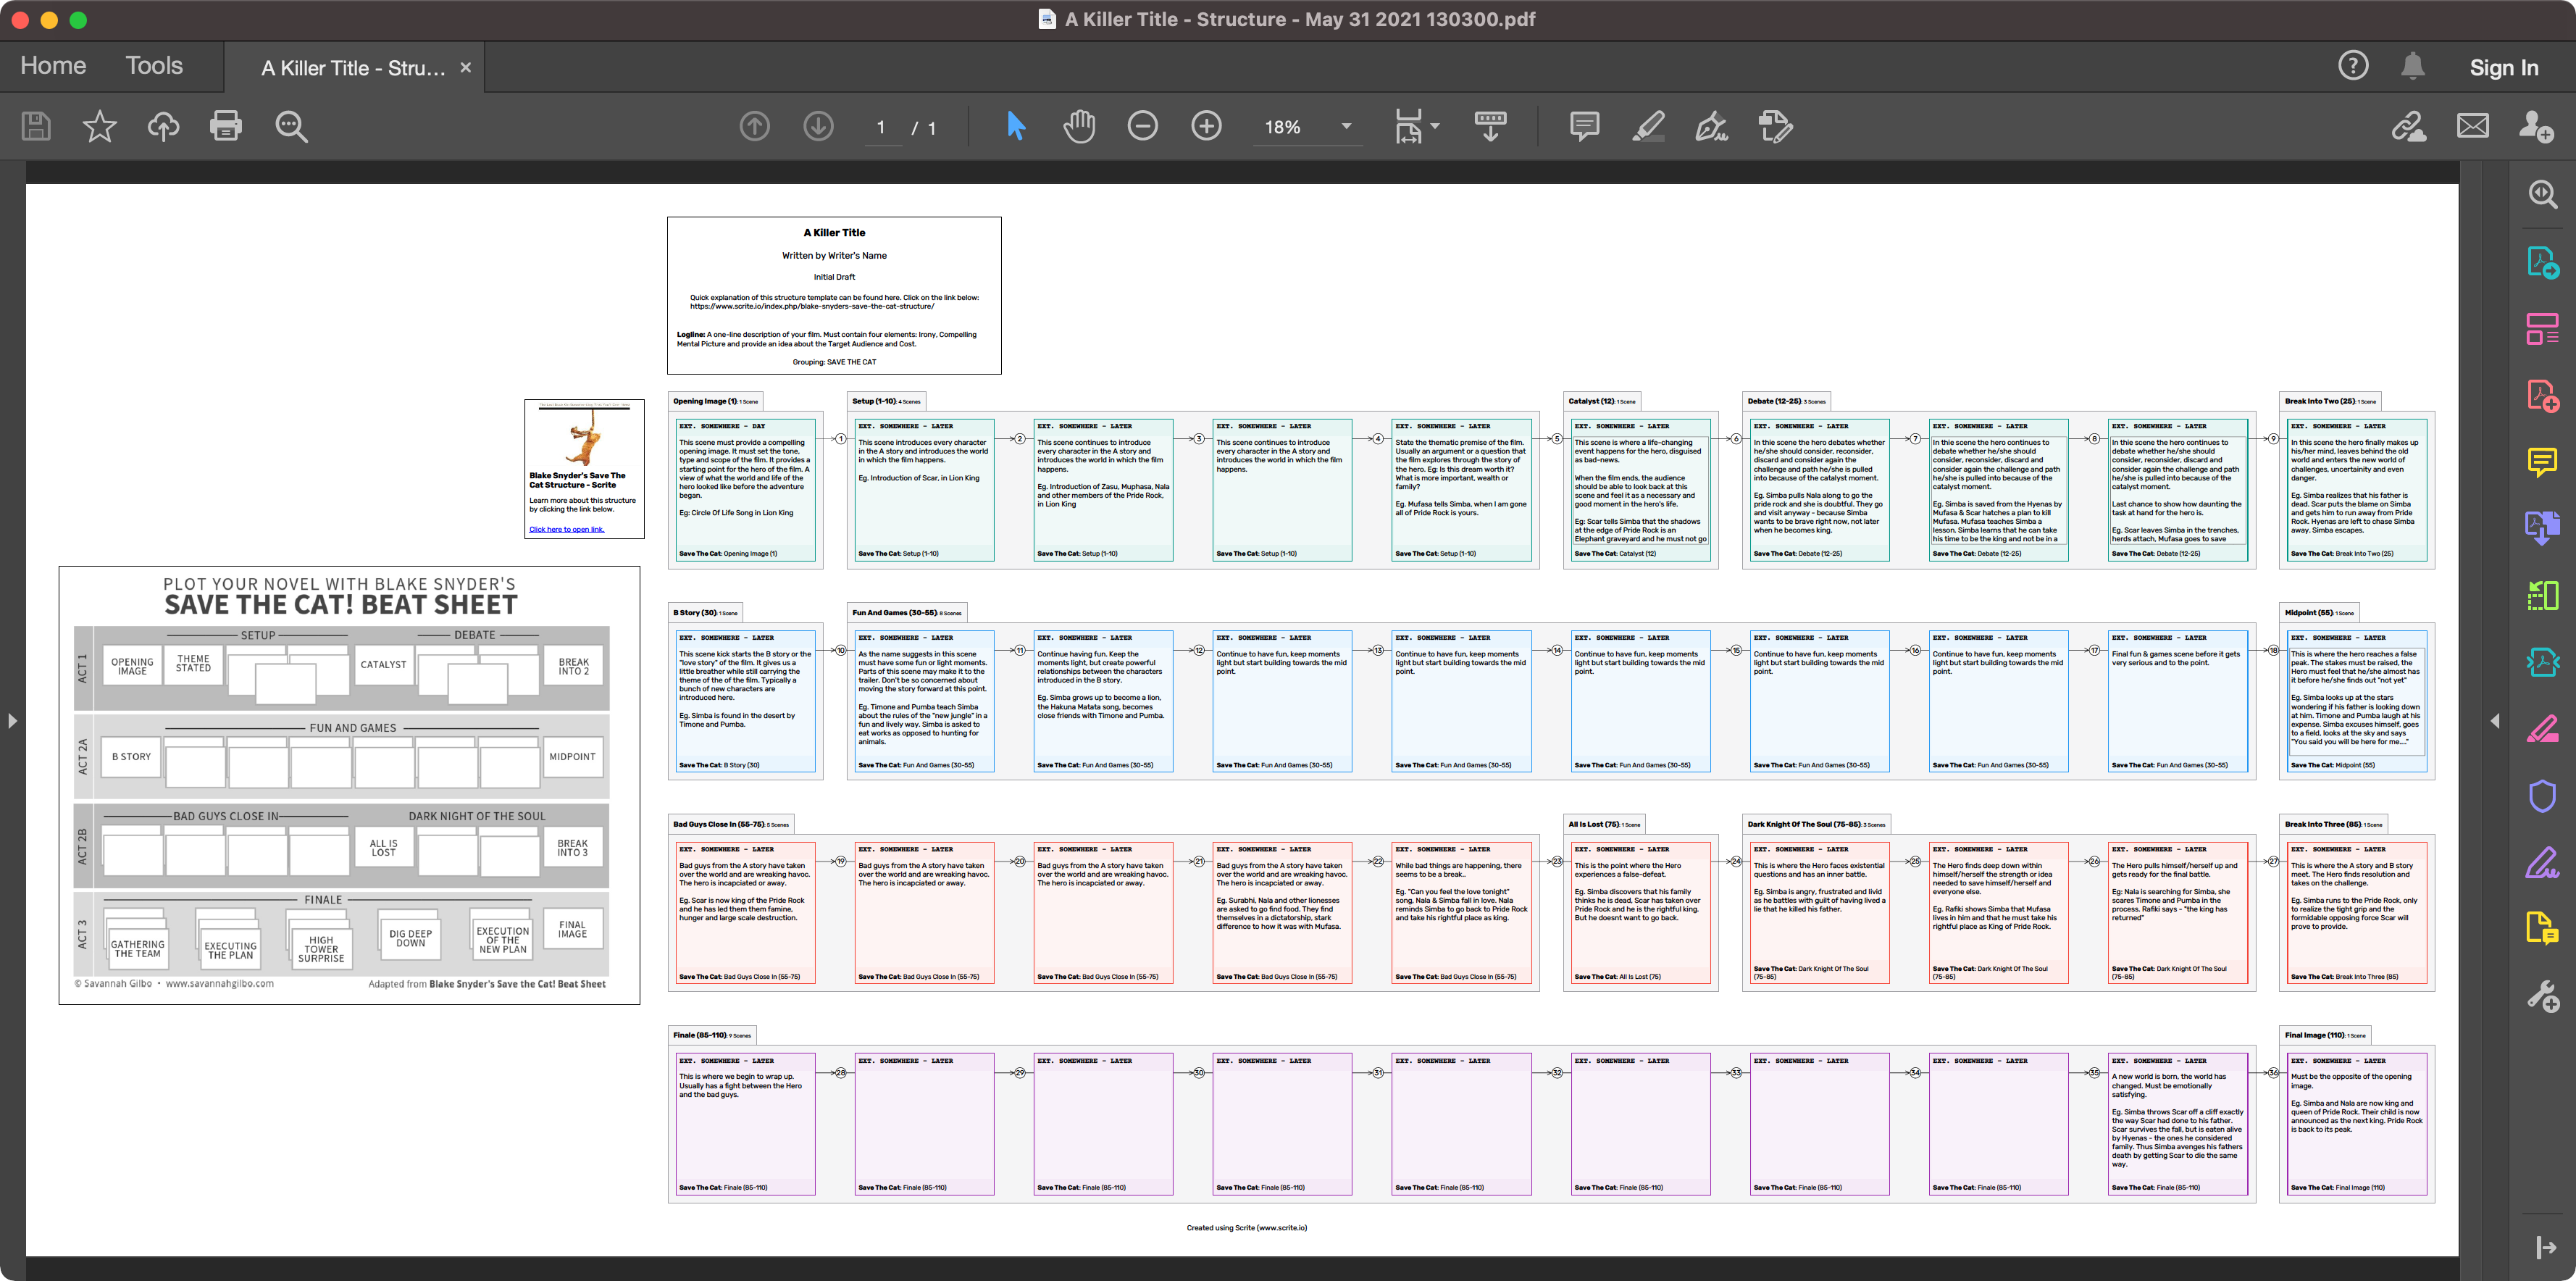
NOTE: Currently Scrite generates a single page PDF file, which is very useful to view on phones, tablets, desktops and laptops. If you want to print the generated PDF, then we recommend that you download Adobe Reader DC and then use its poster printing facility to break the single page into multiple tiled pages.
Using Annotations
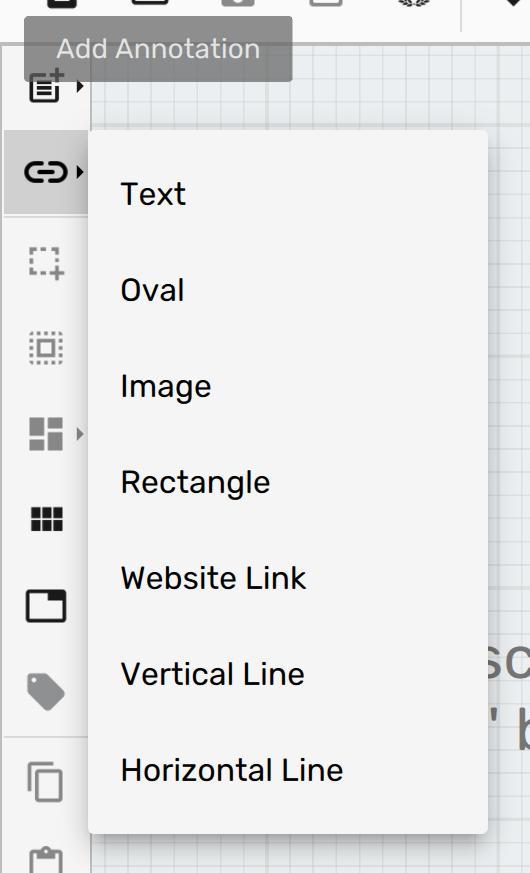
On the Structure Canvas you can add annotations to aid and expand on the visual capture of your screenplay structure. Annotations can be used to provide additional information on the structure canvas, above and beyond what the index cards provide. For instance, you could insert an image annotation with reference images suitable for your story. Or a URL that links to a song or reference video. Or lines to accentuate plot points in your story.
To add an annotation, simply click on the “Add Annotation” button in the toolbar attached to the structure canvas, pick an annotation and then click on an empty area in the canvas.
Below is a screenshot where we have added a Website Link Annotation.
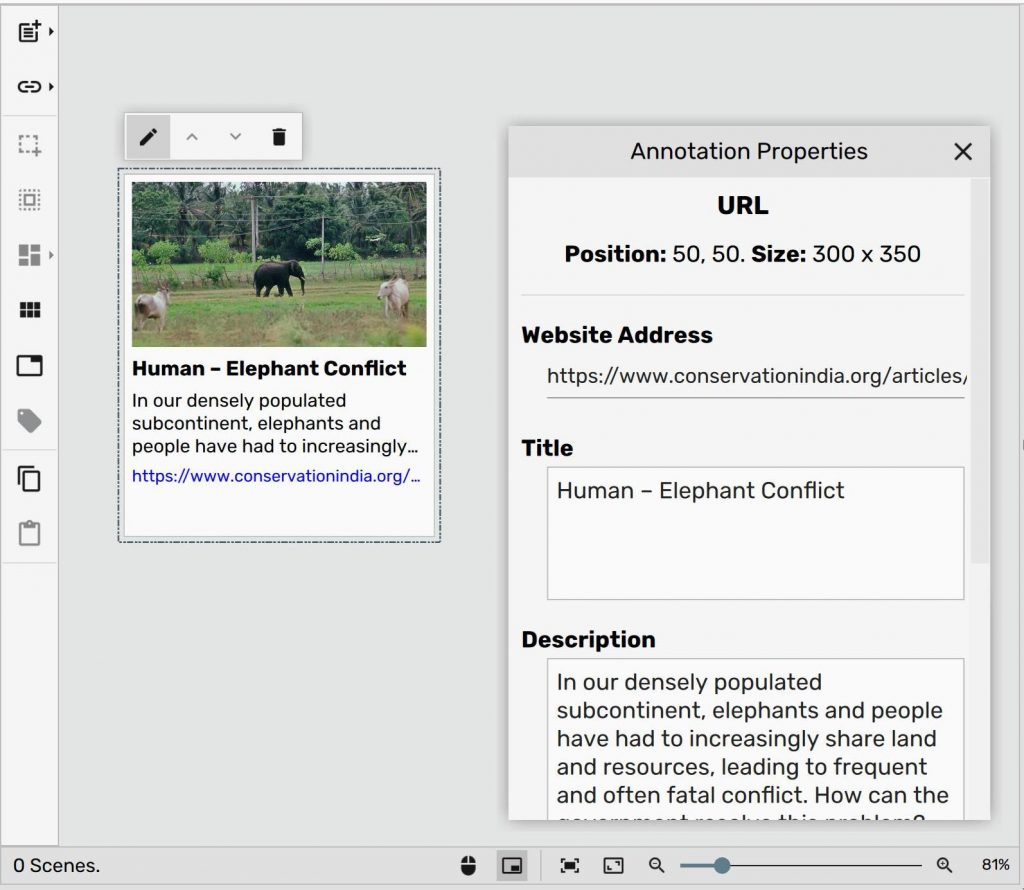
You can configure annotation properties by using the controls provided in the Annotation Properties dock widget. You can move annotations just like you can move index cards.
What’s Next?
In the next article we show you how to make use of the Scriptalay to download screenplays & templates in Scrite format.