Since the first beta release of Scrite back in April 2020, a built-in transliteration mechanism was baked into the app. Many users complained that the transliteration was not as easy as the ML based transliteration services that people are used to like Google Translate and even Microsoft’s own inbuilt features in Windows 10.
We did integrate Google Translate with the app, but never released it. Our users prefer to work on their screenplays in a way that no one (including Google) becomes aware of what they are writing. Offering a Google Translate service meant looping every keystroke made on Scrite through our servers and Google servers. This was something we never wanted to do.
After researching a lot of APIs, we finally decided to work closely with Input Methods provided by the operating systems for a better typing experience.
Input Methods
Operating systems allow you to configure input methods for different languages. While you could always use custom input methods with Scrite before, with 0.4.13 we have made it easy to explicitly integrate specific languages with input methods offered by your operating system. The newly added Transliteration page in Application Settings, offers you this option.
This article explains how you can use this new feature in Scrite.
Configuring Input Methods on macOS and Windows 10
On macOS you can go to System Preferences > Languages > Input Sources to add input methods for languages of your choice. Watch the following 30 second video to see how its done.
On, Windows you can go to Settings > Languages and add additional input methods. Watch the following 60 second video to see how its done.
While macOS supports a phonetic input method only for Hindi, Windows offers phonetic input methods for almost every language that Scrite supports.
Configuring Scrite to use the Input Methods
You can now configure Scrite such that it uses these newly added input methods for specific languages.
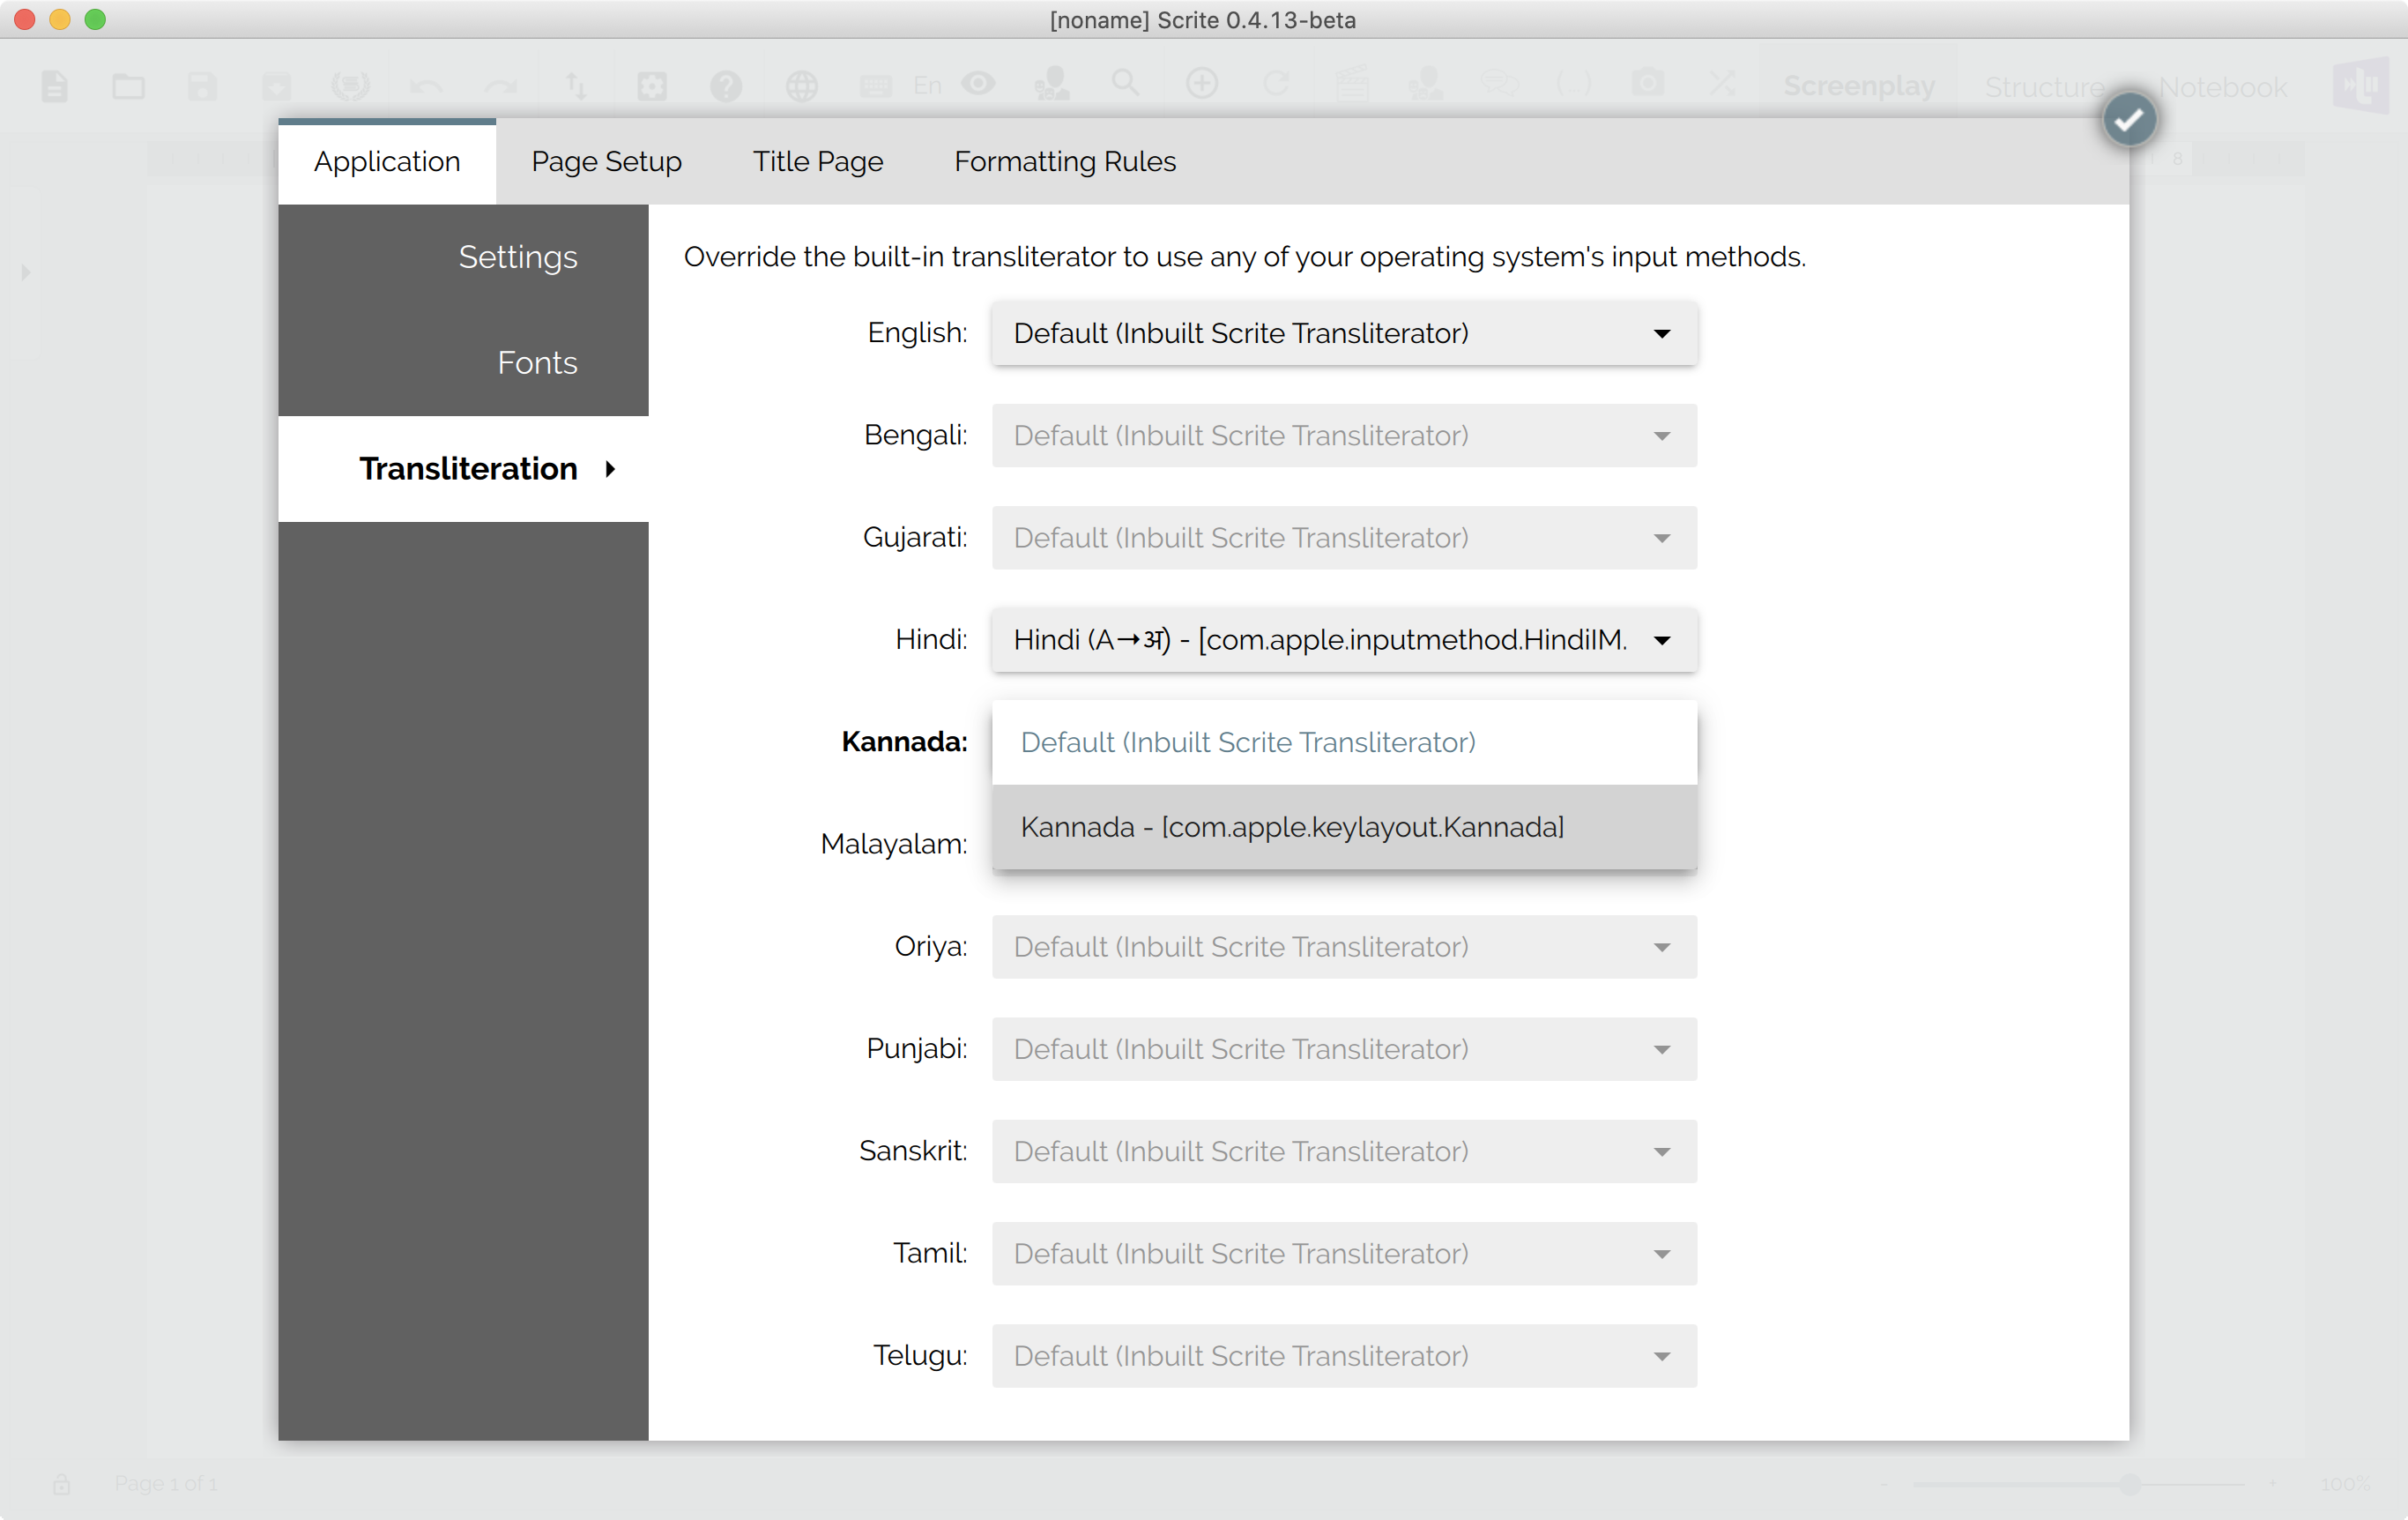
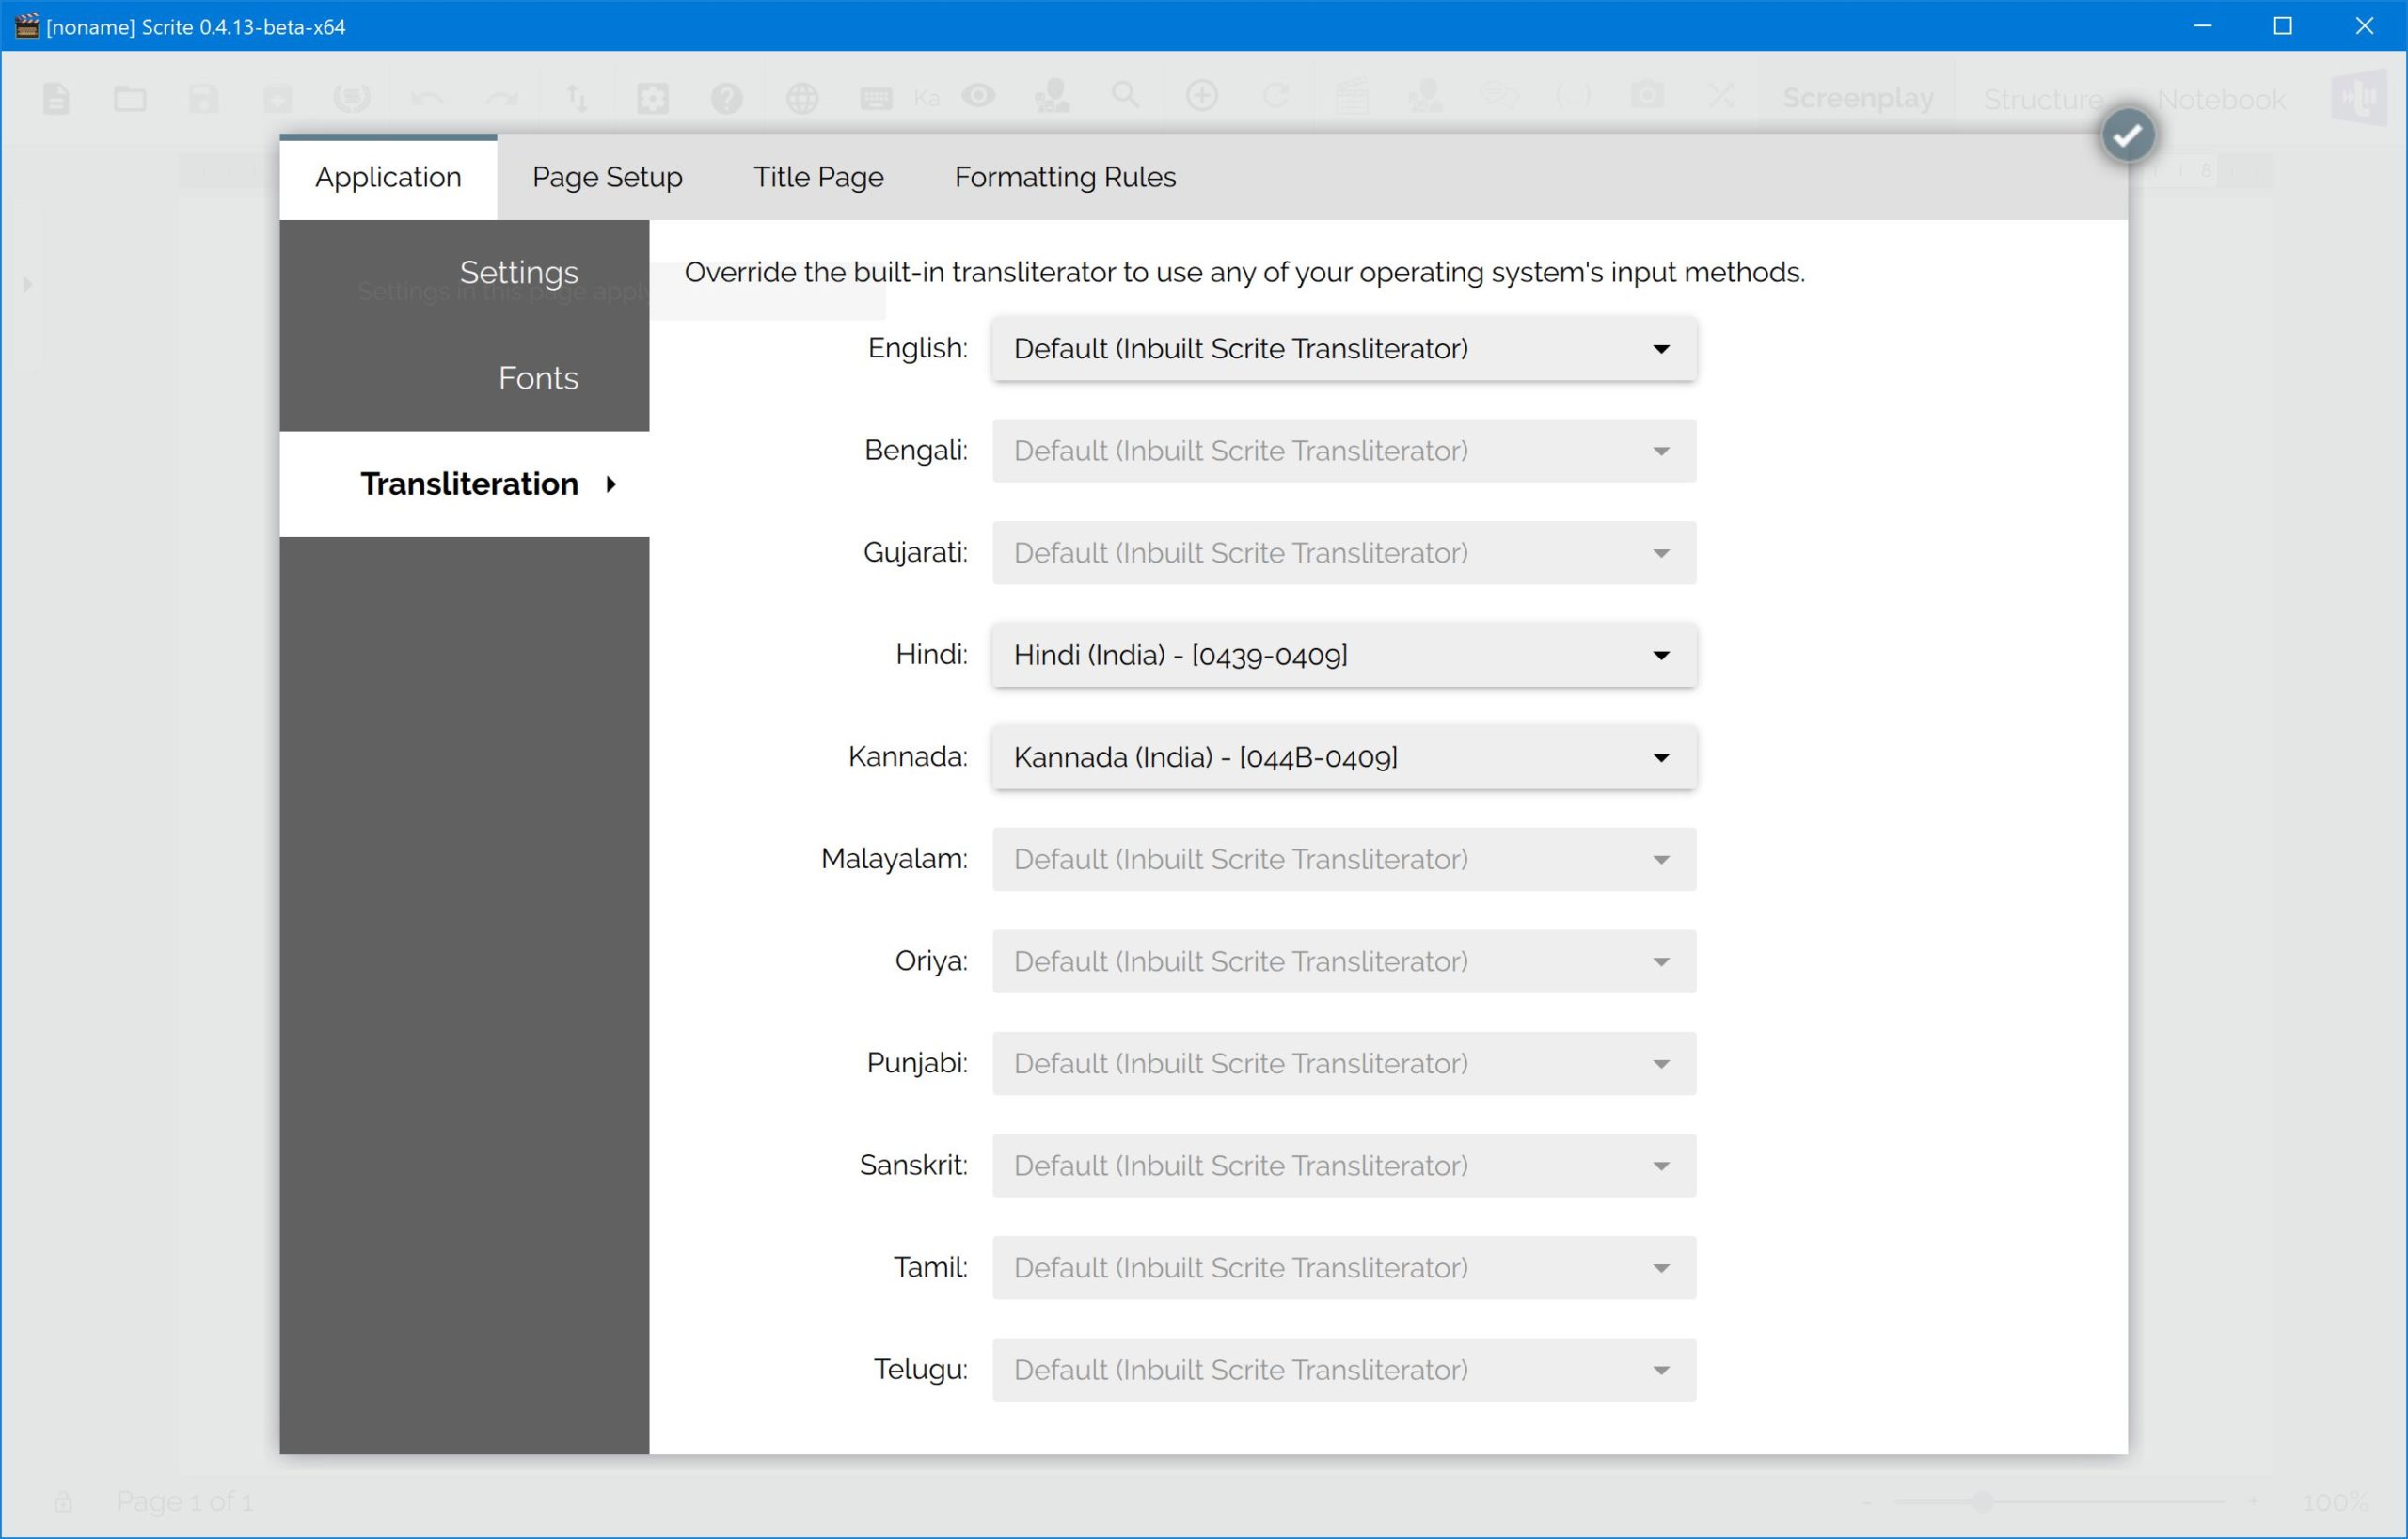
Open Settings in Scrite and switch to the Transliteration tab. Here you can enable transliteration settings for each language.
Since we have only added Kannada and Hindi input sources in the OS, only the combo boxes for these languages are enabled. Others (apart from English) appear disabled.
The dialog box looks exactly the same on Windows 10, except that the input method IDs are shown differently on Windows.
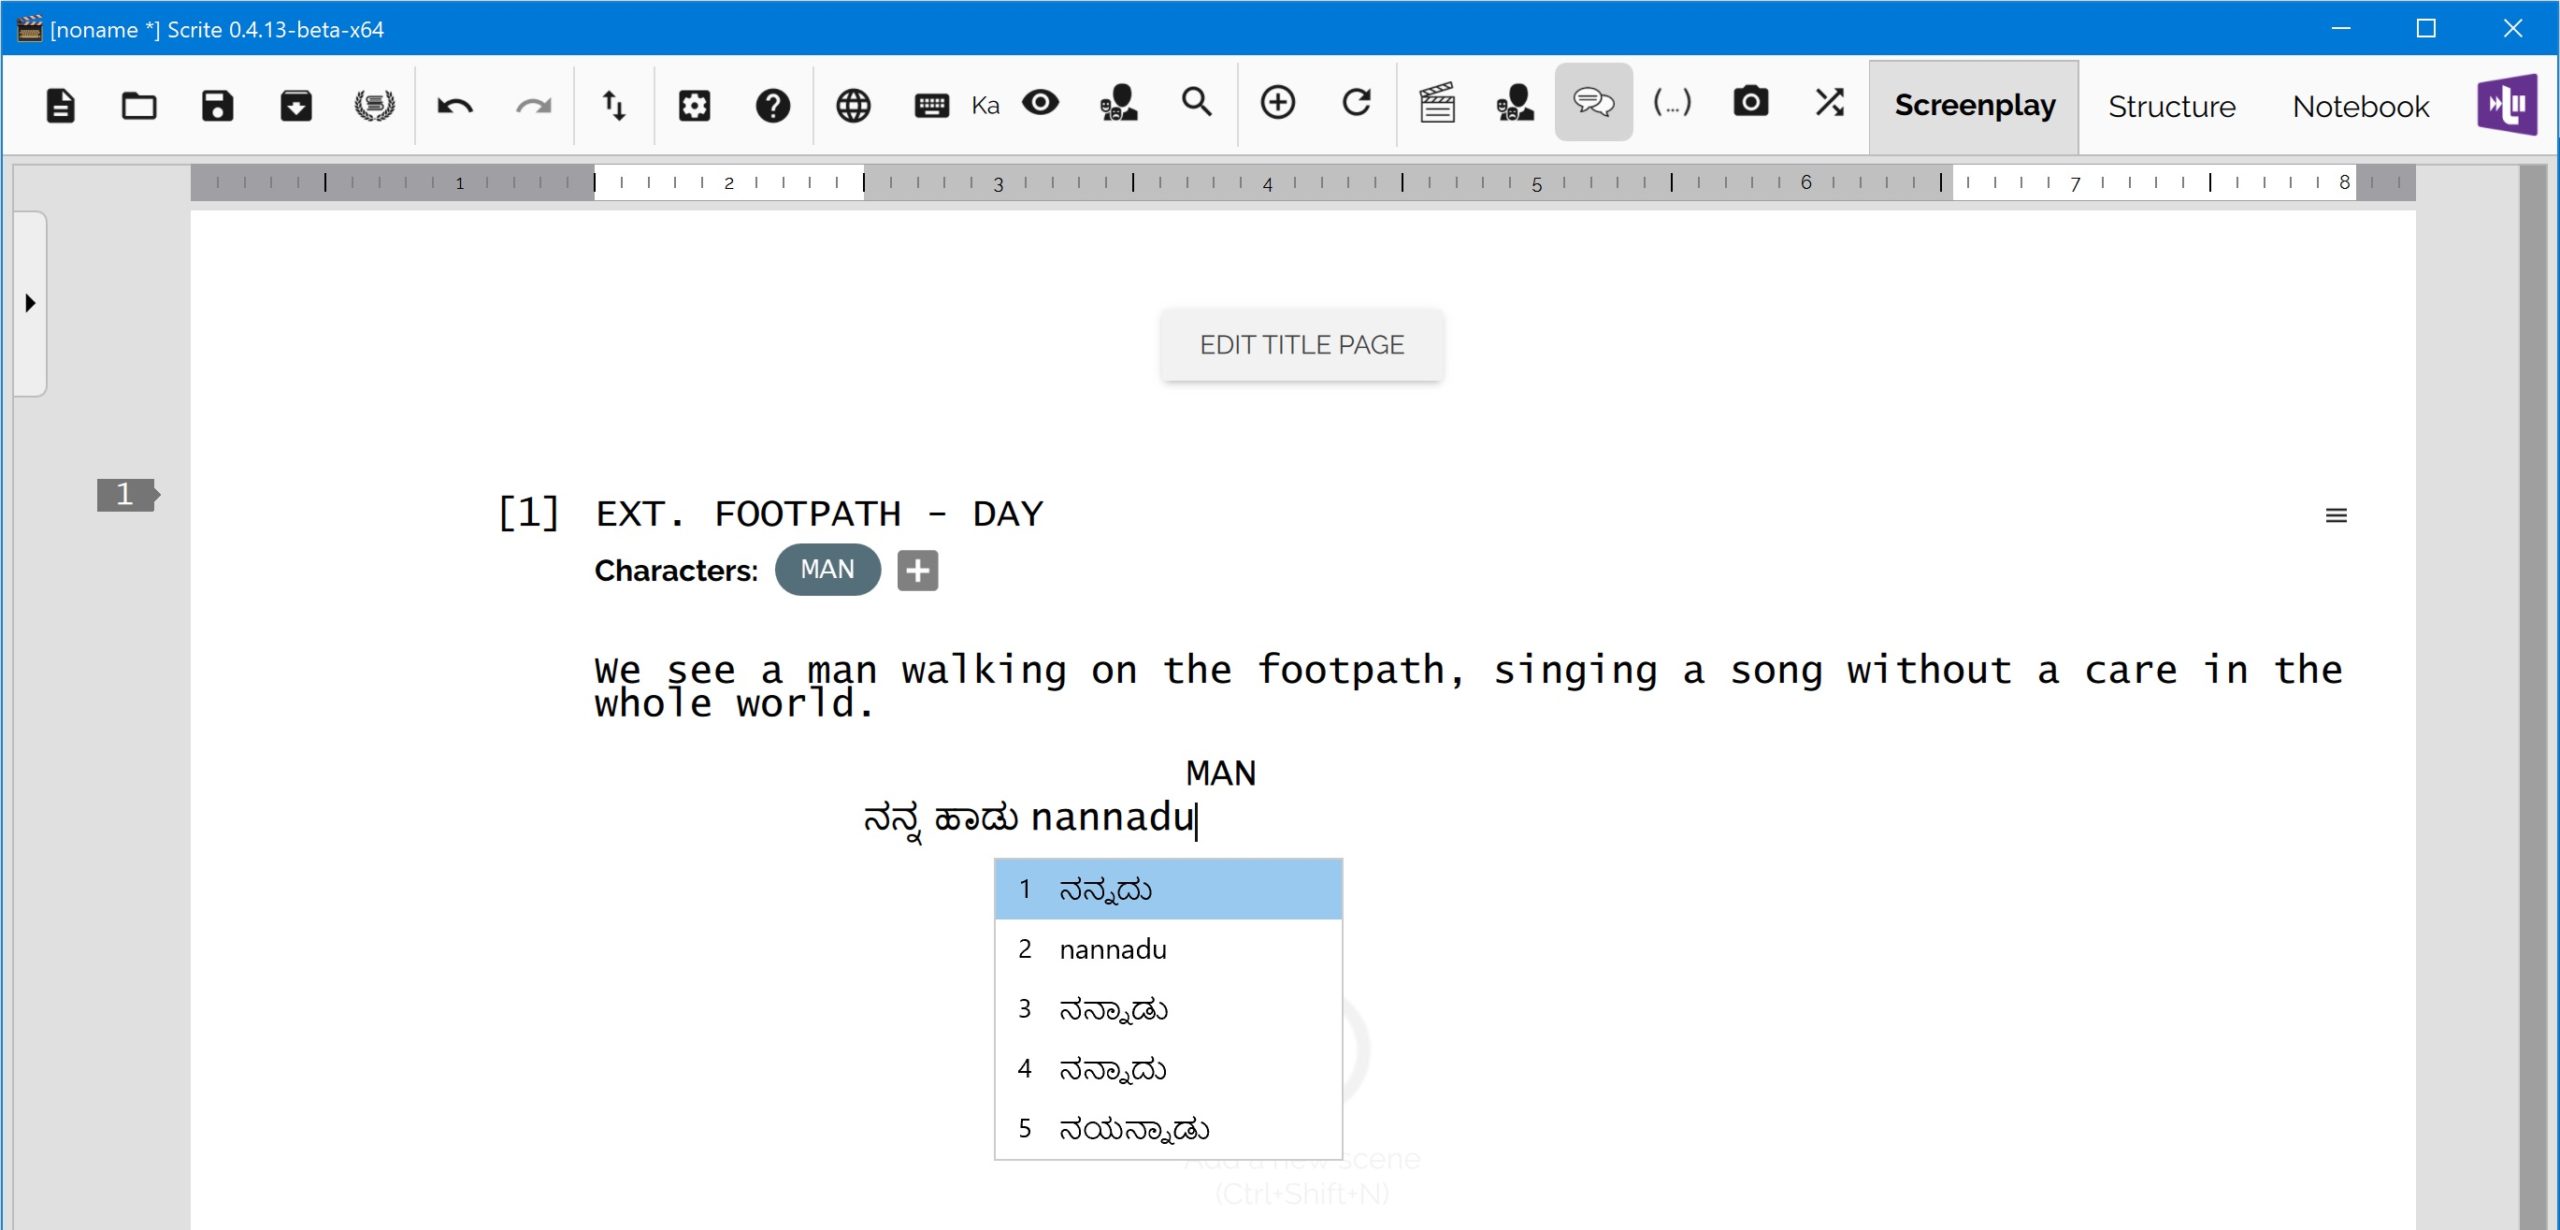
Once configured, Scrite will now automatically switch to the Input Method provided by your operating system whenever you switch to the languages for which an input method is mapped.
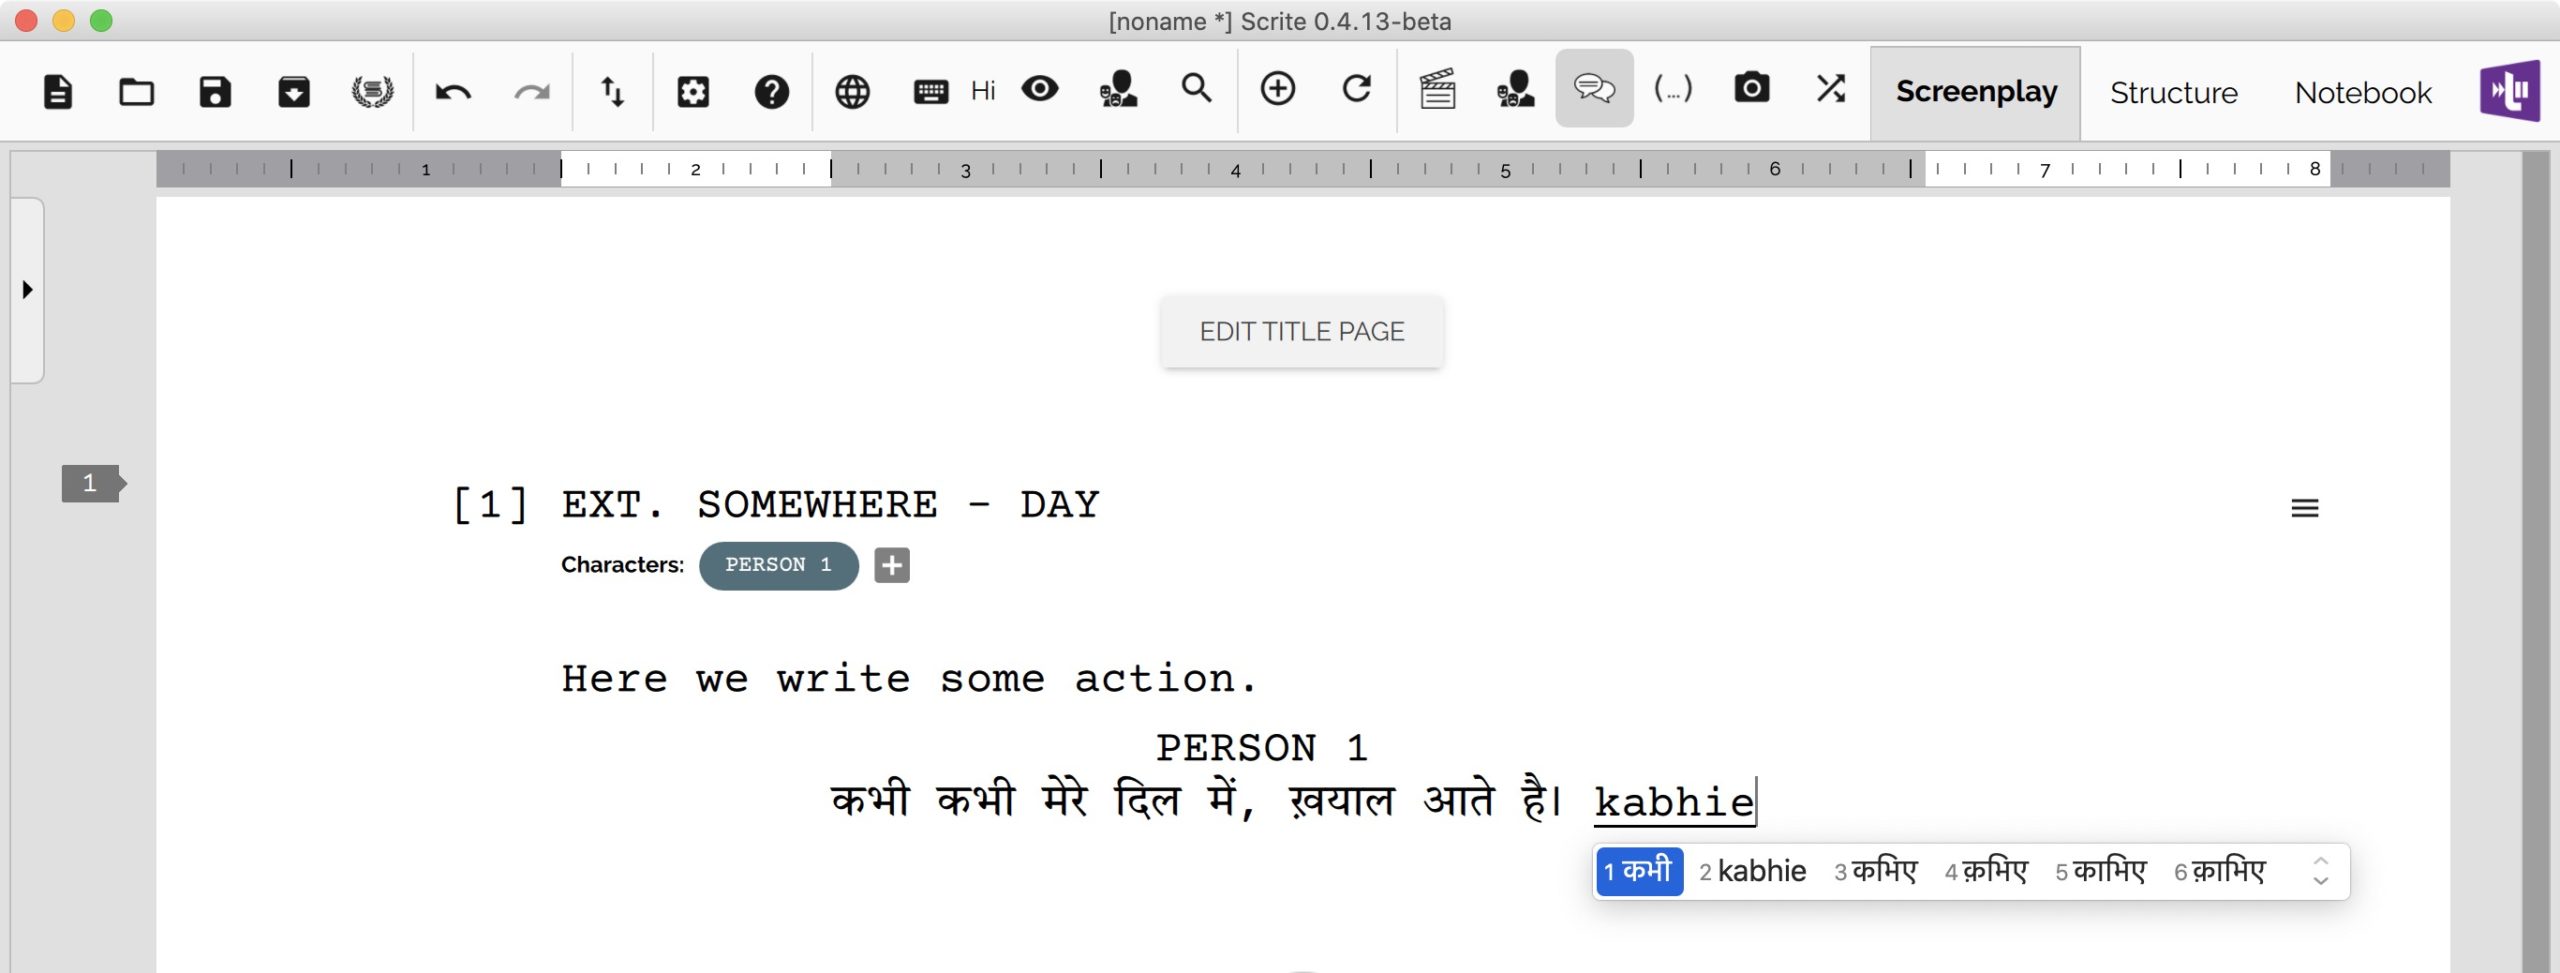
Write dialogues in your native language
For several updates now, Scrite allows you to configure dialogues (or for that matter any paragraph type) in a specific language. Simply head over to Settings > Formatting Rules tab and switch to Dialogue page in it.
Notice the Language option in this page.
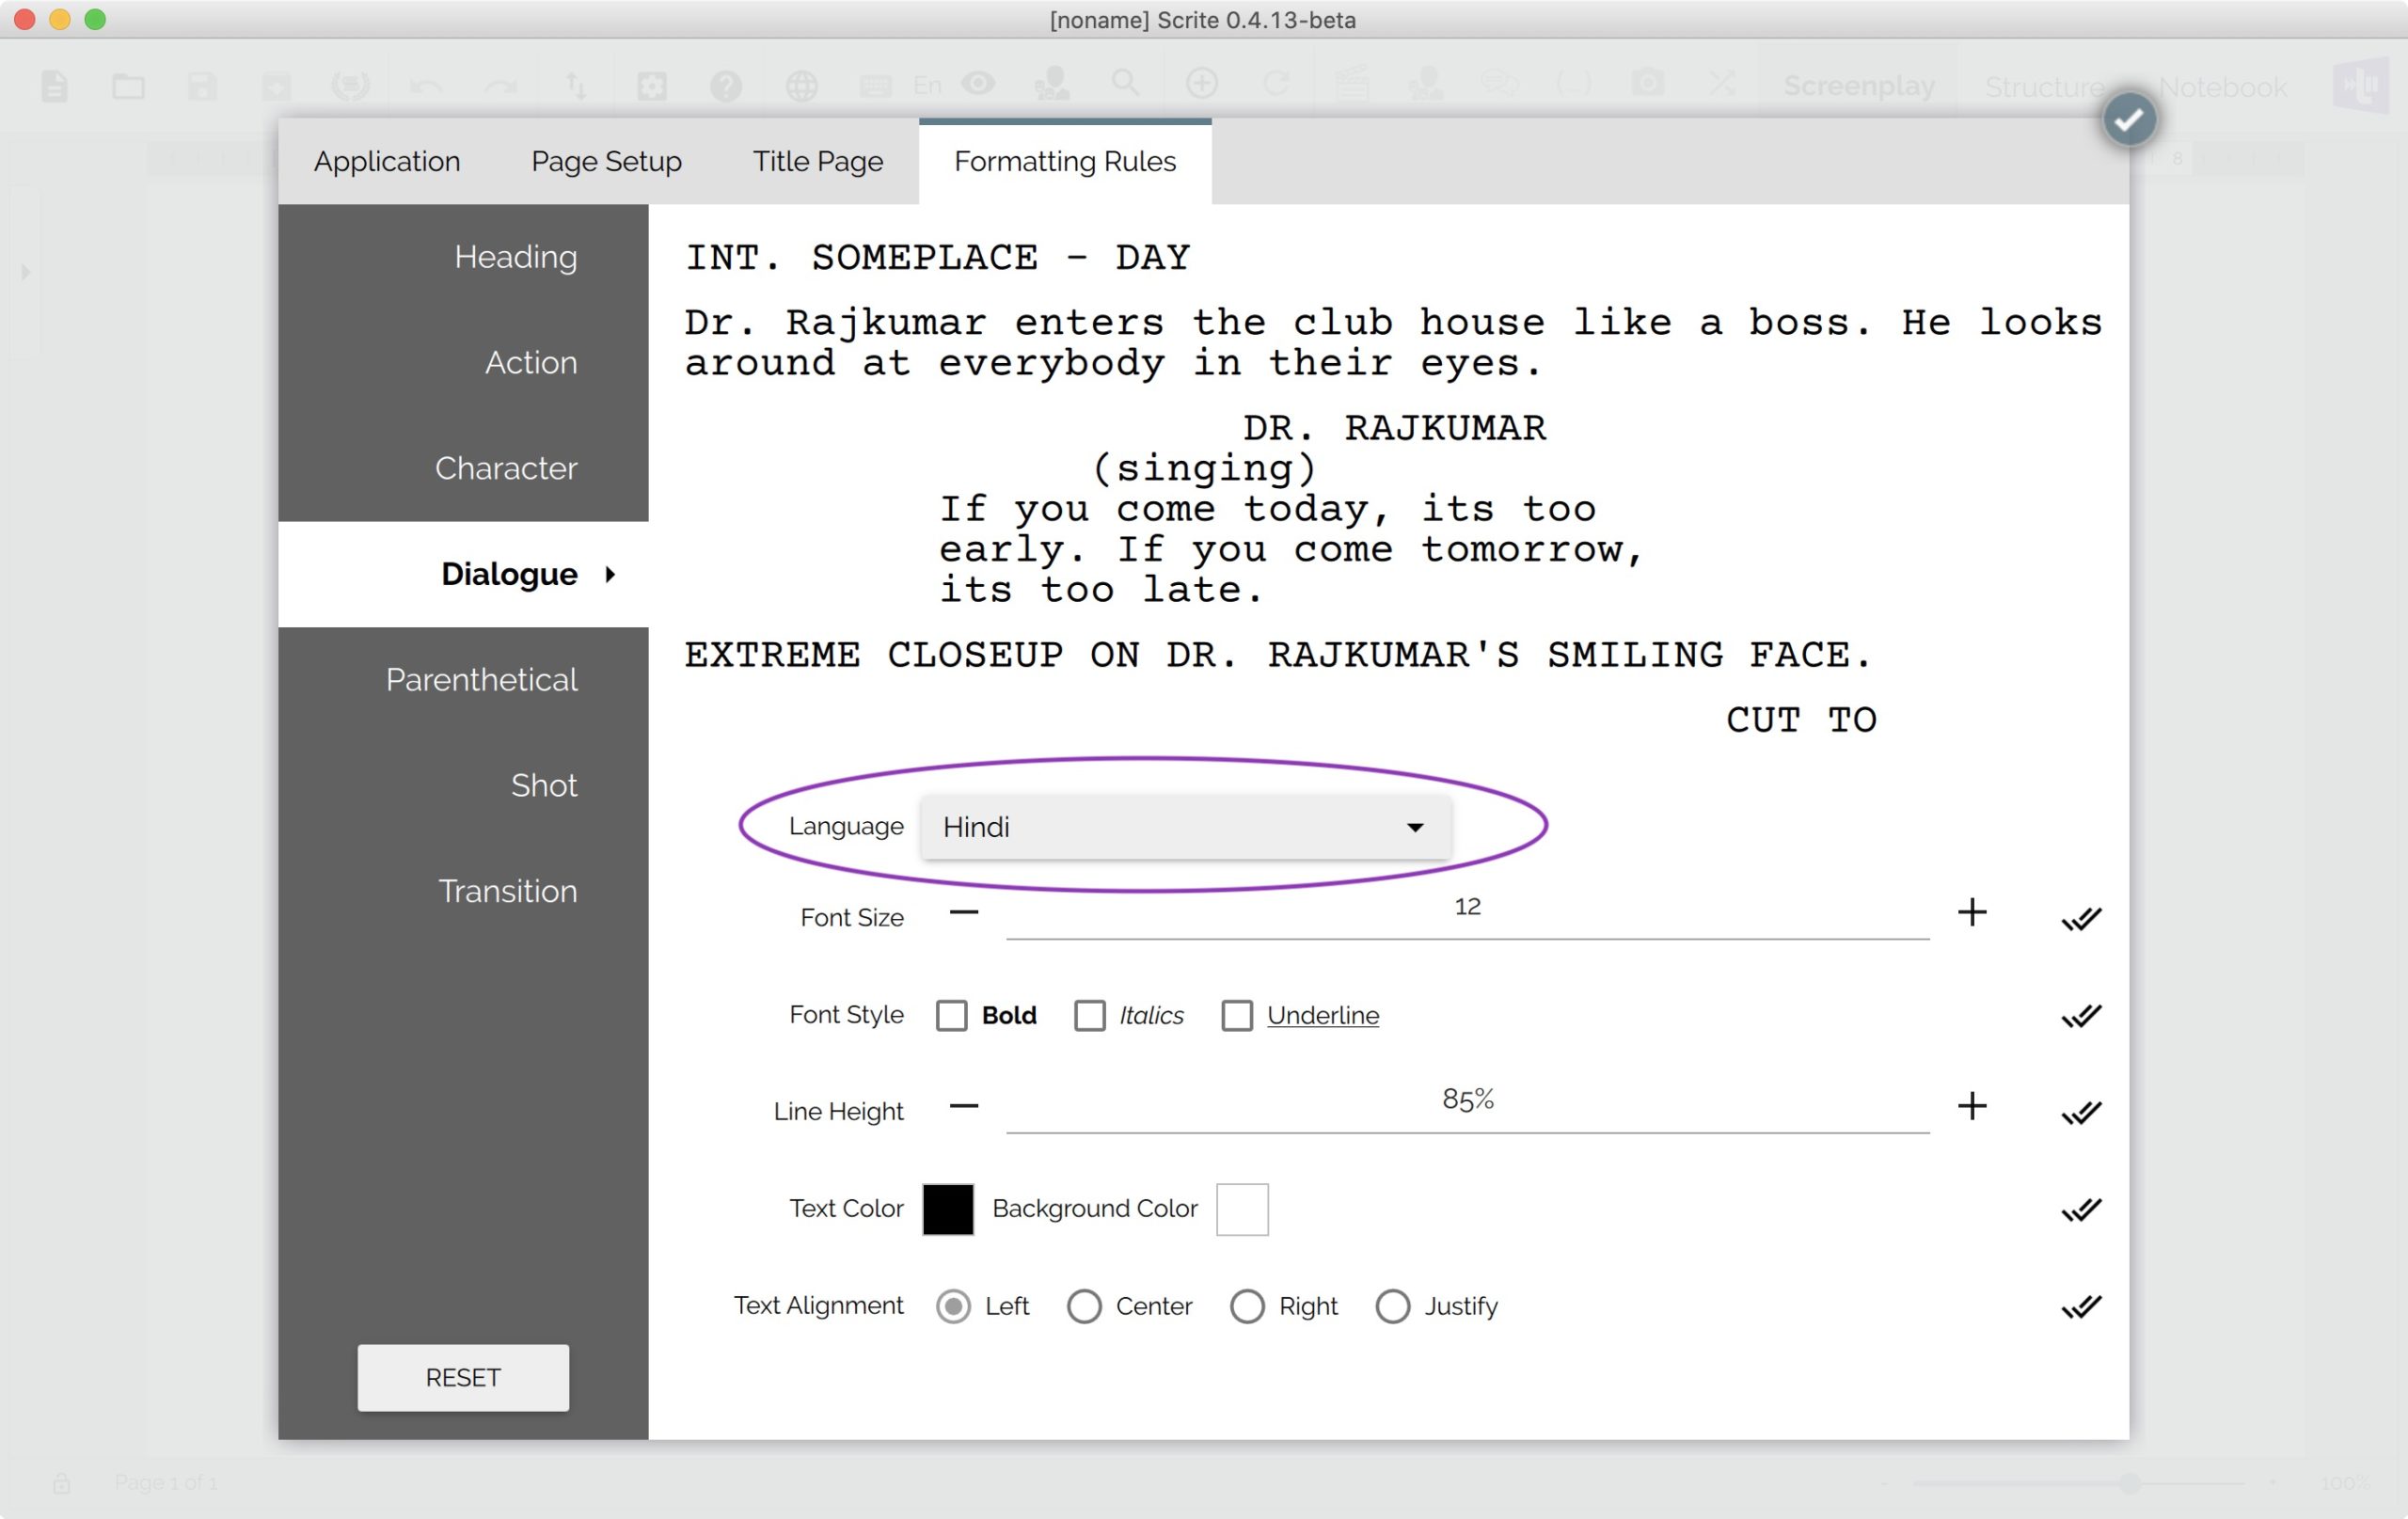
Here we have configured Language to Hindi. Whenever a dialogue paragraph is created, the language now automatically switches to Hindi.
With these new features, we believe that you will enjoy writing your screenplays in Scrite even more.
You can install or upgrade to 0.4.13 to try out this feature.