We assume that you have downloaded Scrite and have now launched the app with an intention to start writing. This guide walks you through the UI until you create your first really simple screenplay.
Table Of Contents
Scene-Centric Approach
Most screenwriting apps treat a screenplay like a series of pages, but Scrite treats it like a series of scenes—because that’s how movies are made. Instead of focusing on page counts, Scrite helps you structure and visualize your story through its scene-centric UI.
Scrite is not a direct replacement for traditional screenwriting apps like Final Draft, Celtx, or Arc Studio. It doesn’t mimic the typewriter-based, page-centric approach these apps follow. Instead, it reimagines screenplay writing by focusing on scenes as the fundamental unit of storytelling.
Screenwriting apps have traditionally mirrored typewriters, where each page roughly translates to one minute of screen time—a format deeply rooted in the industry. While page count remains important, Scrite shifts the focus to scenes because that’s how filmmakers think.
In Scrite, you don’t write with pages in mind—you build your screenplay scene by scene. This approach makes it easier to structure your narrative, see relationships between different scenes, and navigate your story organically. Scrite incorporates familiar elements from traditional apps, but presents them in a way that prioritizes scene flow rather than rigid page formatting.
By embracing this scene-first mindset, Scrite offers a unique writing experience that better aligns with the way stories are conceived, developed, and brought to life.
Scrite still supports industry standards but helps writers think in scenes first.
Page-Centric Apps
Scrite’s Scene-Centric Approach
Think in pages
Think in scenes
Screenplay length = page count
Screenplay length = scene flow
Mimics typewriters
Mimics filmmaking structure
Formatting = aligned with industry standard
Formatting = aligned with industry standard
Navigation = scroll through pages
Navigation = jump between scenes
Supported Platforms
Scrite is currently a desktop-only app, which means you can install and use the app on desktops and laptops that run Windows, macOS or Linux OS. As of writing Scrite is not available for tablets and mobile phones, thought we would like to support them at some point in the future.
If you plan to write using your desktop or laptop, then head to the downloads section and download a copy of Scrite right away.
NOTE: Please take a moment to read installation instructions in the downloads page for Windows, macOS and Linux to understand the correct way to install Scrite on those platforms.
Creating your account
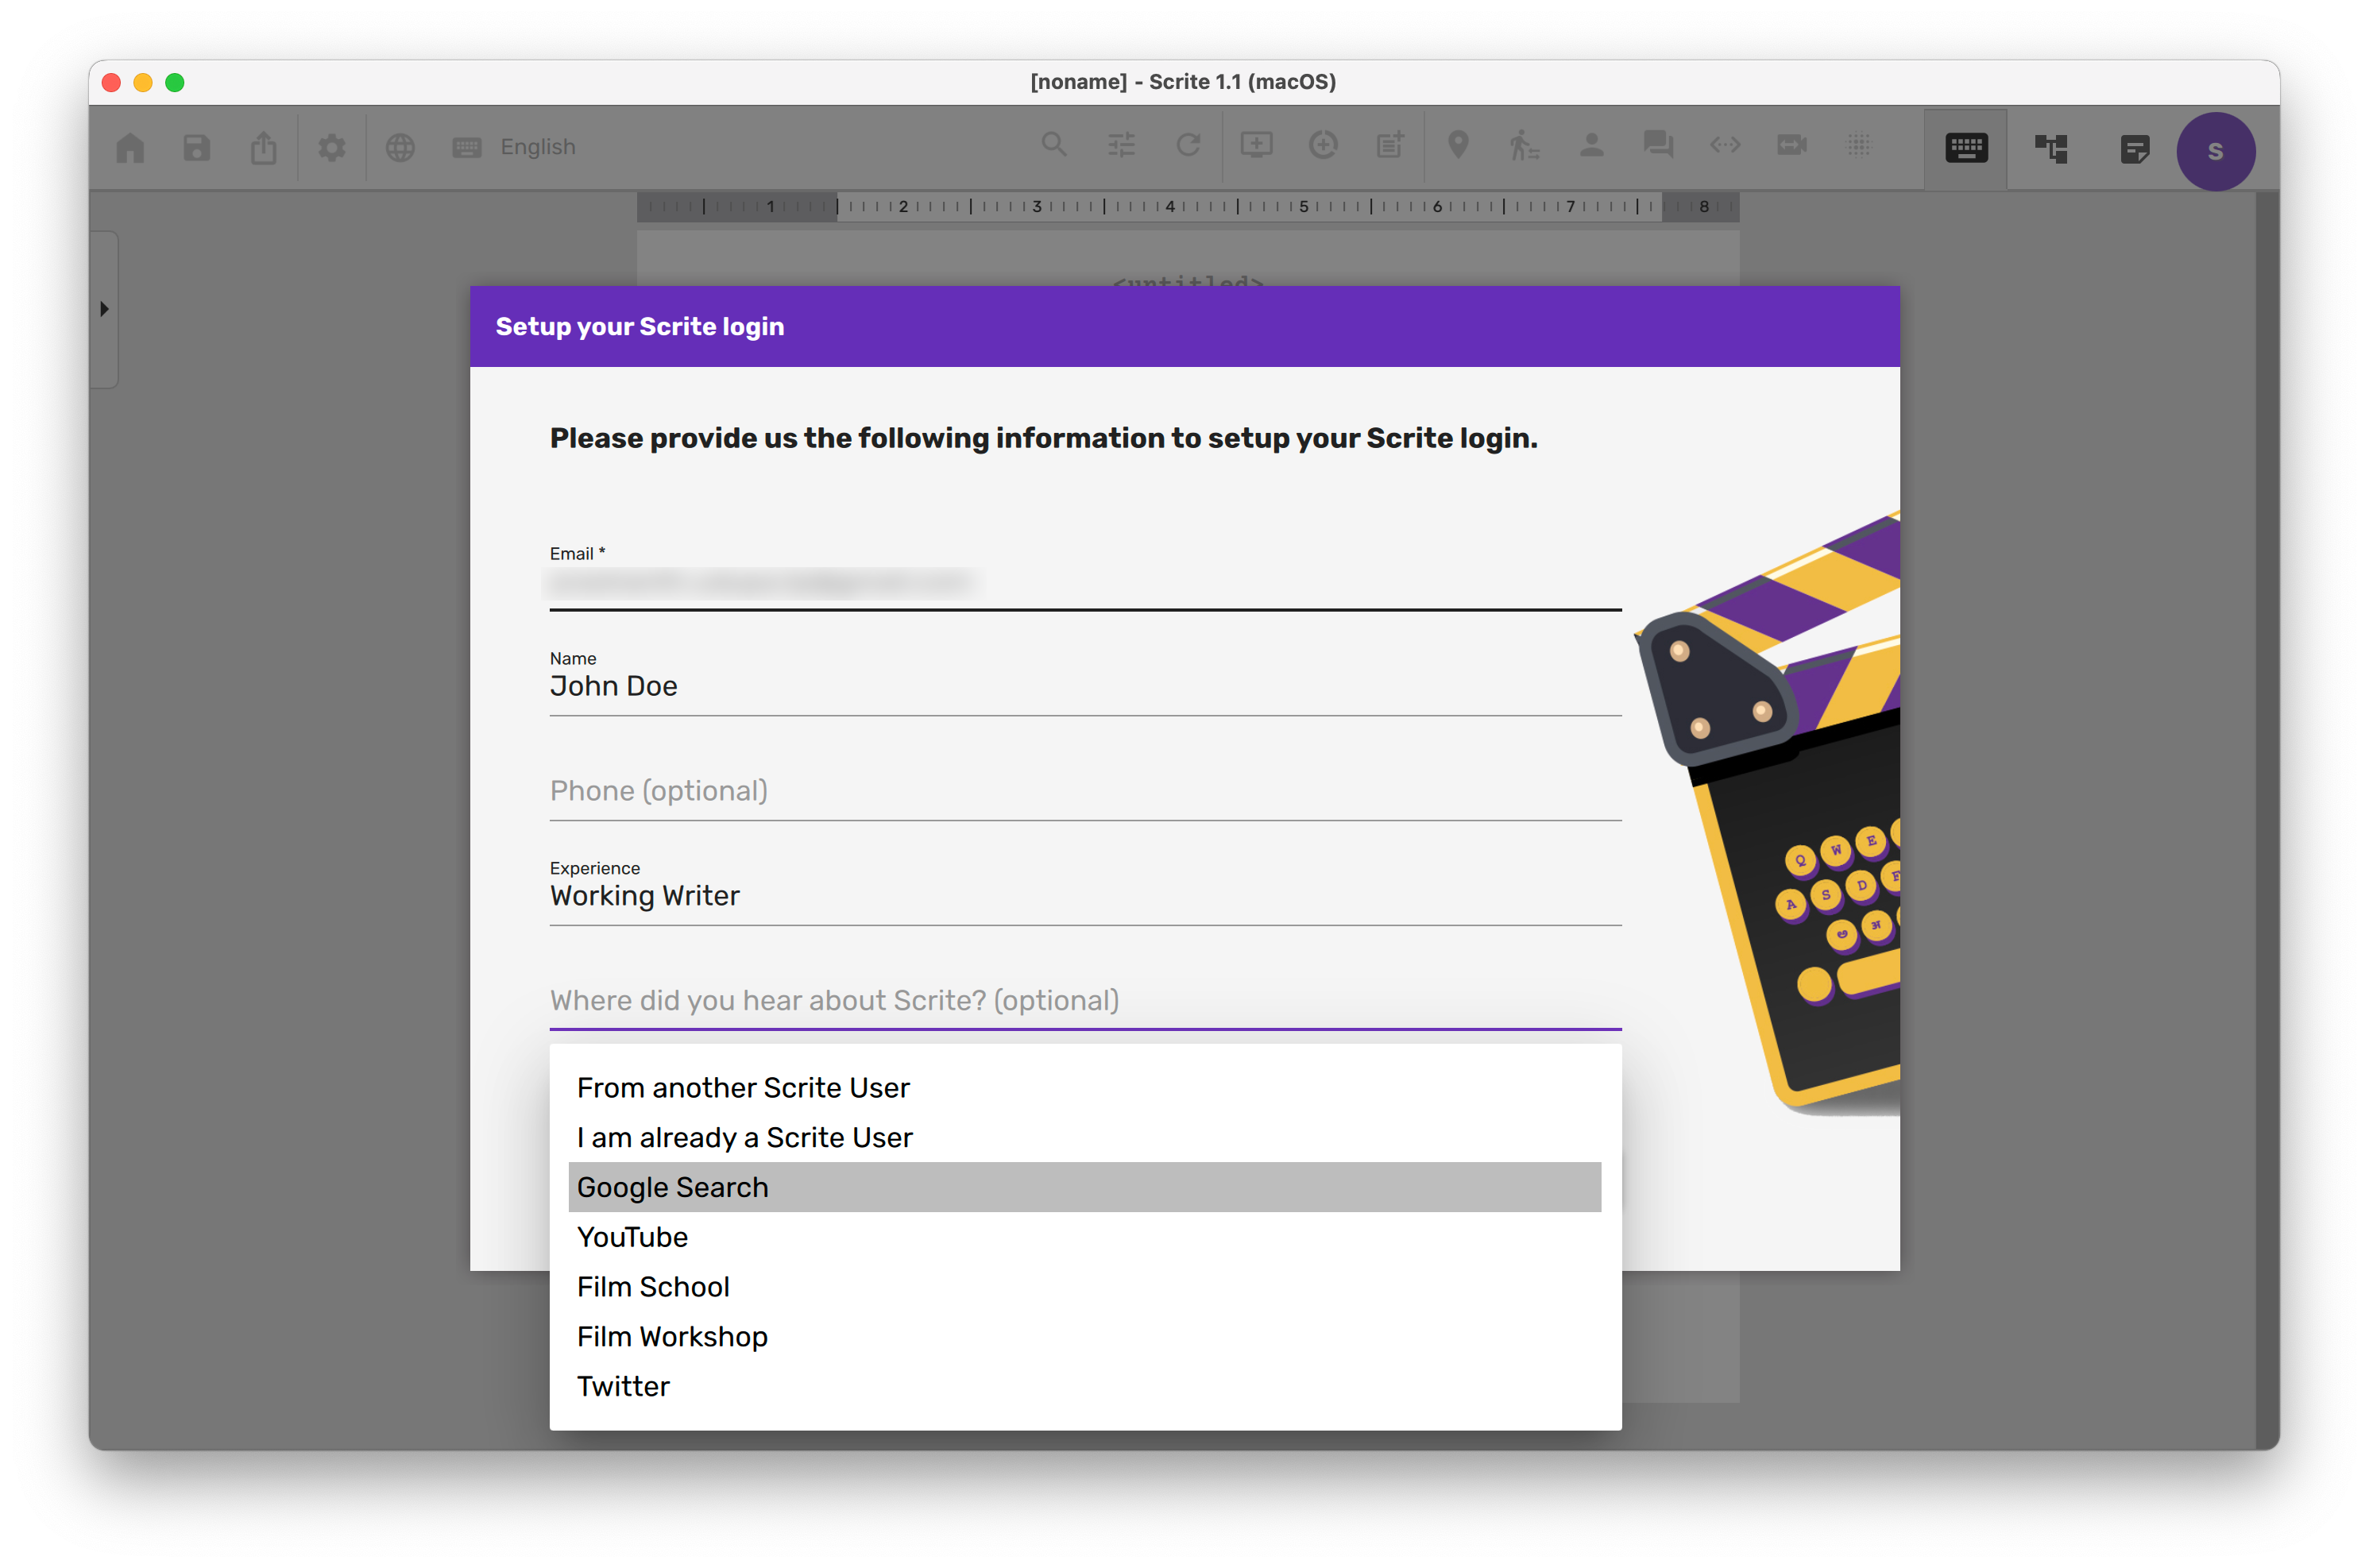
When you launch Scrite for the first time, you will be asked to setup your Scrite login by providing an email id.
You can optionally fill out other fields in the form and click on the Continue button on this form.
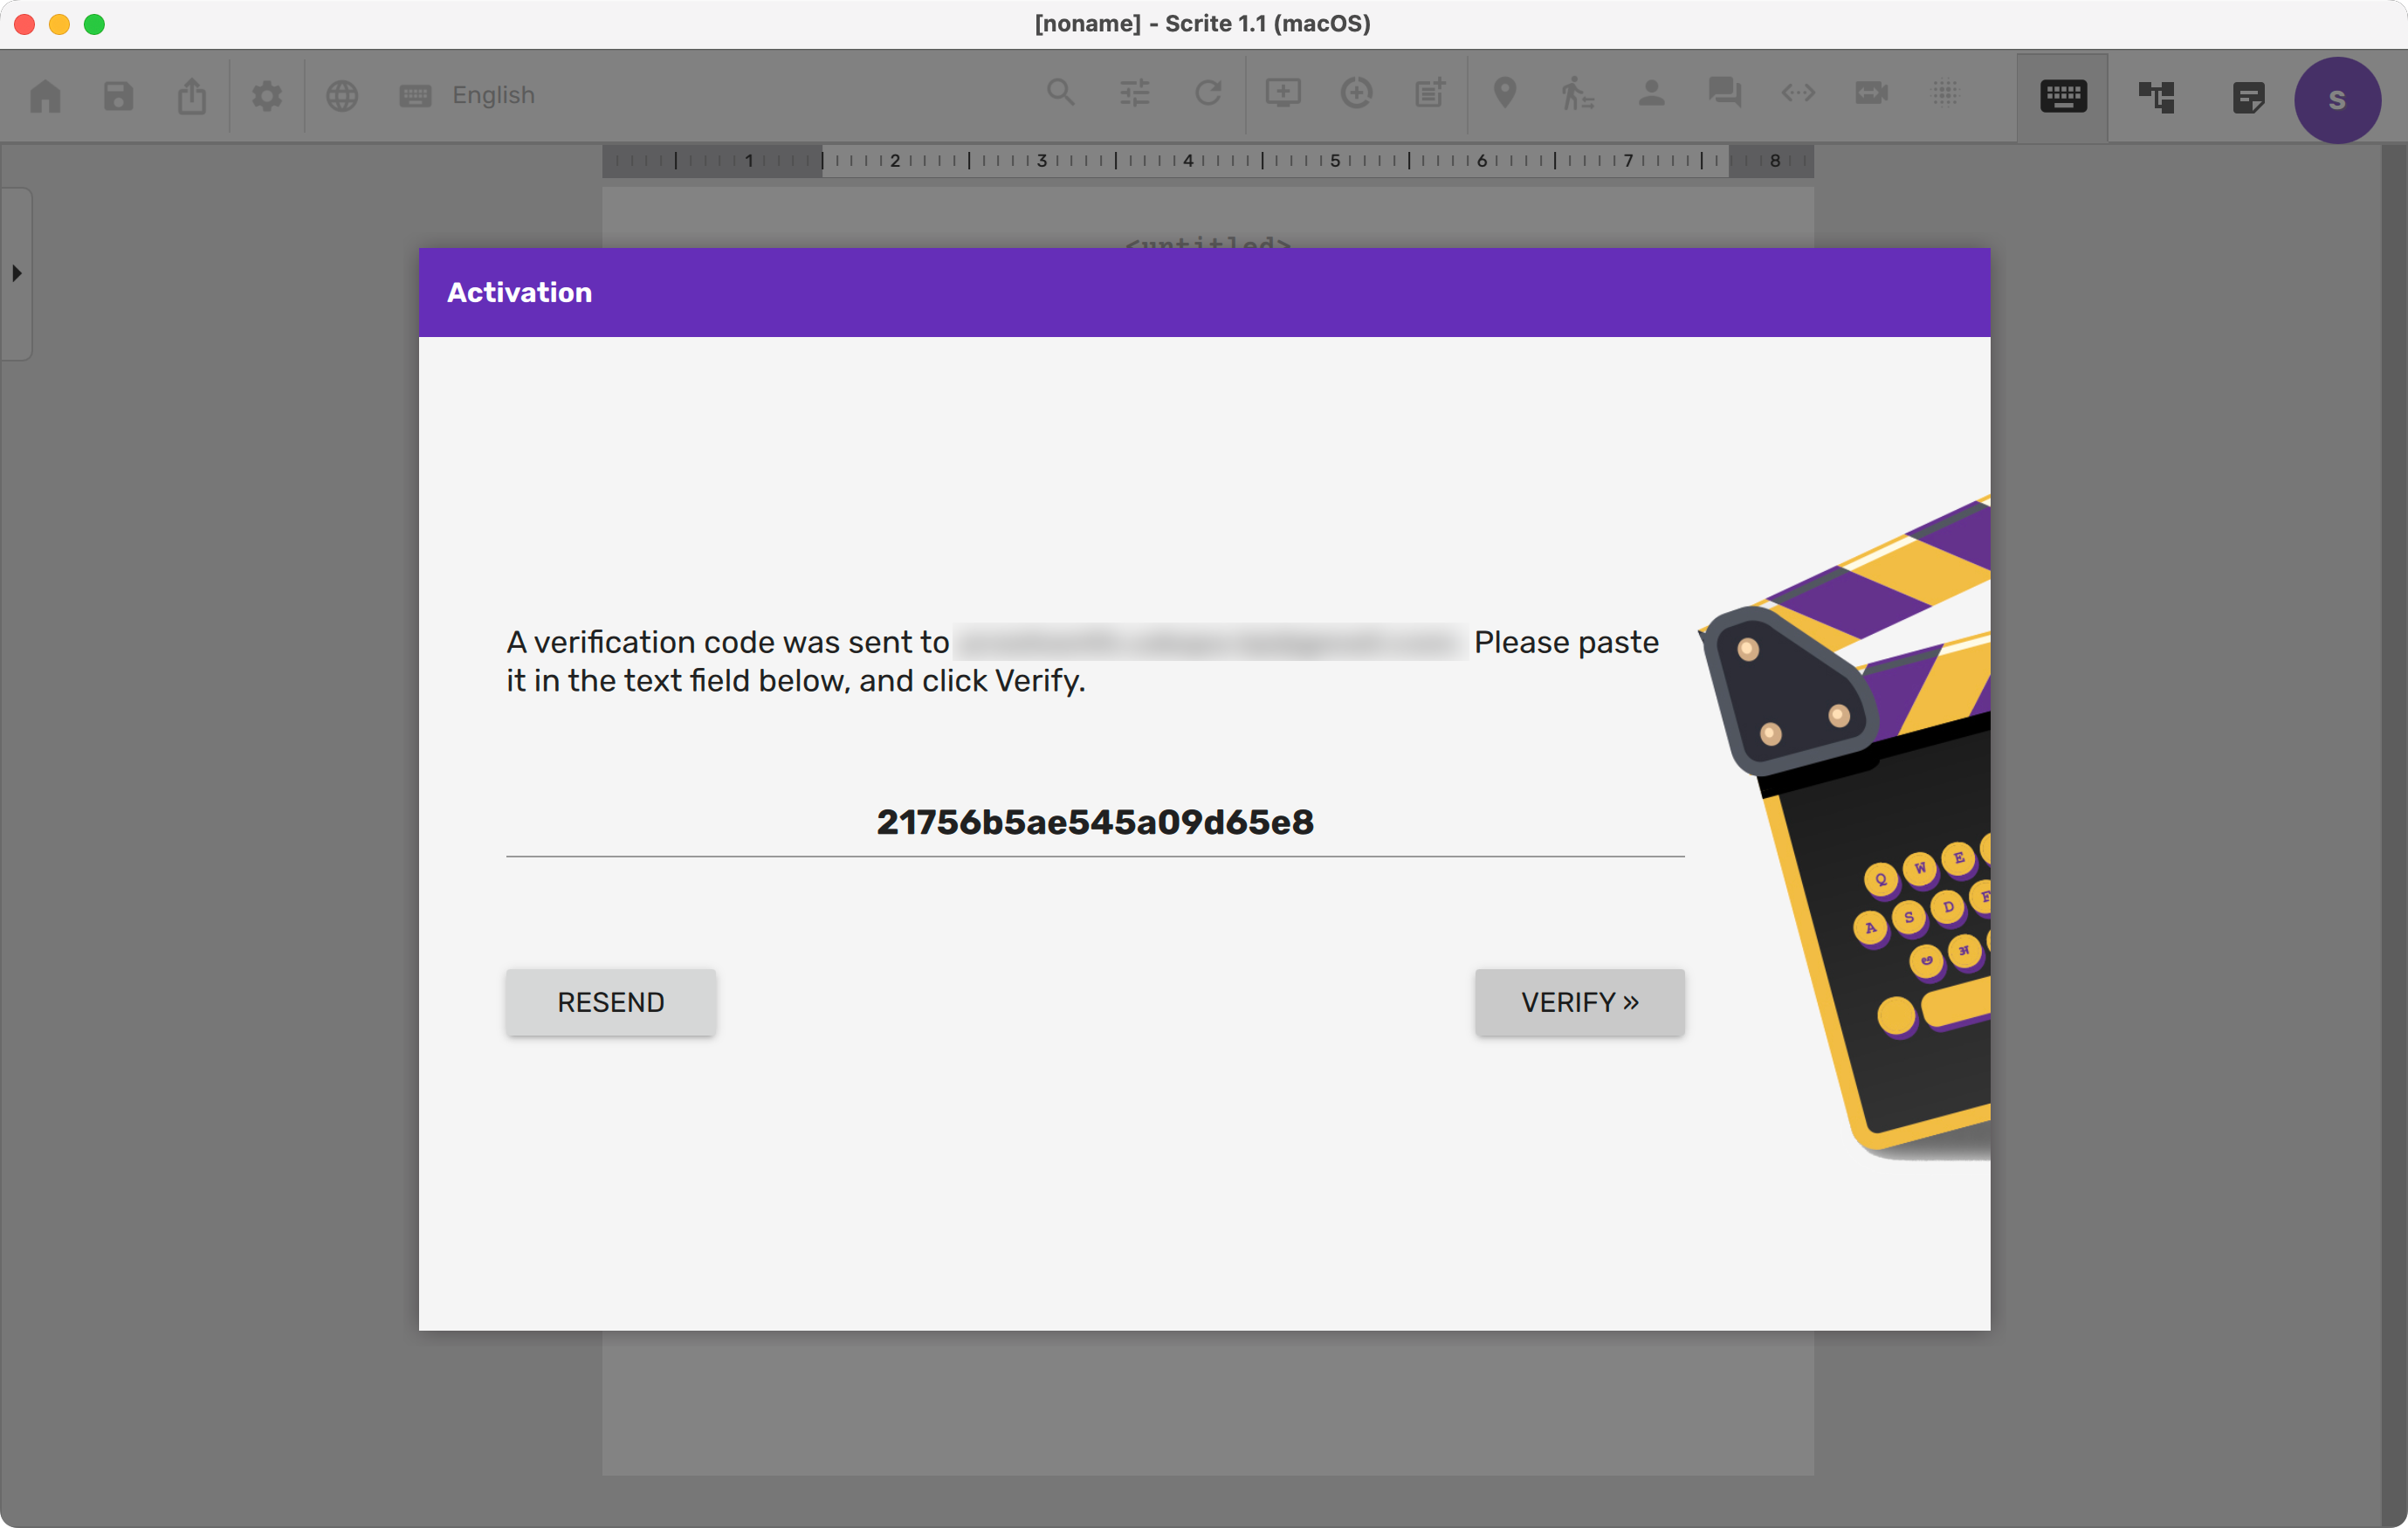
A verification code will be sent to the email you had provided.
Please copy the verification code sent to the email you had provided, and paste it into the text field shown on the Scrite window and then click Verify.
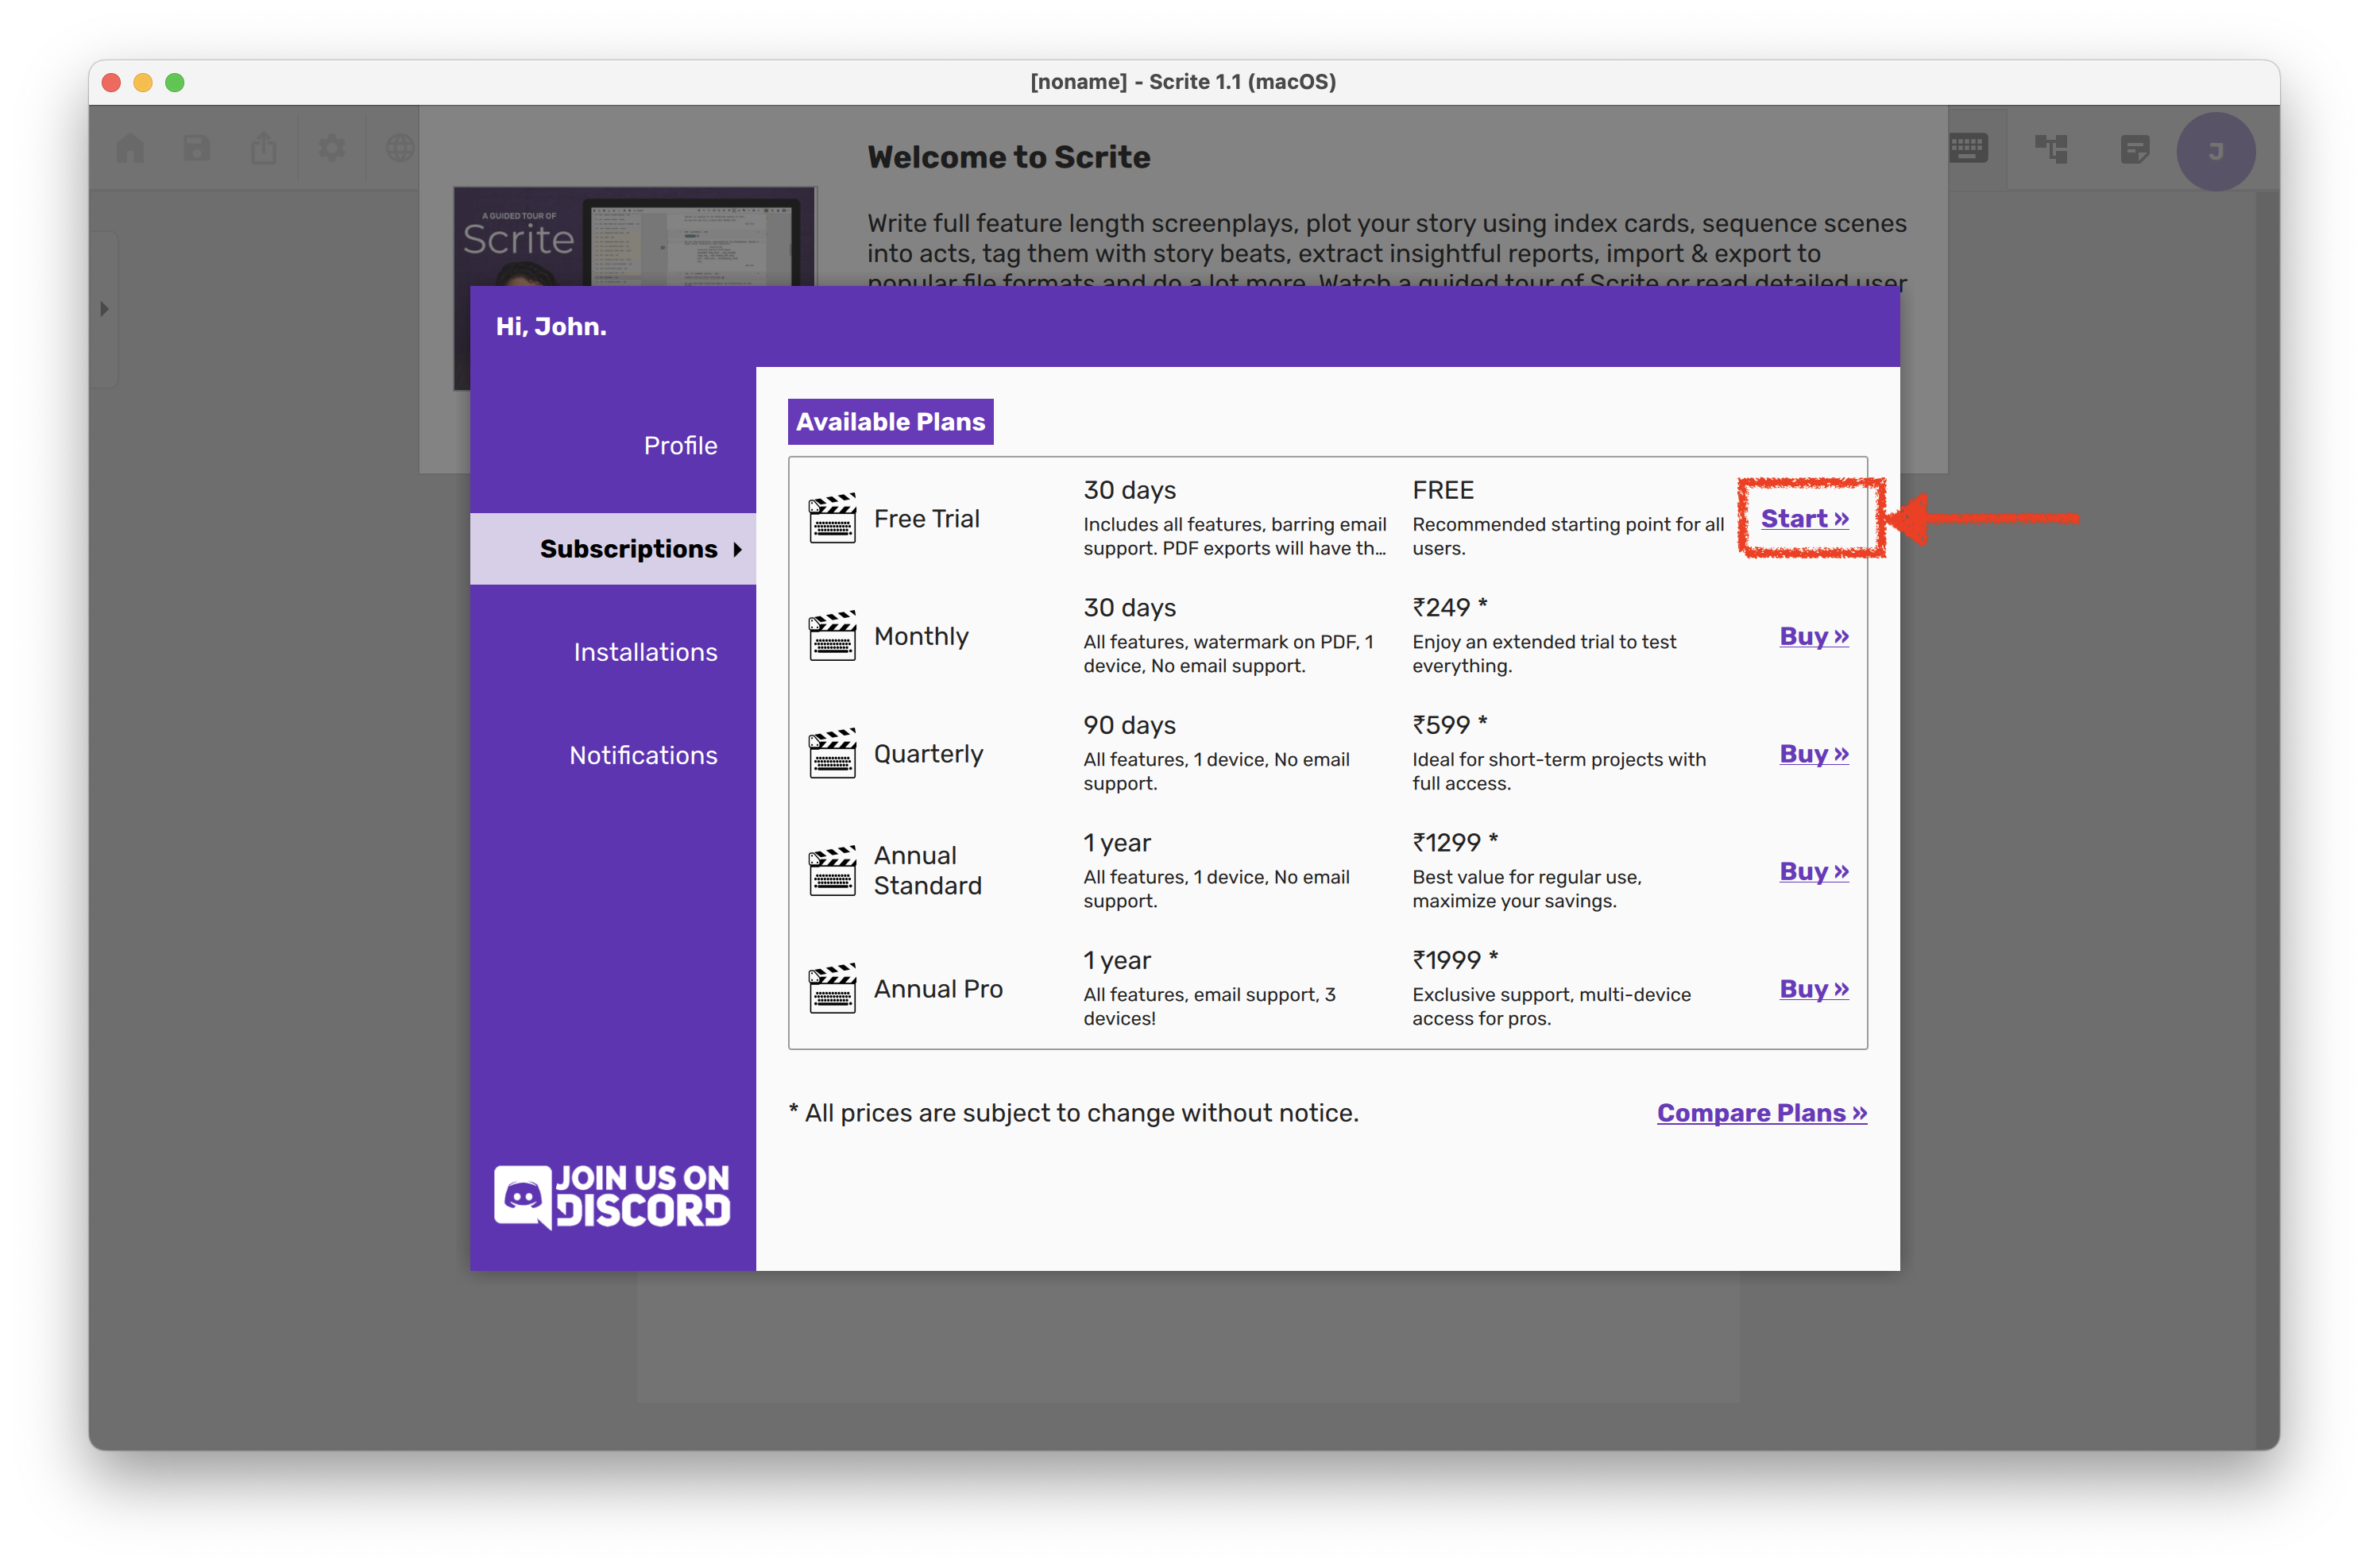
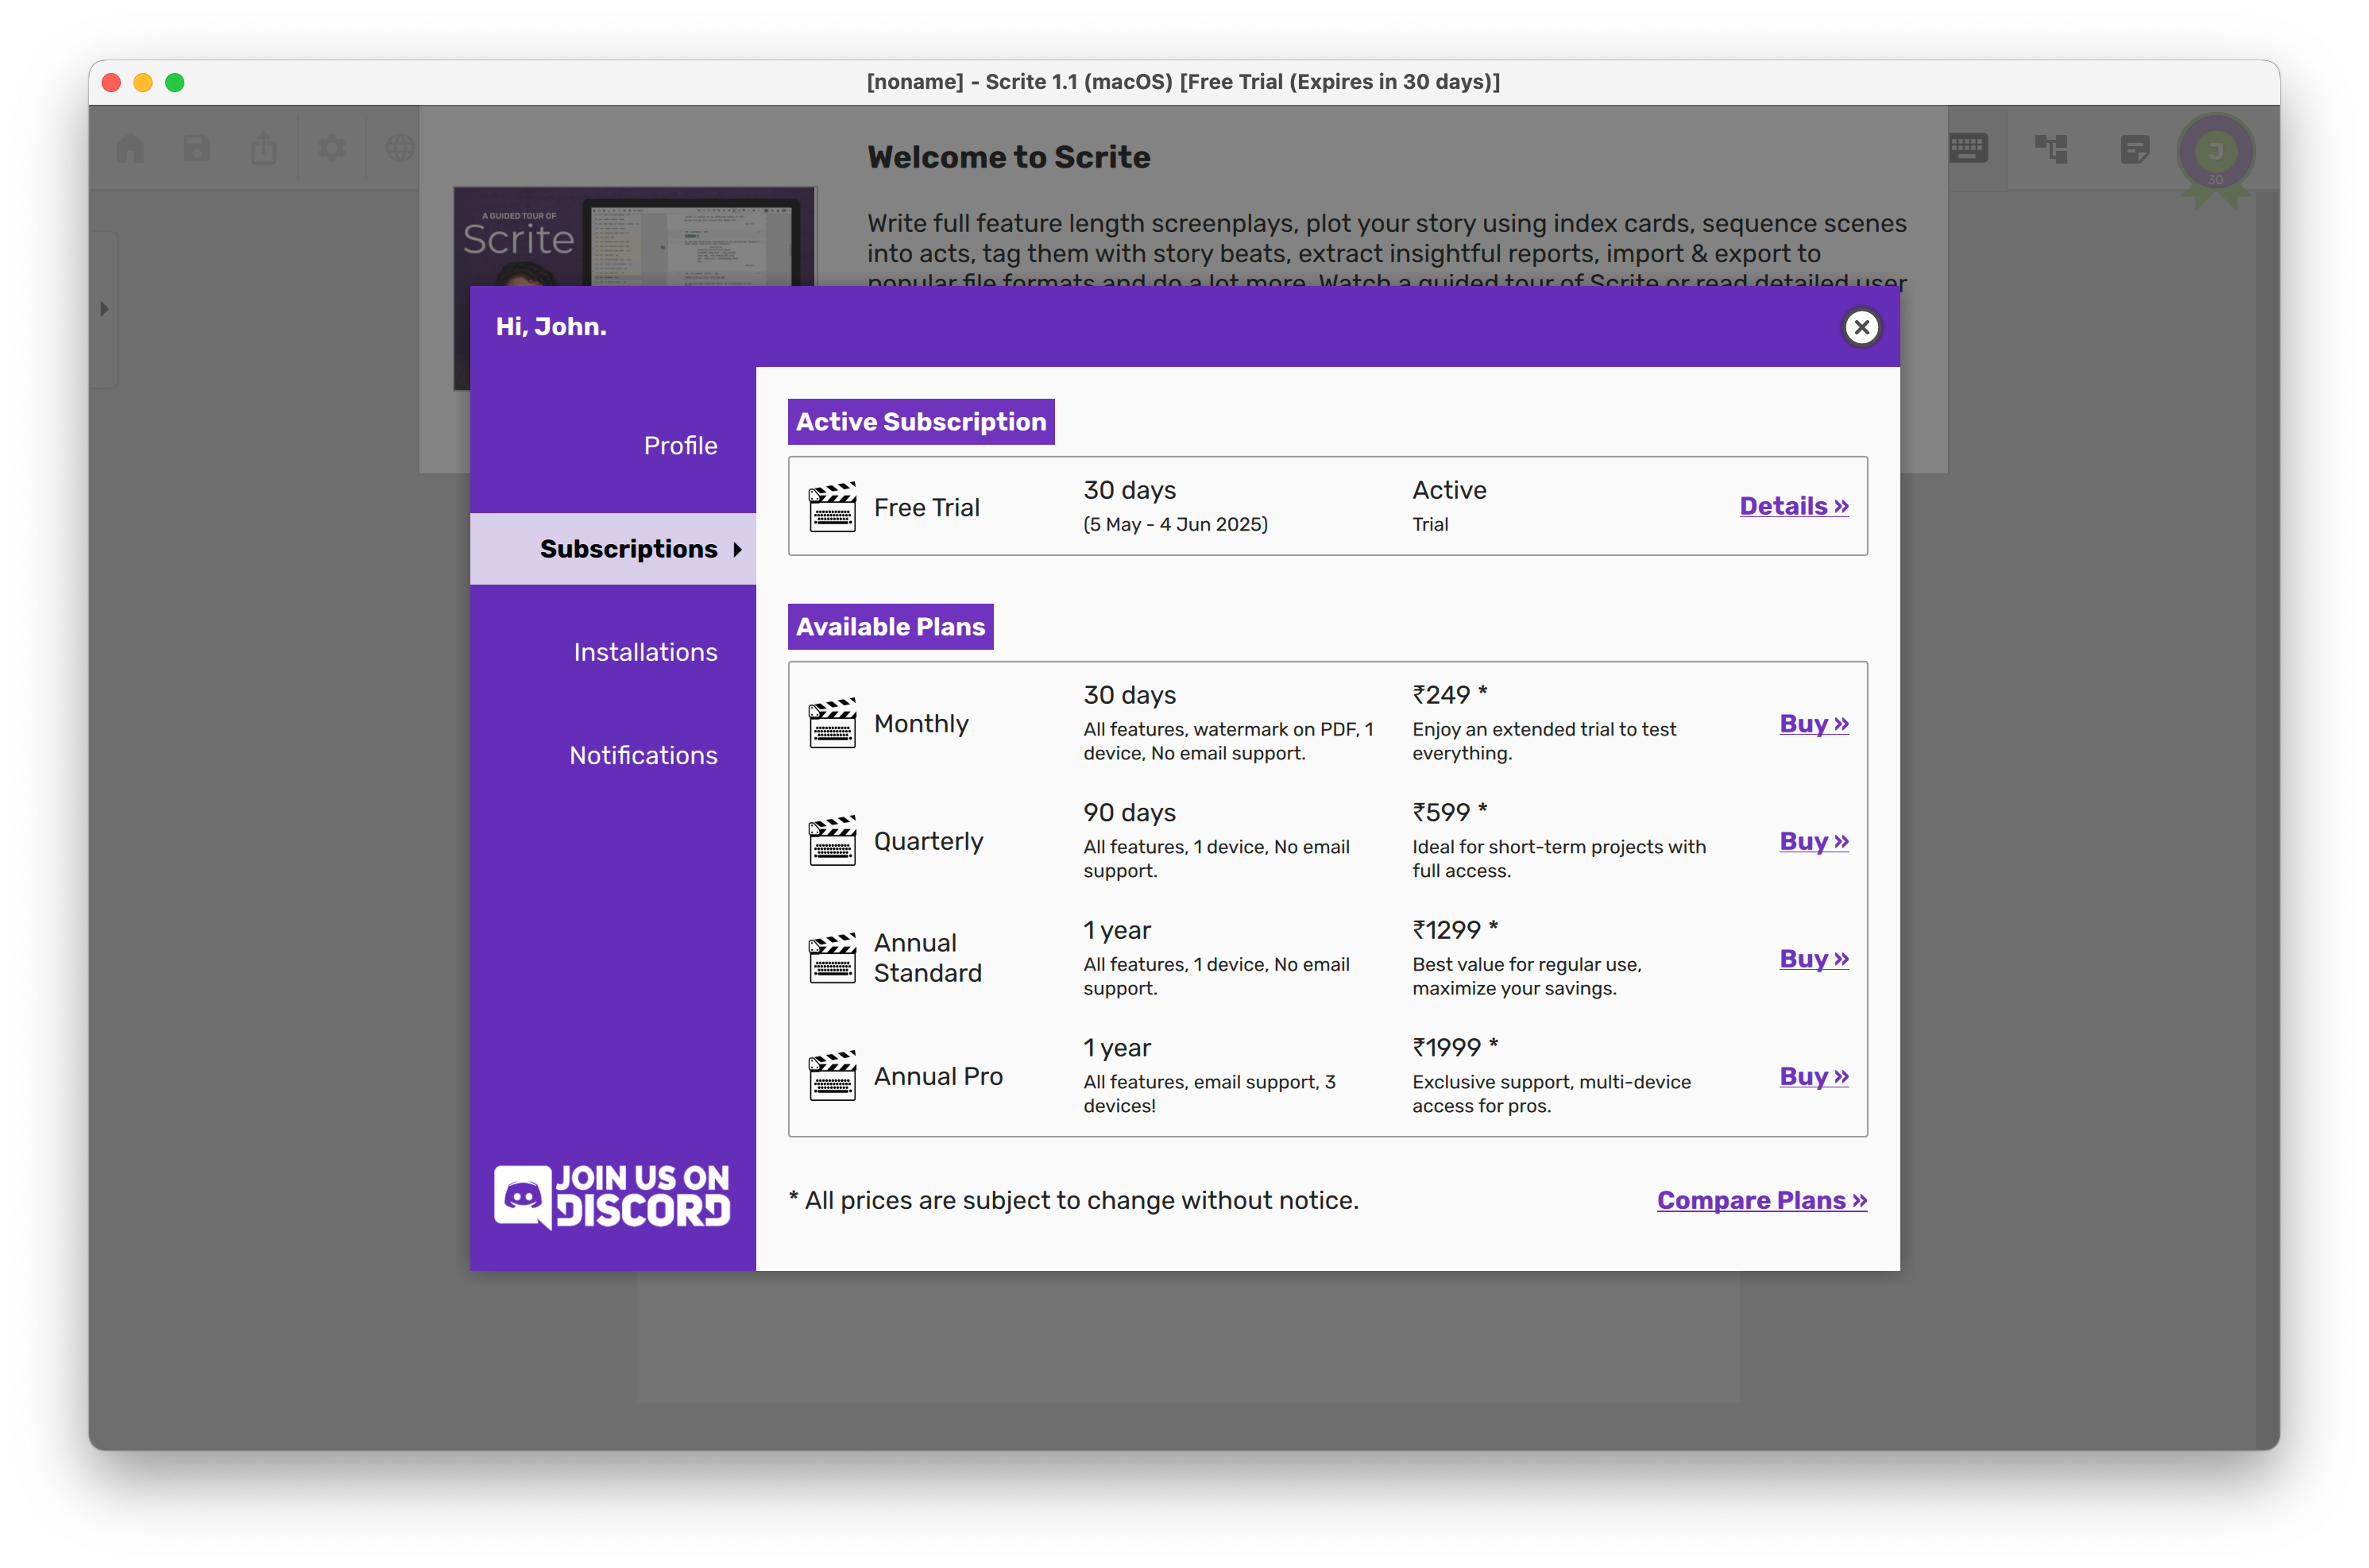
The next screen will list out all the plans available to you, which you can either activate or purchase. If you are new to Scrite, we recommend that you start your free 30-day trial to test drive all features of Scrite and to make sure that the app works on your desktops and laptops.
Activating Trial
Since January 2025, you can start a 30-day free trial to try out all features of Scrite and make sure that the app works on your desktops and laptops. Simply click on the Start button next to Free Trial to activate your trial.
At anytime during your trial, you can sign up for any of the paid plans and enjoy all features unlocked from the paid plan for the remainder of your trial and for the duration of the plan you have purchased.
The actual list of plans, prices and currency shown in the UI vary depending on your location and other parameters. For example, if you are a film-school student, you can reach out to us on support@scrite.io and we will enable a special discounted plan for you.
Please note: without an active subscription (trial or paid), you cannot use any part of the Scrite app.
Once you start your free trial, you can either continue to explore other plans available to you, or close the user profile window and enter the Scrite UI.
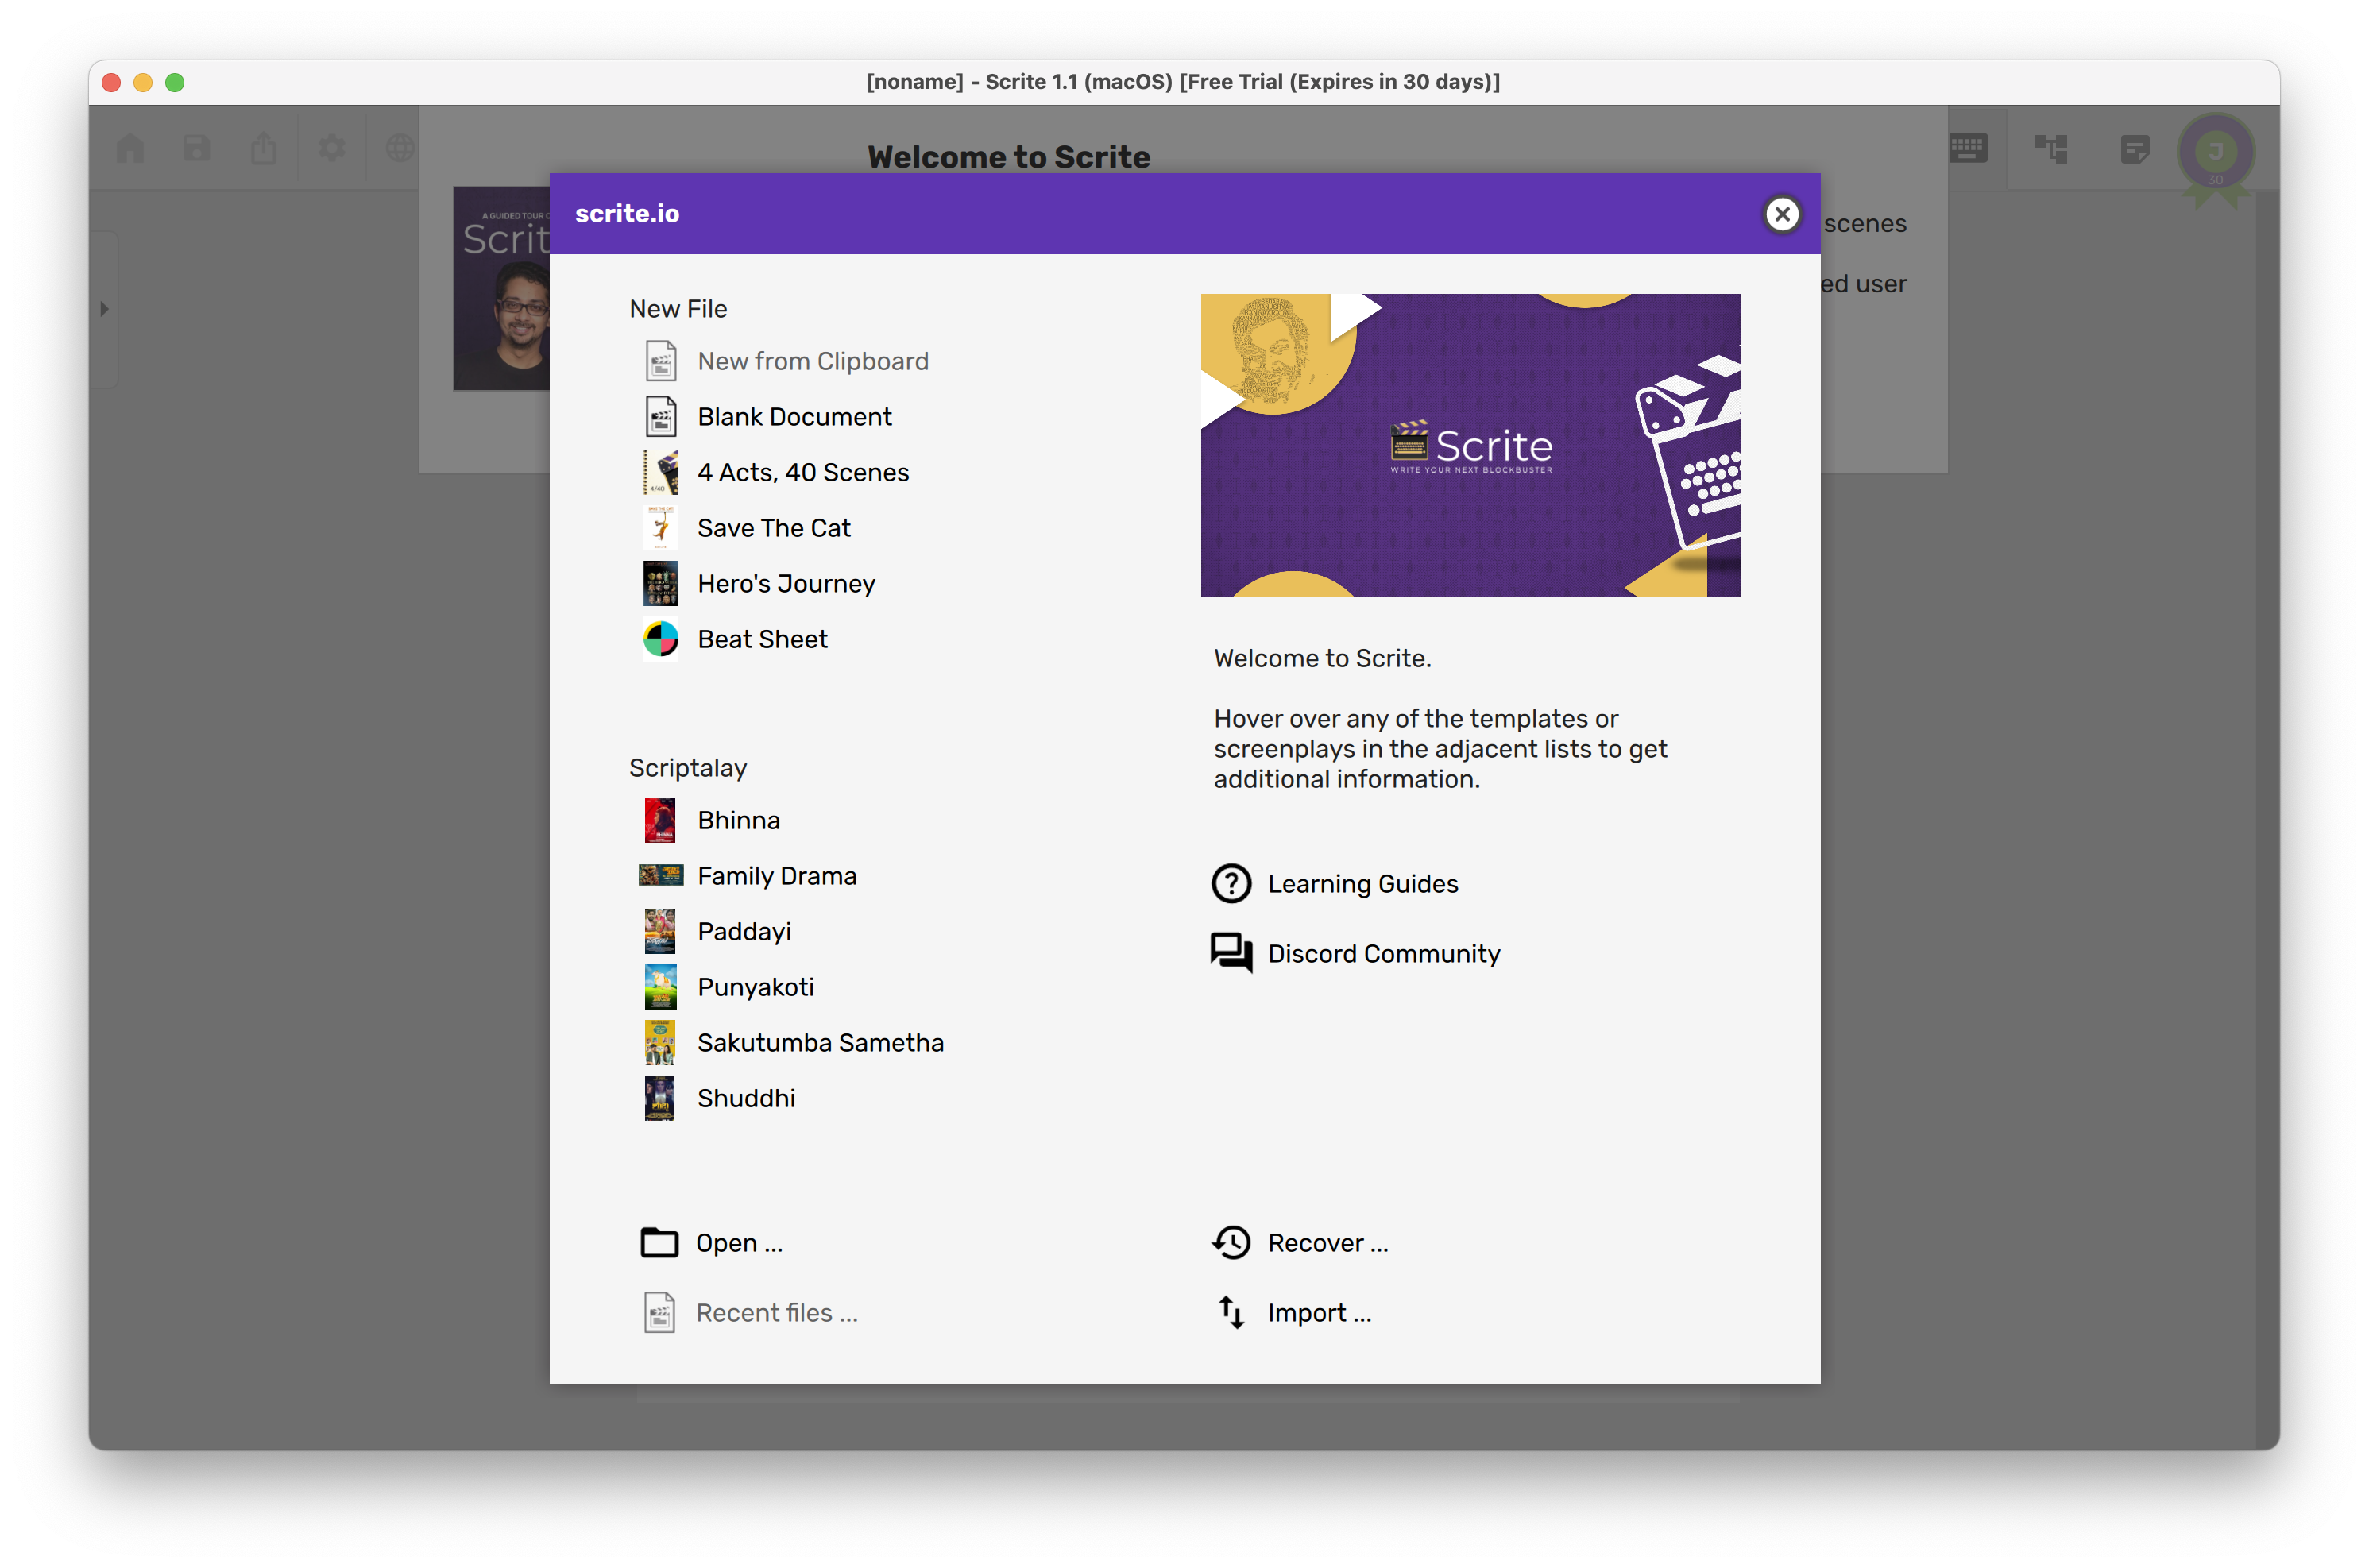
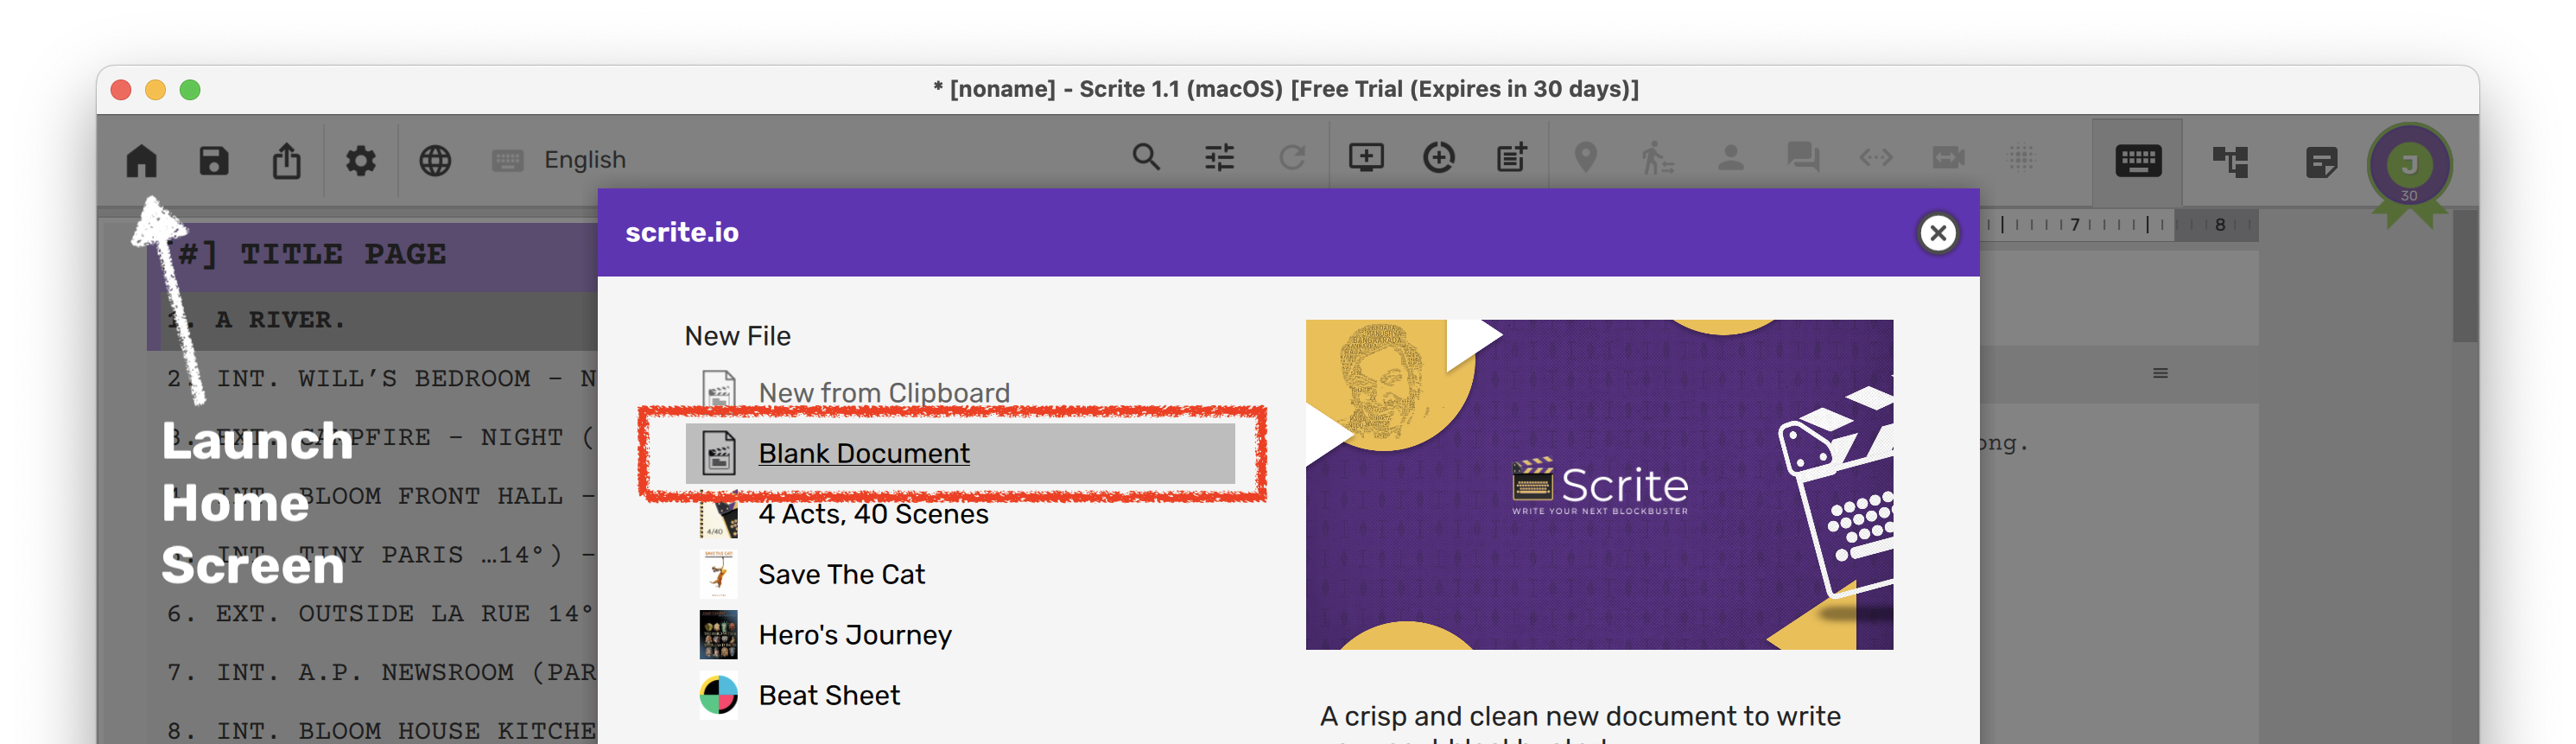
Home Screen
The first thing you will be greeted with when you start Scrite is the Home Screen.
From this screen you can
Start a new document, either from scratch or from one of the templates provided.
Open a document from Scriptalay, our online mini-library of screenplays
Open a document from your local disk
Import from Final Draft or Fountain formats
Or recover unsaved screenplays from the vault.
Once you have worked with one or more documents, you will also be able to pick from a list of recent files from here.
Getting Help
We understand that Scrite has a small learning curve, and that you may want to ask questions, lookup user guides or watch tutorial videos while starting off. Here are a few recommendations for you:
Head to our FAQ section to see if any of your questions are already addressed there.
Click on the “Learning Guides” link the the Home Screen to get access to indepth guides and tutorial videos.
Join our growing Discord community of users where you can post questions, report bugs, request for missing features and more. Please be sure to review existing material on Discord, because its possible that your queries have already been addressed there.
Subscribers on certain paid-plans can also reach out to us on support@scrite.io for email support.
Additionally, the Scrite app displays help tips along the top edge of the window from time to time. Please consider watching the video or reading the guides linked in these tips.
Importing your screenplays
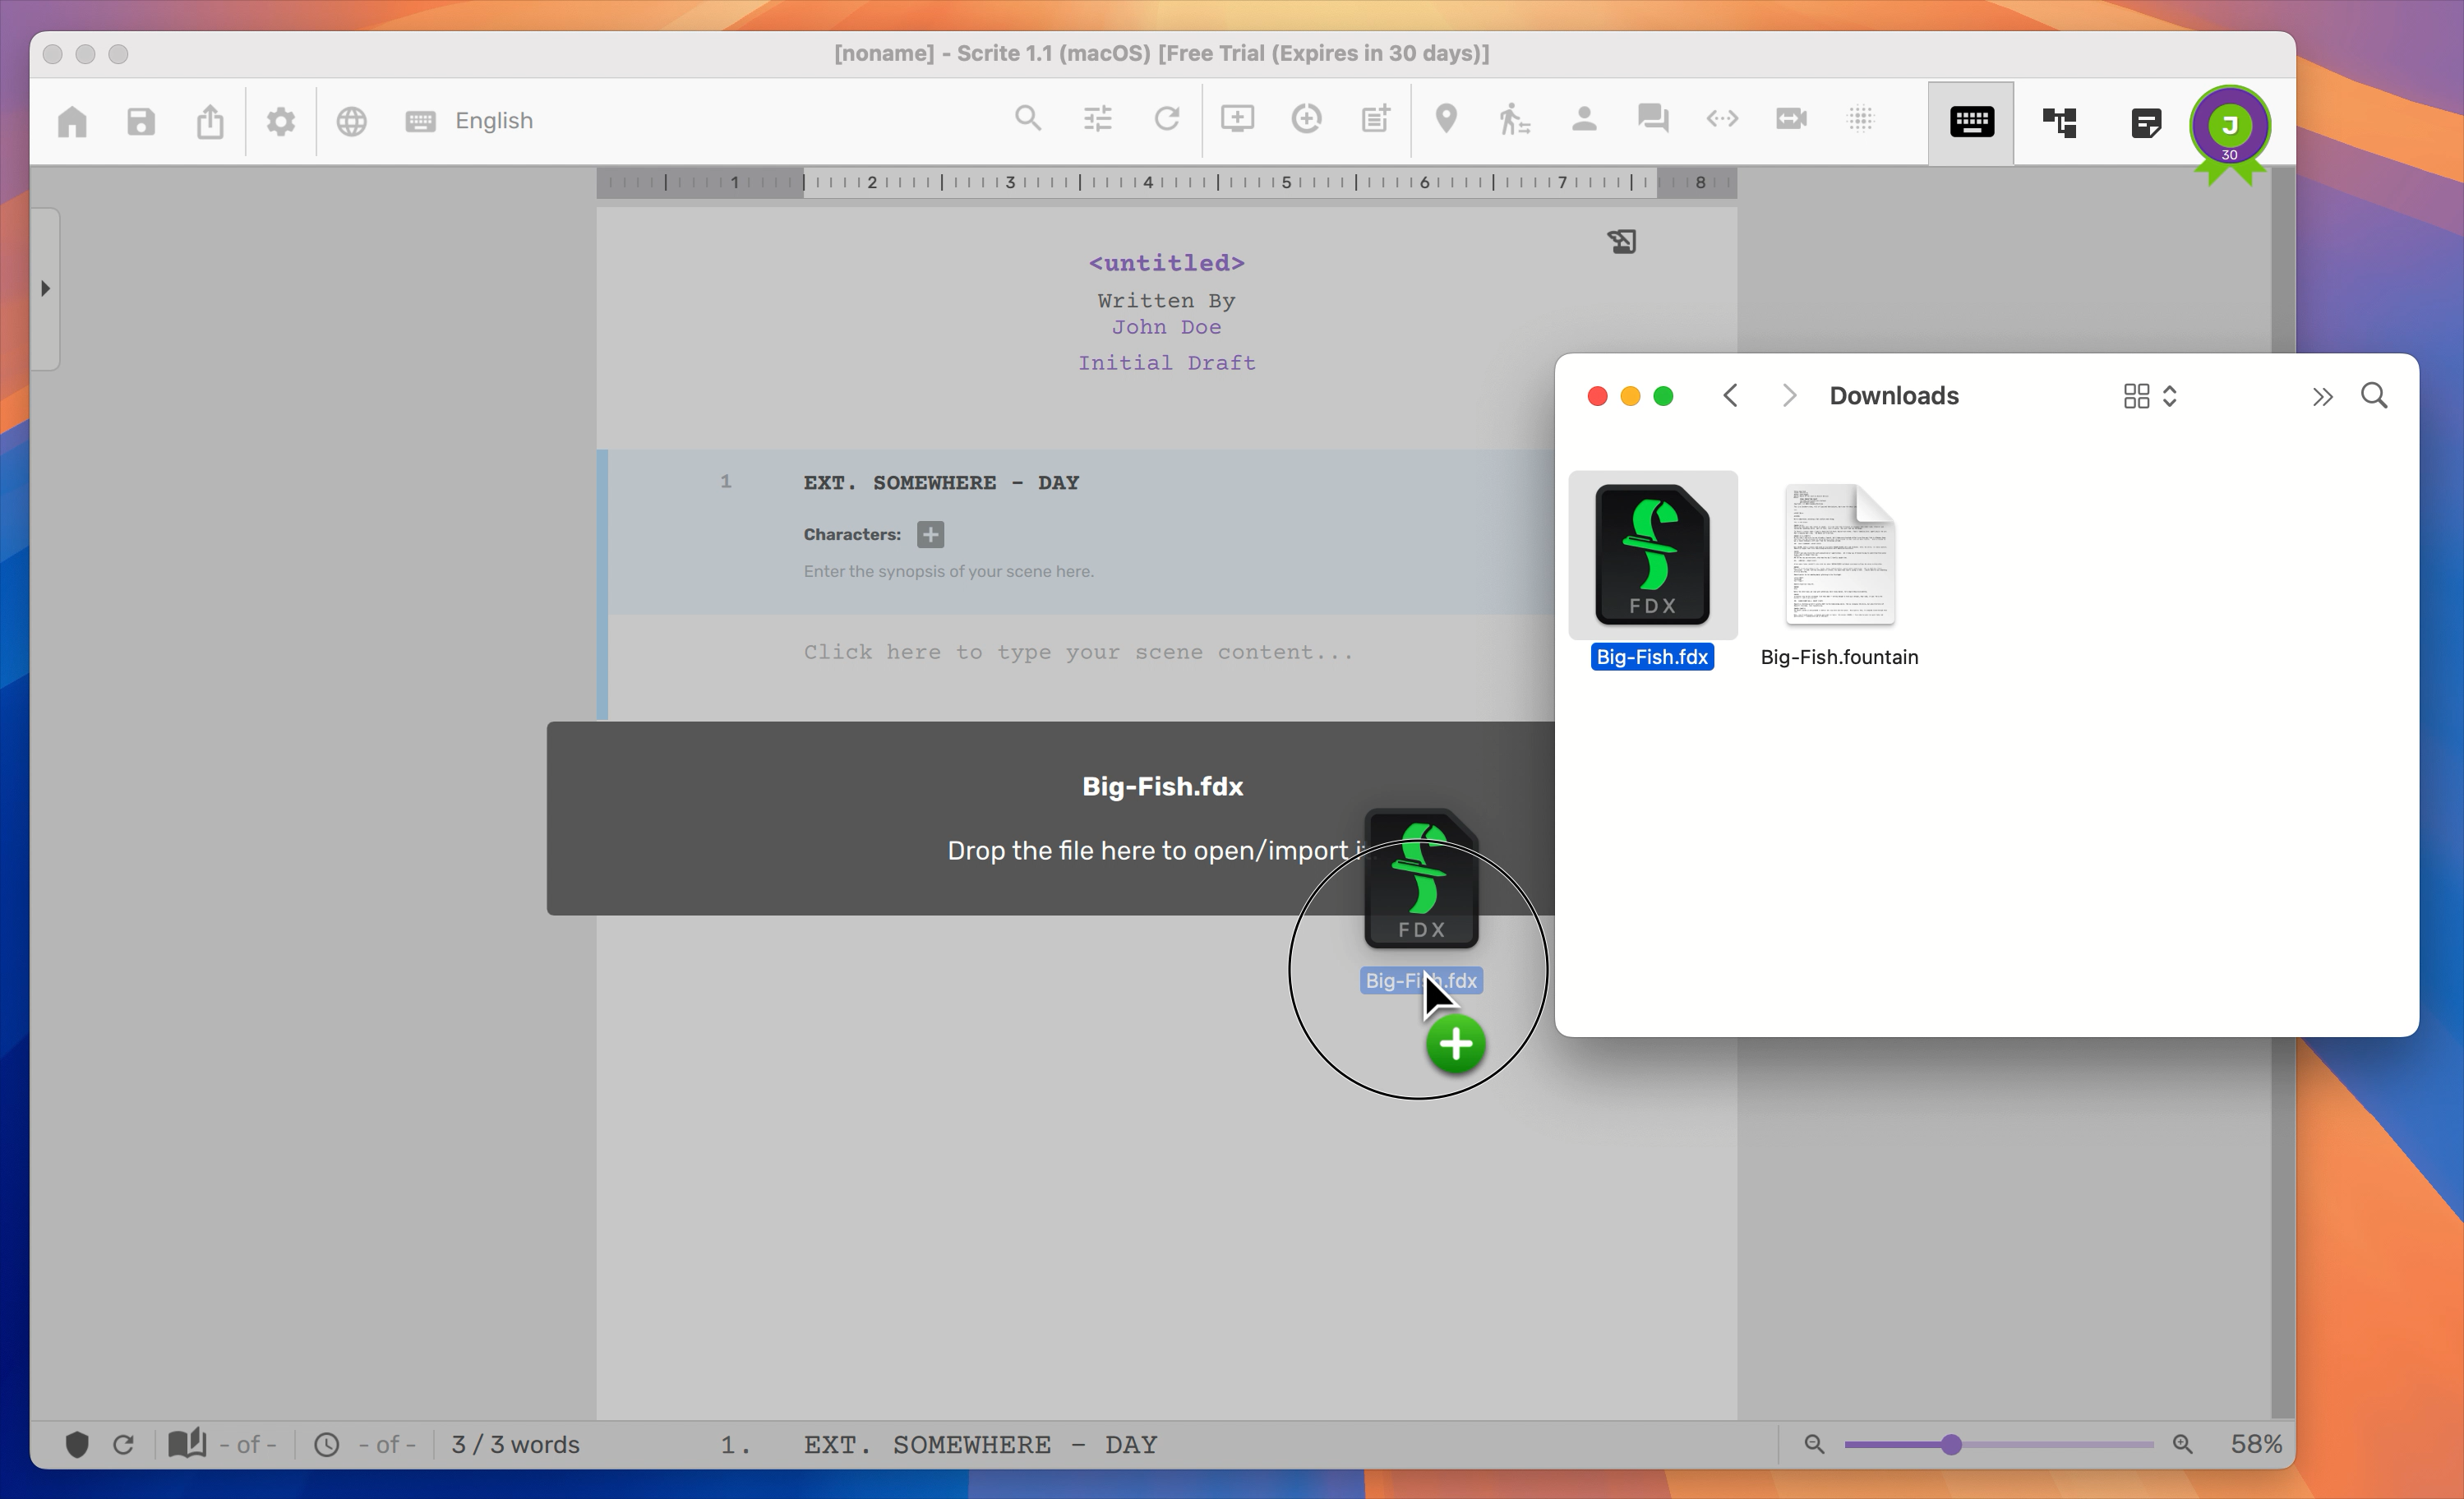
Many of our users are professional writers. The first thing they do when they install Scrite is to import their existing screenplays from Final Draft or Fountain formats. If you would like to do the same, then close the Home Screen and simply drag and drop your FDX or Fountain files on to the Scrite window.
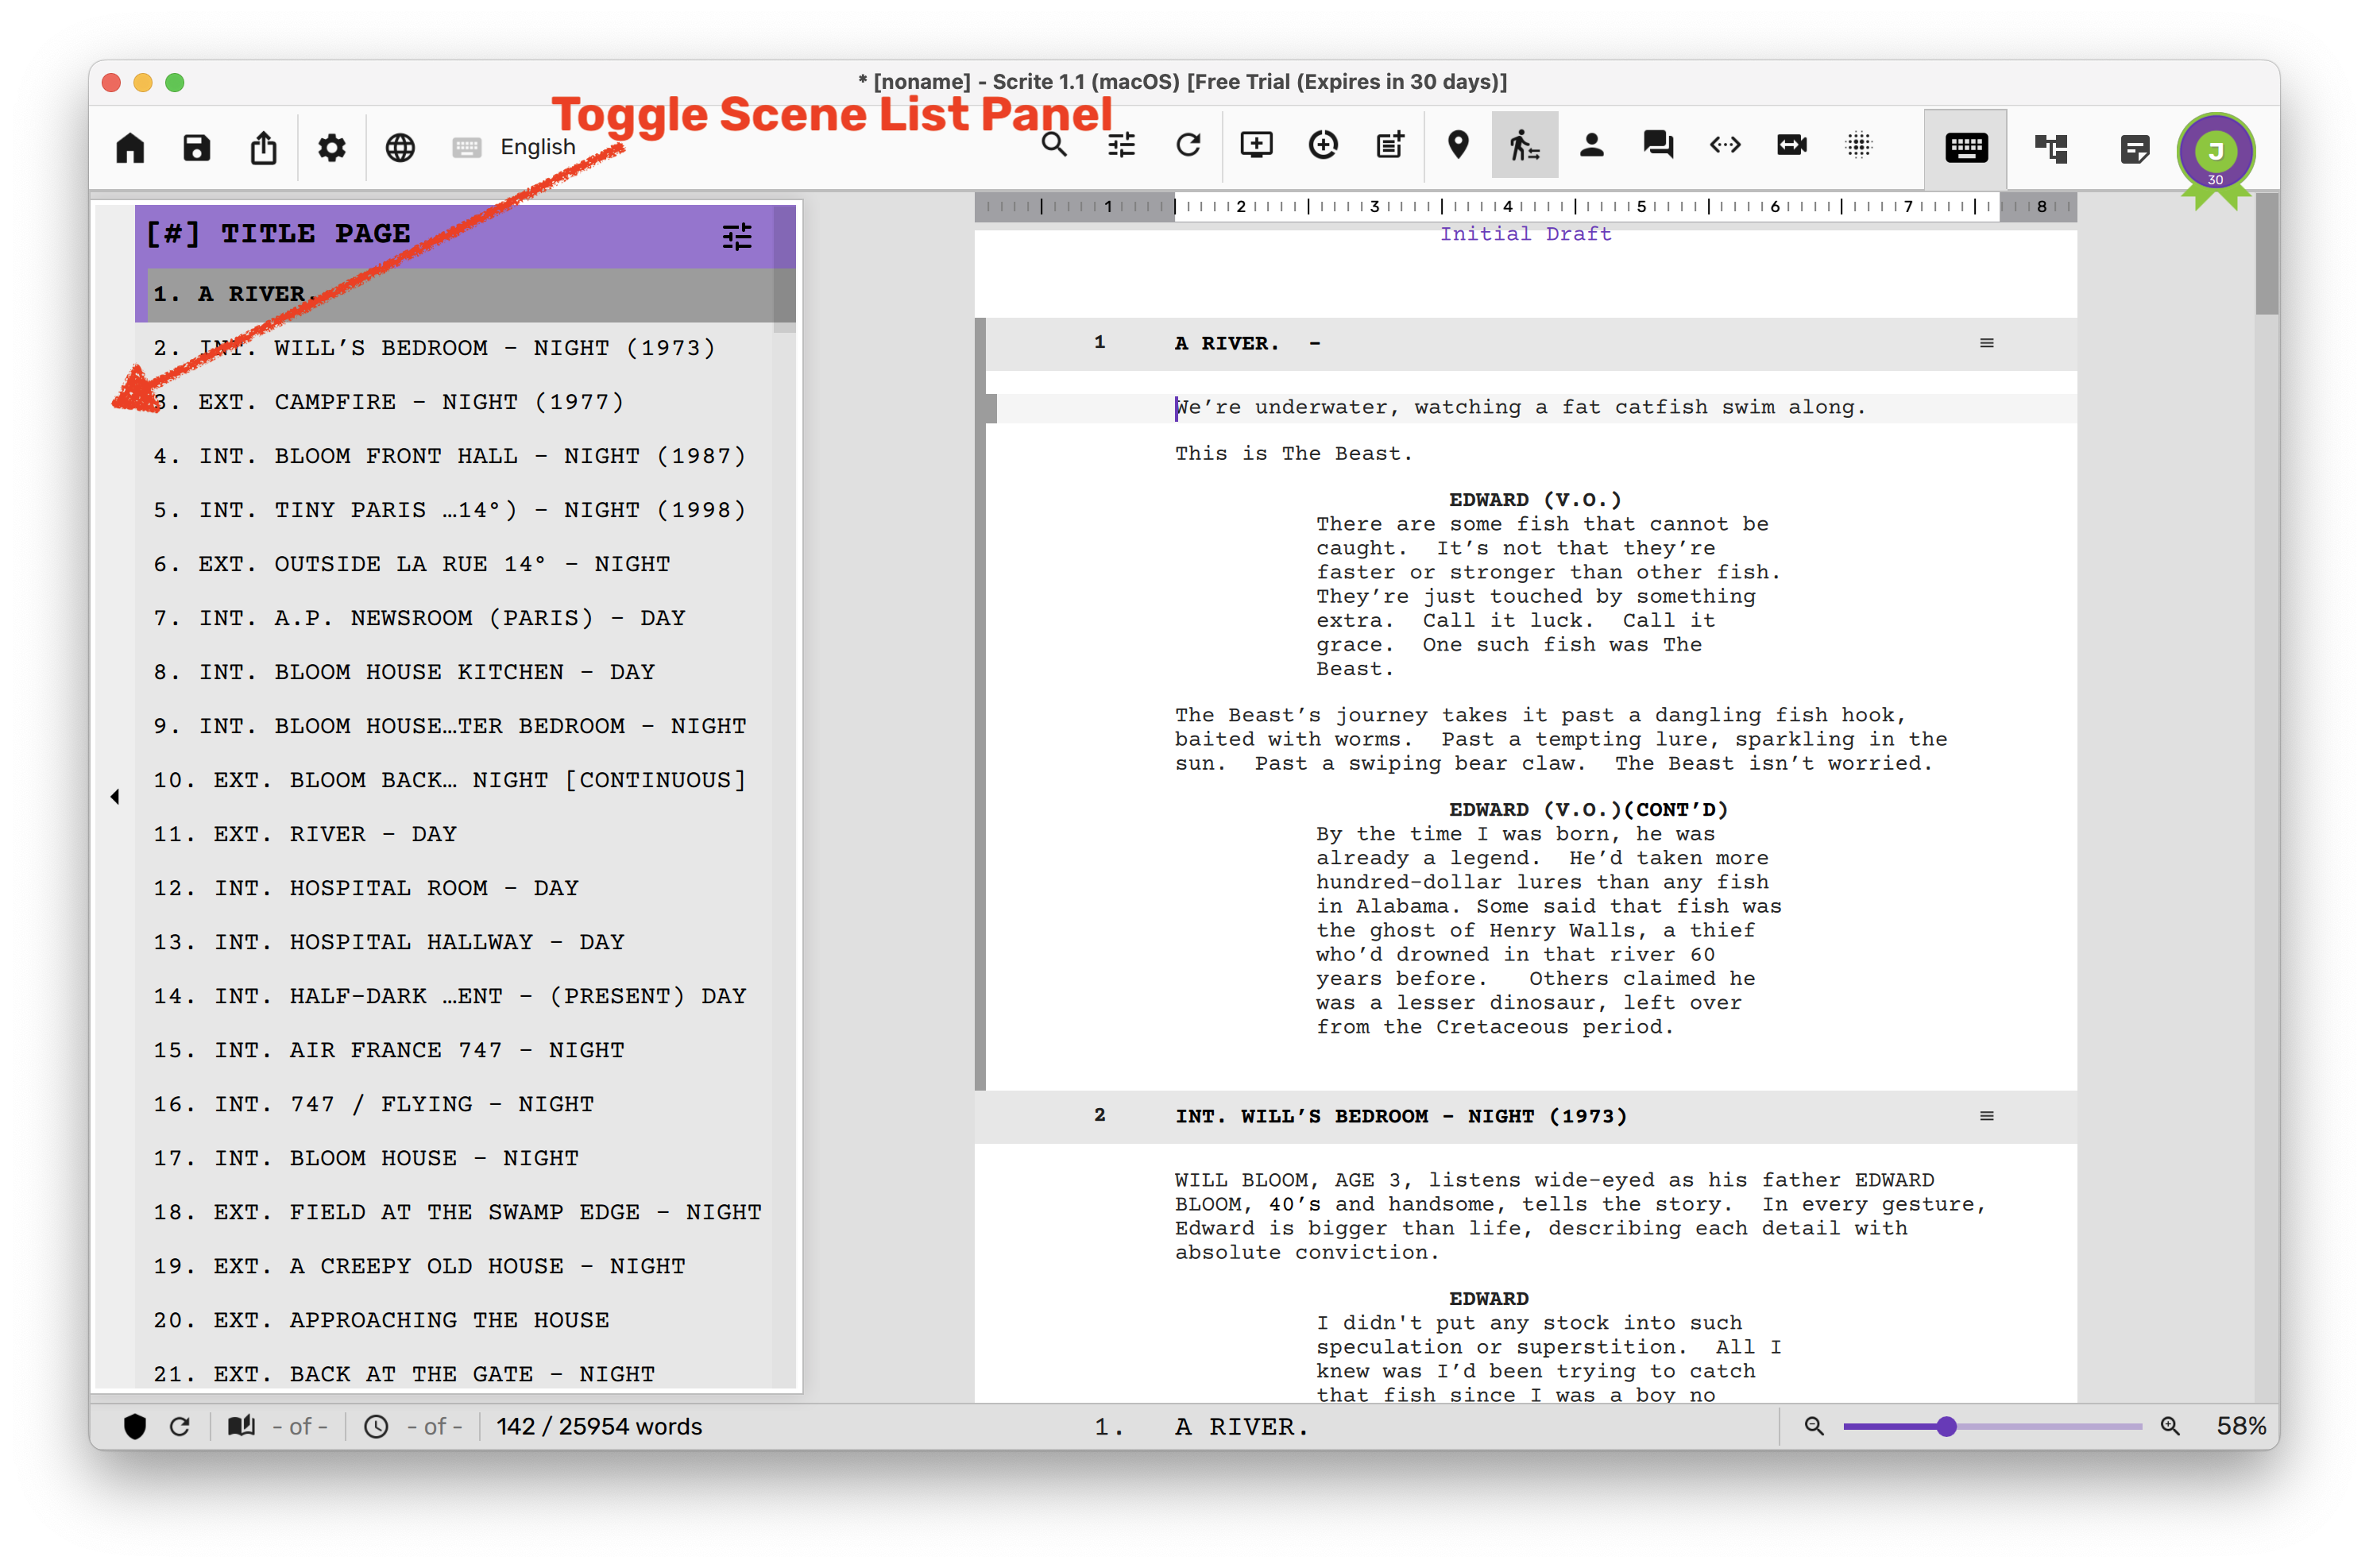
Scrite supports importing from Final Draft (FDX) files created using Final Draft versions 5 through 13. While importing, paragraphs formatted in scene heading, action, character, parenthetical, shot and transition are imported and identified as such. Once imported, you can click on the Scene list panel button to the left to take a look at all the scenes.
Click on any scene listed in this panel to quickly navigate to that scene in the screenplay editor.
Scrite can also import from plain text and fountain files, although there may be import errors.
Creating a new screenplay
To start from scratch, launch the Home Screen and select the Blank Document option.
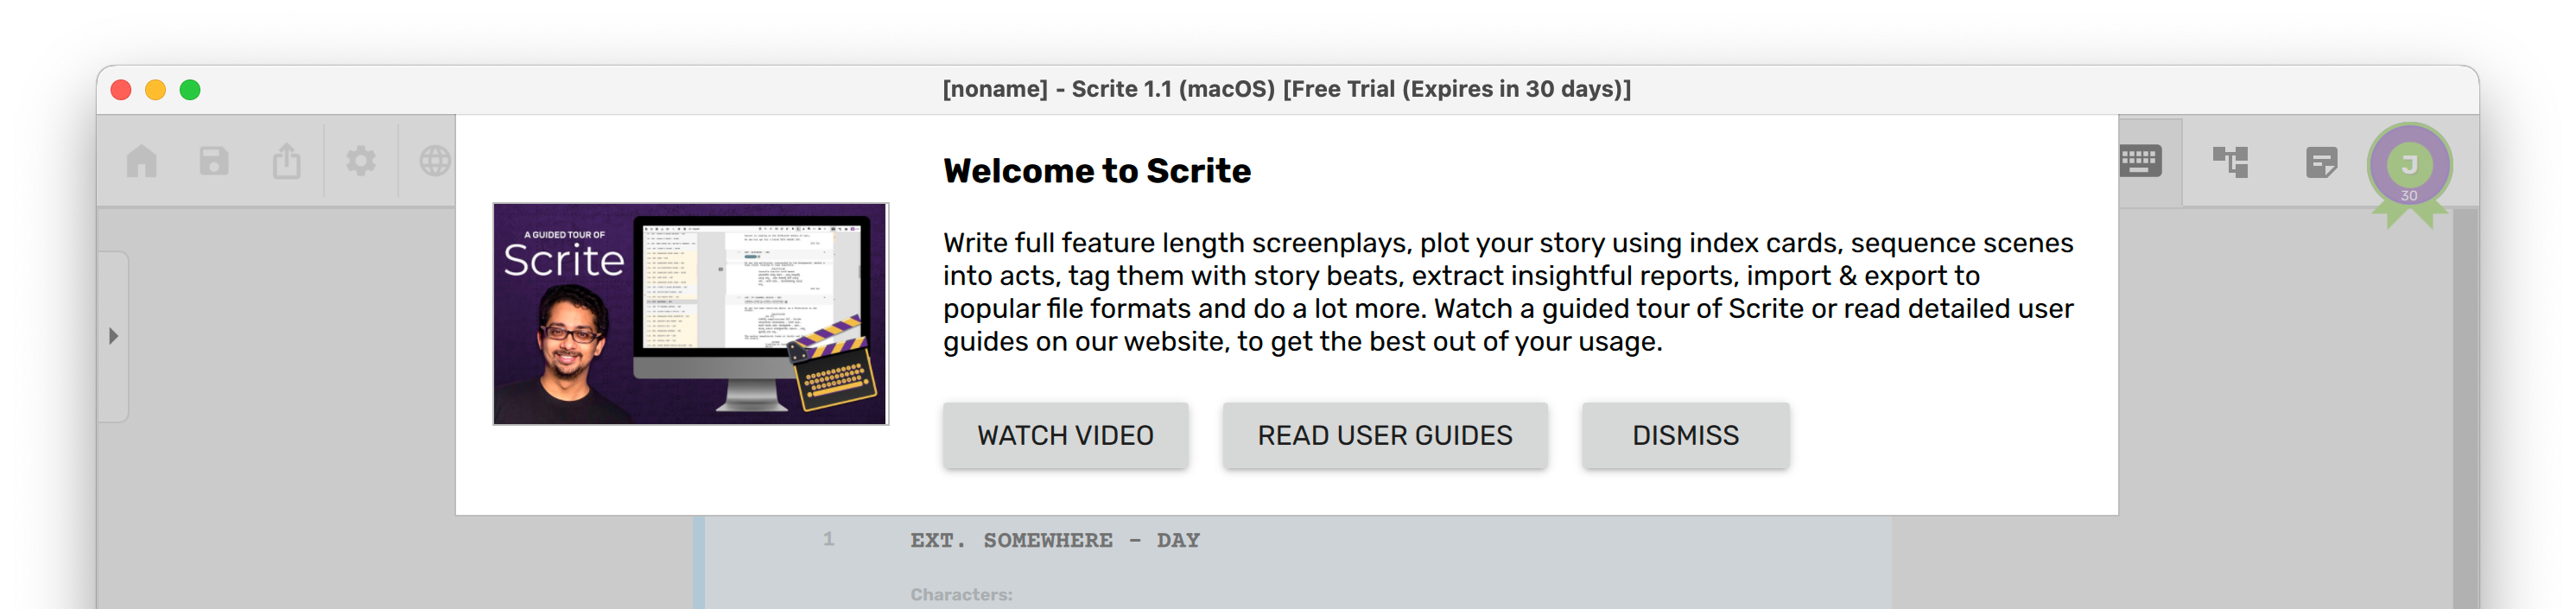
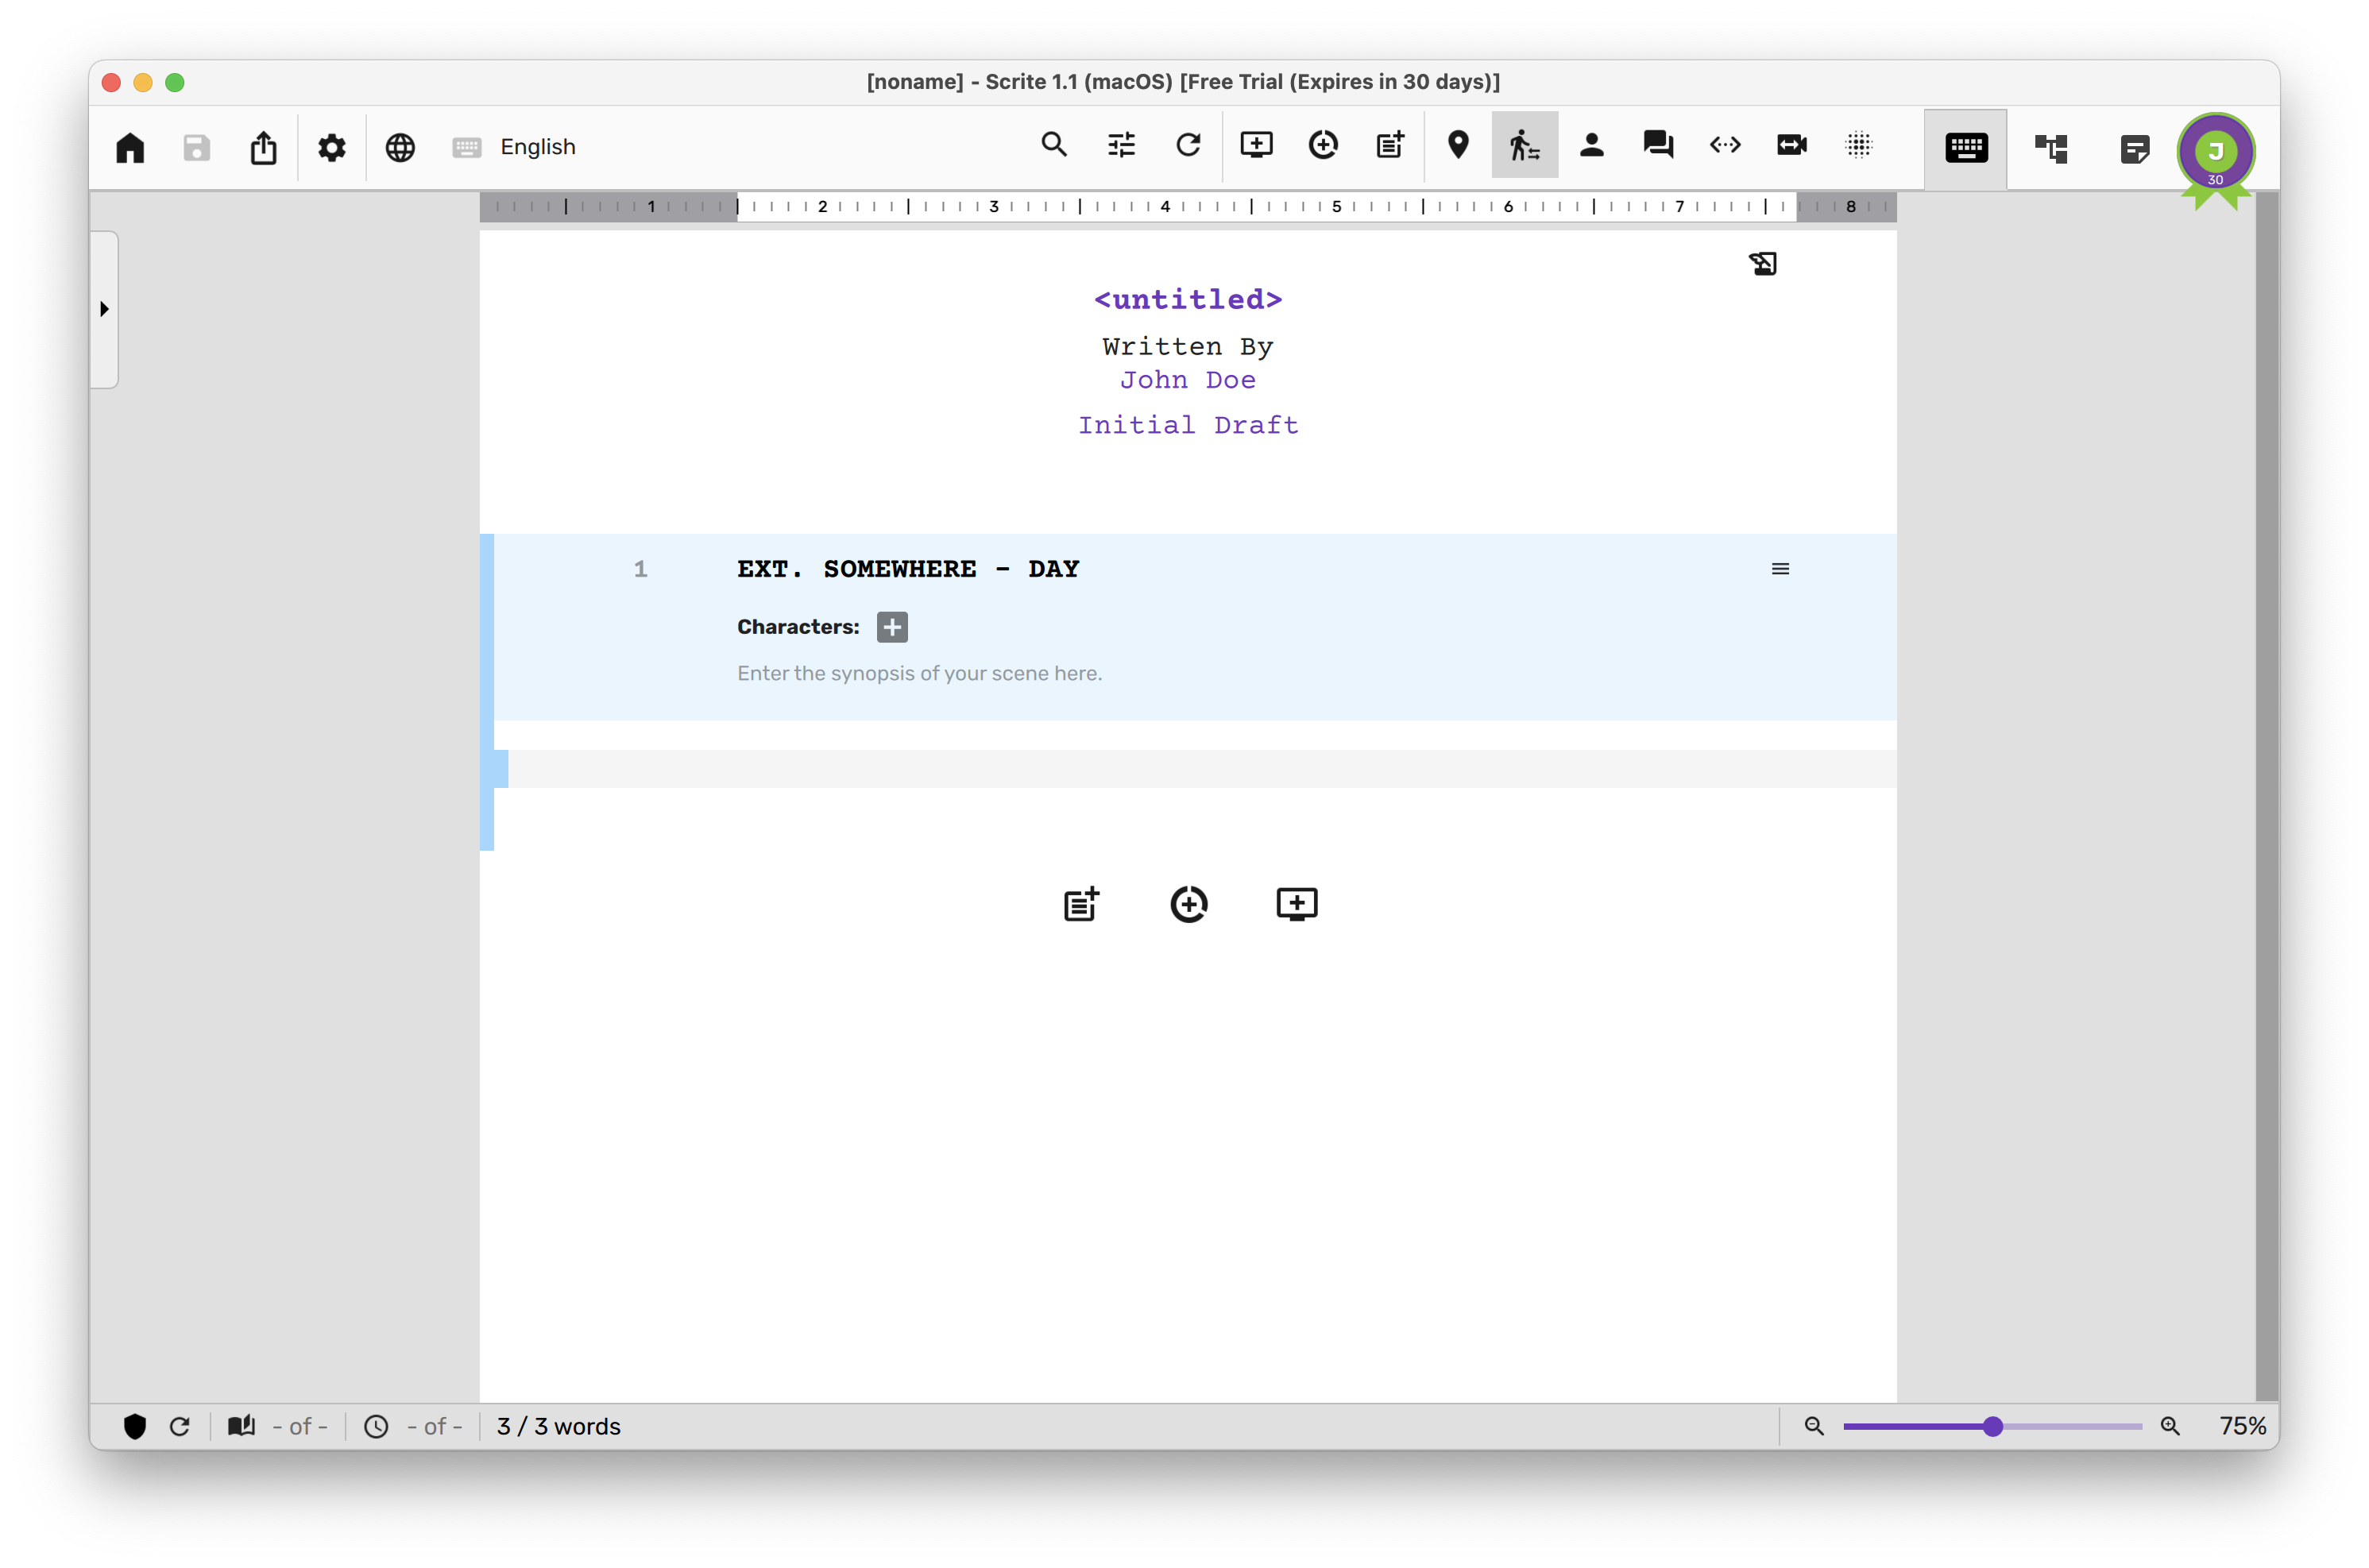
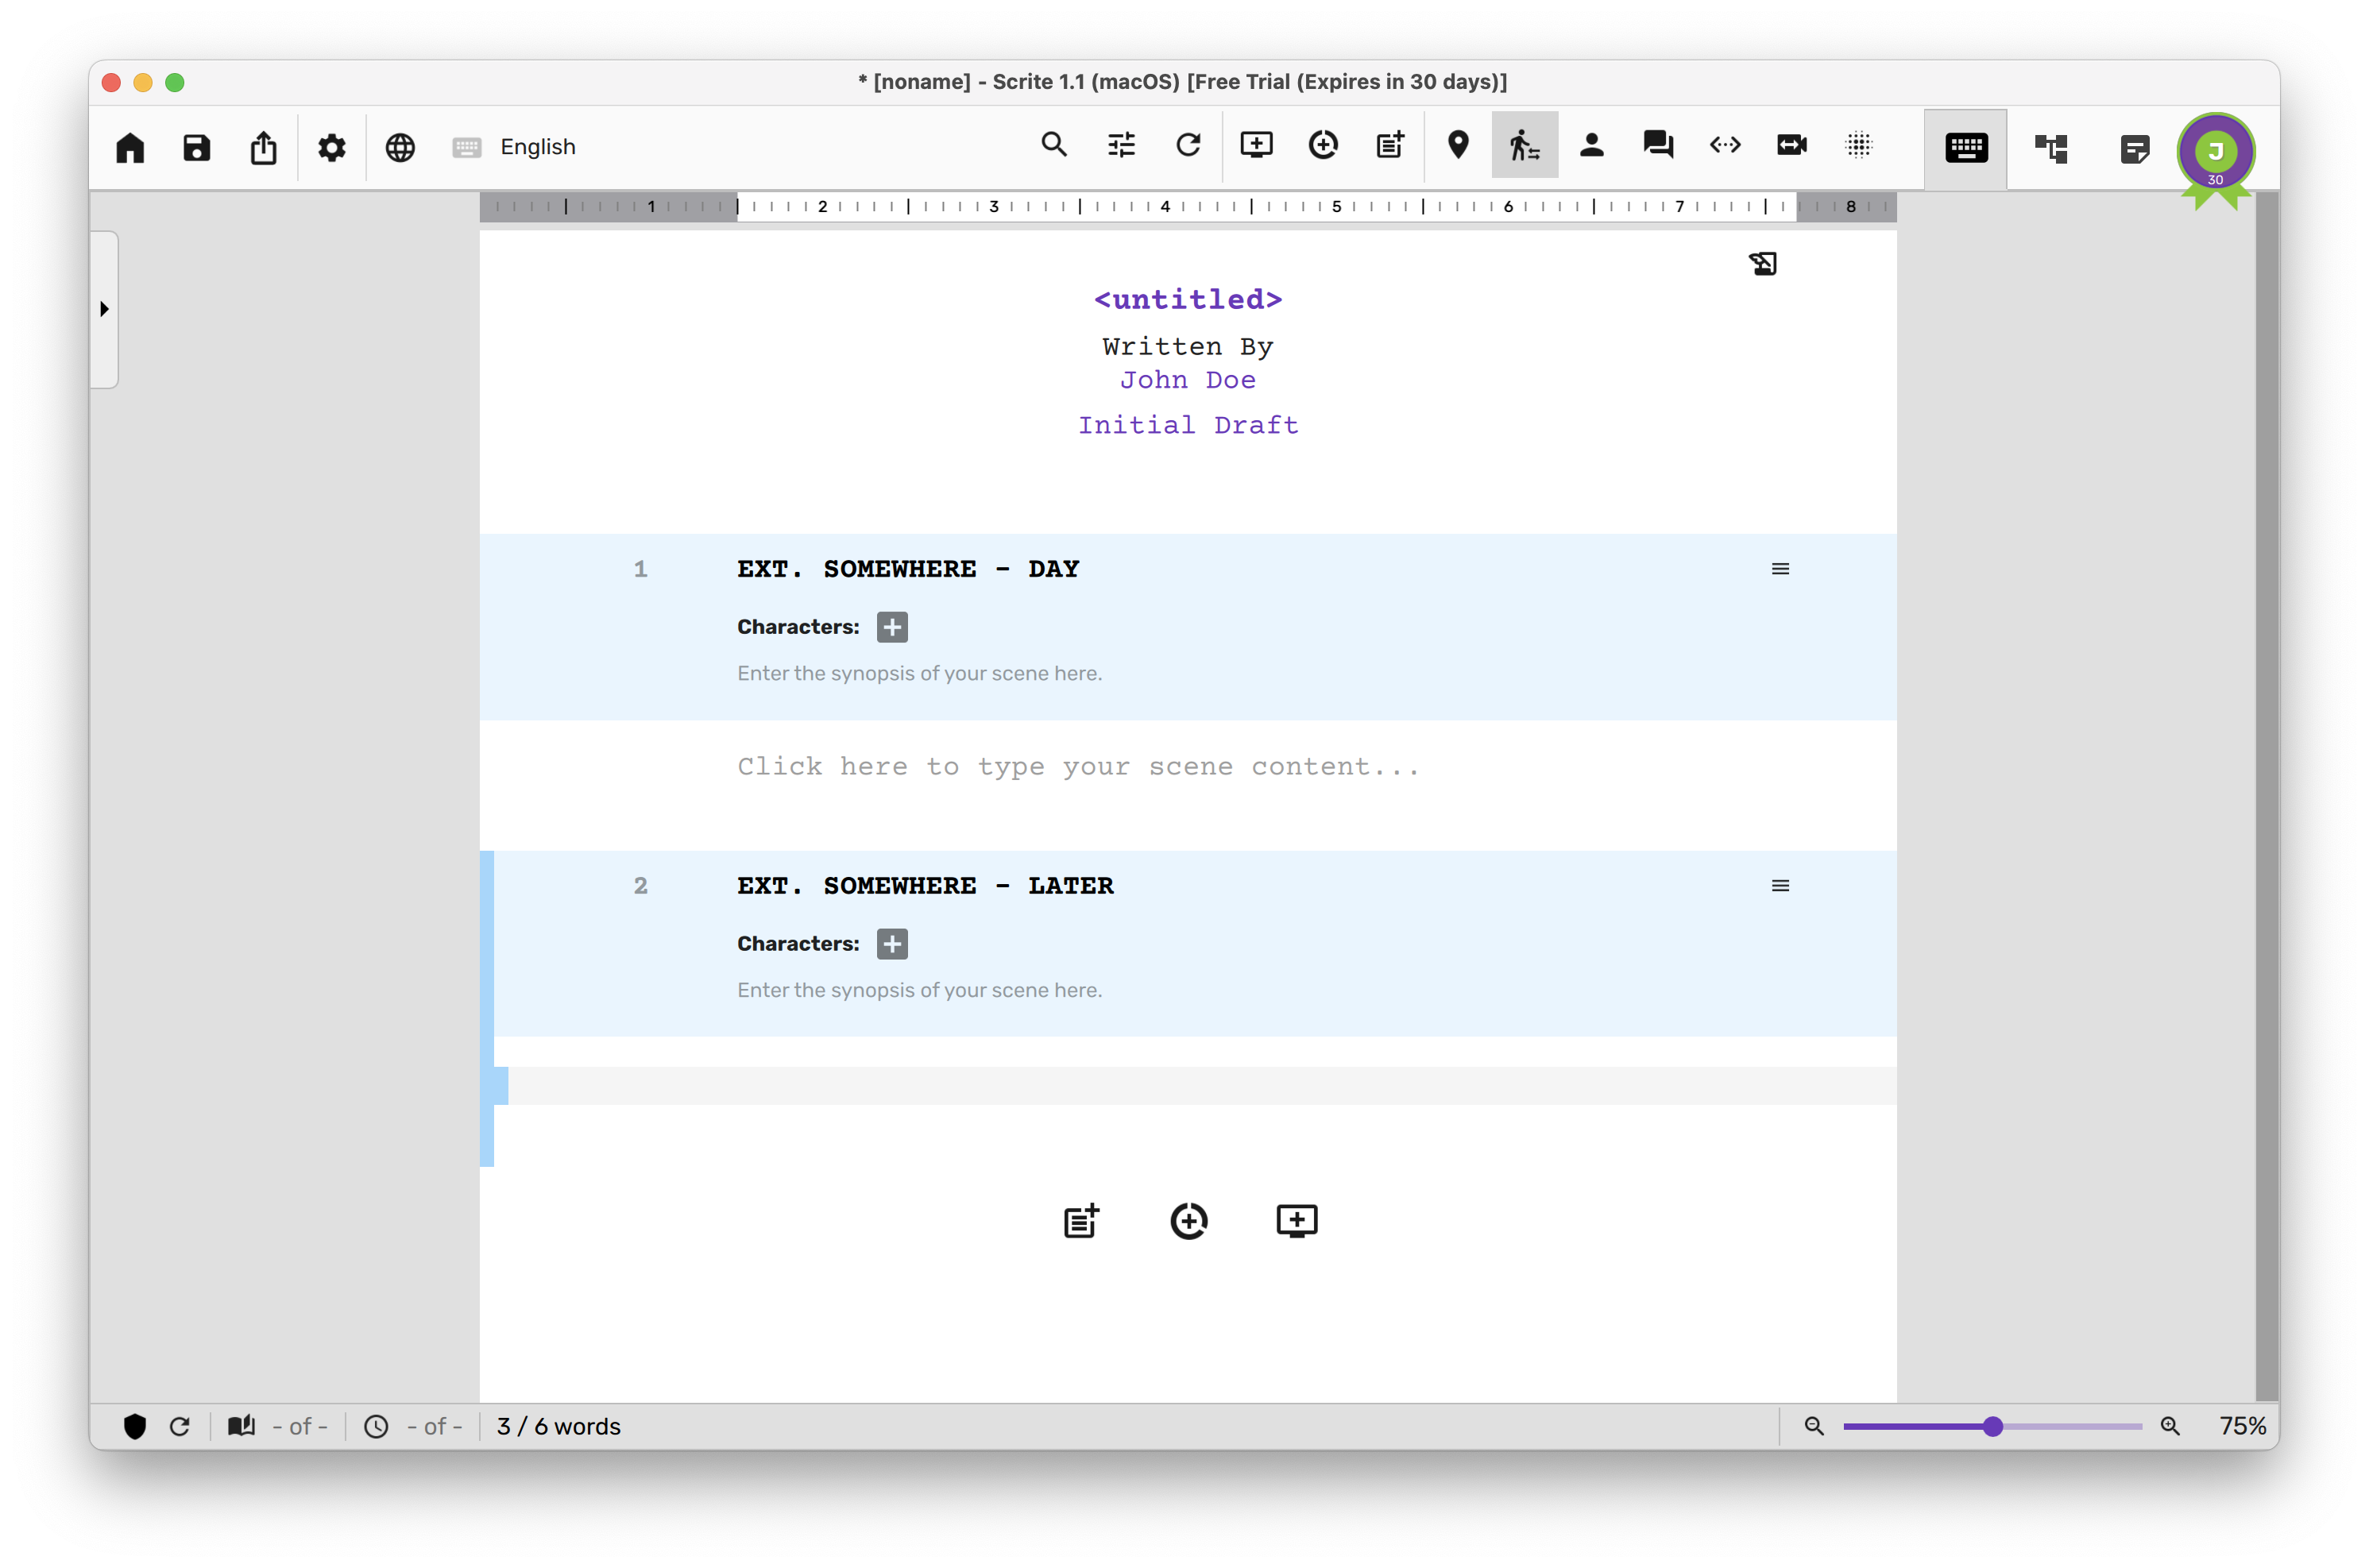
When you launch Scrite, the first thing you will notice is that there is a blank scene, with the initial scene heading shown as EXT. SOMEWHERE – DAY.
As mentioned before, Scrite’s UI is scene-centric. So you will not see pages in the app, but you will see a text block for each scene.
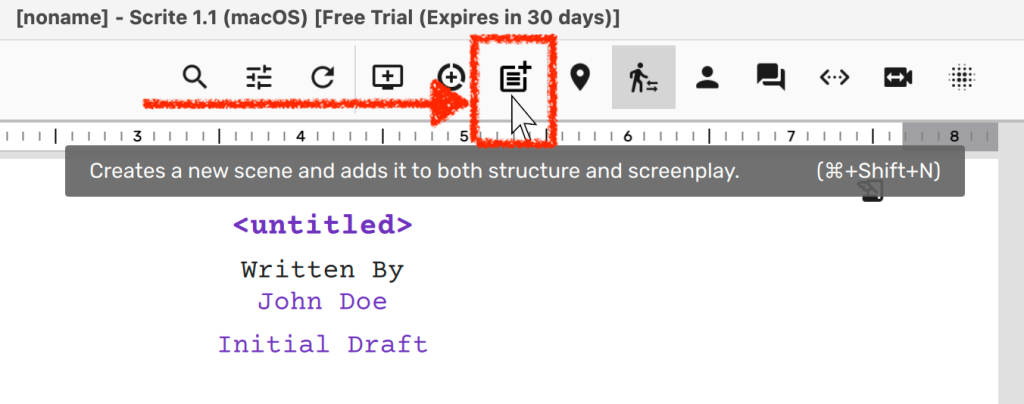
To create a new scene, you can click on the “New Scene” button in the toolbar, or use the keyboard shortcut Ctrl+Shift+N (on Windows & Linux) or ⌘+Shift+N (on macOS).
This will create a new empty scene after the currently selected scene (or at the end, if no scene is selected).
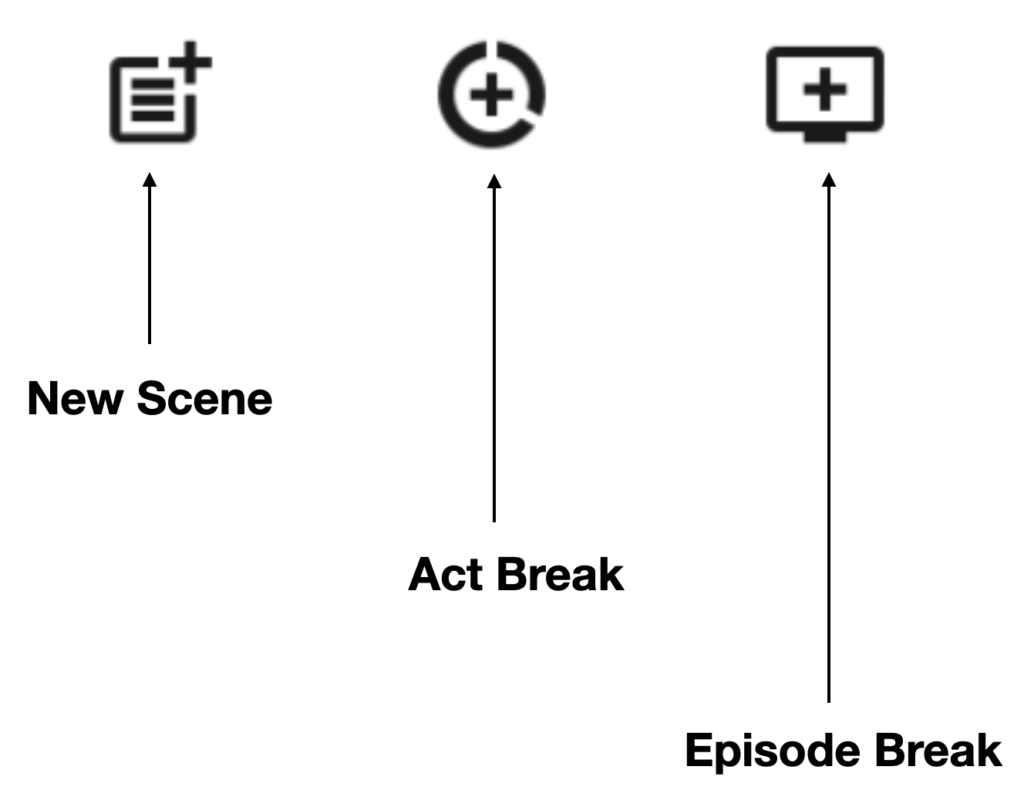
You can also use the buttons at the end to append a new scene, act or episode break.
Scrite will add a new scene with a default scene heading and cursor blinking in the scene content area of that scene.
Saving and Opening Files
New files are unnamed and unsaved. Scrite allows you to work on your screenplay until you actually decide to save it.
While we do have auto-save, it kicks in only if enabled and after a file has been saved atleast once and is in a directory which can be written into.
To save a file, you simply have to click on the save icon , select a folder and provide a file name. Scrite files are saved with extension .scrite.
You can open files by
Double clicking on the .scrite file in File Explorer (Windows), Finder (macOS) or Nautilus/Konqueror (Linux).
If that doesn’t work, then go to the Home Screen and select the Open option (or simply use the keyboard shortcut Ctrl+O (on Windows & Linux), ⌘+O (on macOS).
Alternatively, you can drag and drop your Scrite document on the app-window to open it.
Editing the Scene Heading
You can click on the Scene Heading or use keyboard shortcut Ctrl+Zero (⌘+Zero) to move cursor to the scene heading and edit it.
When you are done, you can hit Enter to switch cursor to the scene content area.
Here is the first difference between Scrite and other apps. While other apps provide a way to mark any paragraph as a scene heading, Scrite requires you to create a scene explicitly and assign a scene heading to it. Later on in a future article, we will show you how (and why) you can create scenes without a scene heading.
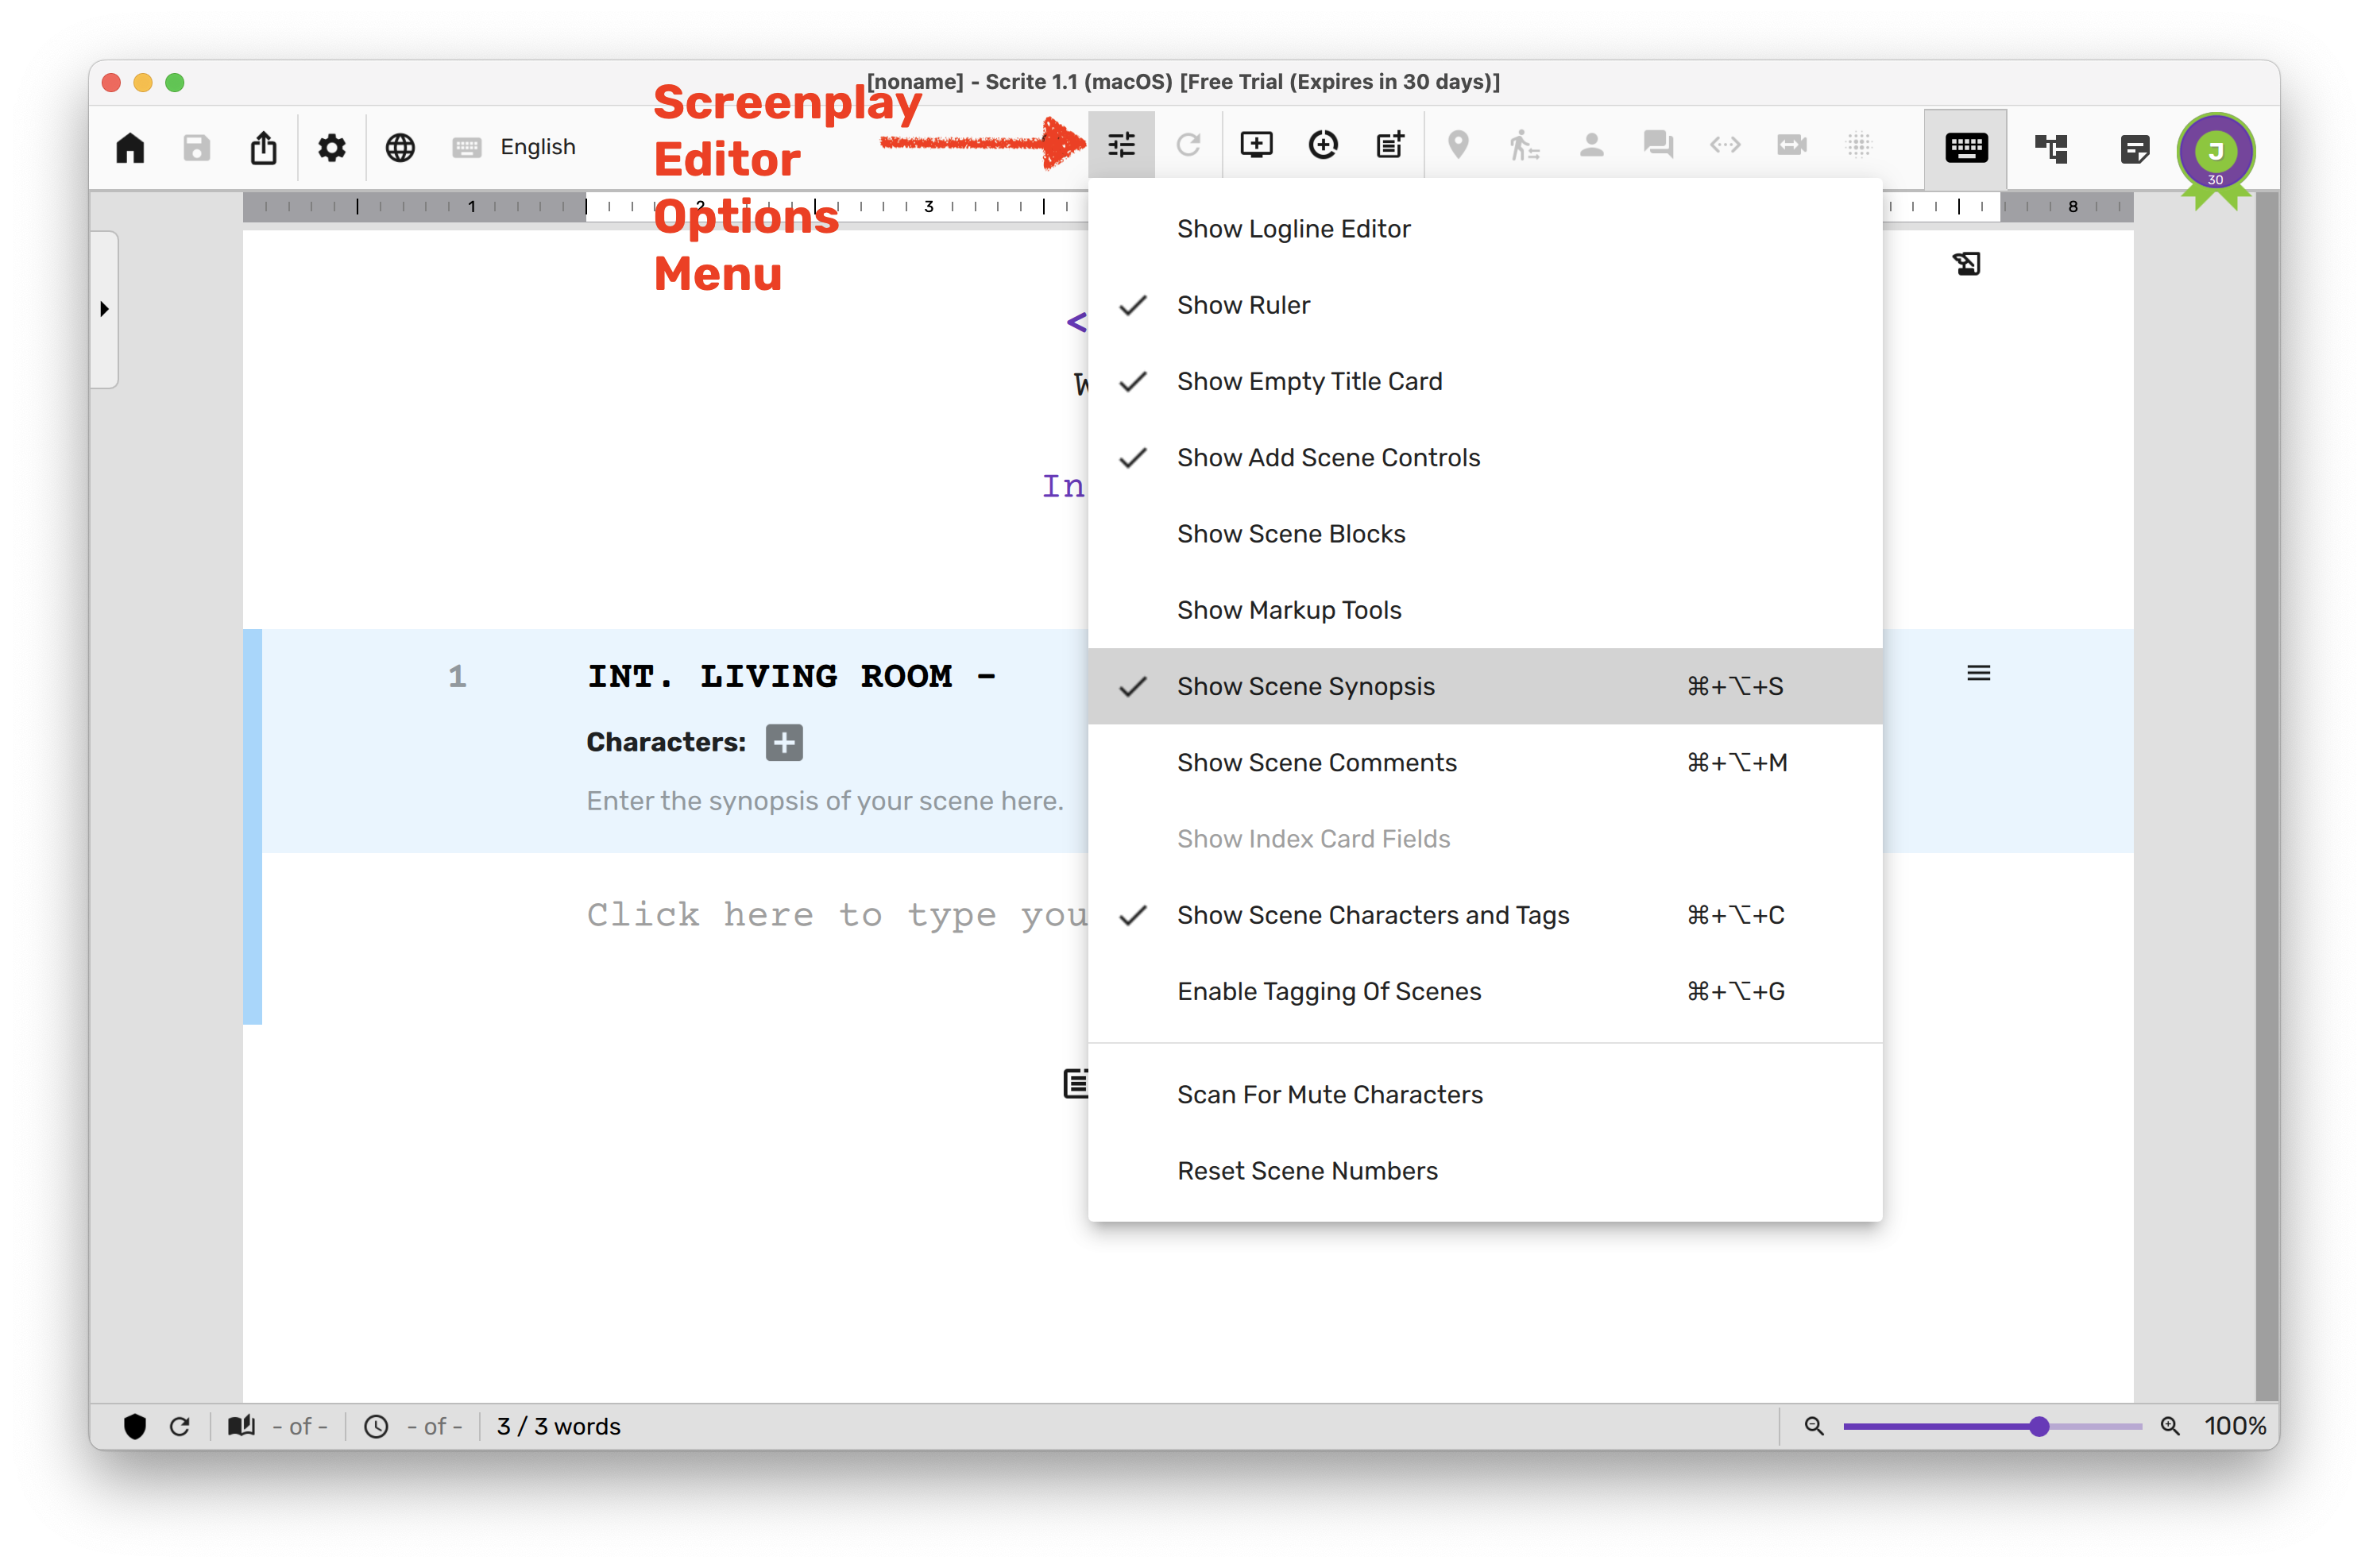
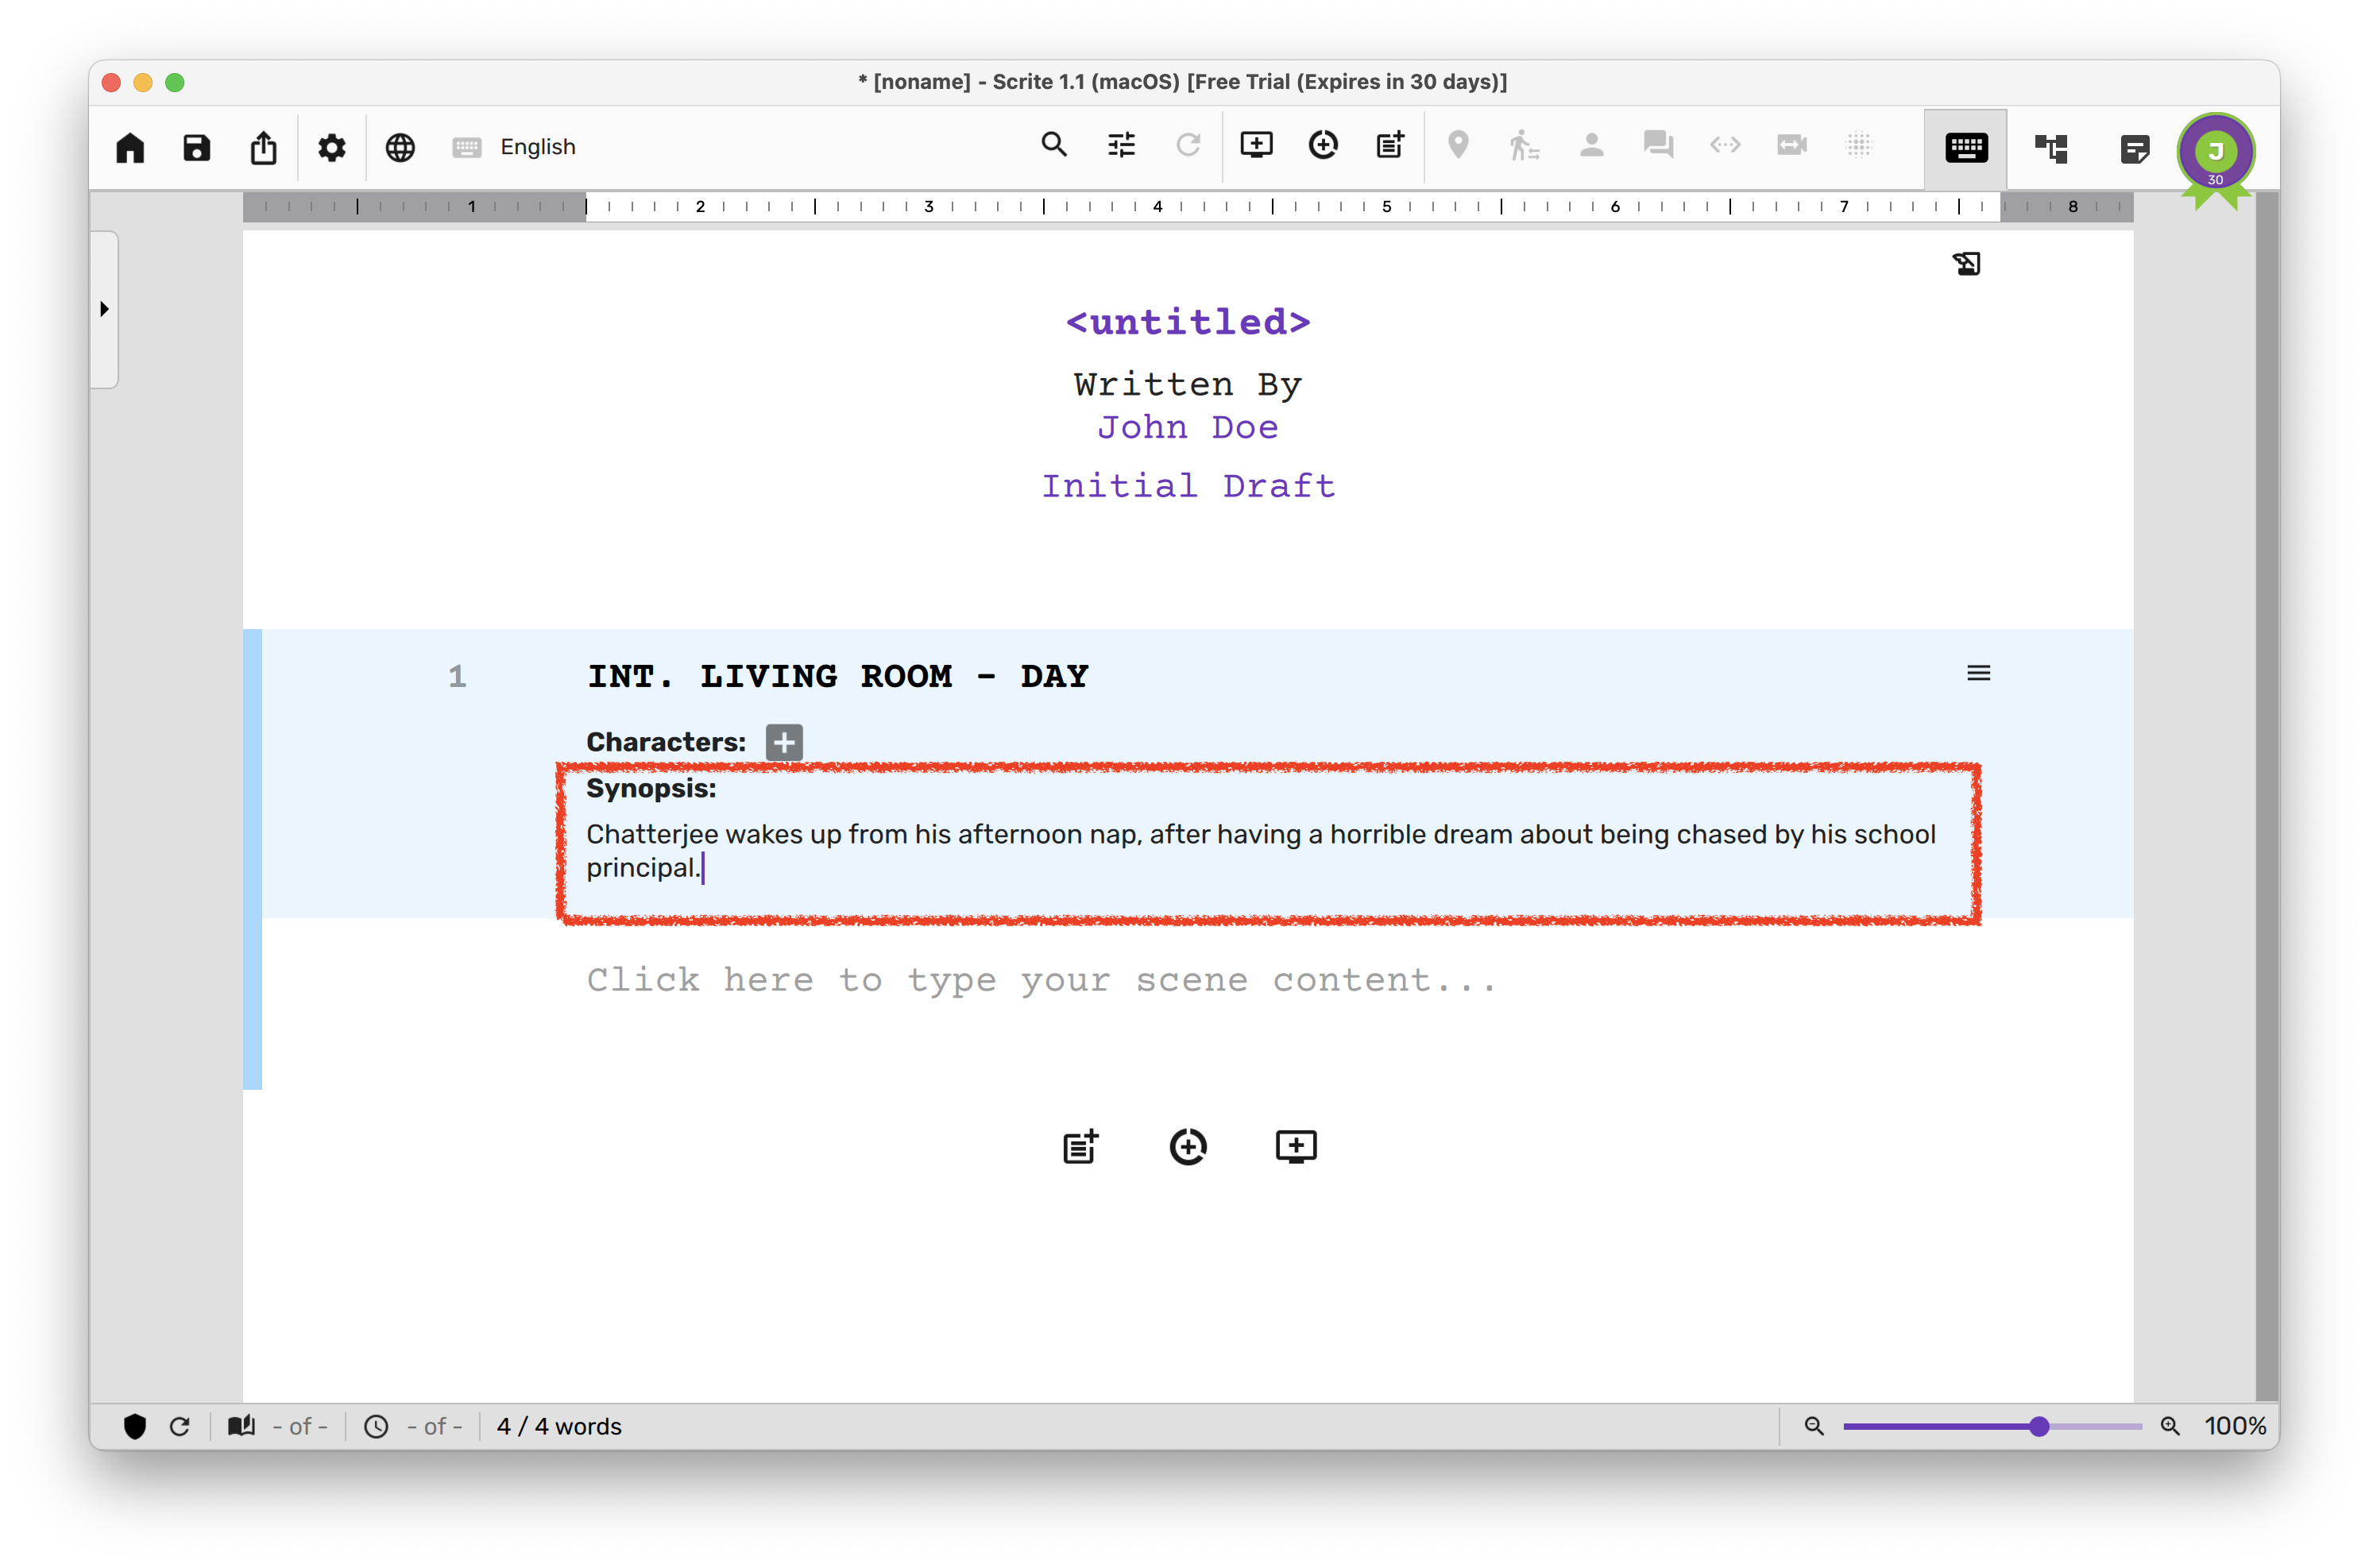
Also notice how the Scene heading area has a color to it and it also shows characters list. Infact, you can configure Scrite to show you the scene synopsis as well.
Once you check the “Scene Synopsis” option, you will notice that a new area now shows up in the scene heading where you can type the synopsis of your scene.
The Synopsis field is where you can type a short description of what you think should happen in this scene. When you export your screenplay to PDF, the synopsis is not exported by default; although you can toggle that option explicitly if you want.
Typing Scene Content
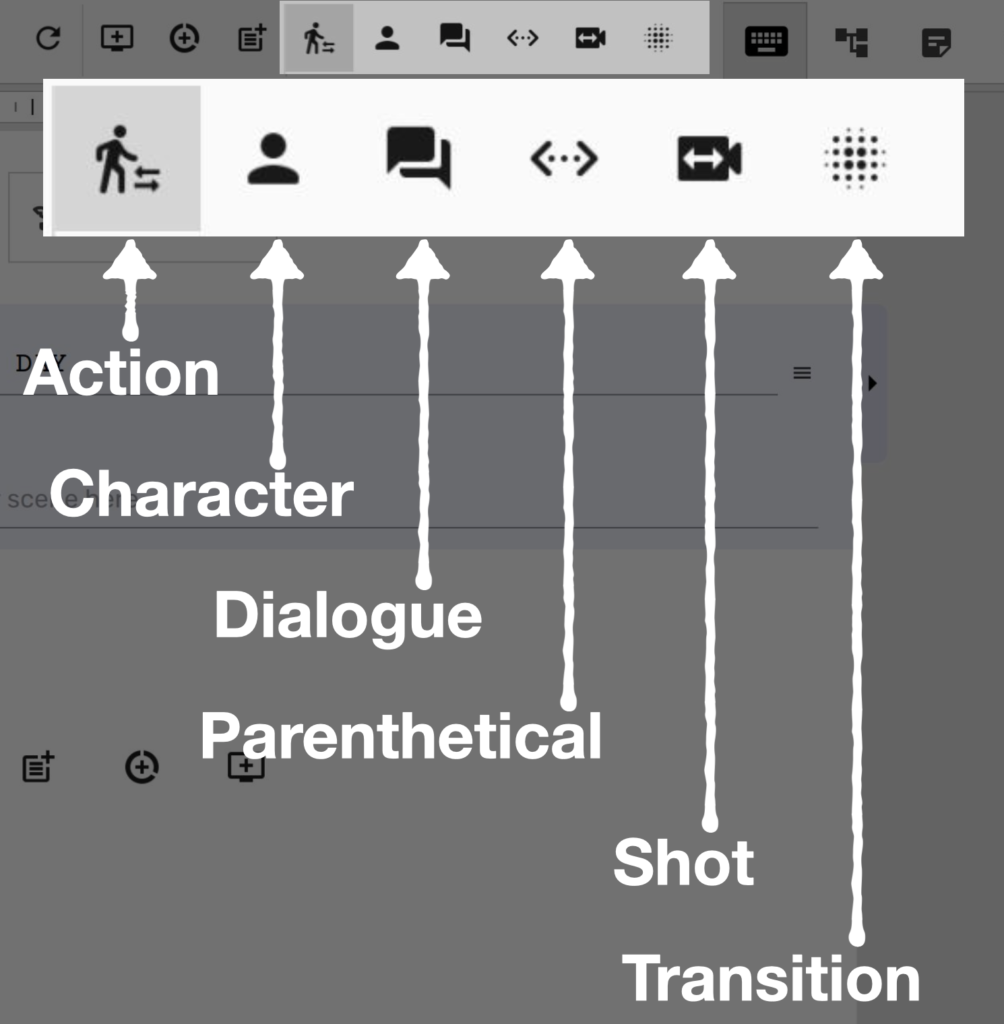
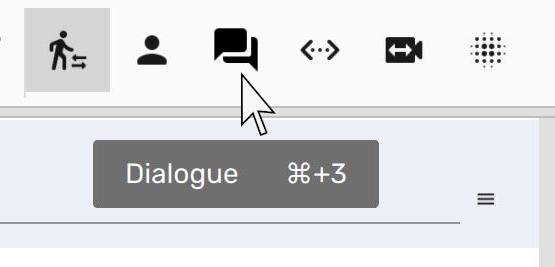
While writing your scene content, you probably want to format your action, character, dialogue, parenthetical, shot and transition paragraphs. Scrite has a button for each paragraph type on the toolbar as shown below.
While editing you can also use keyboard shortcuts as outlined in the table below to switch between various paragraph types.
Paragraph Type
Windows, Linux
macOS
Action
Ctrl+1
⌘+1
Character
Ctrl+2
⌘+2
Dialogue
Ctrl+3
⌘+3
Parenthetical
Ctrl+4
⌘+4
Shot
Ctrl+5
⌘+5
Transition
Ctrl+6
⌘+6
Infact, in most cases you can simply use the Tab key to switch to the paragraph type, of the current paragraph under the cursor, to the next most appropriate paragraph type.
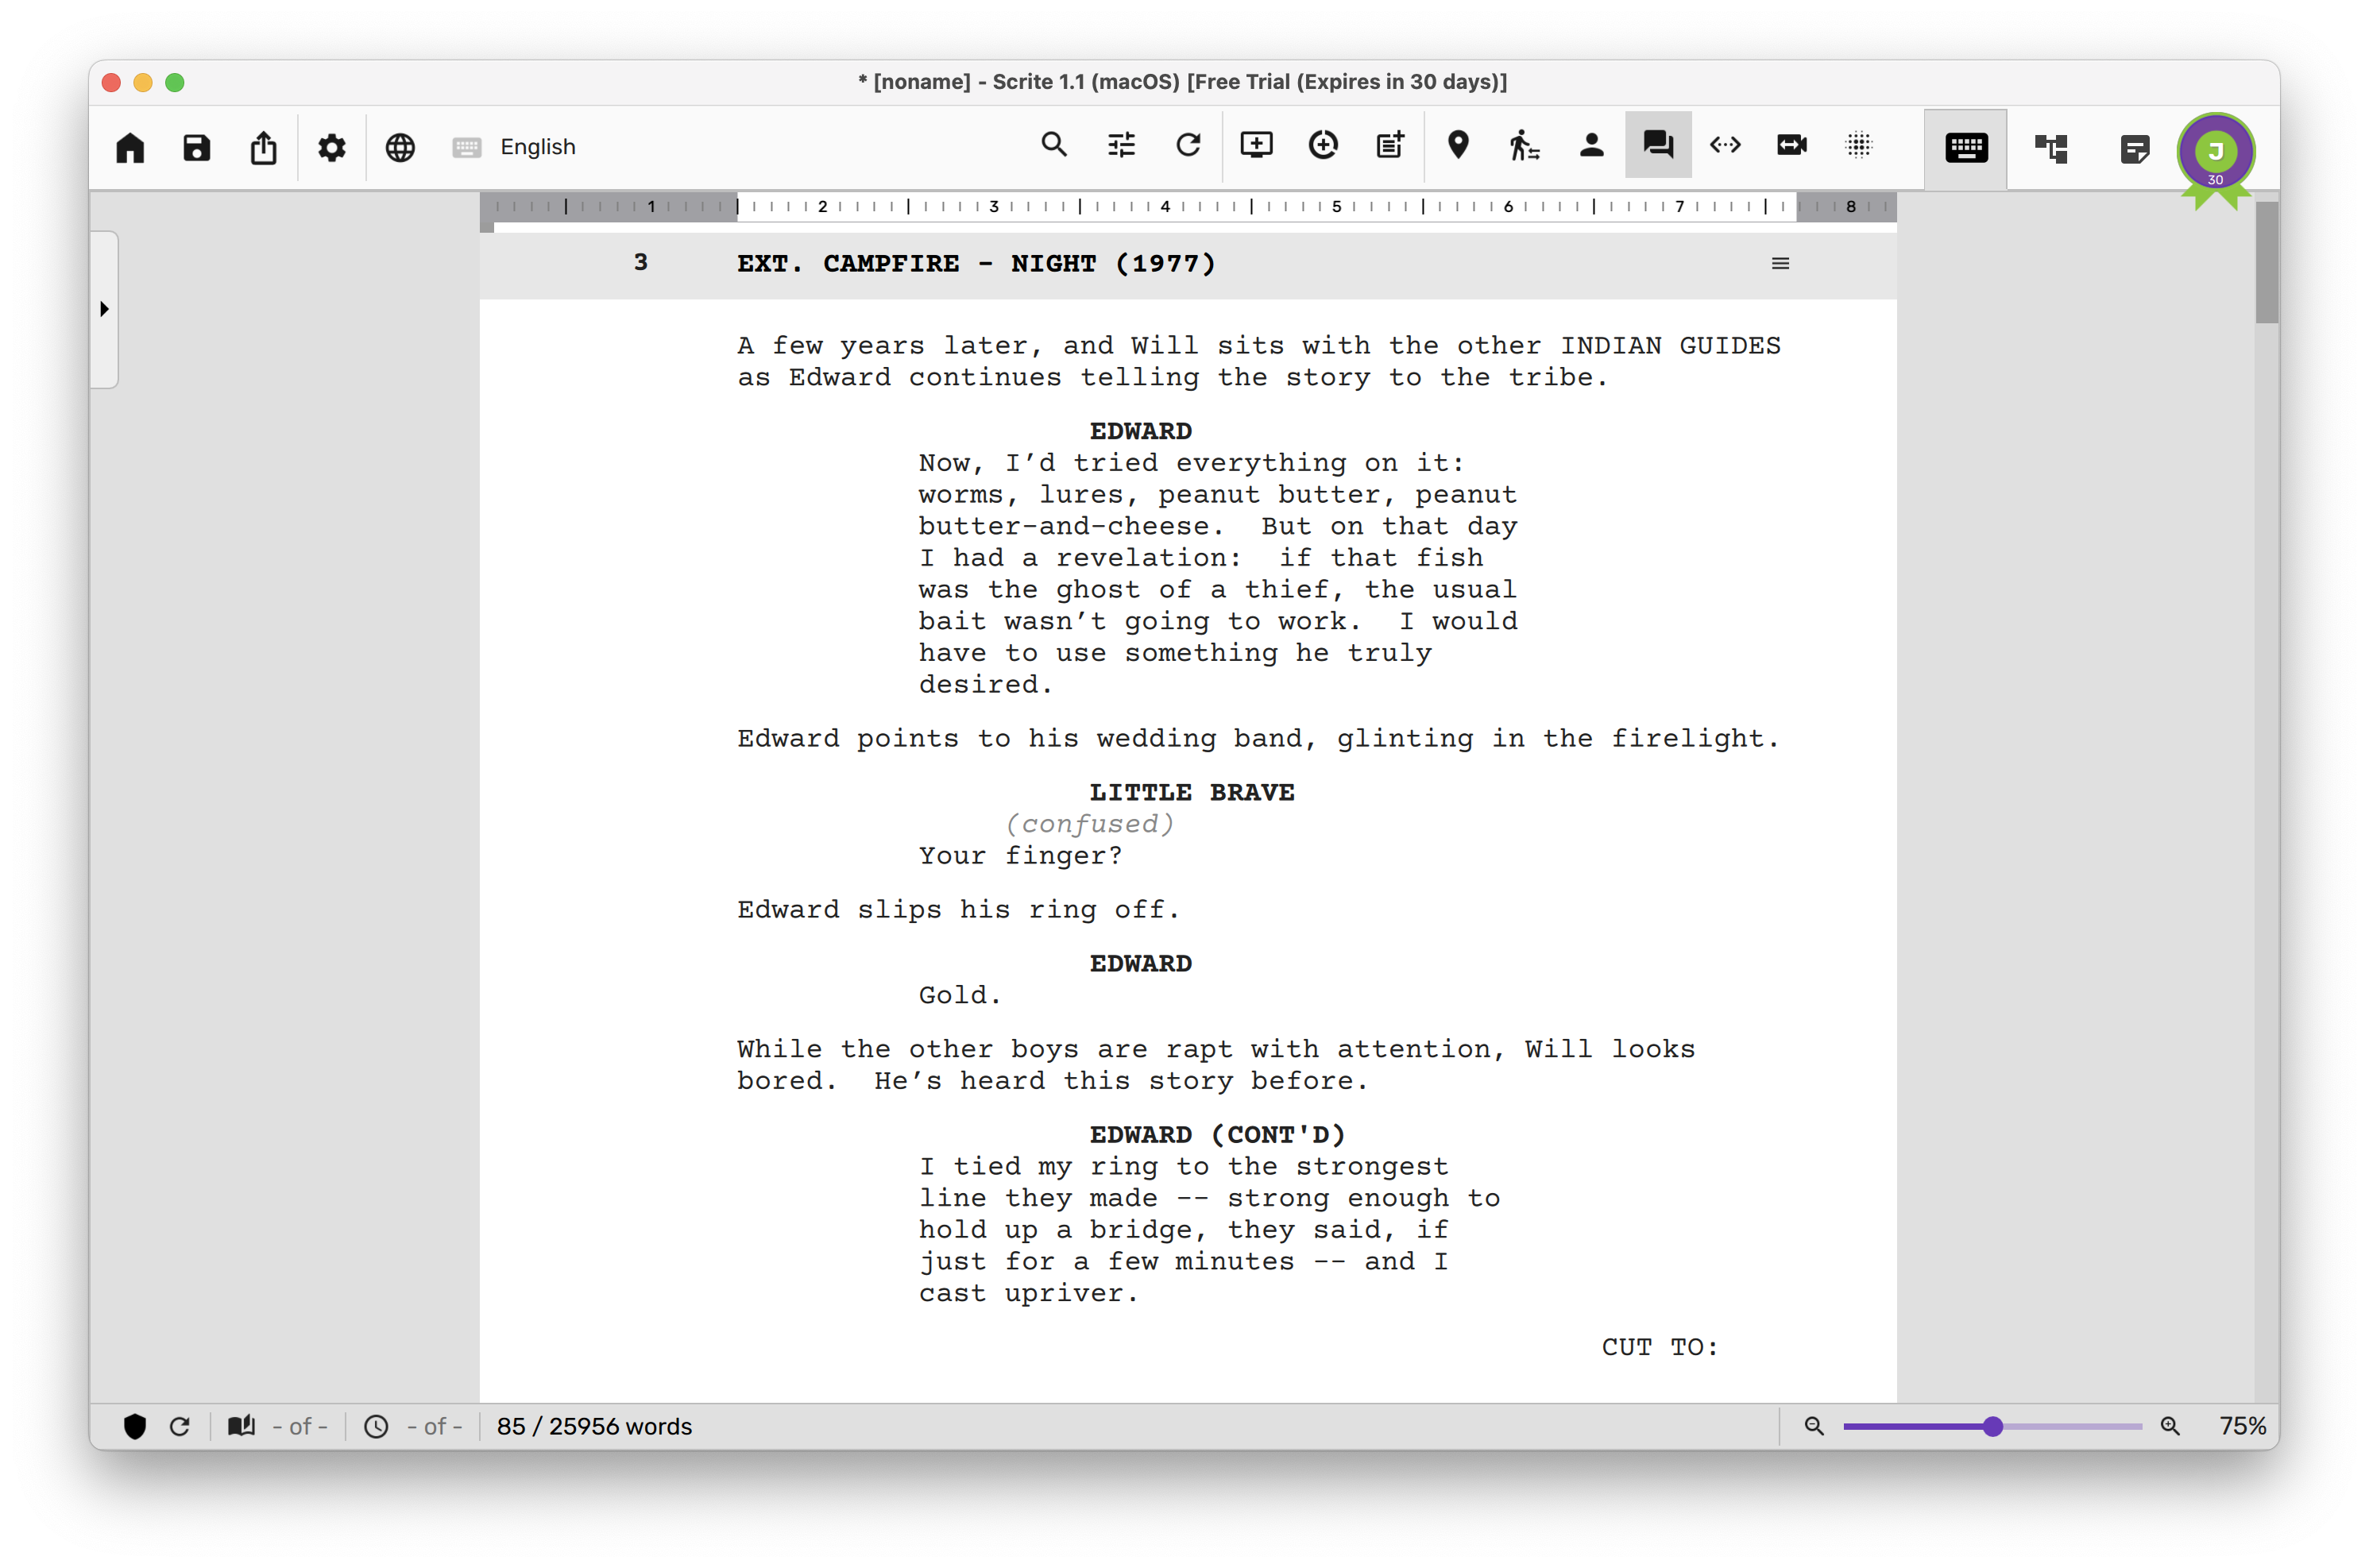
Shown below is contents of a scene, with paragraphs properly formatted.
Adding More Scenes
As mentioned before, you can keep creating more scenes and adding content to each of the scenes. To add a new scene, you can either click on the new scene button at the end of the page or on the toolbar as shown below.
Scrite is optimized for screenplays that follow best practices in structure—featuring predominantly short scenes with a few longer ones as needed.
The app performs best when most scenes are under a page in length, with occasional scenes extending up to two pages. This not only supports smoother performance but also aligns with industry standards for pacing and reader engagement. While you can write longer scenes in Scrite, please note that if the majority of scenes exceed two pages, the app’s performance may become noticeably sluggish and, in some cases, difficult to use. For the best experience, we recommend keeping scene lengths concise as much as possible.
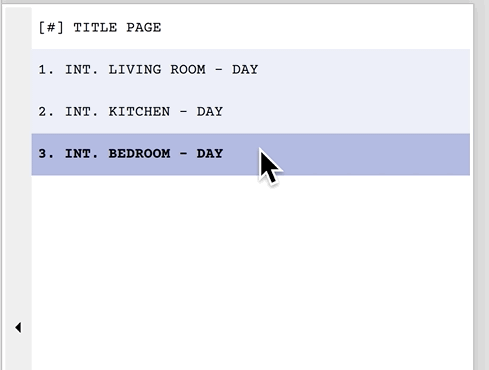
Scene List Panel
As shown before, you can click on the icon along the left edge of the window to toggle visibility of the scene list panel.
Clicking on a scene heading in the left causes Scrite to switch to that scene on the editor. You can even reorder scenes on the list by clicking on a scene and dragging it to another position in the screenplay.
Distraction Free Writing
You can turn off scene character list and synopsis panels using the “Screenplay Editor Options” menu.
And finally, you can collapse the scene list panel on the left. You will now have a clean and distraction free writing area.
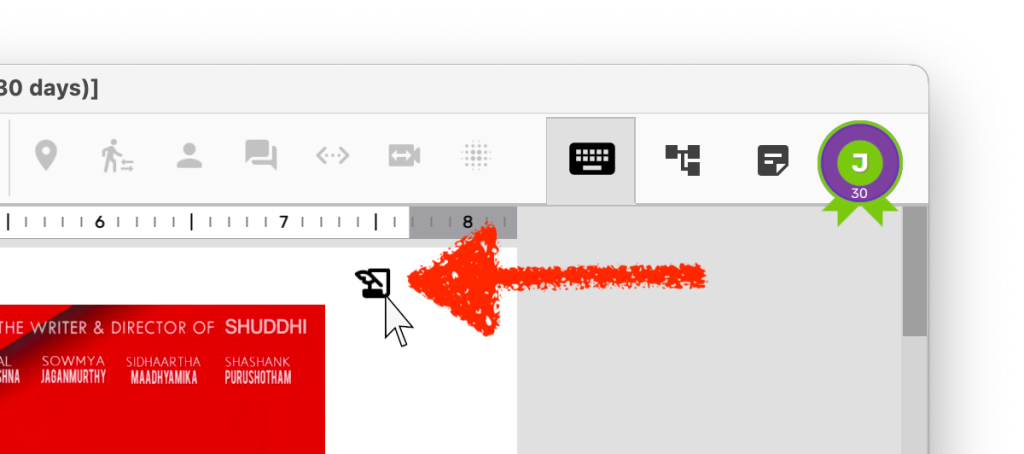
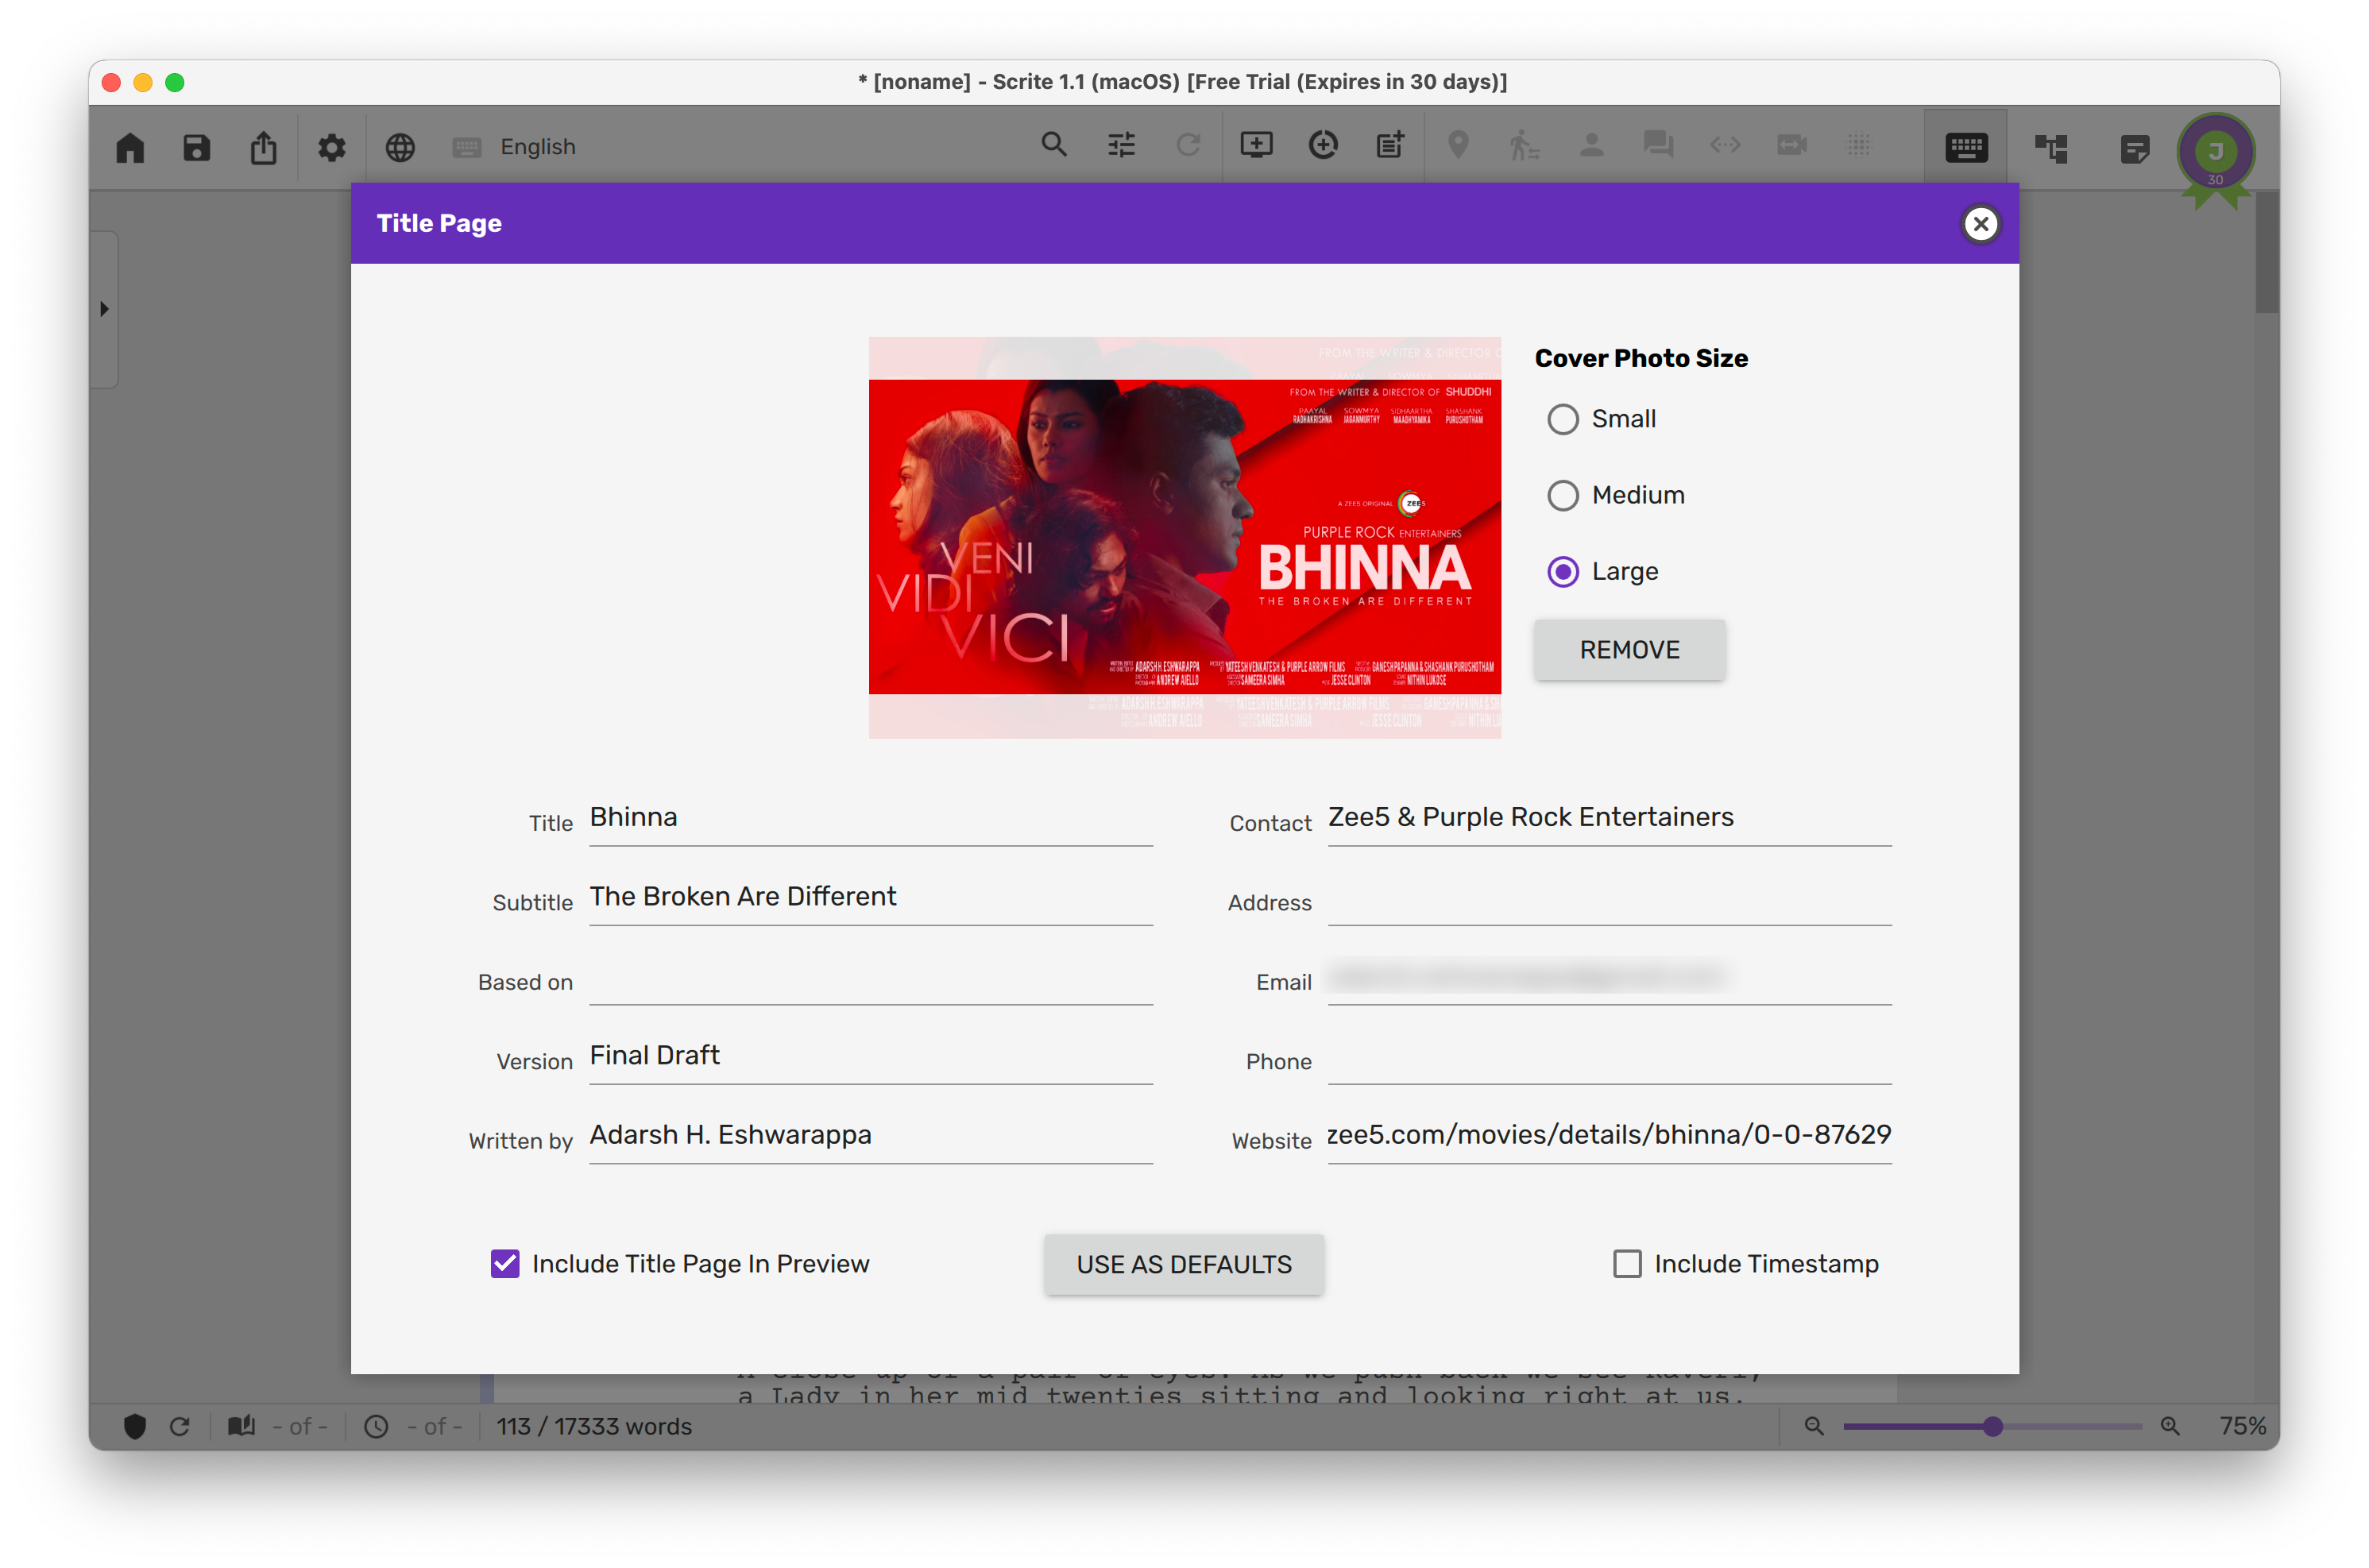
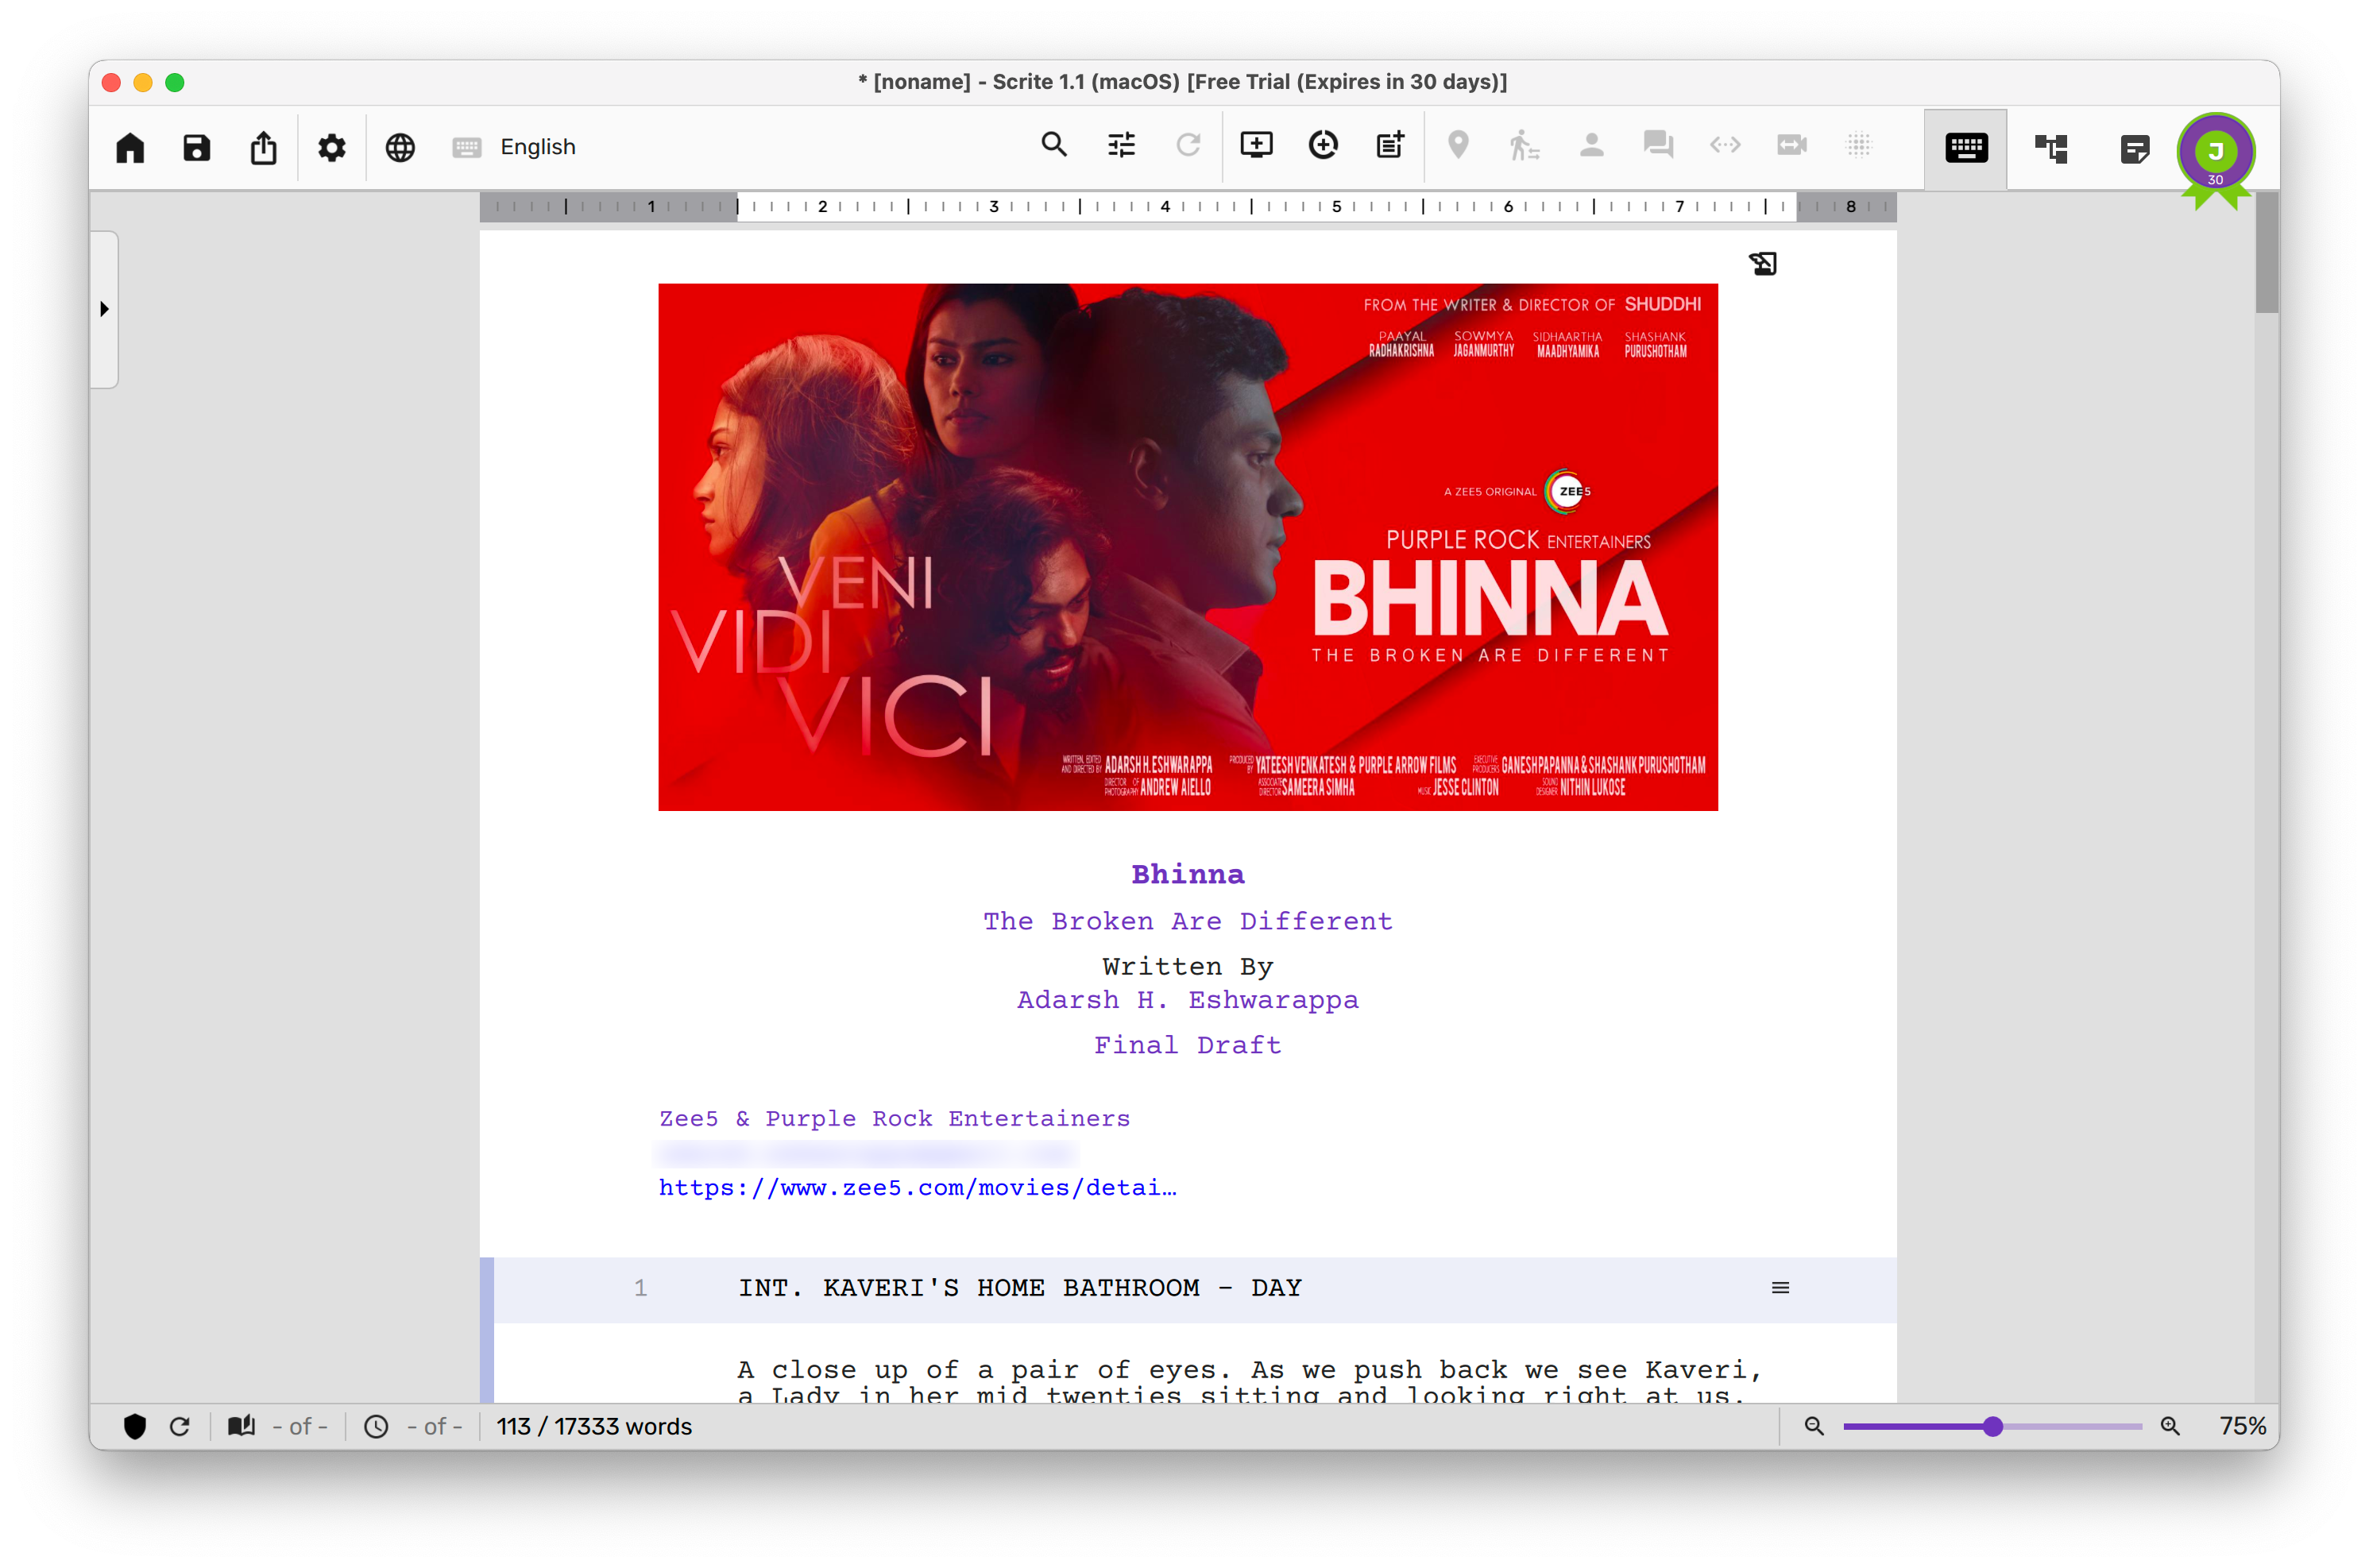
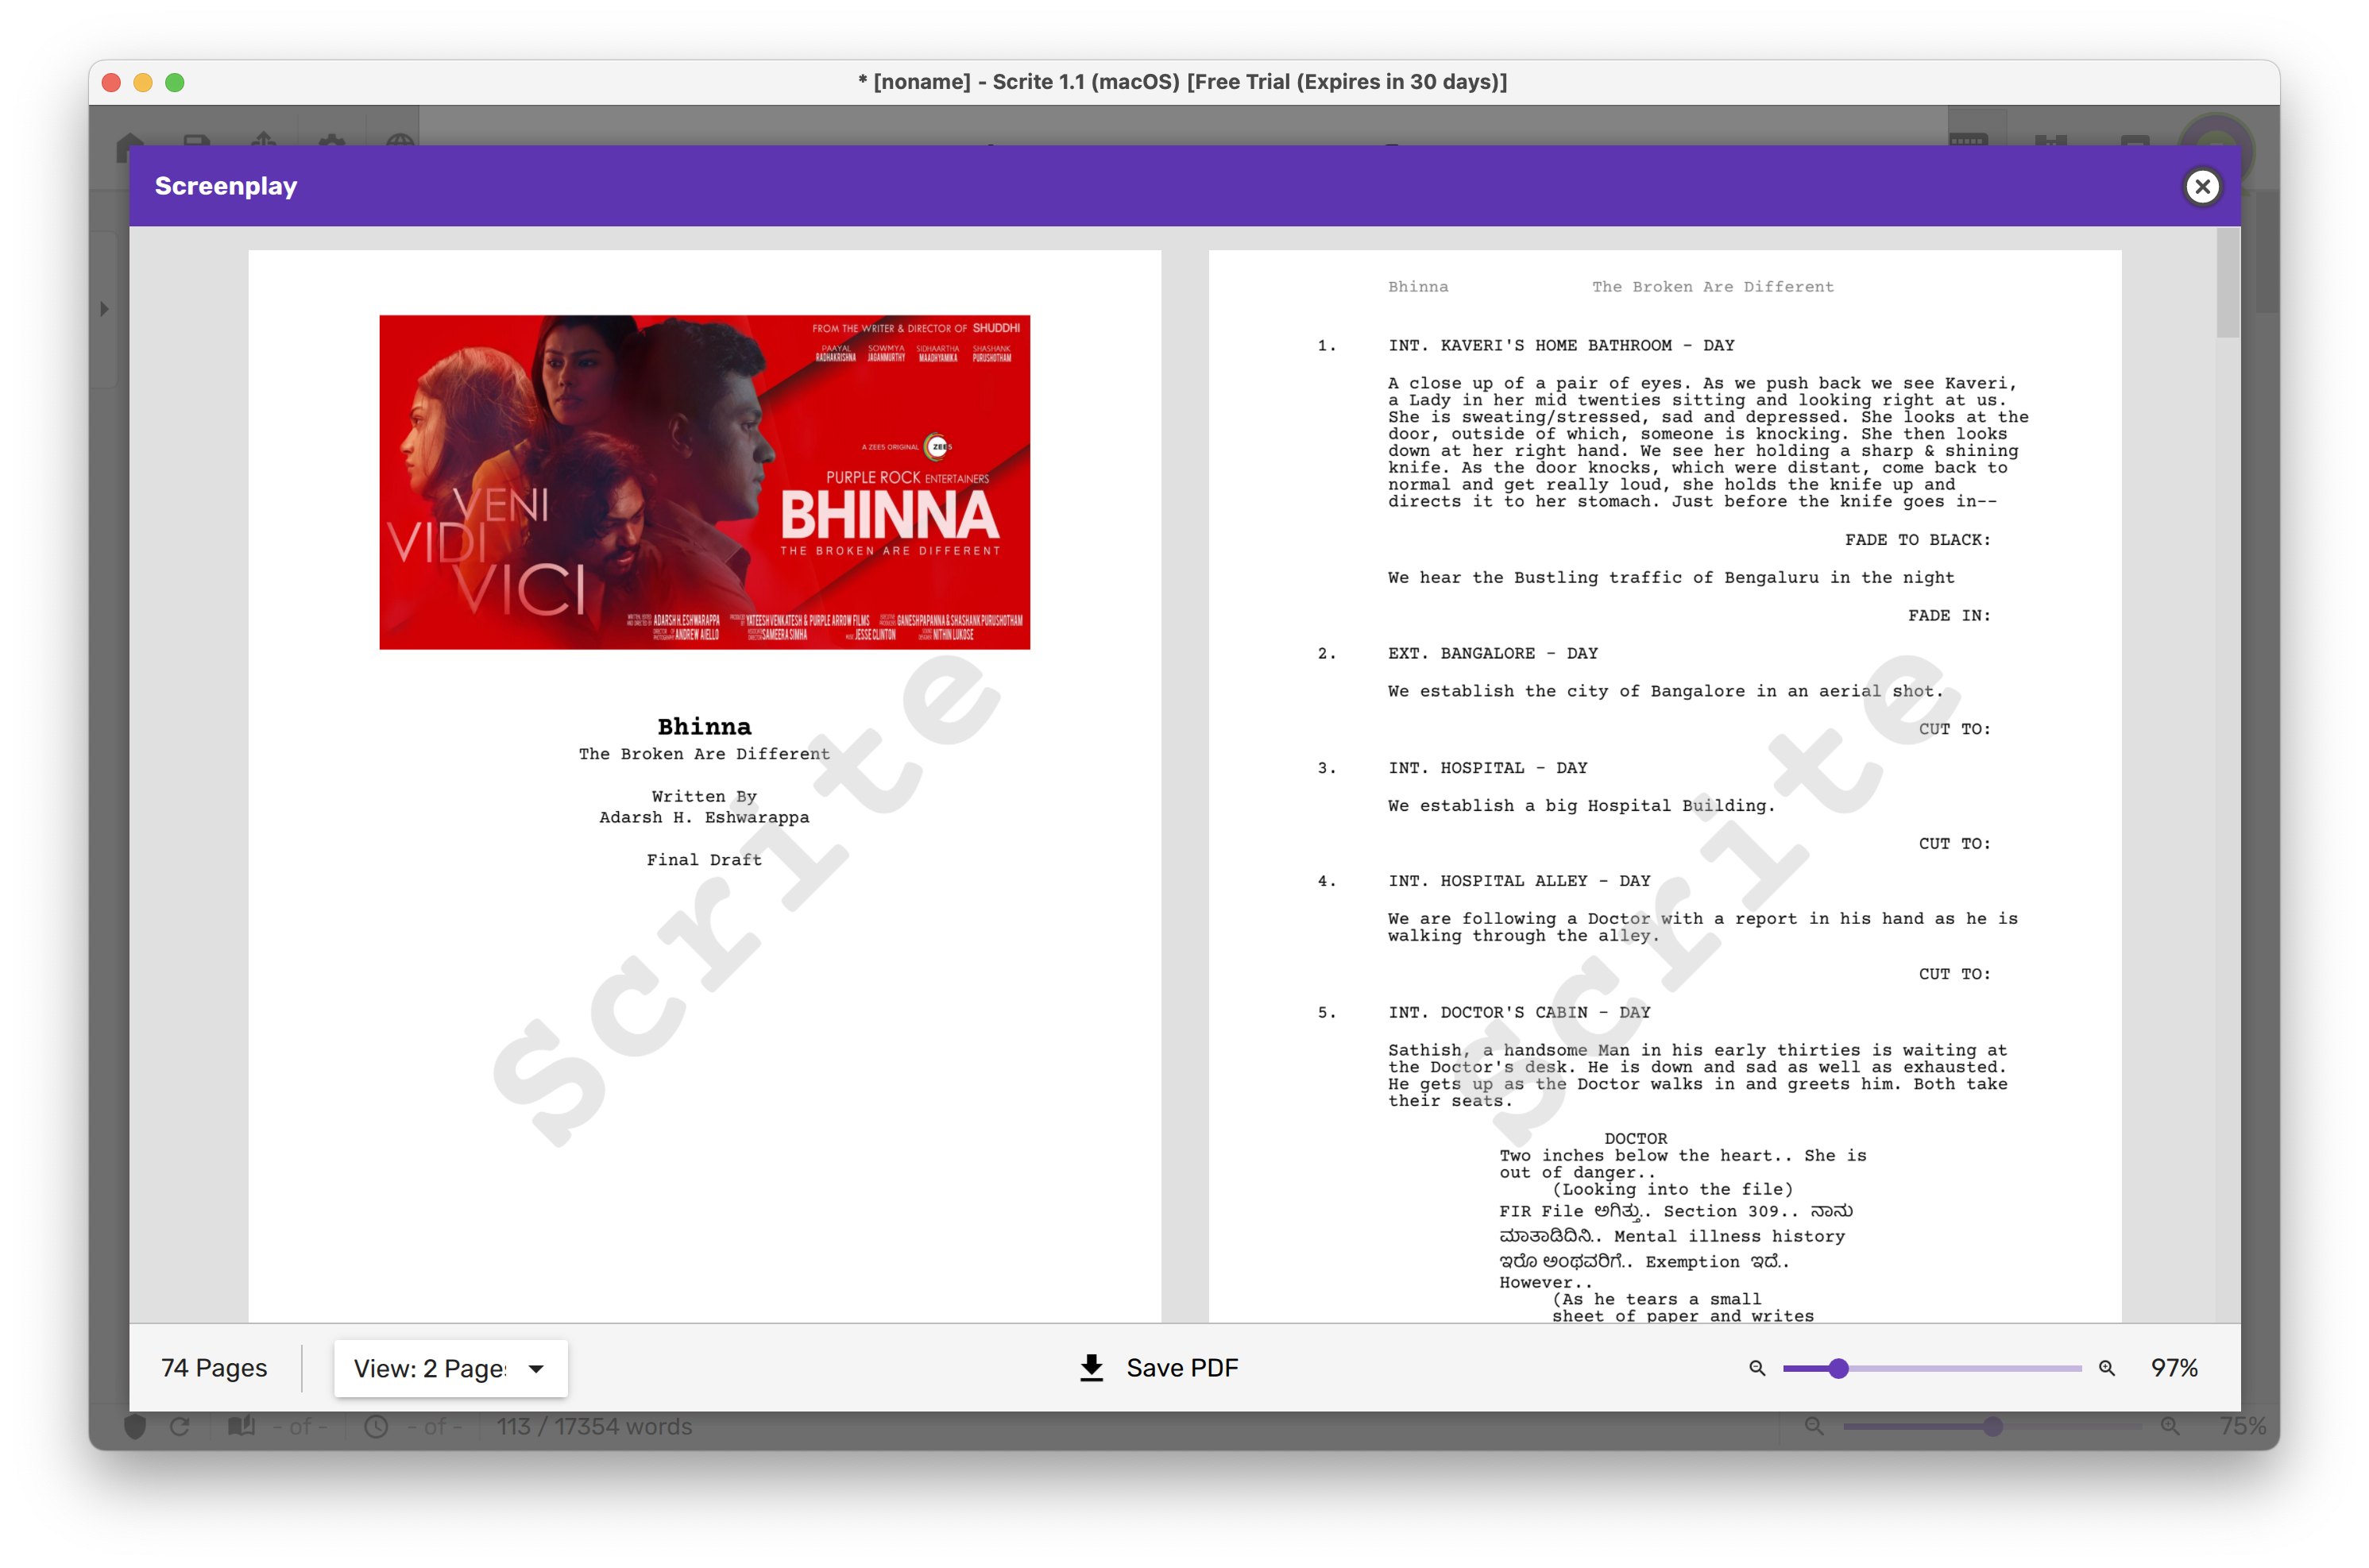
Editing The Title Page
You can click on the “Edit Title Page” button at the top of your screenplay.
This opens a title page editor dialog box, where you can assign a cover page image and also key values against title-page fields.
Once done, you can click on the close icon on the top right of the dialog box to apply the changes. From then on, the title page fields along with the cover art will show up before the first scene of your screenplay.
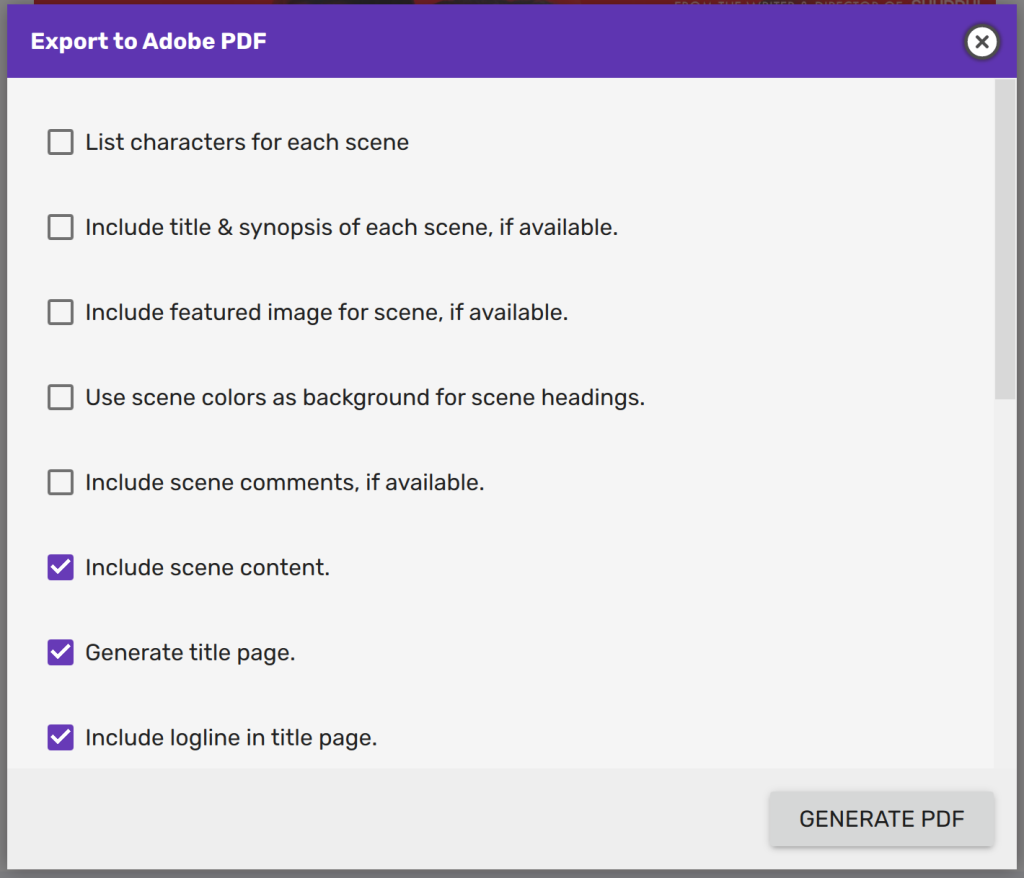
Exporting to PDF
You can select Export > Adobe PDF, or use the keyboard shortcut Ctrl+P (on Windows & Linux), ⌘+P (on macOS) to preview how your screenplay would look when exported to PDF.
The “Export to Adobe PDF” configuration dialog box offers a bunch of options to customise how your PDF file will look. In here you can toggle title page, synopsis and more.
Please review the options available on this dialog box and customize your PDF output the way you like it.
Finally, click on “Generate PDF” to generate a preview of the PDF file.
Once you are satisfied, you can click on the “Save PDF” button along the bottom edge of the dialog box to save the PDF file to a location of your choice.
Please note that you will not be able to change or remove the default watermark while you are using the app in free-trial. Please purchase a plan that supports customisation of watermarks to change or remove the watermark.
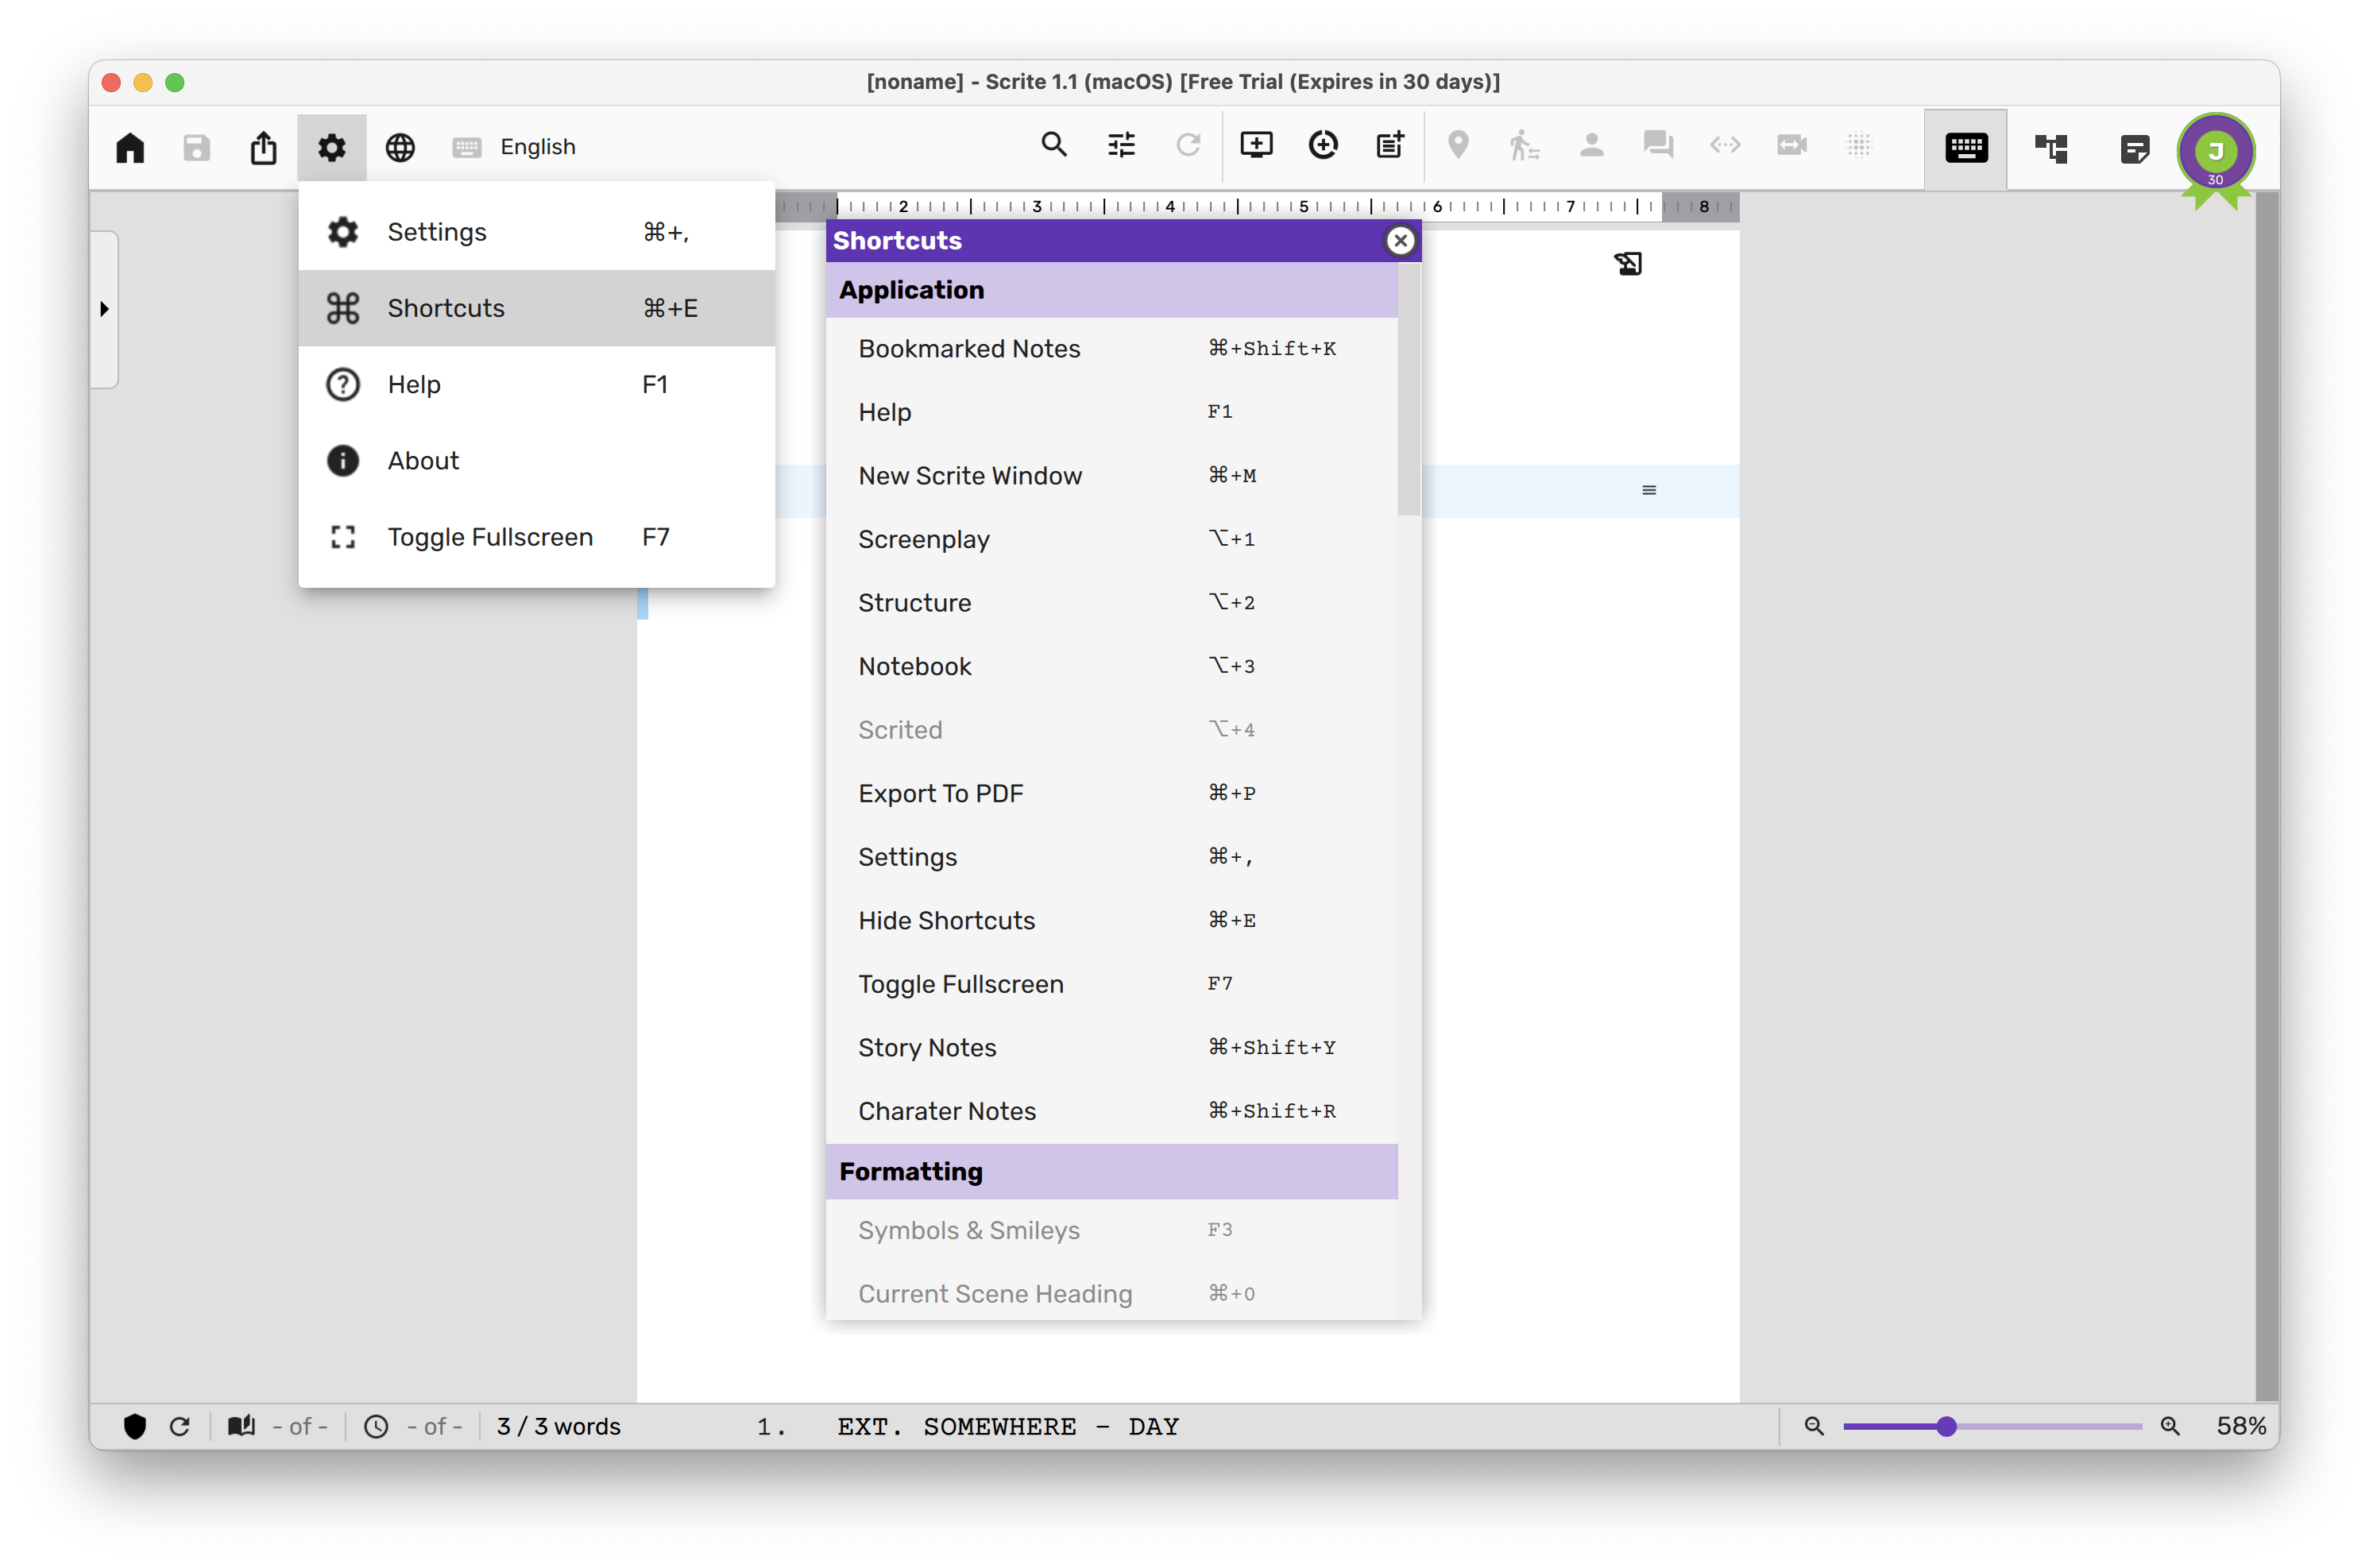
Discovering Keyboard Shortcuts
Before signing off from this quick start guide, we want to show you how to discover keyboard shortcuts for many actions in Scrite.
Keyboard shortcuts are displayed on most menu & toolbar options and sometimes also on tooltips.
However, if you want to get a quick list of all keyboard shortcuts then you can pull out the shortcuts dockwidget.
Purchasing a Plan
As mentioned before, at anytime during your trial, you can sign up for any of the paid plans and enjoy all features unlocked from the paid plan for the remainder of your trial and for the duration of the plan you have purchased.
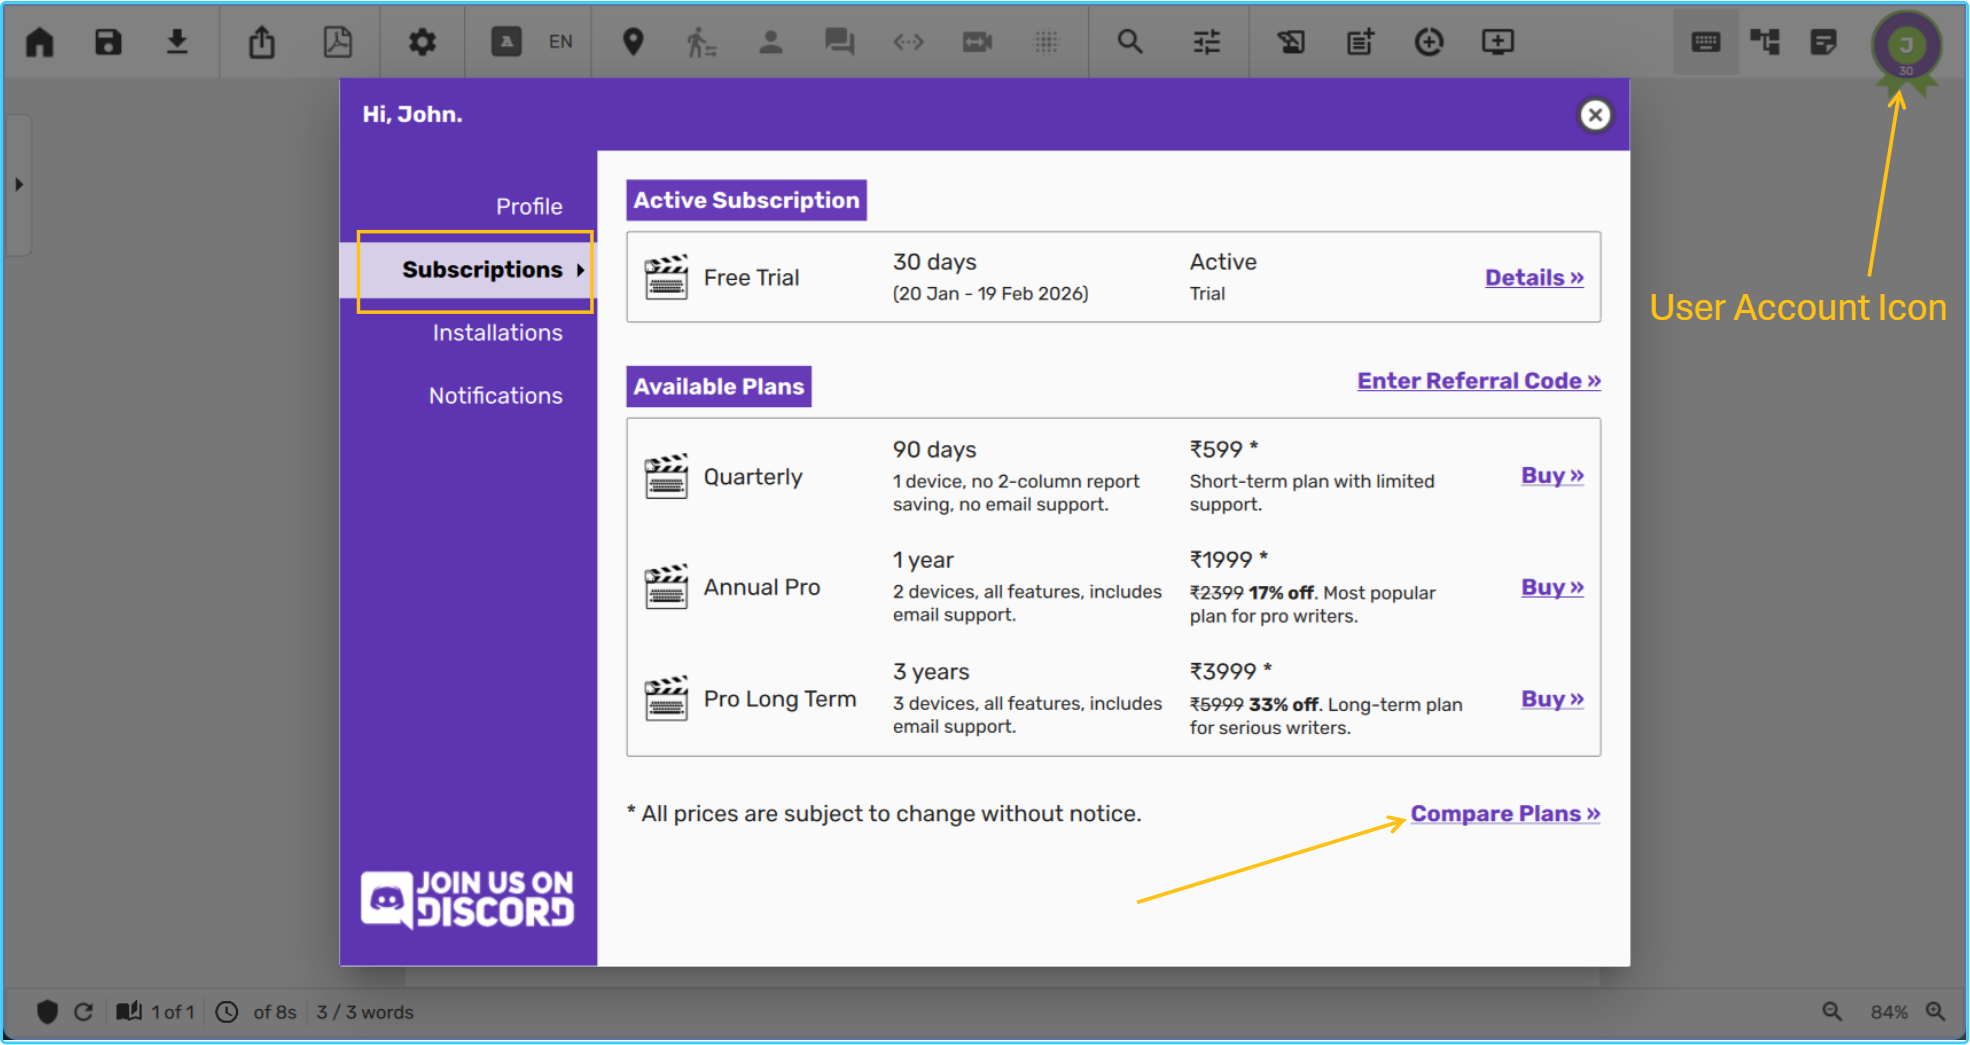
To lookup plans available to you, please click on the “User Account” icon to the top right corner of the Scrite window to open the User Profile dialog box, and then switch to the Subscriptions tab.
All plans available for you to purchase are listed in this tab.
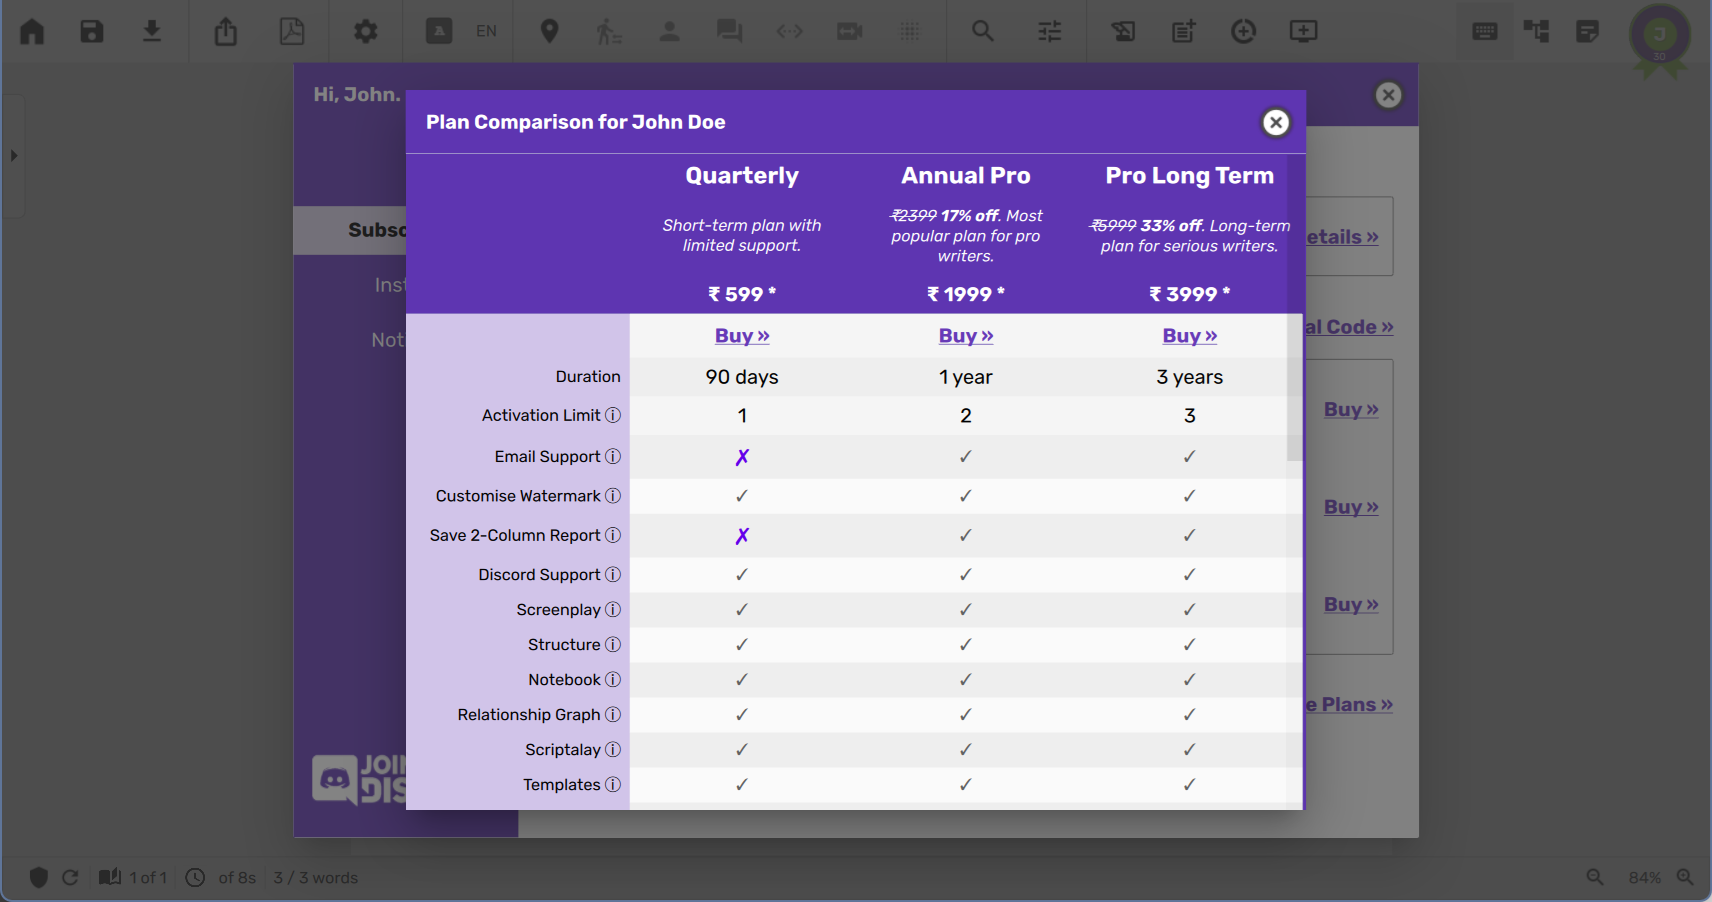
You can click on the “Compare Plans” link towards the bottom right corner of Available Plans box, to pull out a feature comparison table.
Please ensure that you review all features available against each plan before purchasing. No cancellation or upgrade is currently offered against any plan.
Once you have chosen the plan you want to purchase, click on the Buy link against that plan to open a browser window from where you can pay for the plan. As soon as your payment is received, you will notice confirmation message on the browser window, after which you can switch to the Scrite app and begin using the features purchased in your plan. If you have days remaining in your trial period, the app will continue to display TRIAL on the title bar, but you can use all features from your upcoming paid plan during the remaining period of your trial.
If you run into payment or subscription activation issues, please lookup our FAQ and see if you can find solutions there. You can always reach out to us on email at support@scrite.io for further assistance.
Further Reading
The goal of this guide was simply to help you get started. Please read our guide on Advanced Editing Features to know more about other editing features available in Scrite, some of which you can never find in another screenwriting app!


 , select a folder and provide a file name. Scrite files are saved with extension .scrite.